Table of Contents >> Show >> Hide
- Why Food Storage Containers Get So Messy
- Step 1: Declutter Your Food Storage Containers Like a Pro
- Step 2: Choose a Storage Zone That Fits Your Kitchen
- Step 3: Tame the Lid Chaos Once and For All
- Step 4: Make Your System Easy to Maintain
- Smart Shopping Tips for Food Storage Containers
- Creative Ways to Reuse Extra Containers
- Real-Life Experiences: Organizing Food Storage Containers Hometalk-Style
- Conclusion: A Calm Cabinet, One Lid at a Time
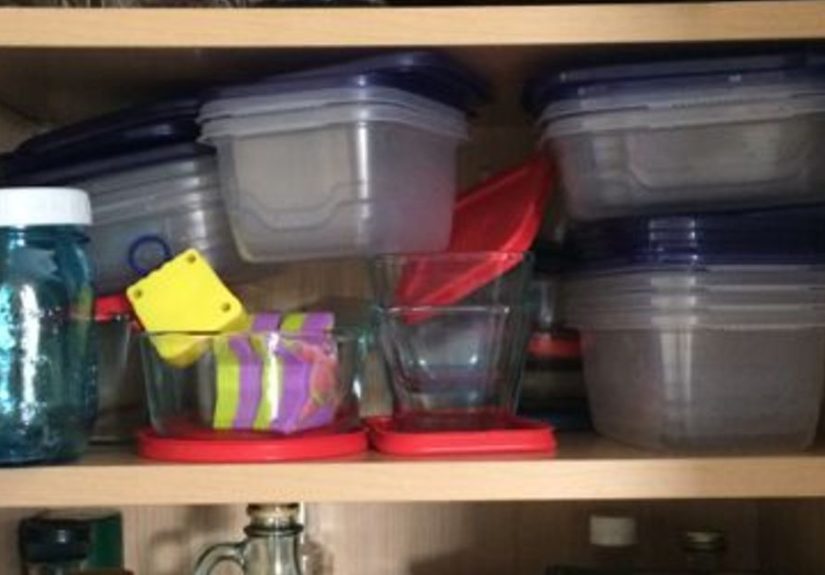
If opening your “Tupperware cabinet” feels like playing pantry Jenga, this guide is for you.
Food storage containers are supposed to make life easier, but when the lids are in one universe
and the bottoms are in another, all they really store is chaos.
The good news? With a few smart organizing strategies, a couple of budget-friendly tools,
and a sprinkle of Hometalk-style DIY creativity, you can turn that avalanche-prone cabinet
into a calm, tidy zone where every lid actually has a matching container. Yes, really.
Why Food Storage Containers Get So Messy
Food storage containers are uniquely talented at creating clutter. They come in different sizes,
shapes, and materials; they multiply after every takeout order; and their lids seem to disappear
into the same portal as missing socks. On top of that, most of us toss them into the nearest
cabinet or drawer and hope for the best.
To fix the mess, you don’t need a custom kitchen or expensive built-ins. You just need a clear
system that works with how you actually cook, store leftovers, and clean up. Let’s break it down
step by step.
Step 1: Declutter Your Food Storage Containers Like a Pro
Empty Everything Out (Yes, Everything)
Start by pulling every single container, lid, and rogue yogurt tub out of your cabinet, drawer,
and dishwasher. Seeing the entire collection at once is a little shocking, but it’s the only way
to get real about what you own and what you actually use.
Match Lids and Containers
Line containers up by size and shape, then find their lids. Anything that doesn’t have a partner
goes into a “questionable” pile. If a lidless container hasn’t been useful for anything else,
it’s a strong candidate for repurposing or letting go.
Decide How Many You Really Need
Be realistic about your lifestyle:
- Meal preppers might need full sets of matching containers in the same size.
- Takeout lovers can probably keep a few sturdy “free” containers and recycle the rest.
- Small households do not need 37 leftover containers “just in case.”
As a rule of thumb, keep the containers you reach for every week and let go of the oddly shaped,
stained, or cracked ones that annoy you every time you open the cabinet.
Be Picky About Quality
If you can, prioritize sets that are:
- Stackable or nestable
- Dishwasher-safe
- Free of stains and lingering odors
- Available in a few standard sizes instead of a million random ones
The more uniform your containers are, the easier they are to stack, store, and match with lids.
Step 2: Choose a Storage Zone That Fits Your Kitchen
Now that you’ve trimmed your collection, decide where these containers will officially “live.”
Don’t overthink it: the best spot is usually near where you prep food or pack lunches.
Option 1: Deep Drawer Dream Setup
If you have a deep kitchen drawer, consider dedicating it entirely to food storage containers.
This is one of the easiest layouts to maintain:
- Use the back of the drawer for larger containers that nest inside each other.
- Keep smaller containers at the front so they don’t disappear.
- Stand lids up vertically in a bin, plate rack, or lid organizer on one side.
The big win with drawers is visibilityyou can see everything from the top and grab what you need
without triggering a plastic avalanche.
Option 2: Cabinet with Pull-Out Helpers
No deep drawers? No problem. A standard cabinet can work just as well when you add pull-out or
slide-out pieces:
- Shallow plastic bins or trays act like DIY pull-out shelves.
- Stacking baskets can separate containers by size or material.
- A wall file or magazine holder mounted to the inside of the cabinet door can corral lids.
Slide-out trays and bins are especially helpful in deep, dark cabinets where containers
love to hide in the back.
Option 3: Tiny Kitchen, Big Ideas
In small spaces, you may need to get creative:
- Use a rolling cart as a portable “leftover station.”
- Store attractive glass containers on open shelving where they can double as decor.
- Reserve prime cabinet space for daily-use containers and stash extras in a pantry or utility closet.
The key is to keep your go-to containers within arm’s reach and treat everything else as backup,
not everyday clutter.
Step 3: Tame the Lid Chaos Once and For All
Let’s be honest: the lids are the real villains in this story. Left unsupervised, they slide,
stack, and scatter everywhere. Your mission is to give them a designated, well-contained home.
Use a Dedicated Lid Organizer
A lid organizer is like a file cabinet for your container tops. Many popular styles use adjustable
dividers so you can store lids by size and shape. Slip them in vertically, like records in a crate,
and you’ll be able to grab the one you need in seconds.
Place the organizer:
- Along one side of a drawer
- Inside a cabinet next to your stacked containers
- On a shelf riser to create a second level of storage
Try Budget-Friendly DIY Lid Hacks
If you love a Hometalk-style project, you’ve got plenty of options:
- Cooling rack in a bin: Drop a metal cooling rack into a plastic bin and stand lids between the wires.
- Plate rack: Use a plate organizer to store lids upright instead of dishes.
- Mail sorter or file holder: Perfect for keeping medium and large lids separated.
- Cabinet door pocket: Mount a wall file or small bin to corral lids right on the door.
These hacks are cheap, easy to try, and surprisingly effective at stopping the slide-and-topple lid shuffle.
Should You Store Containers with Lids On or Off?
This is the great container debate, so let’s break it down:
-
Lids off: Containers nest inside each other, saving tons of space. Lids are filed separately
in an organizer, rack, or bin. -
Lids on: You never have to hunt for a match; what you see is what you get.
It takes more room, but it can be easier to maintain.
Choose the style that matches your personality. If you hate visual clutter and love maximum space,
store lids separately. If you’d rather use a little more room to avoid lid-hunting forever,
store containers with lids snapped on and limit how many sets you keep.
Step 4: Make Your System Easy to Maintain
Organizing your food storage containers once is great. Keeping them organized is the real magic trick.
Label, Group, and Set Limits
A few simple habits can keep your system from slowly collapsing:
-
Group by material: Keep plastic together, glass together, and specialty containers
(like bento boxes or meal-prep sets) in their own zone. -
Label bins: Use simple labels like “Small Containers,” “Large Containers,” or “Glass Lids”
so everyone in the household knows where things belong. -
Set a hard limit: If your bin, drawer, or shelf is full, something has to go
before new containers can move in.
Standardize When You Can
When it’s time to replace containers or upgrade, choose sets that:
- Share the same lid size across multiple container sizes
- Stack neatly in your existing cabinet or drawer
- Work for both fridge and pantry when possible
Switching to a modular system means fewer lid types to track and less time spent searching.
Do a Quick Weekly Reset
Once a weekmaybe while the dishwasher is runningtake two minutes to:
- Match stray lids and containers
- Pull out any stained or cracked pieces
- Return wandering containers from the fridge or lunch bags to their home base
This tiny reset prevents the slow slide back into chaos and keeps your beautiful system intact.
Smart Shopping Tips for Food Storage Containers
Before you buy another random 20-piece set, get strategic. The right containers will practically
organize themselves.
-
Glass vs. plastic: Glass is sturdy, stain-resistant, and great for reheating; plastic is lightweight
and easier for kids to handle. Many people use a mix of both. -
Choose stackable shapes: Rectangular or square containers usually waste less space than round ones
in cabinets and drawers. - Check your shelves first: Measure your cabinet or drawer depth and height so your containers actually fit.
- Look for airtight seals: Especially for pantry storage, an airtight seal keeps dry goods fresher longer.
Think of containers as part storage, part tool. If they’re easy to use, easy to clean, and easy to store,
your kitchen will feel calmer every time you open a cabinet.
Creative Ways to Reuse Extra Containers
Even after decluttering, you might have a few decent containers that just don’t fit your new system.
Don’t toss them right awayput them to work in new ways.
- In the office: Store paper clips, sticky notes, pens, and USB drives in small containers.
- In the garage: Use them for nails, screws, zip ties, and small hardware.
- In the bathroom: Corral cotton rounds, hair ties, or sample-size products.
- In the fridge or pantry: Use lidless containers as drawer dividers for snacks or condiment packets.
- For kids’ crafts: Perfect for crayons, beads, googly eyes, and tiny toys.
Once you start reusing them as organizers, you may realize the “annoying extras” were organizing gold all along.
Real-Life Experiences: Organizing Food Storage Containers Hometalk-Style
Let’s talk about what this actually looks like in real homesnot just in dreamy catalog photos.
The Family Drawer Makeover
Imagine a family of four with one overstuffed cabinet: mismatched takeout containers, cloudy plastic from 2012,
lids wedged in the back like lost artifacts. Every dinner cleanup ended with someone shoving everything in
and slamming the door shut before it spilled out.
One afternoon, they emptied the entire cabinet onto the kitchen table. The kids helped match lids and containers
(bonus: built-in memory game), and anything stained, warped, or lidless went into a donation or recycling pile.
They kept only one main set of stackable containers plus a few extra for school lunches.
Next, they turned a deep drawer into a container zone: large containers nested at the back, smaller ones in the front,
and all the lids filed upright in a simple rack. Now, after dinner, even the kids know exactly where everything goes.
Cleanup is faster, and no one screams, “Has anyone seen the small square lid?” anymore.
The Small-Apartment Cook’s Survival System
In a tiny apartment kitchen with limited cabinet space, there was no way an entire shelf could be devoted to containers.
The solution was a rolling cart parked near the fridge. The top shelf holds glass containers for leftovers, the middle
shelf houses meal-prep containers, and the bottom shelf contains reusable takeout containers for sharing food with friends.
A narrow file organizer mounted inside the cabinet door holds lids; only the most-used sizes earned a spot there.
Everything else went to a bin in a closet labeled “extras” for occasional use. The result: a small kitchen that still
functions like a meal-prepper’s dream workspace.
The Hometalk DIY Organizer Fan
Picture a DIY lover scrolling Hometalk, collecting ideas from other creators who tackled the same chaotic cabinet.
Inspired, they grabbed a couple of dollar-store bins, a cooling rack, and an old mail sorter.
One bin plus the cooling rack turned into a custom lid station, with small lids up front and larger ones at the back.
The mail sorter went into a cabinet for medium and large lids. A leftover wooden tray became a container corral,
holding nested stacks of different sizes. The whole transformation cost a few dollarsand saved a ton of daily frustration.
That’s very much the Hometalk spirit: use what you have, add a few inexpensive pieces, and turn everyday chaos
into something functional and surprisingly stylish.
How It Feels When the System Works
Once your food storage containers are finally under control, a few things change:
- You stop buying emergency container sets because “ours are a mess.”
- Leftovers actually get stored instead of abandoned in the pot.
- Packing lunches takes minutes instead of a full-blown search mission.
- Your cabinets and drawers stop being jump-scare zones.
It’s a small project with a big payoff. And the best part? Almost every solution can be done with affordable containers,
basic organizing tools, and a little bit of DIY creativityexactly the kind of project Hometalk homeowners love.
Conclusion: A Calm Cabinet, One Lid at a Time
Organizing food storage containers isn’t about perfection; it’s about creating a system that your real life can actually follow.
Declutter, match what you have, give lids a proper home, and choose storage zones that suit your kitchen layout. Add a few clever
hacks and limit how many sets you own, and you’ll never again risk a plastic avalanche just to pack leftovers.
Start small: one drawer, one cabinet, one bin. Soon you’ll open your container storage with zero fearand maybe even
a tiny bit of pride.