
Table of Contents >> Show >> Hide
- Why a Wire Heart Wreath Is the Budget-Friendly MVP
- Pick Your Base: Three Cheap Ways to Get a Heart Frame
- Supplies List (Budget Mode + Upgrade Options)
- Budget Breakdown: What This Can Cost (Realistic Examples)
- Step-by-Step: How to Make a Cute DIY Wire Heart Wreath
- Step 1: Decide Your Design (Full, Half, or Minimal)
- Step 2: Prep and Reinforce the Frame
- Step 3: Build a “Base Layer” (Cheap Filler That Makes It Look Full)
- Step 4: Add Focal Flowers in Clusters (Not One-by-One)
- Step 5: Add a Bow (Instant “Finished” Button)
- Step 6: Make a Clean Hanger That Won’t Tilt
- Step 7: Tidy the Back (So It Doesn’t Scratch Your Door)
- Design Ideas That Look Expensive (But Aren’t)
- Pro Tips for a Sturdy, “Not-From-the-Dollar-Store” Finish
- Outdoor Hanging and Door-Safety Tips
- Quick Safety Checklist (Because Wire and Hot Glue Don’t Care About Your Plans)
- Troubleshooting: Fix Common Wreath Problems Fast
- FAQ
- Real-World Experiences and Lessons (Extra )
- Conclusion
Want a front-door moment that says “I’m festive” without screaming “I financed this at 29% APR”? A wire heart wreath is the sweet spot:
lightweight, customizable, and surprisingly affordableespecially when you build it like a crafty accountant with glitter on their sleeves.
This guide walks you through a cute DIY wire heart wreath you can make on a budget using a heart-shaped wire frame (or even a humble wire hanger),
plus simple techniques for making it look full, balanced, and sturdy. You’ll get step-by-step instructions, budget hacks, design ideas for every style,
and real-world troubleshooting so your wreath doesn’t end up looking like a heart-shaped tumbleweed.
Why a Wire Heart Wreath Is the Budget-Friendly MVP
- It’s reusable: Swap out florals and ribbons for different seasons without rebuilding the base.
- It’s lightweight: Easier to hang and less likely to pull down hooks or damage doors.
- It’s flexible: Minimalist? Go airy. Maximalist? Pack it with blooms. Indecisive? Do a half-wreath and call it “asymmetry.”
- It plays nice with bargain supplies: Dollar-store florals, ribbon scraps, and thrifted greenery can look genuinely high-end with smart placement.
Pick Your Base: Three Cheap Ways to Get a Heart Frame
Option A: Buy a Heart-Shaped Wire Wreath Form
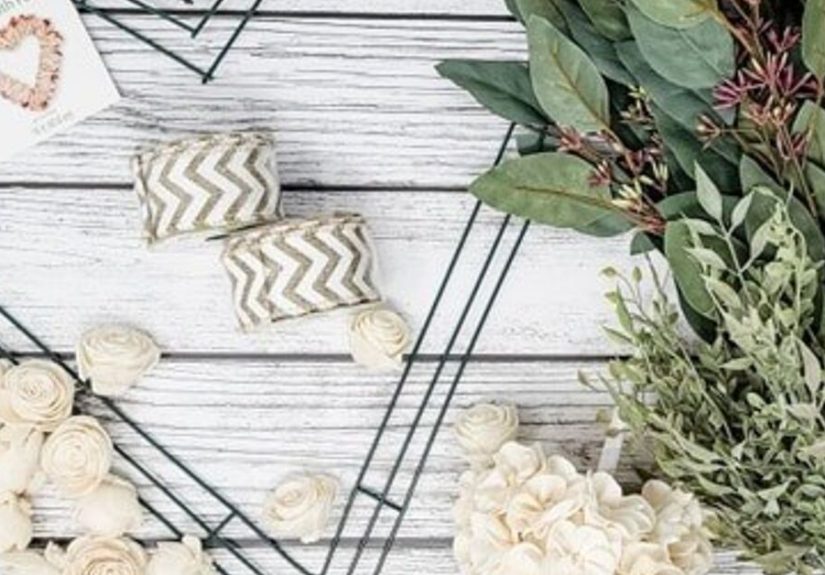
Craft stores often carry heart wire wreath forms (especially around Valentine’s Day), and they’re usually the easiest option. They’re already sturdy,
symmetrical, and ready for wire ties, zip ties, or floral stems. If you plan to make more than one wreath (or re-style it seasonally), this option pays off.
Option B: Bend a Wire Hanger into a Heart
Yes, the classic wire hanger can become a heart frame. It’s a legit DIY move: shape the hanger into a heart, then reinforce any wobbly spots with floral wire.
This is perfect if you want “free-ish” and already have hangers lurking in your closet like little metal gremlins.
Option C: Wrap Floral Wire Around a Heart Template
For a lighter, artsy look, you can build a heart by wrapping sturdy floral or paper-covered wire around a heart template multiple times. This creates a layered wire
form that’s flexible but still holds shapegreat for indoor decor or a minimalist wall hanger.
Supplies List (Budget Mode + Upgrade Options)
Core Supplies
- Heart-shaped wire wreath form (or one wire hanger)
- Floral wire (thin gauge for tying stems; medium gauge for reinforcement)
- Wire cutters (or strong scissors designed for wire)
- Hot glue gun + glue sticks (optional but helpful)
- Ribbon or twine for hanging and a bow
- Decor: faux flowers, greenery, felt hearts, fabric scraps, or mini ornaments
Nice-to-Have Upgrades
- Floral tape (for wrapping and hiding mechanics)
- Pipe cleaners (cheap, easy ties that blend into greenery)
- Zip ties (fast, strong, and excellent for thicker stems)
- Spray sealer (optional for outdoor durability)
Budget Breakdown: What This Can Cost (Realistic Examples)
Here are three “tiers” you can actually pull off without selling your favorite houseplant:
- $0–$6 “Use What You Have”: wire hanger frame + ribbon scraps + backyard twigs or clipped greenery + one accent flower (or a paper heart).
- $7–$15 “Dollar-Store Cute”: heart wire form + 2–4 faux flower bunches + one ribbon spool + floral wire.
- $16–$30 “Looks Boutique”: sturdier heart form + mixed greenery + 6–10 quality faux stems + wired ribbon + small embellishments.
The secret isn’t spending moreit’s how you distribute volume. A few well-placed “statement” blooms and lots of inexpensive filler (greenery,
smaller flowers, leaves) will look richer than a wreath that’s just 30 identical big roses stuffed on like a crowded elevator.
Step-by-Step: How to Make a Cute DIY Wire Heart Wreath
Step 1: Decide Your Design (Full, Half, or Minimal)
Before you attach anything, choose a layout:
- Full wreath: Decor all the way around. Best for dramatic front doors.
- Half wreath (recommended for budgets): Decorate one side or the bottom curve. It looks modern and uses fewer materials.
- Minimal: A few sprigs + a bow + one focal flower cluster. Clean, airy, and very “I definitely meant to do this.”
Step 2: Prep and Reinforce the Frame
If you’re using a wire hanger, shape it into a heart and twist the hook area tight. If your heart looks slightly lopsided, don’t panicwreath decor hides a lot.
For extra stability, wrap floral wire around the top “dip” and the point at the bottom, then twist it snug.
Optional but helpful: wrap sections of the wire with floral tape or ribbon to create grip for glue and prevent decorations from sliding.
Step 3: Build a “Base Layer” (Cheap Filler That Makes It Look Full)
Your base layer is where you win the budget game. Use inexpensive greenery first:
- Dollar-store eucalyptus-style stems or leafy picks
- Thrifted faux garland snipped into smaller pieces
- Foraged twigs (for rustic styles) or dried stems (for farmhouse vibes)
Attach filler in small bundles (think 3–5 sprigs at a time). Lay each bundle on the frame and secure it with floral wire twists or pipe cleaners.
Work in the same direction so it looks intentional, not like your wreath got caught in a wind tunnel.
Step 4: Add Focal Flowers in Clusters (Not One-by-One)
To make the wreath look curated, group your main flowers in clusters. A good starter formula:
- 1–2 main flowers (biggest blooms)
- 2–3 secondary flowers (medium blooms)
- filler accents (tiny blooms, berries, baby’s breath-style stems)
Create 2–3 clusters and place them firstthen fill gaps. This prevents the “random sticker book” look.
Attachment method: If stems are wire-backed, thread them through the frame and twist behind. If stems are thick plastic, trim them short,
then wire them down or hot-glue and reinforce with a wire tie. Hot glue is great for quick holds, but wire is what keeps your wreath from shedding decorations
like a stressed-out golden retriever.
Step 5: Add a Bow (Instant “Finished” Button)
A bow covers a multitude of sins. Put it at:
- Top center (classic)
- Top left or right (modern, asymmetrical)
- Bottom point (extra cute; also hides the sharpest heart angle)
Use wired ribbon if possibleit holds shape. If you only have soft ribbon, double it up or add a twist tie on the back to help it keep structure.
Step 6: Make a Clean Hanger That Won’t Tilt
Use ribbon, twine, or thin wire to create a hanging loop. Attach it at two points near the top sides of the heart so it hangs level.
If it tilts, shorten one side of the loop by a half inch. Yes, a half inch can be the difference between “charming” and “why is the heart falling sideways?”
Step 7: Tidy the Back (So It Doesn’t Scratch Your Door)
- Clip sharp wire ends and tuck them inward.
- Add a small felt pad where the frame might touch the door.
- If using hot glue, let it cool fully before hanging.
Design Ideas That Look Expensive (But Aren’t)
1) Minimal Modern Heart
Leave parts of the wire frame visible (especially if it’s gold or painted). Add greenery on one side, then one small flower cluster.
Finish with a simple bow or a thin velvet ribbon. This style uses fewer stems but looks intentionally “designer.”
2) Cozy Farmhouse Heart
Wrap the frame in twine or burlap ribbon first, then add white or blush florals and eucalyptus-style greenery.
A gingham bow makes it feel like it belongs in a magazine spread titled “She Owns Two Bread Boards and Isn’t Sorry.”
3) Rag Heart Wreath (Perfect for Scrap Fabric)
Cut fabric scraps into strips and tie them onto the wire form until it’s fluffy. Mix solids and patterns.
This is one of the cheapest ways to get a “full” wreath without buying a lot of florals.
4) Seasonal Switch-Up Heart
Build a neutral base (greenery + simple bow), then swap the focal cluster:
- Valentine’s Day: pink/red florals, mini hearts
- Spring: tulips, pastel blooms
- Fall: berries, mini pumpkins, rust tones
- Winter: pine picks, ornaments, metallic accents
Pro Tips for a Sturdy, “Not-From-the-Dollar-Store” Finish
- Use wire for structure, glue for speed: Wire keeps things attached; glue keeps things from spinning.
- Work in sections: Build one side fully, then mirror the “weight” on the other side (not necessarily the exact same pieces).
- Mix textures: A wreath looks richer when it has at least 3 textures (leafy greenery, soft petals, and something shiny/berry/woody).
- Hide mechanics with filler: After wiring clusters, tuck small leaves over the twist points.
- Choose 2–3 main colors: Too many colors can look chaotic fast. Let greenery be your neutral.
Outdoor Hanging and Door-Safety Tips
If you’re hanging on a door or wall, choose a method that won’t damage paint. Many people use removable hooks/strips designed for damage-free removal,
and the key to clean removal is following the “pull straight down slowly” approach instead of yanking outward.
For outdoor durability:
- Hang under a covered porch when possible.
- Use weather-friendly faux stems (and avoid paper decor outdoors).
- Consider a light spray sealer for extra protection, especially if your wreath gets sun.
Quick Safety Checklist (Because Wire and Hot Glue Don’t Care About Your Plans)
- Clip and tuck wire ends: sharp ends can scratch doors and poke fingers.
- Use wire cutters: don’t sacrifice your good scissors.
- Hot glue basics: keep the gun upright on a protected surface and never leave it unattended while plugged in.
- Work surface: cardboard or a craft mat saves tables and relationships.
Troubleshooting: Fix Common Wreath Problems Fast
“My wreath looks thin.”
Add more filler before adding more focal flowers. Greenery and small accents create fullness cheaper than big blooms.
“It keeps sliding and won’t stay where I put it.”
Add a wrap of floral tape or ribbon where you’re attaching bundles. Then wire-tie again. Wire grips better when it has friction.
“It hangs crooked.”
Adjust your hanging loop so it attaches at two balanced points. Shorten the side that dips. If using a hanger frame, reinforce the top curve with wire.
“Stuff is falling off.”
Hot glue alone can fail over timeespecially with temperature changes. Reinforce heavy items with wire or zip ties. Then hide the ties with leaves.
FAQ
What’s the best wire to attach florals?
Thin floral wire is great for tying stems and greenery; medium wire is better for reinforcement. If you’re unsure, test: if it snaps when you twist, go thicker.
If it’s hard to twist neatly, go thinner.
Can I make this without a glue gun?
Absolutely. Use floral wire, pipe cleaners, or zip ties. Glue is convenient, not mandatory.
How long does it take?
Plan 30–60 minutes for a simple half-wreath, and 60–120 minutes for a fuller designespecially if you’re trimming stems and building clusters.
Real-World Experiences and Lessons (Extra )
Ask a group of crafters how their first wire heart wreath went and you’ll hear a theme: it starts out adorable in their head and ends up looking like a
“romantic science experiment” halfway through. That’s normalwire frames are honest. They reveal every design decision you make, including the ones made
in a panic when the hot glue starts stringing like melted mozzarella.
One of the most common learning moments is realizing that fullness is mostly filler. Beginners often buy too many big flowers and not enough
greenery, then struggle to hide wire twists and bare frame spots. Experienced wreath-makers flip that ratio: they build a leafy base first, then place a few
showy blooms like punctuation marks. The result looks more expensive because the eye reads “lush” before it reads “individual stems.”
Another real-world tip: cluster-building saves money and sanity. Instead of attaching ten flowers one-by-one and hoping they somehow arrange
themselves into a masterpiece (they won’t), crafters often assemble two or three clusters off to the side. Once those clusters are anchored, everything else becomes
easy: you’re filling gaps, not reinventing the wheel. This also helps with symmetry. You don’t need a mirror-image wreath, but you do want “visual balance,” meaning
the left side doesn’t look like a garden party while the right side looks like it missed the invite.
Hanging is another place where experience matters. Many people start with a single loop at the very top, only to discover the wreath tilts the moment a breeze hits it
(or the door closes with any enthusiasm). A more stable approach is anchoring the hanger at two points near the top sides of the heart. That tiny change can make the
wreath hang flatter against the door, which also helps it look more intentional in photosbecause yes, even if you don’t post it, your camera roll will.
Outdoor wreaths come with their own wisdom. Faux florals can fade in direct sun, and glue can weaken with heat or cold. Crafters who display wreaths outside often
reinforce heavier pieces with wire (or zip ties) and treat glue as a “helper,” not the main support. They also learn the value of a covered porch: fewer weather surprises,
longer-lasting color, and less “why is my bow soggy?” energy.
Finally, the best experience-based takeaway is simple: build in rounds. Do a first pass (greenery), step back, then a second pass (flowers), step back,
then a final pass (tiny fillers, bow, and hiding mechanics). That pause-and-check habit is what separates “I made this in my living room” from “I could sell this at a
craft fair and buy a fancy coffee.”
Conclusion
A cute DIY wire heart wreath on a budget is all about smart structure: a sturdy frame, a generous filler layer, and a few well-placed focal clusters. Whether you go
minimalist, farmhouse, or full-on Valentine’s Day fabulous, the same rules applybuild volume with inexpensive greenery, secure with wire first, and finish with a bow
that makes everything look deliberate. Your door is about to look loved, and your wallet is about to feel respected. That’s a win-win romance.






