Table of Contents >> Show >> Hide
- Why This DIY Planter Idea Works So Well
- Safety First: Read This Before You Touch a “Vintage Gas Can”
- Tools and Materials
- Step-by-Step: Make Your DIY Vintage Can Planter
- Five Cute Design Recipes You Can Copy
- Best Plants for Vintage Can Planters
- Common Mistakes (and Easy Fixes)
- Simple Maintenance Plan
- Budget, Timeline, and Skill Level
- Eco-Friendly Upcycling Tips
- Hands-On Experiences: Real Lessons from Making Vintage-Style Can Planters (Bonus )
- Conclusion
If your porch is begging for personality and your plants are tired of looking like everyone else’s plants, this project is your new weekend favorite.
Vintage-style gas can planters are quirky, colorful, and surprisingly practical when you build them the right way. They bring that “found treasure”
charm to patios, balconies, kitchen corners, and even office desks. Think farmhouse-meets-retro with a wink.
This guide walks you through the full processfrom choosing the right container to styling a finished arrangement that looks expensive but costs less
than a takeout weekend. You’ll get real gardening advice, simple design formulas, and maintenance tips that actually work in normal life (yes, even if
you sometimes forget to water until your basil gives you the silent treatment). You’ll also get a bonus experience section at the end with practical lessons,
funny mistakes, and what to do instead.
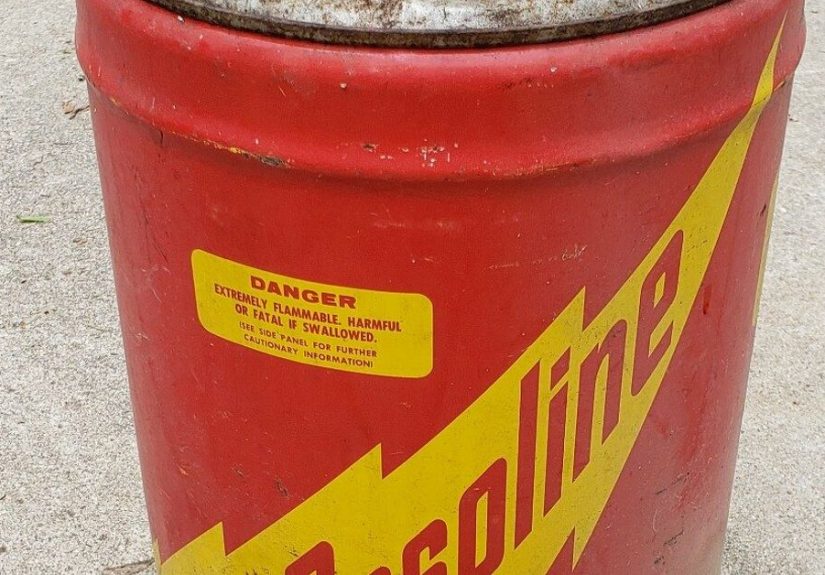
Important note before we start: this tutorial is for decorative vintage-style cans or non-fuel containers only. Do not repurpose any can
that has held gasoline or other toxic chemicals. Safety first, cute second.
Why This DIY Planter Idea Works So Well
The charm of a vintage gas can planter comes from contrast: industrial shape + soft greenery. That tension gives your decor instant character.
A plain corner suddenly looks styled. A dull windowsill suddenly looks intentional. And unlike trend-heavy decor that ages out in a season, this look
can swing rustic, cottage, modern farmhouse, or even eclectic depending on your paint and plant choices.
It also solves a practical problem: container gardening lets you grow almost anywhere. No yard? No problem. Tough soil? Skip it. Need mobility for sun
or weather changes? Pick up and move your planter. This format is especially friendly for herbs, compact flowers, trailing plants, and small edibles.
Best of all, this project is highly customizable:
- Color personality: matte black, robin’s egg blue, cherry red, sage green, distressed cream.
- Plant mood: cottage blooms, succulent minimalism, edible herb garden, pollinator mini-bed.
- Placement flexibility: porch steps, fence shelf, kitchen ledge, balcony rail stand, entry table.
In short: low footprint, high visual payoff, and very giftable.
Safety First: Read This Before You Touch a “Vintage Gas Can”
Let’s keep this project fun and safe. If a container has ever held fuel, solvents, pesticides, or unknown liquids, do not convert it into
a planter. Residues and vapors can be harmful to people and plants, and old metal can hide contamination you cannot fully see or smell.
The safest path is simple:
- Use a new decorative gas-can-style metal container made for crafts or decor.
- Or use a true vintage display piece only as an outer sleeve with a sealed nursery pot inside, with no drilling.
- If there is any doubt about prior contents, retire it as shelf decornot a planter.
Also, if you plan to grow herbs or edible plants, be extra strict about container safety. Food-grade or known-safe containers are the standard.
Quick workshop basics:
- Work in a ventilated area.
- Wear eye protection if drilling.
- Use gloves when sanding or handling sharp edges.
- Keep children and pets away from tools, paint, and metal shavings.
Cute planters are great. Cute planters with no emergency room story are better.
Tools and Materials
Core Supplies
- Decorative vintage-style metal can (unused for fuel)
- Plastic nursery pot (optional insert method)
- Drill and metal bit (if adding drainage to safe containers)
- Sandpaper (medium + fine grit)
- Rust-inhibiting primer (for bare metal)
- Outdoor-safe paint or clear sealant
- Potting mix (soilless or lightweight container mix)
- Plant(s): trailing, compact, or upright varieties
- Optional: activated charcoal, coco liner, decorative moss, pebbles for top dressing
Optional Styling Extras
- Vintage label stickers
- Twine, jute, or leather wrap around handle
- Mini chalkboard plant tags
- Small stand or riser for layered height
Step-by-Step: Make Your DIY Vintage Can Planter
Step 1: Pick the Right Container Strategy
You have two good methods:
- Direct planting: use a safe decorative container and add proper drainage holes.
- Double-pot method: place a drainage-ready nursery pot inside the decorative can and hide the rim with moss.
If you’re unsure, choose double-pot. It’s beginner-friendly, safer, and easier to refresh seasonally.
Step 2: Clean and Prep the Exterior
Wipe dust and oils off the can. Lightly sand glossy surfaces so primer grips better. If there’s minor surface rust on decorative metal, remove loose rust,
then apply rust-inhibiting primer. Let everything dry fully before painting.
Want a timeworn look? Paint, then gently distress edges with fine sandpaper. Want modern? Keep a smooth satin finish with clean lines.
Step 3: Handle Drainage the Smart Way
Plant roots need air as much as water. Without drainage, roots suffocate, rot starts, and your plant collapses while you insist you “just watered yesterday.”
For direct planting in a safe decorative can:
- Mark 3–6 holes on the base (more holes for larger containers).
- Drill slowly on a stable surface with eye protection.
- Smooth burrs so they don’t tear gloves or roots.
No-drill option: use the double-pot method with a proper nursery pot that already has holes.
Step 4: Skip the Old “Gravel Layer” Myth
You do not need a thick rock layer at the bottom to improve drainage. In many cases, it can worsen perched water behavior in containers.
Fill with quality potting mix instead. If holes are large, place a small mesh square or shard over holes to keep mix from washing out.
Step 5: Add Potting Mix and Plant Like a Pro
Use a lightweight container potting mixnot dense garden soil. Fill to leave about 1 inch below the rim so water doesn’t overflow.
Set plant root balls at original depth; don’t bury stems too deep unless species requires it.
A reliable design formula:
- Thriller: one upright focal plant (e.g., coleus, dwarf grass, upright rosemary).
- Filler: one mound-forming plant (e.g., calibrachoa, compact basil, lantana).
- Spiller: one trailing plant (e.g., ivy, sweet potato vine, creeping Jenny).
Step 6: Water Deeply Once, Then Monitor
After planting, water until moisture runs out the drainage holes. This settles roots and evenly hydrates the full root zone.
Then check moisture by touch, not by guesswork. In hot weather, small containers may need daily watering.
Step 7: Style Your Finished Planter
Place your planter where the plant’s light needs are met first, then style around that spot. Use groupings of three for visual balance:
- one tall container, one medium, one low trailing
- repeat one accent color for cohesion
- mix smooth leaves + feathery texture + trailing shape
Add a tiny sign, a vintage scoop, or stacked books underneath for height. Suddenly it looks curated, not random.
Five Cute Design Recipes You Can Copy
1) Farmhouse Herb Can
Paint: matte white + distressed edges. Plants: basil, thyme, oregano. Finish: chalk label tags.
Great for kitchen windows with 6+ hours of sun.
2) Retro Diner Pop
Paint: cherry red with cream stripe. Plants: variegated ivy + petunia spillers. Finish: glossy topcoat.
Looks great near front doors and porch rails.
3) Desert Minimal
Paint: charcoal or sand. Plants: haworthia, echeveria, sedum mix. Top-dress with fine gravel.
Best with a cautious watering schedule.
4) Cottage Garden Mini
Paint: sage green or robin’s egg blue. Plants: alyssum, lobelia, dwarf salvia.
Soft, romantic, and perfect for spring.
5) Pollinator Porch Blend
Paint: natural metal with clear seal. Plants: lantana, verbena, trailing calibrachoa.
Colorful, lively, and beneficial to visiting pollinators.
Best Plants for Vintage Can Planters
Container size matters. Smaller cans favor compact roots and tidy growth. Here are easy wins:
- Herbs: basil, parsley, chives, thyme, oregano (bright light, regular trimming).
- Sun annuals: calibrachoa, petunia, verbena, lantana.
- Shade/part shade: coleus, impatiens, begonias, creeping Jenny.
- Low-water look: sedum, echeveria, sempervivum (use a fast-draining mix).
- Trailing texture: ivy, sweet potato vine, dichondra ‘Silver Falls’.
Pro tip: group plants with similar water and sunlight needs in the same container. Mixing thirsty basil with drought-loving succulents is a little like putting
a marathon runner and a couch champion on one training plan.
Common Mistakes (and Easy Fixes)
Mistake 1: No drainage
Fix: Add holes or use a nursery insert pot. This is non-negotiable for plant health.
Mistake 2: Using garden soil
Fix: Switch to quality container mix for airflow and moisture balance.
Mistake 3: Overwatering on a strict schedule
Fix: Check soil first; water when the top inch is dry (or by plant type).
Mistake 4: Choosing the wrong plant for light
Fix: Match plant label to your real conditions, not your wishlist.
Mistake 5: Oversized transplant shock
Fix: Size up gradually; don’t jump tiny plants into giant containers.
Simple Maintenance Plan
- Daily (hot weather): quick moisture check, especially for small metal planters.
- Weekly: deadhead flowers, trim herbs, inspect leaves for pests.
- Every 2–4 weeks: light fertilizer as directed for container plants.
- Seasonal: refresh top layer of mix, rotate planters for even growth, repaint scuffed areas if needed.
If the planter sits outdoors year-round, elevate it slightly on pot feet to improve drainage and reduce rust at the base.
Budget, Timeline, and Skill Level
- Skill level: Beginner to intermediate
- Time: 1–3 hours (plus drying time for paint/primer)
- Typical budget: $20–$75 depending on container quality, paint, and plant choices
Budget saver: use one premium focal plant and inexpensive trailing fillers. It still looks high-end if your composition is balanced.
Eco-Friendly Upcycling Tips
If sustainability matters to you (and it should), this project can be beautifully low-waste:
- Choose reclaimed decorative containers from thrift stores or flea markets.
- Reuse nursery pots as inserts instead of buying new liners.
- Refresh paint instead of replacing containers each season.
- Compost plant trimmings when possible.
- Repurpose old labels and hardware for embellishments.
Cute and conscientious is a very good combo.
Hands-On Experiences: Real Lessons from Making Vintage-Style Can Planters (Bonus )
The first time I made one of these planters, I focused way too hard on aesthetics and not enough on function. I picked a gorgeous retro container, painted it
perfectly, staged it on my porch… and forgot the drainage plan. Two weeks later, the plant looked offended, yellow, and dramatic. That moment taught me the
golden rule of container gardening: roots need oxygen, not soggy soup. Since then, every project starts with a drainage decision before color, before styling,
before “where will this look cutest for photos?”
My second lesson came from soil choice. I once used leftover garden soil because it was “right there and free.” Bad idea. It compacted, stayed wet at the bottom,
and dried into a brick at the top. When I switched to a lightweight potting mix, the difference was immediatebetter drainage, healthier root growth, and easier
watering. If you’re new, this one change alone can make you feel like a plant wizard.
Then came the heat-wave lesson. Small metal planters can warm up quickly in direct sun, and moisture disappears faster than expected. I started checking soil in the
morning and again in late afternoon during very hot spells. Not always watering twicejust checking. This helped prevent both extremes: crispy drought stress and
panic overwatering.
On the design side, I learned that restraint beats clutter. Early versions had too many add-ons: twine, tags, faux flowers, vintage spoons, pebbles, random charms…
basically a craft store exploded. Now I use one focal detail and let the plants do the talking. A simple distressed finish, one trailing vine, one bloom color family,
and the whole planter looks cleaner and more expensive.
Another practical win: the double-pot method. Instead of planting directly into every decorative can, I often place a nursery pot inside. It makes seasonal swaps easy:
herbs in spring, flowers in summer, mini evergreens in winter. It also reduces maintenance headaches and protects your decorative container finish from constant wet soil.
I also discovered that gifting these planters is a guaranteed crowd-pleaser. A personalized herb can (“Pizza Night Kit” with basil + oregano) is always a hit.
For housewarmings, a low-maintenance succulent arrangement works great. For grandparents, a cheerful bloom mix with a handwritten care card feels thoughtful and practical.
Most importantly, this project taught me that DIY success is less about perfection and more about process. If the paint chips a little, it can look intentional.
If the first plant combo fails, you replant. If the style evolves, that’s part of the fun. Over time, your collection of planters becomes a visual diary of your seasons,
experiments, and tiny wins. Some were quick projects, some were do-overs, all were worth it.
So if you’ve been waiting for a sign to try this: this is it. Start with one container. Keep it safe. Keep it simple. Let function lead, then layer on personality.
By the time you finish your first cute vintage-style can planter, you’ll already be planning number two.
Conclusion
Making cute DIY planters out of vintage-style gas cans is one of those rare projects that checks every box: creative, affordable, customizable, and genuinely useful.
The key is balancing style with plant sciencesafe container selection, drainage, proper potting mix, and realistic care. Get those right, and your planter won’t just
look good for a week; it’ll thrive season after season.
Start with one design recipe from this guide, then make it your own. Try a bold paint color, a favorite herb trio, or a trailing floral combo that brightens your entry.
Keep experimenting, keep learning, and keep your hands dirty in the best way.