Table of Contents >> Show >> Hide
- What Is Rolled Roofing (And When Does It Make Sense)?
- Before You Start: The “Don’t Regret This Later” Prep
- Tools and Materials (Typical)
- How to Apply Rolled Roofing: 15 Steps (Checklist Style)
- Step 1: Confirm rolled roofing is appropriate for your roof slope
- Step 2: Read the manufacturer instructions like they’re the final exam
- Step 3: Plan safety and access (seriously)
- Step 4: Measure the roof and calculate materials with waste in mind
- Step 5: Choose the installation method (and don’t mix systems)
- Step 6: Prep the deck: repair, secure, clean, and dry
- Step 7: Install drip edge / edge metal where required
- Step 8: Install underlayment in neat, lapped courses
- Step 9: Snap chalk lines and dry-fit your first roll
- Step 10: Install starter strips along eaves and rakes
- Step 11: Install the first course at the eave, aligned and fastened correctly
- Step 12: Treat side laps like they’re the whole point (because they kind of are)
- Step 13: Stagger end laps and keep seams off “problem zones”
- Step 14: Flash and seal penetrations, transitions, and walls with care
- Step 15: Finish the top termination and do a serious final inspection
- Common Mistakes (So You Don’t Have to Learn the Hard Way)
- How to Tell the Job Was Done Well
- Maintenance Tips That Actually Help
- Real-World “Experience” Notes: What People Learn After Their First Roll-Roof Job (500+ Words)
- Conclusion
Rolled roofing is the “good-enough hero” of the roofing world: it’s budget-friendly, quick to cover a low-slope roof, and it doesn’t require a master’s degree in shingle geometry. It’s commonly used on sheds, porches, workshops, carports, and other structures where practicality beats prestige. But here’s the not-fun part (that I’m going to say anyway): roof work is genuinely dangerous. Falls happen fast, and a “quick weekend project” can turn into a “quick ambulance ride.”
So consider this article a homeowner’s understanding guide and a 15-step checklist you can use to plan the job, talk to a contractor, or supervise a skilled adult installer. If you’re not trained, not properly equipped, or you’re under 18, don’t do roof work yourselfuse this to make smarter decisions and ask better questions.
What Is Rolled Roofing (And When Does It Make Sense)?
Rolled roofing (often called “roll roofing” or “mineral-surfaced roll roofing”) is a roofing material sold in rolls rather than individual shingles. Many products are asphalt-based with a mineral surface on top (the gritty part), and they’re designed for roofs with a low slope where water drains but doesn’t rocket off the edge. Some rolled systems are nail-down with roofing cement at laps; others are self-adhered (peel-and-stick style) or part of a modified bitumen system.
Rolled roofing can be a smart choice when:
- You’re roofing a small, simple structure (shed/garage/porch roof) and want a straightforward install.
- You need a practical solution for a low-slope roof where traditional shingles aren’t ideal.
- You’re balancing cost and speed and you accept that rolled roofing is typically a shorter-lifespan option than premium roof systems.
It may be a poor choice when:
- Your roof is very visible and you care a lot about curb appeal.
- The roof slope is outside the product’s rated range (always check the manufacturer’s requirements).
- You have complex valleys, dormers, or tons of penetrationsdetails multiply like rabbits.
Before You Start: The “Don’t Regret This Later” Prep
Pick the right day (and the right temperature)
Rolled roofing behaves best when it’s warm enough to relax and lay flat. Cold material can curl, fight you, wrinkle, and generally act like it has opinions. Plan for dry weather, minimal wind, and temperatures that match the product’s installation guidance.
Know your roof deck condition
Rolled roofing is not a magic eraser for rotten decking. If the deck is soft, wet, delaminated, or full of protruding fasteners, the roofing will telegraph those problemsand then water will find them. The best-looking roll roof starts with boring, solid, clean sheathing. (Boring is underrated.)
Understand the system parts
Even “simple” roll roofing is still a system: underlayment, drip edge, starter strips, laps, flashings, fasteners, and sealants all work together. Skipping pieces often “saves money” the way skipping brakes saves money on a car.
Tools and Materials (Typical)
What you need depends on the roll roofing type and manufacturer instructions, but most jobs involve:
- Rolled roofing (mineral-surfaced roll or self-adhered roll system)
- Underlayment (roofing felt or a compatible membrane)
- Drip edge / edge metal and fasteners
- Roofing nails (corrosion-resistant, sized to penetrate the deck properly)
- Roofing cement or approved adhesive (for laps, edges, and flashing details when required)
- Chalk line, measuring tape, utility knife with hook blades
- Hand roller (useful for bonding and smoothing), broom/blower for cleanup
- Flashing materials for walls, penetrations, and transitions
- Safety gear appropriate for roof work (this is non-negotiable)
How to Apply Rolled Roofing: 15 Steps (Checklist Style)
These steps describe the common flow of a professional installation. Exact lap sizes, nail patterns, and cement/adhesive placement vary by productyour manufacturer’s instructions and local code win every argument.
Step 1: Confirm rolled roofing is appropriate for your roof slope
Rolled roofing is typically intended for low-slope roofs, not dead-flat roofs and not steep, highly visible roofs where shingles look better. Verify the minimum/maximum slope allowed for your specific product before spending a dime.
Step 2: Read the manufacturer instructions like they’re the final exam
Rolled roofing isn’t one universal material. Different products call for different laps, fasteners, adhesives, and detailing. Print or pull up the installation instructions and keep them on-site. This isn’t overkillit’s waterproofing.
Step 3: Plan safety and access (seriously)
Safe roof access, stable ladders, and fall protection planning come before materials. If a contractor is doing the work, ask what fall protection methods they’ll use. If you’re supervising, prioritize safety over speed. A roof is not a place for “close enough.”
Step 4: Measure the roof and calculate materials with waste in mind
Measure length and width of roof planes, then account for overlaps, starter strips, waste at edges, and extra for details like penetrations and flashing. Ordering “exact coverage” is how people end up with a half-finished roof and an emotional support tarp.
Step 5: Choose the installation method (and don’t mix systems)
Nail-down roll roofing with cemented laps is common, but self-adhered systems exist too. Use compatible underlayment, adhesives, and flashing materials recommended for your system. Mixing random products because they were on sale is a top-tier way to create future leaks.
Step 6: Prep the deck: repair, secure, clean, and dry
Replace rotten sheathing, tighten loose panels, sink or remove protruding nails, and clean off dust and debris. Adhesives and cements bond best to dry, clean surfaces. Dirt is basically a “do not bond” sticker.
Step 7: Install drip edge / edge metal where required
Edge metal helps direct water off the roof and protects roof edges. Install it as required for your roof design and local codeoften at eaves and rakeswith proper fastening and overlaps.
Step 8: Install underlayment in neat, lapped courses
Underlayment adds a secondary water-shedding layer and can improve performanceespecially where wind-driven rain or minor leaks might occur. Apply it in straight runs, overlap per the product and code requirements, and keep it smooth (wrinkles can telegraph through).
Step 9: Snap chalk lines and dry-fit your first roll
Straight layout matters because crooked courses don’t magically fix themselves. Dry-fit a roll to confirm alignment, edge overhang, and how seams land. If the roll wants to curl, acclimate it so it relaxes before you commit.
Step 10: Install starter strips along eaves and rakes
Starter strips help reinforce edges and prevent exposed joints at the roof perimeter. They also give your first course a cleaner, stronger base to bond to. Think of starter strips as the “don’t let the edge fail first” insurance policy.
Step 11: Install the first course at the eave, aligned and fastened correctly
Start at the low point of the roof so courses lap in the direction water naturally flows. Align the first course carefully, then attach it using the manufacturer’s specified method (fasteners and/or adhesive/cement). Smooth it as you go to minimize wrinkles and fishmouths.
Step 12: Treat side laps like they’re the whole point (because they kind of are)
Most roll-roof failures show up at seams. Apply lap cement/adhesive where required, maintain the proper overlap, and press/roll the lap firmly so it seals consistently. Too little bonding invites leaks; too much can cause mess and performance issuesfollow the instructions, not your instincts.
Step 13: Stagger end laps and keep seams off “problem zones”
End laps should be overlapped and sealed per the product instructions, and joints are typically staggered so you don’t create a single “zipper line” for water. Avoid placing end laps where water concentrates (like near drains/valleys) unless the system details specifically allow it.
Step 14: Flash and seal penetrations, transitions, and walls with care
Pipes, vents, skylights, and wall transitions are leak magnets. Use appropriate flashing materials and detailing: base flashing, compatible sealants/cements, and (where applicable) counterflashing. This is not the place for improvisation. If you’ve ever thought, “I’ll just glob some cement on it,” pause and rethink.
Step 15: Finish the top termination and do a serious final inspection
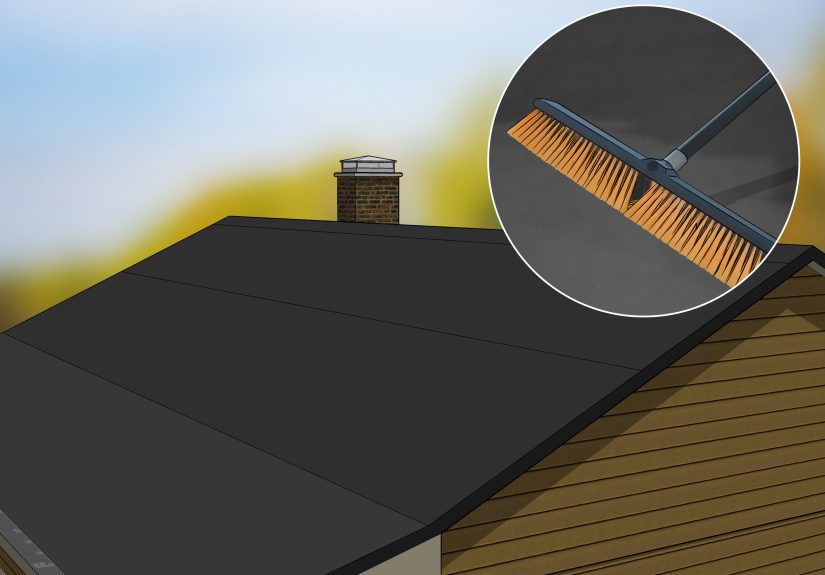
At the high point, the roof needs a clean termination that won’t allow water to back up under the material. Complete any cap/termination details required by your system, seal exposed edges where specified, and inspect every lap and flashing. Then clean the roof surface and surrounding area so debris doesn’t trap moisture or damage the finish.
Common Mistakes (So You Don’t Have to Learn the Hard Way)
1) Skipping deck prep
A dusty, uneven deck is a bonding nightmare. Rolled roofing doesn’t like surprises underfoot.
2) Ignoring temperature and storage
Cold rolls fight you. Overheated storage can distort materials. Keep products stored and conditioned the way the manufacturer describes.
3) “Eyeballing” laps
Laps are engineered details. Make them consistent, straight, and properly bonded.
4) Messy flashing details
A rolled roof can be perfect everywhere and still leak at one poorly flashed vent. Details matter more than square footage.
How to Tell the Job Was Done Well
- Courses are straight and consistent with clean edges.
- Laps lie flat with no gaps, fishmouths, or persistent bubbles.
- Flashing details look intentionalnot like a last-minute arts-and-crafts project.
- No exposed fasteners where the system expects them to be covered or sealed.
- Water sheds smoothly at edges; there are no obvious low spots holding water.
Maintenance Tips That Actually Help
- Inspect after big storms: Look for lifted edges, damaged flashing, and debris build-up.
- Keep it clean: Leaves and dirt can trap moisture and accelerate wear.
- Don’t ignore small issues: A tiny seam lift is cheap to address early and expensive later.
- Watch penetrations: Sealants around vents and edges can age faster than the field material.
Real-World “Experience” Notes: What People Learn After Their First Roll-Roof Job (500+ Words)
You can read all the instructions in the world and still get surprised the first time you work with rolled roofingmostly because the material is simple, but the physics aren’t. People often expect it to behave like wrapping paper: roll it out, stick it down, done. In reality, rolled roofing is more like a stubborn yoga mat that’s been living in a cold garage. It wants to curl, it remembers how it was stored, and it will absolutely highlight every bump you didn’t fix.
One of the biggest “aha” moments homeowners and first-timers report is how much temperature changes the job. When the material is too cool, it doesn’t relax easily, and that’s when wrinkles, bubbles, and fishmouths show upespecially near laps. On the flip side, in very hot sun the surface can scuff more easily during foot traffic and the adhesive/cement can get messy fast. The sweet spot is working conditions where the roll lays flatter with minimal persuasion, and your bonding steps feel controllednot frantic.
Another common lesson: layout is 80% of “looking professional.” People who rush chalk lines or skip dry-fitting tend to end up with courses that slowly drift. At first it looks finethen by the time you reach the top of the roof, the edge alignment is off, end laps land in awkward places, and trimming becomes a patchwork of “creative solutions.” Taking ten extra minutes to snap lines and confirm where seams will fall can save hours of annoying corrections later.
Then there’s the “more is better” trap with roofing cement or adhesive. A lot of folks assume a thicker layer equals better waterproofing. In practice, too much can create squeeze-out, attract grit, and in some systems contribute to blistering or uneven bonding. The most experienced installers treat cement like seasoning: enough to do the job, applied in the right place, and not slathered everywhere like frosting. If you’ve ever seen a roof seam that looks like it lost a fight with a caulk gun, that’s usually overapplication (and panic).
Flashing details are where reality truly tests confidence. The field areabig, open roofoften goes smoothly. Then you reach a vent pipe, a wall transition, or an edge condition that isn’t perfectly square. That’s when people realize rolled roofing isn’t “just rolls,” it’s water management. The best outcomes come from slowing down at details, using the correct flashing approach, and checking that every layer sheds water in the right direction. A neat-looking roof that leaks at one penetration is still a leaky roof, and water does not care about your feelings.
Finally, many homeowners who hire the job out still learn something valuable: watching a pro work can help you understand what to look for later. You’ll notice how they keep seams clean, how they press/roll laps for consistent bonding, how they avoid trapping debris under the material, and how they treat edges as high-risk zones. That knowledge pays off during maintenance checksbecause you’ll know what “normal” looks like, and you’ll catch the first signs of trouble before they become a ceiling stain.
Conclusion
Rolled roofing can be a smart, economical solution for the right roofespecially small, low-slope structures where you want fast coverage and straightforward detailing. The secret isn’t a magic product; it’s the basics done well: solid deck prep, correct underlayment and edge detailing, consistent laps, careful flashing work, and a final inspection that doesn’t skip the boring parts. Use the 15 steps above as your planning checklist and your “contractor conversation script,” and you’ll be far more likely to end up with a roof that sheds water like it’s proud of itself.