
Table of Contents >> Show >> Hide
- Why Transform a Microwave Cabinet?
- Planning the Microwave Cabinet Transformation
- Popular Microwave Cabinet Transformation Ideas
- Step-by-Step: How to Transform a Microwave Cabinet
- Design Details That Make the Cabinet Look Custom
- Common Mistakes to Avoid
- Budget-Friendly Microwave Cabinet Makeover Ideas
- Real-Life Experience: What a Microwave Cabinet Transformation Teaches You
- Conclusion
A microwave cabinet is one of those kitchen features that quietly judges you every morning. It holds the appliance, maybe a few crumbs, possibly a rogue packet of instant oatmeal from 2019, and somehow still manages to look like an afterthought. But with a smart plan, a tired microwave cubby can become one of the most useful, polished, and surprisingly stylish zones in the kitchen.
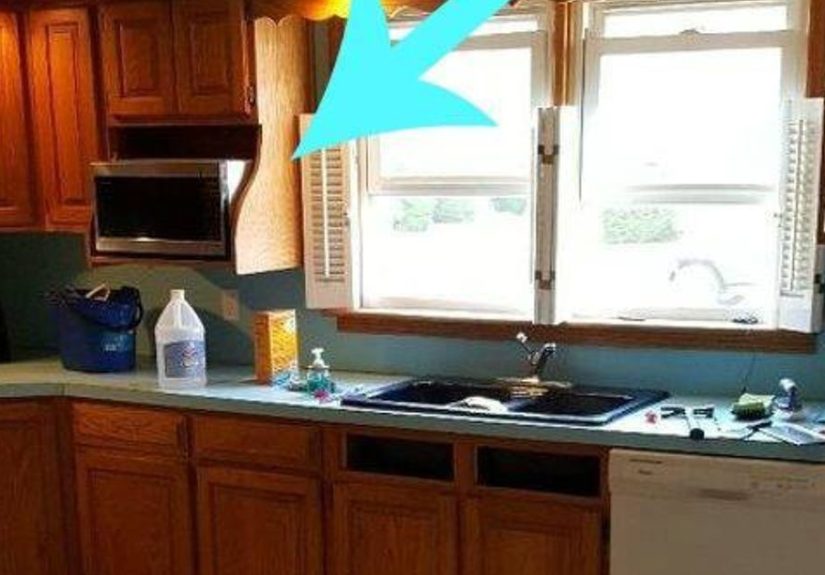
The transformation of a microwave cabinet is not just about hiding an appliance. It is about improving kitchen flow, reclaiming counter space, creating better storage, and making the room feel intentional instead of “we put the microwave here because the outlet was nearby.” Whether you are working with a dated upper cabinet, an awkward pantry nook, a base cabinet, or a built-in opening that no longer fits your new microwave, this project can deliver a major upgrade without requiring a full kitchen remodel.
The best microwave cabinet makeovers combine three things: safety, function, and style. The microwave needs proper ventilation, stable support, convenient access, and enough surrounding space so it does not overheat or become annoying to use. After that, you can have fun with trim, paint, shelves, doors, drawers, lighting, and finishes. In other words, first we keep the appliance from throwing a tantrum, then we make it pretty.
Why Transform a Microwave Cabinet?
A microwave cabinet makeover can solve several common kitchen problems at once. First, it frees up valuable counter space. In smaller kitchens, every inch of countertop matters, especially near the sink, stove, or prep area. Moving the microwave into a cabinet or improving an existing microwave opening instantly gives the kitchen a cleaner, calmer look.
Second, it improves visual flow. A microwave sitting randomly on the counter can interrupt a beautiful backsplash, block a corner, or make even a tidy kitchen feel crowded. A transformed cabinet allows the microwave to look built in, even if the appliance itself is a standard countertop model.
Third, it creates better storage. Many old microwave cabinets waste space above, below, or beside the appliance. With a redesign, those empty gaps can become shelves for cookbooks, drawers for wraps and containers, or vertical storage for trays and cutting boards. The result is not just a prettier cabinet, but a smarter kitchen command center.
Planning the Microwave Cabinet Transformation
Before touching a screwdriver, start with a plan. Measure the existing cabinet opening, the microwave, the surrounding cabinets, nearby outlets, and the available landing space. A microwave should be easy to reach, easy to open, and easy to unload without forcing anyone to lift hot soup over their eyebrows. Convenience matters, but safety matters more.
Measure the Appliance and the Opening
Measure the microwave width, height, depth, door swing, and vent locations. Then compare those measurements with the cabinet opening. Many homeowners make the mistake of measuring only the front of the microwave. The back, sides, feet, cord, plug, and vents all matter. If the microwave sticks out slightly, that may be acceptable for some designs, but it should look deliberate rather than like the appliance is trying to escape.
If you are replacing an old microwave, do not assume the new one will fit the same space. Modern microwaves vary widely in size, especially when comparing countertop models, built-in models, drawer microwaves, and over-the-range units. A half-inch difference can turn a smooth project into an afternoon of dramatic sighing.
Check Ventilation Requirements
Ventilation is the rule you do not want to ignore. Microwaves produce heat during operation, and cabinet installation can restrict airflow if the opening is too tight. Always check the manufacturer’s installation instructions for the specific appliance. Some models are designed for built-in use with trim kits, while others need open space around the sides, back, or top.
If you are using a countertop microwave inside a cabinet, avoid sealing it into a tight box. Leave breathing room around the appliance according to the manufacturer’s guidance. If the microwave vents from the side, do not press that side against a cabinet wall. If it vents from the back, make sure the rear area is not blocked. A beautiful cabinet is not worth shortening the life of the appliance.
Think About Height and Daily Use
The best microwave location depends on who uses the kitchen. A microwave placed too high can be awkward and unsafe, especially when removing hot bowls, mugs, or plates. A microwave placed too low can be inconvenient if it requires constant bending. For many kitchens, counter-height, pantry-height, or base-cabinet placement works better than an over-the-range position.
Think about your daily routine. Do you mostly reheat coffee? Warm leftovers? Make oatmeal? Defrost meat? Heat kids’ meals? The more often the microwave is used, the more accessible it should be. If the microwave is used only occasionally, hiding it behind a cabinet door or in a pantry zone may be a good choice.
Popular Microwave Cabinet Transformation Ideas
There is no single correct way to transform a microwave cabinet. The best solution depends on your layout, budget, appliance type, and style. Here are several practical options that can make a big difference.
1. Turn an Open Cubby Into a Built-In Feature
If your kitchen already has an open microwave cubby, you can make it look more finished with trim, paint, and better proportions. Add a frame around the opening so the microwave appears built in. Match the trim to your cabinet color for a seamless look, or use a contrasting finish for a custom accent.
For example, a white shaker kitchen can look more polished with a simple face frame around the microwave opening. A wood-tone kitchen may benefit from stained trim that matches the surrounding cabinetry. The goal is to make the microwave look like part of the design, not a guest who arrived late and brought no snacks.
2. Add a Shelf Above the Microwave
Many microwave cabinets have wasted vertical space. Adding a shelf above the appliance can create storage for mugs, bowls, cookbooks, small baskets, or coffee supplies. This is especially useful when the microwave is part of a breakfast station or beverage center.
Keep the shelf practical. Avoid storing heavy or heat-sensitive items directly above the microwave unless the cabinet design allows safe clearance and airflow. Light items such as napkins, tea boxes, or small serving pieces are usually better choices.
3. Convert the Cabinet Into an Appliance Garage
An appliance garage is a cabinet zone designed to hide small appliances while keeping them easy to access. A microwave cabinet can become an appliance garage with pocket doors, lift-up doors, tambour doors, or simple cabinet doors that open fully during use.
This works best when the microwave is not used constantly throughout the day. If you choose doors, make sure they do not block ventilation while the microwave is running. The safest habit is to open the doors fully before using the appliance and leave them open until the microwave cools. The cabinet gets to look calm and elegant, and the microwave gets to breathe. Everybody wins.
4. Move the Microwave to a Base Cabinet
A base microwave cabinet can be a smart option for families who want the appliance off the counter but not above shoulder height. It can sit below the countertop in a dedicated opening, often with a drawer underneath for wraps, containers, or microwave-safe lids.
This setup works well in islands, peninsulas, and pantry walls. It keeps the microwave visually lower and can make upper cabinets feel less crowded. However, it may not be ideal for every household because it requires bending. Consider the height, mobility, and habits of the main users before choosing this option.
5. Replace a Standard Microwave With a Drawer Microwave
A drawer microwave can create a sleek, modern look because it slides out from the cabinetry instead of swinging open like a traditional microwave. It is commonly installed in base cabinets or islands and can be easier to access from above. This option is usually more expensive than adapting a standard microwave cabinet, but it can look very high-end.
If you are considering a drawer microwave, plan carefully. These appliances have specific cabinet dimensions, electrical needs, and installation instructions. They are not usually a casual “let’s see if it fits” kind of project. That path leads to frustration, extra holes, and possibly a cabinet that looks like it lost a fight.
6. Create a Microwave and Coffee Station
One of the most useful microwave cabinet transformations is turning the area into a mini breakfast station. Place the microwave near coffee supplies, mugs, tea, oatmeal, toaster pastries, or breakfast bowls. Add a shelf for mugs, a drawer for spoons, and a small basket for packets or pods.
This arrangement reduces morning traffic in the main cooking zone. Instead of having everyone hover around the stove or sink, the breakfast station creates a separate grab-and-go area. It is especially helpful in busy households where mornings can feel like a small but emotional airport.
Step-by-Step: How to Transform a Microwave Cabinet
Step 1: Empty and Inspect the Cabinet
Remove everything from the cabinet and inspect the structure. Look for loose shelves, sagging panels, damaged hinges, weak backing, old screw holes, peeling veneer, or signs of heat damage. A microwave cabinet needs to be sturdy because the appliance has weight, movement, and heat output.
If the cabinet feels flimsy, reinforce it before moving forward. Add support cleats, secure the cabinet to wall studs if needed, and make sure shelves are level. A microwave should sit on a stable surface, not on a shelf that flexes like a trampoline.
Step 2: Decide Whether to Keep, Resize, or Rebuild
Some microwave cabinets need only cosmetic updates. Others need resizing. If the opening is too tall, you can add a shelf or filler panel. If it is too wide, side fillers or trim can create a better fit. If it is too shallow, you may need to adjust the back panel or choose a different appliance.
In older kitchens, cabinet dimensions can be unpredictable. Custom fillers, simple plywood panels, and matching trim can solve many awkward gaps. Paint or stain helps blend the new pieces with the original cabinets.
Step 3: Plan the Electrical Setup
A microwave needs a safe, accessible power source. Avoid running cords through random gaps or across shelves. If the outlet is not in the right location, hire a qualified electrician to install or move it. The outlet should be positioned so the cord is not pinched, stretched, or trapped behind sharp cabinet edges.
This is one area where DIY confidence should know its limits. Painting cabinets is one thing. Improvising electrical work is another. Your kitchen does not need that kind of plot twist.
Step 4: Improve Airflow
If the cabinet has a solid back, consider whether it restricts ventilation or cord access. Depending on the microwave model and cabinet type, you may need to cut a rear opening, add ventilation slots, or use a proper built-in trim kit. Do not block vents with trim, doors, baskets, or decorative panels.
Good airflow helps the microwave operate safely and efficiently. It also helps prevent heat buildup that can damage cabinet finishes over time.
Step 5: Add Trim and Finish Details
Once the fit and function are right, focus on appearance. Add trim around the opening, fill nail holes, caulk seams, sand rough edges, prime bare wood, and paint or stain the surfaces. These small finishing steps make the difference between “DIY project” and “custom kitchen feature.”
Choose a finish that matches the surrounding kitchen. White paint feels clean and classic. Warm wood adds texture. Matte black can create contrast. A soft greige or muted green can make the microwave zone feel like part of a designer pantry wall.
Design Details That Make the Cabinet Look Custom
Small details can elevate a microwave cabinet transformation. Consider adding under-cabinet lighting below the microwave shelf if the cabinet sits above a counter. Add matching hardware to nearby doors and drawers. Use baskets or bins to organize small items. Install a pull-out tray if you need easier access to items stored above or below.
Another great trick is to repeat materials already used in the kitchen. If your island has wood accents, add a wood shelf near the microwave. If your backsplash has warm tones, use trim or paint that connects with those colors. A microwave cabinet should not look like a separate project. It should look like it was invited to the kitchen design meeting from the beginning.
Common Mistakes to Avoid
Ignoring the Manual
The most common mistake is assuming every microwave can be installed the same way. It cannot. Manufacturer instructions vary by model. Some appliances need more clearance, some require trim kits, and some are not designed for enclosed cabinet installation at all.
Placing the Microwave Too High
A high microwave may save space, but it can be uncomfortable and risky when removing hot food. A good microwave cabinet transformation should improve daily use, not turn leftovers into a balancing act.
Blocking the Door Swing
Always test the door swing before finalizing trim or fillers. Make sure the door opens fully and does not hit a wall, side panel, handle, or neighboring cabinet. A microwave door that opens halfway is not charming. It is a tiny daily irritation with a power cord.
Forgetting Landing Space
Landing space is the nearby surface where you place hot dishes after removing them from the microwave. Ideally, the microwave should be close to a countertop, shelf, or pull-out surface. This makes cooking safer and more convenient.
Budget-Friendly Microwave Cabinet Makeover Ideas
You do not need a luxury remodel budget to transform a microwave cabinet. Paint is one of the most affordable upgrades. A fresh coat can hide years of wear and make the cabinet look intentional again. New trim can disguise gaps. Peel-and-stick wallpaper or removable liner can add personality to the inside of an open cabinet. LED strip lighting can add a soft glow without major construction.
If the microwave cabinet is part of a rental kitchen, focus on reversible improvements. Use removable liners, tension rods, baskets, adhesive hooks, and freestanding shelves. You can still create a cleaner, more functional microwave zone without angering the security deposit gods.
Real-Life Experience: What a Microwave Cabinet Transformation Teaches You
After working through a microwave cabinet transformation, you quickly learn that the project is less about the microwave and more about how the kitchen actually functions. On paper, it may seem simple: remove the old appliance, adjust the opening, add trim, and call it a day. In real life, you discover that the microwave is connected to everything around it: storage, workflow, outlet placement, cabinet proportions, lighting, and even family habits.
One of the biggest lessons is that measuring twice is not enough. Measure the cabinet. Measure the microwave. Measure the plug. Measure the door swing. Measure the plate you use most often. Measure the height of the person who reheats soup every night. Then measure again because the tape measure enjoys drama. A small detail, such as a plug sticking out from the wall, can change how far the microwave sits forward. A handle can interfere with a cabinet door. A vent location can change the trim plan. The cabinet may look square until you place a perfectly rectangular appliance inside and suddenly realize the house has opinions.
Another experience many homeowners share is the satisfaction of reclaiming counter space. Moving a microwave from the counter into a cabinet can make the whole kitchen feel larger. That newly open space may become a prep area, a coffee zone, or simply a clean surface that makes the room feel less chaotic. It is amazing how one appliance can visually shrink a kitchen, and equally amazing how moving it can make the space breathe again.
The transformation also teaches patience with finishing work. The structural changes may happen quickly, but the polished look comes from sanding, caulking, painting, and adjusting. Trim pieces need clean cuts. Paint needs proper drying time. Caulk needs a steady hand. Hardware needs alignment. These are not glamorous steps, but they are the steps that make people ask, “Was this custom?” instead of “What happened here?”
Function should always win over looks. A hidden microwave cabinet may look beautiful in photos, but if you use the microwave ten times a day, doors that must constantly open and close may become annoying. A low microwave may look sleek in an island, but it may not suit someone who dislikes bending. A high microwave may create a clean wall of cabinets, but it may be uncomfortable for daily use. The best transformation is the one that matches real life, not just a mood board.
Finally, a microwave cabinet makeover reminds you that small projects can change how a kitchen feels. You may not replace every cabinet or install new countertops, but improving one awkward zone can make the entire room feel more organized. It turns visual clutter into purpose. It turns wasted space into storage. It turns an appliance you barely noticed into a design feature that quietly supports daily life. And unlike a full renovation, it does not require moving out, eating takeout for six weeks, or having a deep emotional relationship with dust.
Conclusion
The transformation of a microwave cabinet is a practical, stylish, and highly rewarding kitchen upgrade. Done well, it improves safety, saves counter space, adds storage, and gives the kitchen a more custom look. The key is to plan carefully, follow appliance requirements, prioritize ventilation, and design the cabinet around how the kitchen is actually used.
Whether you create a built-in cubby, a hidden appliance garage, a base cabinet microwave station, or a coffee-and-breakfast zone, the goal is the same: make the microwave useful without letting it dominate the room. With thoughtful measurements, smart materials, and a little finishing patience, even the most awkward microwave cabinet can become one of the hardest-working features in the kitchen.






