
Table of Contents >> Show >> Hide
- What Is a Stainless Steel Compost Pail, Exactly?
- Why Stainless Steel Wins the Countertop Compost Olympics
- Key Features to Look For (So You Don’t Buy a Fancy Smell Bucket)
- How to Use a Stainless Steel Compost Pail Without Summoning Odors or Fruit Flies
- Choosing the Right Style: 4 Common Stainless Steel Compost Pail “Personalities”
- Cleaning and Maintenance: Keep the Shine, Lose the Funk
- Is a Stainless Steel Compost Pail Actually Worth It?
- Conclusion: The Countertop Upgrade That Pays You Back Daily
- Kitchen Chronicles: of Real-World Compost Pail Experience
Some kitchen tools quietly change your life. Not in a “I just discovered fire” waymore in a “Why did I spend years throwing banana peels into a bag that immediately turns into a fruit-fly nightclub?” way. Enter the stainless steel compost pail: the countertop sidekick that keeps food scraps under control, reduces trash funk, and makes you feel mildly heroic while you’re still wearing pajama pants at 2 p.m.
Whether you compost in your backyard, use a city green bin, or drop scraps at a community garden, the hardest part is rarely the compost pile. It’s the in-betweenthe daily peelings, coffee grounds, onion skins, and “oops-that-spinach-went-slimy” moments. A good stainless steel countertop compost bin makes that middle step clean, easy, and (shockingly) low-drama.
What Is a Stainless Steel Compost Pail, Exactly?
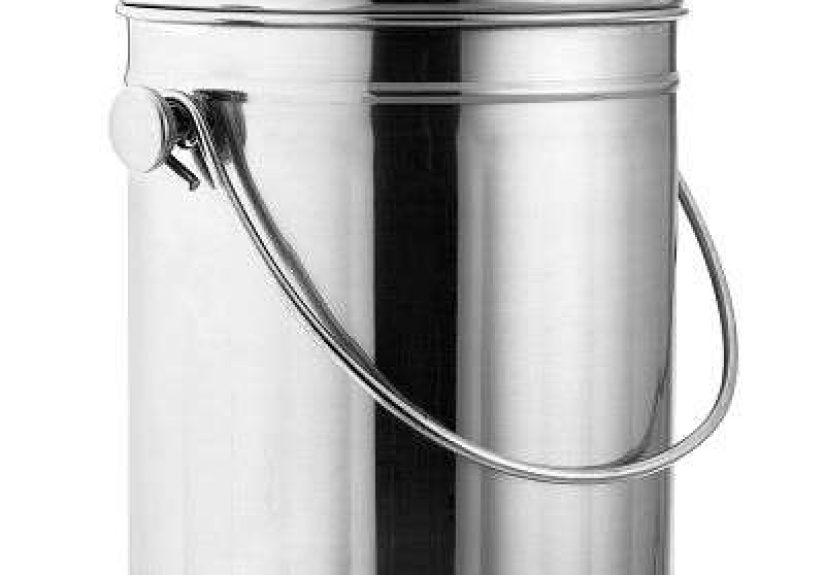
A stainless steel compost pail (also called a kitchen compost container, food scrap bin, or countertop compost caddy) is a small, lidded container designed to hold compostable kitchen scraps until you take them to your outdoor composter or municipal collection bin.
Most are sized for daily cooking rhythmsbig enough to handle a few meals’ worth of scraps, small enough to sit on the counter without looking like a science project. Many include some form of odor control, typically a charcoal filter in the lid or a “breathable” seal designed to reduce stink.
Why Stainless Steel Wins the Countertop Compost Olympics
1) It’s naturally stink-resistant
Compared with many plastics, stainless steel is less porous. Translation: it’s less likely to hang onto smells like a guilty memory. If you’ve ever had a plastic container that permanently smells like yesterday’s garlic, you already understand why this matters.
2) It’s tougher than your “I’ll start composting Monday” motivation
Stainless steel holds up to daily bumps, clanks, and “I’m cooking fast and this carrot peel is going somewhere” moments. It doesn’t crack as easily, and it generally ages better on a busy counter.
3) It looks like it belongs in a kitchen
Let’s be honest: aesthetics change behavior. A good-looking stainless steel compost pail can sit out in the open without making your kitchen feel like a back alley behind a salad bar. When the bin is convenient, you actually use itconsistency beats composting guilt every time.
Key Features to Look For (So You Don’t Buy a Fancy Smell Bucket)
Capacity: match the pail to your household
Many classic stainless pails land around the 1 to 1.5 gallon range (often marketed as ~1.3 gallons or 4–5 liters). That’s usually enough for a couple days of scraps for one or two people, or roughly a day for a busy household. If you cook a lot, bigger is convenientbut only if you’ll empty it often.
- 1–2 people: ~0.75 to 1.3 gallons can be plenty.
- Families / heavy cooking: 1.3 to 1.75 gallons reduces trips.
- Small-space life: consider a slim caddy that tucks under the sink or docks near your trash can.
Lid design: airtight vs. “let it breathe”
There are two main philosophies in compost pail lids:
- Airtight + charcoal filter: Great for odor control. The tradeoff is you’ll replace filters periodically.
- Soft-seal / vented designs: Some systems aim to reduce odor by letting scraps breathe in a controlled way, often paired with liners. These can work well, but they’re not magicwet scraps still need management.
Charcoal filters: helpful, not a force field
Activated charcoal filters can make a huge differenceespecially with pungent scraps like onion skins and coffee grounds. But they’re a “maintain me” feature. If odors creep in, it’s often time to replace the filter, empty more frequently, or both.
One-handed opening: underrated joy
If you’re scraping cutting-board scraps with one hand and holding a knife (or your dignity) with the other, a lid that flips open easily is a real quality-of-life upgrade. Hinged or flip-top lids tend to feel smoother for everyday use than fully removable lids.
Handle comfort and carry-to-curb reality
A sturdy handle matters because compost is heavier than it looksespecially after coffee grounds, melon rinds, and the emotional weight of forgetting leftovers. Look for a handle that feels solid and doesn’t pinch when the pail is full.
Interior shape: smooth walls = less rage-cleaning
Food scraps create gunk. Smooth interior walls and rounded corners make cleanup faster. Some bins include a removable inner bucket; others rely on the main body being easy to rinse. Either can workwhat you want is “wipe and done,” not “chisel and pray.”
Liners: compostable, paper, or none?
Liners keep things cleaner, but the “right” liner depends on where your scraps are going. Some municipal programs accept compostable bags; others don’t (and some allow clear plastic liners for cleanliness because they can be separated later). A few practical guidelines:
- If you use curbside compost pickup: check local rules for allowed liners and bag types.
- If you backyard compost: skip plastic. Consider paper liners, paper towels, or no liner (with more frequent rinsing).
- If you use compostable bags: look for certified compostable options and follow your program’s instructions.
How to Use a Stainless Steel Compost Pail Without Summoning Odors or Fruit Flies
Empty it on a schedule, not on vibes
The simplest odor strategy is boringbut undefeated: empty often. If your pail sits for a week holding wet scraps, you’re basically running a small experimental swamp. Many people find every 1–3 days works best, depending on what’s inside.
Control moisture (wet scraps are the real troublemakers)
Moisture turns “compost” into “mystery soup.” To keep things manageable:
- Drain juicy scraps when possible (hello, watermelon season).
- Add a “dry layer” like torn cardboard, paper egg cartons, or a folded paper towel.
- Keep coffee filters and grounds togetherthey help absorb moisture and smell.
A few odor hacks that actually help
- Baking soda: a light sprinkle can help neutralize smells (don’t overdo it if you’re backyard compostingsmall amounts go a long way).
- Freeze super-stinky scraps: shrimp shells, fish skins, or anything you know will get weird fastfreeze them and add them right before you empty (if your program allows those materials).
- Keep it out of the heat zone: avoid placing your pail next to the stove, toaster oven, or sunny window. Heat accelerates stink physics.
Know what not to toss in (because pests love “free buffet”)
Rules vary by composting method and municipality, but generally, meat, dairy, grease, and oily foods are the usual suspects for odor and pest issuesespecially in backyard compost setups. If your city program accepts them, follow local guidance; if you compost at home, keep it simple unless you’re using a method designed for those materials.
Choosing the Right Style: 4 Common Stainless Steel Compost Pail “Personalities”
1) Classic countertop pail with charcoal filter
This is the familiar cylindrical or oval stainless pail with a lid-mounted filter. It’s popular for a reason: it’s straightforward, looks clean, and handles everyday scraps well when emptied regularly.
2) Bag-friendly stainless caddy
Some compost caddies are designed to hold a liner neatly (no sad bag overhang), making disposal cleanerespecially if you’re using curbside organics pickup.
3) Dockable or under-sink compost caddy
If you hate countertop clutter, look for a design that can hang or dock near your main trash can, or tuck under the sink. These can be surprisingly convenient during meal prep.
4) “Not just a pail” systems
Electric food recyclers and countertop composters exist too. They can reduce volume and speed things up, but they’re a different category (and a different budget). If your goal is simple daily collection before drop-off or backyard composting, a stainless pail is usually the most practical starting point.
Cleaning and Maintenance: Keep the Shine, Lose the Funk
Daily-ish: quick rinse and reset
Even if you use liners, condensation and tiny bits happen. A quick rinse after emptying prevents buildup. Warm water + dish soap is usually enough.
Weekly: a deeper clean that takes less time than scrolling
- Wash with warm soapy water and a non-scratch sponge.
- For stubborn odors: a paste of baking soda and water can help.
- Dry thoroughly to prevent water spots.
Filters: replace before you blame the pail
If your stainless steel compost pail uses a charcoal filter, swap it out when odors start winning. For many households, that’s somewhere in the “every few months” zone, but your nose will give you the most honest performance review.
Is a Stainless Steel Compost Pail Actually Worth It?
Yesif you want composting to feel like a normal kitchen habit instead of an occasional guilt-fueled hobby. A stainless pail:
- Reduces food waste going to landfill (and the smell that comes with it).
- Makes sorting scraps effortless during cooking.
- Keeps your kitchen cleaner, especially compared with tossing scraps into a trash bag.
- Supports backyard composting, municipal programs, or community drop-off routines.
And here’s the underrated part: it lowers friction. Lower friction means you stick with it. Composting isn’t about perfectionit’s about doing the easy thing consistently.
Conclusion: The Countertop Upgrade That Pays You Back Daily
A stainless steel compost pail is the practical middle step between “I cook food” and “I don’t want my trash to smell like regret.” Choose one with the right capacity, a lid you’ll actually use, and a cleaning setup you won’t resent. Pair it with a simple routineempty often, manage moisture, and follow your local compost rulesand you’ll have a cleaner kitchen and a smoother composting habit with almost no extra effort.
Kitchen Chronicles: of Real-World Compost Pail Experience
Let’s talk about the part nobody puts on the product box: what it feels like to live with a stainless steel compost pail every day. Because the first week is always cute. You’re saving the planet, one avocado pit at a time. You’re basically a Disney princess, except your animal companions are… microorganisms.
Then reality arrives wearing muddy shoes. You discover that the true villain isn’t “composting.” It’s wet scraps. Tomato guts. Melon rinds. That one lemon half you swear you’ll use later (you won’t). The first time your pail develops an aroma that can only be described as “fermented smoothie,” you learn the golden rule: dry the wet, and empty before it becomes a science fair project.
My favorite real-life trick is the “paper towel landing pad.” I keep a folded paper towel (or a torn egg carton) at the bottom of the pail. It quietly absorbs moisture, reduces slime, and makes cleanup way less dramatic. Coffee grounds also do heroic work here. They’re like the bouncers of the compost pail: “No liquids, no drama, everyone stay calm.”
Next lesson: the lid matters more than you thinkmostly because your hands are always busy when you need it. If the lid is annoying, you’ll start doing weird kitchen gymnastics: balancing scraps, elbowing the lid, and eventually missing the pail entirely, like a tragic basketball highlight reel. A lid that opens smoothly (preferably one-handed) turns composting into a normal motion, like tossing something in the trashexcept you feel slightly better about yourself afterward.
Then there’s the “countertop real estate” debate. Some people want their compost bin hidden away, others want it front-and-center for convenience. I’ve tried both. Hidden under the sink feels tidy… until you forget it exists and accidentally create a tiny rainforest ecosystem. Countertop placement keeps you consistent, but you’ll want a pail that looks decent and doesn’t scream “I contain onion skins.” Stainless steel helps: it blends in, wipes clean, and doesn’t visually punish you for doing a good habit.
About liners: they’re wonderful when your compost program accepts them. They make emptying quick and clean, especially if you’re carrying scraps to a curbside bin. But I’ve also gone liner-free and survivedprovided I emptied more often and rinsed regularly. If you’re liner-free, the “rinse right after emptying” habit is everything. Five seconds now saves five minutes later. That’s just math (and peace).
Finally: fruit flies. If you ever feel personally disrespected by a cloud of tiny insects, welcome to the club. The fix is usually a combo: empty more often, keep the lid closed, add that dry layer, and don’t park your pail next to heat. In peak summer, freezing extra-stinky scraps until “emptying time” is weirdly effective. Is it glamorous? No. Does it work? Yes.
After a month, composting stops being a “project” and becomes a rhythm. The stainless steel compost pail becomes just another kitchen toollike a cutting board, but with better karma. And once it’s easy, you’ll wonder how you ever lived without it (right up until you go on vacation and forget to empty it firstask me how I know).






