
Table of Contents >> Show >> Hide
- What the Alternator Does (and Why Your Battery Gets Blamed)
- Signs Your Alternator Might Be Failing
- Confirm It’s the Alternator (Before You Buy Anything)
- Decide: DIY With Supervision or Professional Repair?
- What Alternator Replacement Typically Involves
- After Installation: How to Know the Fix Actually Worked
- How Much Does Alternator Replacement Cost?
- How Long Does It Take to Replace an Alternator?
- Common Mistakes (and How to Avoid the Greatest Hits)
- FAQ
- Real-World Experiences Replacing an Alternator (The “Stuff Nobody Mentions” Section)
- Conclusion
Replacing an alternator is one of those car jobs that sounds like a NASA mission (“charging system diagnostics”) but often boils down to:
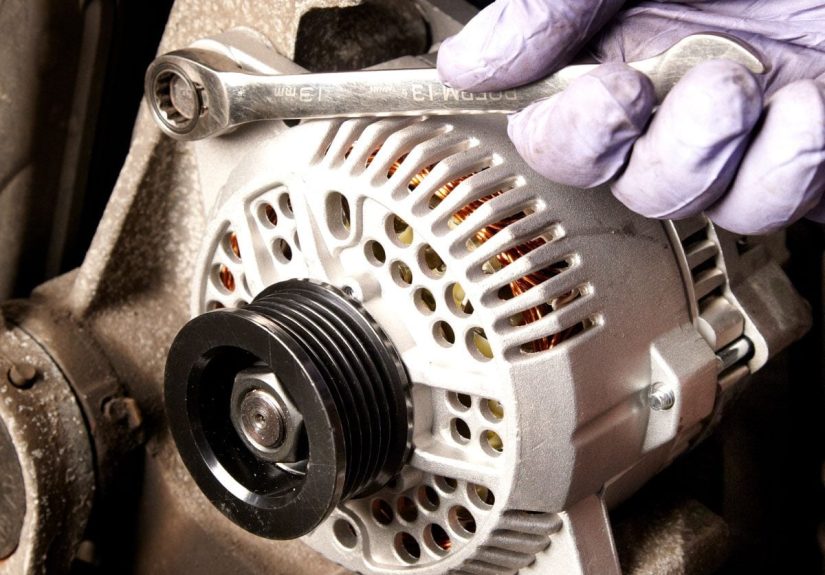
old part out, new part in, belt back on, hope you didn’t leave a socket in the engine bay. The alternator is your car’s tiny power plant.
It keeps the battery charged and helps run everything electrical while the engine is runningheadlights, wipers, infotainment, heated seats, and that one
phone charger everyone fights over.
Important note before we get cozy: working around engines, belts, and electrical connections can be risky. If you’re learning (especially if you’re under 18),
do this only with a qualified adult or a professional technician. This article explains what alternator replacement typically involves, how to confirm the problem,
and how to avoid common “oops” momentswithout pretending every engine bay was designed by a kind, generous engineer.
What the Alternator Does (and Why Your Battery Gets Blamed)
Your battery’s job is to start the car. The alternator’s job is to keep the party going afterward. Once the engine is running, the alternator produces electricity
and replenishes the battery. If the alternator underperforms, the battery ends up doing extra work until it’s drainedthen your car acts like it has the energy of a
phone at 1% in the middle of a long voice note.
Alternator vs. Battery: The Quick Mental Model
- Battery: provides the initial power to crank the engine and stabilizes electrical supply.
- Alternator: generates power while the engine runs and recharges the battery.
- Drive belt (often serpentine belt): spins the alternator via the engine.
- Voltage regulator: helps control alternator output so your electronics don’t get toasted.
Signs Your Alternator Might Be Failing
Alternators rarely fail with dramatic flair (no fireworks, sadly). Instead, you get annoying clueslike a dashboard warning light that suddenly becomes your car’s
favorite accessory.
Common Symptoms
- Battery/charging warning light: often indicates a charging system issue, not just the battery.
- Dim, flickering, or weirdly bright lights: especially noticeable at idle.
- Electrical gremlins: power windows slow down, radio resets, screens glitch, accessories act moody.
- Hard starts or repeated dead battery: the battery keeps losing the fight.
- Burning smell: sometimes from belt slip or an overheated componentalways worth checking ASAP.
- Strange noises: a failing bearing can cause whining or grinding near the alternator area.
These symptoms can overlap with a weak battery, corroded cables, loose connections, or a slipping belt. That’s why the best move is confirming the diagnosis
before replacing partsbecause “parts cannon” is expensive and emotionally damaging.
Confirm It’s the Alternator (Before You Buy Anything)
A reliable diagnosis usually includes checking battery health, belt condition, and charging voltage. Many repair guides emphasize using a multimeter or having the
charging system tested rather than using risky old-school “tests.”
A Practical, Safer Testing Approach
- Check the battery first: a weak or failing battery can mimic alternator symptoms and can also overwork a good alternator.
- Look for obvious issues: loose battery terminals, corrosion, frayed belt, glazing, or belt squeal.
- Measure charging behavior: with the engine running, a healthy charging system typically shows a higher voltage than engine-off battery voltage
(often in the mid-13s to mid-14s range). If voltage stays low or drops hard under electrical load, the alternator (or regulator, wiring, belt drive) may be struggling.
Example: If your battery reads around the low 12s with the engine off and the reading barely changes with the engine runningespecially with headlights and A/C on
that’s a strong clue something in the charging system isn’t doing its job.
Decide: DIY With Supervision or Professional Repair?
Alternator replacement difficulty varies wildly by vehicle. On some cars, it’s accessible from the top with room to work. On others, it’s tucked behind brackets,
hoses, and the hopes and dreams of anyone holding a wrench.
When a Shop Is the Smart Choice
- The alternator is difficult to access (tight engine bay, requires removing multiple components).
- The repair involves lifting the vehicle or working underneath it.
- You’re not comfortable managing belt tensioners, routing diagrams, or electrical connectors.
- You suspect wiring issues, a failing battery, or a recurring charging problem.
If you’re learning, the safest route is doing this alongside an experienced adult or technician. A professional can also test the battery and charging system after
the swap to confirm the fixbecause “new alternator” doesn’t automatically mean “problem solved.”
What Alternator Replacement Typically Involves
Rather than a one-size-fits-all step list (because vehicles refuse to cooperate like that), here’s the usual sequence a technician follows. If you’re doing this
hands-on, always use the correct service information for your exact year/make/model and follow all safety guidance.
1) Make the Area Safe
- Power is shut down to reduce the chance of shorts (commonly by disconnecting the negative battery cable first).
- If access requires going underneath, the vehicle must be properly supported (not “just the jack,” and definitely not “a vibe”).
2) Identify Belt Routing and Access Points
- Technicians reference the belt routing diagram under the hood or in service info.
- They confirm how the alternator is mounted and what components block access.
3) Relieve Belt Tension (Usually a Serpentine Belt)
- Most modern vehicles use an automatic tensioner.
- The tension is relieved, the belt is slipped off the alternator pulley, and the belt condition is inspected.
This is also why many guides recommend inspecting the belt and related pulleys/tensioner while you’re there. If the belt is cracked, glazed, or fraying, replacing
it now can prevent a comeback tour of the same problem later.
4) Disconnect Electrical Connections
- The alternator typically has a main power cable connection and a plug/connector.
- Connections are removed carefully, and routing/positions are noted for reassembly.
5) Remove the Alternator
- Mounting bolts are removed, the alternator comes out of the bracket, and the bracket area is checked for damage or missing hardware.
- The replacement alternator is compared to the old one (mount points, plug orientation, pulley alignment).
6) Install the Replacement and Reassemble
- The alternator is mounted securely using correct fasteners and specifications for that vehicle.
- Electrical connections are reattached correctly.
- The belt is routed according to the diagram and tension is restored.
After Installation: How to Know the Fix Actually Worked
The moment of truth isn’t “it starts.” The real win is “it charges properly and doesn’t throw warning lights.” Post-repair checks matter because other issues
(battery condition, belt slip, wiring resistance, poor grounds) can imitate alternator failure.
Post-Replacement Checkpoints
- Warning lights: the battery/charging light should stay off during normal operation.
- Charging behavior: voltage should rise with the engine running, and remain stable under typical electrical loads.
- Belt tracking: belt should sit correctly on pulleys with no squeal or wobble.
- Noise: listen for unusual whining or grinding near the alternator and belt area.
- Battery health: if the battery was repeatedly drained, it may need testing (a worn battery can shorten alternator life).
If the charging light remains on after replacement, don’t panicbut do switch back into diagnostic mode. A loose connector, slipping belt, blown fuse/fusible link,
or wiring issue can still trigger a warning.
How Much Does Alternator Replacement Cost?
Cost depends on vehicle design, alternator type (new vs. remanufactured), and labor time. In many cases, the alternator itself is the biggest chunk of the bill.
Some alternators include an additional “core charge” that you get back when the old alternator is returned for rebuilding.
Typical Cost Drivers
- Parts type: new alternators usually cost more than remanufactured ones.
- Amperage/output needs: vehicles with high electrical demand may require higher-output units.
- Access difficulty: more labor time if the alternator is buried under other parts.
- Related repairs: belt, tensioner, battery, or cable issues can add cost.
If you’re shopping parts, pay attention to warranty terms and whether you’re comparing like-for-like (output rating, connector style, pulley type).
A “close enough” alternator is a great way to collect new dashboard lights like they’re Pokémon.
How Long Does It Take to Replace an Alternator?
Many mainstream estimates land around 1–2 hours for a professional shop on a typical vehicle, with DIY time often longer due to learning curve and tool setup.
On certain vehicles, the job can take more time because access is restricted or additional components must be removed.
Common Mistakes (and How to Avoid the Greatest Hits)
Mistake 1: Replacing the Alternator When the Battery Is the Real Problem
A failing battery can trigger symptoms that look like alternator trouble. Always confirm battery condition and cable connections.
Think of it like blaming the Wi-Fi when your phone is actually in airplane mode.
Mistake 2: Ignoring the Belt and Tensioner
A slipping belt can reduce alternator output and trigger a charging warning even if the alternator itself is fine. Inspect the belt and related pulleys while you
have access.
Mistake 3: Mixing Up Electrical Connections
Alternators may have multiple connections. Correct reattachment mattersrouting, tightness, and connector seating all affect charging performance.
Mistake 4: Skipping the “Compare the Parts” Moment
Before installation, it’s smart to compare the replacement alternator to the originalmount points, plug location, pulley alignment. A mismatch can create belt
misalignment, connector strain, or a straight-up “this will not fit” situation.
FAQ
Do I need to replace the battery when I replace the alternator?
Not always. But if the old alternator failed and repeatedly drained the battery, the battery may be weakened and should be tested. A tired battery can force an
alternator to work harder than it should.
Is a remanufactured alternator okay?
Remanufactured alternators are common and can be a cost-effective choice, especially when backed by a solid warranty. Quality can vary by supplier, so warranty and
retailer reputation matter.
Why is my battery light still on after a new alternator?
Possible causes include belt slip, wiring/ground issues, blown fuses or fusible links, battery sensor problems, or a connection not fully seated.
A post-repair charging system test can narrow it down fast.
Real-World Experiences Replacing an Alternator (The “Stuff Nobody Mentions” Section)
People who’ve been through alternator replacement tend to remember the same few moments. Not because they’re dramatic (okay, sometimes they are), but because they’re
the points where a routine job turns into a “why is it doing that” mystery.
First: the battery light is rarely polite. Sometimes it flickers only when you’re stopped at a light, as if your car is whispering,
“Psst… I’m thinking about quitting.” Other times it stays on permanently, daring you to ignore it. Many drivers report the same sequence: headlights start dimming,
the radio acts haunted, then one day the car starts fine… until it doesn’t. If you’ve ever watched your dashboard lights fade while you’re still moving,
you understand why people suddenly become very interested in “nearest auto parts store” searches.
Second: access is everything. On some vehicles, the alternator is right there up toppractically waving hello. On others, it’s tucked behind a
bracket, under an intake tube, next to a coolant hose, beneath a wiring loom, and guarded by a bolt positioned exactly where human wrists don’t bend.
This is the moment many folks learn an important life lesson: there is a difference between “I own sockets” and “I have the correct socket, extension, and patience.”
Third: the belt routing diagram becomes your best friend. People often think they’ll remember how the belt goes back on. Then they remove it,
blink twice, and suddenly every pulley looks the same. The most common “experience tip” is simple: take a quick photo before anything comes off,
even if there’s a routing sticker. Stickers fade. Photos do not (unless your phone is also low battery… which is very on-theme here).
Fourth: remanufactured alternators and core returns. Many drivers are surprised by the idea of a “core charge”that extra deposit that you get back
after returning the old unit. The experience lesson: keep your receipt and return the old alternator promptly. People also mention checking the replacement unit
carefully before installationmatching connectors and mount pointsbecause exchanging a wrong alternator after the car is half reassembled is a special kind of grief.
Fifth: the fix can be bigger than the alternator. Some people replace the alternator and still have issuesbecause the battery was already weakened,
the belt was slipping, or corrosion was adding electrical resistance. A common success story goes like this: alternator replaced, charging looks good, but the car still
struggles until the battery is tested and replaced too. Another classic: everything is perfect except one connector isn’t fully seated, and the warning light stays on
until it clicks in. It’s humblingbut also kind of satisfyingwhen the solution is “push the plug in the last 2 millimeters.”
The best takeaway from real-world stories is that alternator replacement is less about brute force and more about process: confirm the diagnosis,
keep track of routing and connections, inspect related parts, and verify charging afterward. That’s how you turn “car won’t stay charged” into “problem solved”
instead of “new alternator, same headache, now with extra receipts.”
Conclusion
Alternator replacement doesn’t have to be mysterious. If you confirm the charging system problem first, understand what the belt and connections are doing, and
verify charging after installation, you’ll avoid the most common pitfalls. And if the job on your specific vehicle looks like it requires acrobatics, there’s no shame
in calling a professionalyour knuckles will forgive you.






