
Table of Contents >> Show >> Hide
- Why Proper Punching Bag Technique Matters
- Start With the Right Gear
- Warm Up Before You Punch
- Set Up Your Boxing Stance
- Make a Safe Fist
- How to Throw Basic Punches on a Bag
- Breathe Like a Boxer, Not Like a Scared Goldfish
- Do Not Push the Bag
- Protect Your Wrists, Shoulders, and Lower Back
- Common Punching Bag Mistakes
- A Beginner Heavy Bag Workout That Builds Skill Safely
- How Often Should You Hit the Bag?
- How to Build Power Without Getting Hurt
- Experience Notes: What Punching a Bag Teaches You Over Time
- Final Thoughts
Punching a heavy bag looks simple: you put on gloves, square up, and start throwing thunder like you are auditioning for a sports movie montage. Then, five minutes later, your wrists feel like wet spaghetti, your shoulders are screaming, and the bag is swinging around like it has personal beef with you.
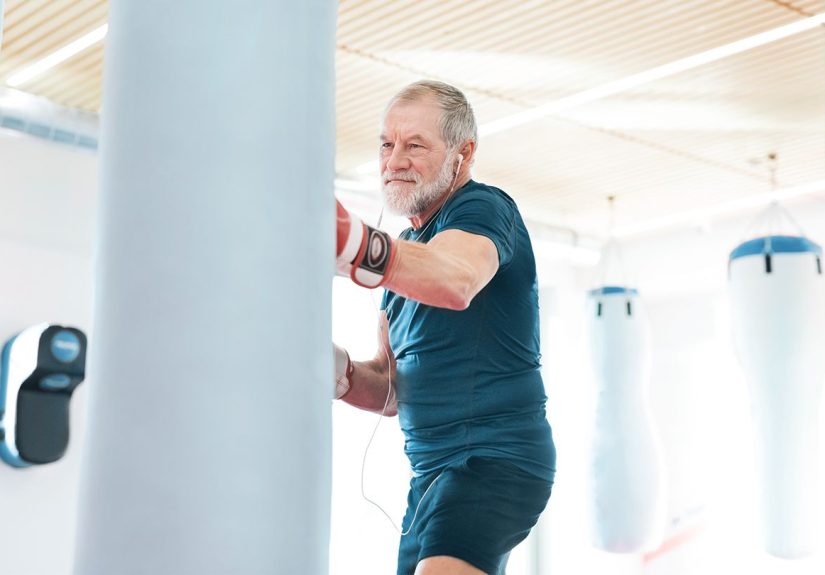
The truth is that learning how to punch a bag properly and not get hurt is less about brute force and more about smart technique. A punching bag is an excellent tool for cardio, coordination, power, stress relief, and boxing skillbut only when your body is lined up correctly. The bag does not care about your ego. It will happily teach bad form the hard way.
This guide breaks down the essentials: how to wrap your hands, choose gloves, stand correctly, throw basic punches, breathe, build power, avoid common injuries, and structure a beginner-friendly heavy bag workout. Whether you are training for boxing fitness, kickboxing class, or just want to stop looking like you are angrily swatting a refrigerator, these tips will help you hit harder, move better, and protect your hands, wrists, shoulders, and back.
Why Proper Punching Bag Technique Matters
A heavy bag is designed to absorb impact, but your body still has to manage the force of every punch. When your fist lands poorly, that force travels backward through your knuckles, wrist, elbow, shoulder, neck, spine, hips, knees, and feet. In other words, one sloppy punch can become a full-body complaint department.
Good technique helps you do three things at once: produce power, stay balanced, and reduce injury risk. Proper alignment lets your fist, wrist, forearm, shoulder, torso, hips, and legs work together as one connected chain. Instead of muscling every punch with your arm, you generate power from the floor, rotate through your body, and snap the punch back safely.
That is why experienced boxers do not simply “hit hard.” They hit clean. They keep their wrists straight, their chin tucked, their feet alive, and their punches relaxed until the moment of impact. The goal is not to bully the bag. The goal is to practice repeatable, controlled movement.
Start With the Right Gear
Use Hand Wraps Every Time
Before gloves come hand wraps. Wraps help support the small bones and connective tissues in your hands while also stabilizing the wrist. They are not decoration, and they are not optional if you plan to hit with real force.
A good wrap should feel snug but not numb. Your fingers should not tingle. Your thumb should not feel trapped. You should be able to make a comfortable fist without the wrap bunching up inside the glove. If the wrap cuts off circulation, it is too tight. If it slides around like a loose scarf, it is too loose.
Choose Proper Boxing Gloves
For heavy bag training, use boxing gloves made for bag work or general training. Many beginners do well with 12-ounce to 16-ounce gloves, depending on body size, training style, and coach recommendation. Heavier gloves can add cushioning and help slow you down enough to focus on form instead of flailing like a caffeinated windmill.
Avoid punching a heavy bag bare-handed. It may look tough in movies, but in real life it is a fast way to irritate your knuckles, strain your wrist, or turn one enthusiastic workout into several weeks of regret.
Warm Up Before You Punch
Cold muscles and stiff joints do not love sudden impact. A warm-up prepares your shoulders, wrists, hips, core, and legs for movement. It also gives your brain a chance to switch from “regular human walking around” mode into “coordinated athlete who knows where their feet are” mode.
Start with five to ten minutes of light movement. Try jumping jacks, jogging in place, jump rope, shadowboxing, arm circles, shoulder rolls, hip rotations, and gentle wrist circles. Then practice slow punches in the air before touching the bag. Think of shadowboxing as a rehearsal. The bag is the performance.
Set Up Your Boxing Stance
Your stance is the foundation of every punch. Without a stable stance, your hands are just making noise. Stand at arm’s length from the bag. If you are right-handed, place your left foot forward and your right foot back. If you are left-handed, reverse it. Your feet should be about shoulder-width apart, knees slightly bent, and weight balanced between the balls of your feet.
Keep your chin slightly tucked, elbows close, and hands up near your cheeks. Your lead shoulder points somewhat toward the bag, not square like you are posing for a passport photo. Stay relaxed. Tension burns energy quickly, and tired arms are where sloppy punches are born.
Find the Right Distance
Distance matters. If you stand too close, your punches will jam and your wrists may bend on impact. If you stand too far away, you will reach, lose balance, and punch with poor alignment. A good punch lands near full extension but not with a locked elbow. Your arm should have a little natural softness at the end, like a whip snapping, not a broomstick poking.
Make a Safe Fist
A proper fist protects your fingers and improves power transfer. Curl your fingers into your palm, then wrap your thumb outside the fingers, never inside. Punching with the thumb tucked inside the fist is a classic beginner mistake and a surprisingly efficient way to make your thumb very unhappy.
On impact, aim to land mainly with the first two knucklesthe index and middle knuckles. Keep your wrist straight, not bent upward, downward, or sideways. Imagine your knuckles, wrist, and forearm forming one solid line. That line is your safety rail.
How to Throw Basic Punches on a Bag
The Jab
The jab is your lead-hand straight punch. It is fast, sharp, and useful for measuring distance. From your stance, extend your lead hand straight toward the bag, rotate the fist slightly so the palm faces down at impact, touch the bag with the first two knuckles, and snap the hand back to your face.
Do not lean your head forward. Do not drop your rear hand. Do not push the bag. The jab should pop, not shove. Think “tap with purpose,” not “move the furniture.”
The Cross
The cross is your rear-hand straight punch and usually carries more power. Start from your stance, rotate your rear foot, turn your hip, rotate your torso, and drive the rear hand straight into the bag. Your shoulder follows the punch, your chin stays protected, and your opposite hand remains up.
The power of the cross comes from your legs and hips, not just your arm. If your rear foot does not pivot, your shoulder may take too much stress. If your wrist bends, your hand takes the bill. Rotate, align, exhale, land, and return.
The Hook
The hook is a short circular punch. Keep your elbow bent about 90 degrees, rotate your lead foot and hip, and bring the punch across the bag. Keep the wrist straight and avoid slapping with the inside of the glove. A hook is not a wild haymaker from a cartoon bar fight. It is compact, controlled, and powered by rotation.
Beginners should practice hooks slowly at first. The hook is one of the easiest punches to throw badly because people often swing too wide, twist the wrist, or over-rotate the shoulder. Start light until the movement feels clean.
The Uppercut
The uppercut travels upward from close range. Bend your knees slightly, rotate your hip, keep your elbow close, and drive the punch upward into the lower half of the bag. Do not scoop from the floor or throw your whole body off balance. The movement is short and sharp.
For beginners, uppercuts on a heavy bag can feel awkward because most bags hang vertically. Focus on technique, not maximum power. If the punch forces your wrist into a strange angle, reduce power or ask a coach to check your form.
Breathe Like a Boxer, Not Like a Scared Goldfish
Many beginners hold their breath when they punch. This makes them tense, tired, and less coordinated. Exhale sharply with each punch. You do not need to make dramatic movie noises, but a quick breath out helps brace the core, release tension, and keep your rhythm steady.
A simple rule: breathe out when you hit, breathe in while you reset. If you are gasping after 30 seconds, slow down. A heavy bag workout is not a contest to see who can panic fastest.
Do Not Push the Bag
One of the biggest beginner mistakes is pushing instead of punching. A clean punch lands and returns quickly. A push stays on the bag too long, drives it away, and usually means your body weight is falling forward.
If the bag swings wildly after every punch, you may be shoving it rather than snapping into it. Step around, reset your feet, and focus on clean contact. The bag should move, of course, but it should not become a wrecking ball chasing you across the gym.
Protect Your Wrists, Shoulders, and Lower Back
Wrist pain often comes from bent wrists, poor wrapping, weak alignment, or hitting too hard before technique is ready. Shoulder irritation can come from overreaching, dropping the hands, or throwing too many power punches with fatigue. Lower back discomfort may show up when you twist without moving your feet or try to generate power from awkward angles.
To reduce these risks, keep the wrist straight, rotate the feet and hips, stay within range, and stop when your form breaks down. Pain is not a badge of honor. It is information. Listen before it turns into a full presentation.
Common Punching Bag Mistakes
Mistake 1: Going 100% on Day One
Heavy bag training feels exciting, which is exactly why beginners often overdo it. Start at 40% to 60% power while learning. Increase intensity only when your punches stay clean, your wrists feel stable, and your breathing remains controlled.
Mistake 2: Dropping the Non-Punching Hand
Even though the bag does not punch back, train as if it could. Keep the non-punching hand near your face. This builds good boxing habits and keeps your posture organized.
Mistake 3: Standing Flat-Footed
If your feet are glued to the floor, your punches become stiff. Stay light on the balls of your feet. Step around the bag after combinations. Small foot adjustments help you control distance and avoid leaning.
Mistake 4: Ignoring Fatigue
Most injuries happen when technique gets sloppy. When your hands drop, wrists bend, breathing gets messy, or punches turn into arm swings, end the round or reduce intensity. Smart training beats dramatic suffering every time.
A Beginner Heavy Bag Workout That Builds Skill Safely
Try this simple 20-minute session two or three times per week. Keep the power moderate and prioritize form.
Warm-Up: 5 Minutes
Do light cardio for two minutes, then add arm circles, shoulder rolls, hip rotations, wrist circles, and easy shadowboxing. Practice jabs and crosses in the air before touching the bag.
Round 1: Jab and Footwork
Work for two minutes. Throw single jabs, double jabs, and jab-step combinations. Move around the bag after each combination. Rest for one minute.
Round 2: Jab-Cross
Work for two minutes. Throw jab-cross, reset, and repeat. Focus on rear-foot pivot, hip rotation, straight wrist alignment, and fast recovery. Rest for one minute.
Round 3: Add the Hook
Work for two minutes. Try jab-cross-hook, then step away. Keep the hook compact and light. Rest for one minute.
Round 4: Controlled Combinations
Work for two minutes. Mix jab, cross, hook, and light uppercut patterns. Stay relaxed. Do not chase the bag. Rest for one minute.
Cool Down: 5 Minutes
Walk, breathe deeply, shake out your arms, and stretch your shoulders, chest, forearms, hips, and calves. Cooling down helps your body shift out of high-intensity mode and gives you a chance to notice any discomfort early.
How Often Should You Hit the Bag?
For beginners, two to three sessions per week is usually enough. Your hands, wrists, shoulders, and calves need time to adapt. Heavy bag workouts are repetitive and impact-based, so recovery matters.
If your knuckles are sore, your wrists ache, or your shoulders feel sharp pain, take a break and review your technique. Mild muscle fatigue is normal. Joint pain is not something to power through. If pain continues, talk with a qualified coach, trainer, or healthcare professional.
How to Build Power Without Getting Hurt
Power is not created by anger. Power is created by timing, rotation, balance, and relaxation. The best punches start from the ground. Your feet grip and pivot, your hips rotate, your core transfers force, your shoulder guides the punch, and your fist lands in alignment.
To build power safely, practice slow technical rounds, then moderate-speed rounds, then short bursts of stronger punches. Do not make every punch a knockout attempt. Real boxing skill includes rhythm changes: light punches, sharp punches, movement, defense, and resets.
A good training cue is “fast back.” Instead of only thinking about hitting the bag, think about returning the glove quickly to your guard. A punch that comes back fast is usually cleaner, safer, and more useful than one that crashes into the bag and stays there for a nap.
Experience Notes: What Punching a Bag Teaches You Over Time
After several weeks of consistent heavy bag training, most people learn a humbling truth: the bag exposes everything. It exposes weak wrists, lazy footwork, poor breathing, stiff shoulders, and the strange belief that enthusiasm can replace technique. The good news is that every round gives feedback. The bag will not compliment you, but it will tell the truth.
One common experience for beginners is realizing that power feels different from what they expected. At first, they try to punch harder by tightening every muscle. Their shoulders rise, their jaw clenches, and their arms burn out quickly. Then, after practicing proper rotation, they discover that relaxed punches are often faster and heavier. A smooth jab-cross with hip rotation can feel easier and land better than a tense, all-arm punch thrown with maximum drama.
Another lesson is that footwork matters more than people think. Beginners often stand in one spot and trade punches with the bag as if they are arguing with a vending machine. After a few sessions, they notice the bag swinging back into them, forcing awkward angles. Learning to step around the bag makes the workout safer and more realistic. You begin to control range instead of letting the bag control you.
Hand care also becomes part of the routine. At first, wrapping hands may feel annoying, like folding a tiny complicated bedsheet around your knuckles. But once you feel the difference between wrapped and unsupported wrists, the habit makes sense. Clean wraps, dry gloves, trimmed nails, and proper gear storage are not glamorous, but neither is opening your gym bag and discovering it smells like a haunted locker room.
People also learn to respect recovery. The heavy bag can be addictive because it feels productive immediately. You sweat, you move, you hear the satisfying pop of a clean punch. But doing too much too soon can irritate joints and slow progress. The better approach is to finish sessions feeling like you could have done a little more. That leaves room for the next workout, and the one after that.
Perhaps the biggest experience-based lesson is that pain and challenge are not the same thing. Challenge feels like effort, heat, breathing, focus, and fatigue. Pain feels sharp, unstable, or wrong. A smart boxer learns the difference. When your form fades, you slow down. When your wrist bends, you reset. When your shoulder complains, you stop throwing power shots and review your mechanics.
Over time, punching a bag properly becomes less about hitting and more about coordination. You learn to breathe with movement, rotate without losing balance, stay relaxed under effort, and think while tired. That is why heavy bag training is so satisfying. It is cardio, strength, rhythm, skill, and stress relief in one sweaty package. Done correctly, it makes you feel powerful without making your joints file a formal complaint.
Final Thoughts
Learning how to punch a bag properly and not get hurt starts with patience. Wrap your hands, wear the right gloves, warm up, stand correctly, keep your wrists straight, land with the first two knuckles, rotate through your hips, breathe out on impact, and snap every punch back to guard.
Do not rush power. Build clean technique first, then gradually increase speed and intensity. The best heavy bag workouts are not wild battles against hanging leather. They are focused practice sessions where every punch has a purpose. Train smart, stay consistent, and your bag work can become one of the most enjoyable and effective parts of your fitness routine.






