Table of Contents >> Show >> Hide
- Why Paint Cabinet Pulls Instead of Replacing Them?
- Can You Really Paint Cabinet Pulls in Seconds?
- Supplies You Will Need
- Step-by-Step: How to Paint Cabinet Pulls in Seconds
- Best Paint Finishes for Cabinet Pulls
- Common Mistakes to Avoid
- How to Make Painted Cabinet Pulls Last Longer
- Quick Style Ideas for Painted Cabinet Pulls
- Is Painting Cabinet Pulls Worth It?
- Real-Life Experience: What Painting Cabinet Pulls Actually Feels Like
- Conclusion
Cabinet pulls are tiny, but they have the dramatic confidence of a home makeover influencer. Swap their color, and suddenly your kitchen, bathroom vanity, laundry room, or thrifted dresser looks fresher, cleaner, and more intentional. The best part? You do not need a giant renovation budget, a contractor, or a weekend-long identity crisis in the paint aisle. With the right setup, you can paint cabinet pulls in seconds per coat.
Now, let’s be honest before the spray paint starts flying: the actual painting can be fast, but the prep and curing matter. If you skip cleaning, sanding, priming, or drying time, your “quick update” may become a peeling, fingerprint-covered cautionary tale. The goal is not just to change the color. The goal is to create a smooth, durable finish that survives daily grabbing, tugging, snack-hunting, and that one drawer everyone yanks open like it owes them money.
This guide explains how to paint cabinet pulls quickly while still doing the job correctly. You will learn what paint to use, how to set up a simple spray station, how to avoid drips, and how to make old hardware look surprisingly expensive.
Why Paint Cabinet Pulls Instead of Replacing Them?
Painting cabinet pulls is one of the simplest budget-friendly cabinet updates. New cabinet hardware can look beautiful, but replacing every knob, handle, and drawer pull adds up quickly. If your existing hardware is sturdy, fits the cabinet holes, and has a shape you still like, paint can give it a second life.
Spray painting cabinet hardware is especially useful when the finish is dated but the pull itself is still functional. Think shiny brass from another era, scratched nickel, builder-grade silver, or dark bronze that no longer matches your cabinet color. A can of metal-friendly spray paint can turn those pulls into matte black, satin bronze, brushed nickel, soft gold, oil-rubbed bronze, or another finish that better fits your room.
Best Situations for Painting Cabinet Pulls
Painting cabinet pulls works well when the hardware is metal, clean, not badly corroded, and not loose or broken. It is ideal for kitchen cabinets, bathroom vanities, mudroom lockers, laundry room cabinets, craft storage, and furniture makeovers.
However, painting is not always the right fix. If the pulls are deeply pitted, bent, flaking, rusty beyond repair, or covered in a failing old coating, replacement may be smarter. Also, avoid painting moving hardware parts that need friction-free movement, such as hinges with tight joints. Drawer pulls and knobs are much better candidates because they are easier to remove, spray, dry, and reinstall.
Can You Really Paint Cabinet Pulls in Seconds?
Yes, but with one important clarification: each spray pass takes seconds. The full project takes longer because cleaning, sanding, priming, drying, and curing are what make the finish last. Think of it like making toast. The toast pops up fast, but only because someone plugged in the toaster first. Prep is the toaster.
Once the cabinet pulls are cleaned, sanded, and arranged on a cardboard spray station, you can apply a light coat in just a few seconds per piece. The secret is to use thin coats instead of one heavy blast. Heavy coats look tempting because they cover quickly, but they often cause drips, sticky edges, bubbling, and uneven shine.
Supplies You Will Need
You do not need fancy tools to paint cabinet pulls. Most of the project can be done with basic supplies from a hardware store or home center.
- Metal-friendly spray paint or paint-and-primer spray paint
- Spray primer suitable for metal, especially if the surface is slick or shiny
- Degreasing cleaner or mild dish soap
- Warm water
- Microfiber cloths or lint-free rags
- Fine-grit sandpaper or sanding sponge
- Cardboard box or flat cardboard sheet
- Painter’s tape
- Disposable gloves
- Drop cloth or newspaper
- Mask or respirator rated for paint fumes
- Small bags or labels for screws
For the best finish, choose a spray paint designed for metal and high-touch surfaces. Enamel spray paint, all-surface spray paint, and metal-specific spray paint are common choices. A satin or semi-gloss finish is often easier to clean than a flat finish, while matte black creates a modern look but may show oils and fingerprints more easily.
Step-by-Step: How to Paint Cabinet Pulls in Seconds
Step 1: Remove the Cabinet Pulls
Use a screwdriver or drill to remove the pulls from cabinet doors and drawers. Keep the screws with the matching hardware. If you are working on many cabinets, place screws in labeled bags or tape them to a piece of paper marked by cabinet location. This sounds overly organized until you are standing in the kitchen holding six nearly identical screws and questioning your life choices.
Do not paint pulls while they are still attached to the cabinets. Painting installed hardware can cause paint buildup around the edges, uneven coverage, and accidental overspray on cabinet doors. Removing the pulls gives you a cleaner finish and better control.
Step 2: Clean Off Grease and Grime
Cabinet hardware collects cooking oil, dust, hand lotion, fingerprints, and mysterious kitchen residue that no one wants to identify under laboratory conditions. Paint will not stick well to grime, so cleaning is non-negotiable.
Wash the pulls with warm water and dish soap or a degreasing cleaner. Scrub around grooves, edges, and screw holes. Rinse thoroughly and dry completely. Any moisture left behind can interfere with primer and paint adhesion.
Step 3: Lightly Sand the Surface
Use fine-grit sandpaper to scuff the surface of each pull. You are not trying to sand the hardware down to bare metal. You simply want to dull the shiny finish so primer and paint can grip better. Sand all visible areas, including the sides and curves.
After sanding, wipe every pull with a clean, dry cloth. Dust particles can ruin an otherwise smooth paint job. A tack cloth can help remove fine dust, but a lint-free rag works well for most small projects.
Step 4: Build a Fast Cardboard Spray Station
This is the trick that makes painting cabinet pulls feel fast. Take a flat piece of cardboard and poke the screws through it from underneath, then thread each pull onto its screws. The pulls should stand slightly above the cardboard, making it easier to spray the front, sides, and edges without touching them.
You can also use a cardboard box as a mini spray booth. Place the hardware inside or across the opening to reduce overspray. This setup keeps your work area cleaner and helps you rotate around the pulls without accidentally decorating your driveway, garage floor, or unsuspecting lawn chair.
Step 5: Apply Primer in a Light Coat
Primer helps paint bond to slick metal surfaces. If your spray paint is a paint-and-primer product, you may still want a separate primer for very shiny, dark, or heavily handled hardware. Adhesion is everything when painting cabinet pulls because they are touched every day.
Shake the can according to the label directions. Hold the can about 8 to 12 inches from the hardware, then spray in light, sweeping passes. Start spraying just before the pull and stop just after passing it. This keeps the coating even and prevents blotchy starts and stops.
Let the primer dry according to the product instructions. Do not rush this step. Primer that feels dry on top may still be soft underneath.
Step 6: Spray Paint the Pulls in Seconds
Once the primer is dry, apply the first coat of spray paint. Move quickly and lightly. Each pull should need only a few seconds of spray time. The first coat may look a little thin, and that is exactly what you want. Thin coats reduce drips and create a smoother final finish.
Wait for the recommended recoat time, then apply a second light coat. Most cabinet pulls look best with two to three thin coats rather than one thick coat. Rotate your position so you can hit the front, sides, curves, and underside edges.
Step 7: Let the Paint Cure Before Reinstalling
Dry paint and cured paint are not the same thing. Dry paint may be touchable, but cured paint is hardened enough to handle daily use. For cabinet pulls, curing matters because hands, rings, fingernails, and cleaning cloths can damage soft paint.
Follow the drying and curing time on the can. Many spray paints need at least 24 hours before handling and longer before heavy use. Waiting feels painfully responsible, but it is better than reinstalling too soon and leaving fingerprints in your brand-new finish.
Best Paint Finishes for Cabinet Pulls
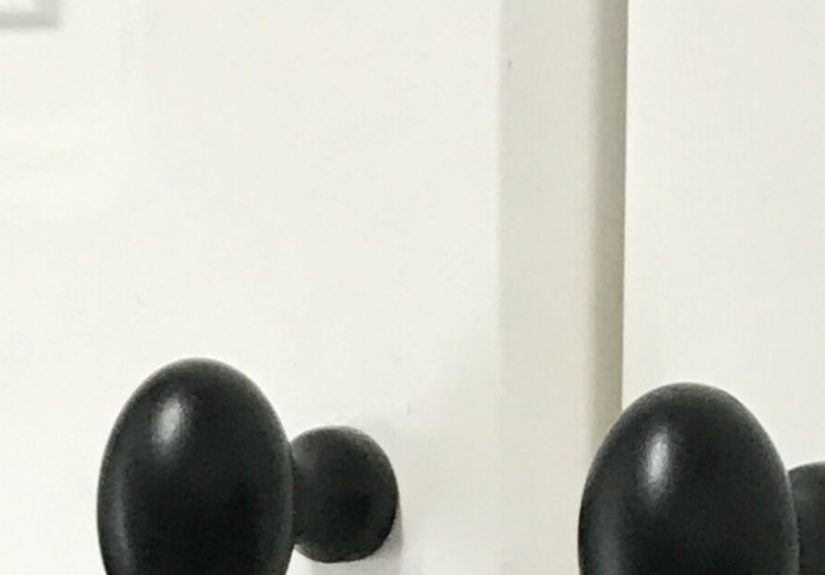
The finish you choose changes the entire mood of the room. Matte black cabinet pulls create a modern farmhouse, industrial, or contemporary look. Satin nickel feels classic and clean. Champagne bronze or soft gold adds warmth without screaming, “I bought every shiny thing in the store.” Oil-rubbed bronze works well with traditional cabinets, while brushed brass can make white, green, navy, or wood cabinets look more custom.
For high-touch cabinet hardware, satin and semi-gloss finishes are practical because they are easier to wipe clean. Flat finishes can look sophisticated but may show smudges faster. Metallic finishes can be gorgeous, but they require extra care during application because uneven coats may create blotches or inconsistent shine.
Common Mistakes to Avoid
Skipping the Cleaning Step
Paint does not like grease. If cabinet pulls feel even slightly oily, clean them again. A few extra minutes of cleaning can prevent weeks of regret.
Spraying Too Close
Holding the can too close can create puddles, thick spots, and drips. Keep the can moving and spray from a consistent distance. Light coats are your best friend.
Painting in Bad Weather
Temperature and humidity affect spray paint. Extremely cold, hot, or humid conditions can slow drying, dull the finish, or cause bubbling. Paint in a well-ventilated area and follow the temperature range listed on the product label.
Reinstalling Too Soon
This is the big one. Cabinet pulls may look finished after an hour, but the coating may not be ready for real use. Let them cure properly before reinstalling and pulling open drawers with enthusiasm.
How to Make Painted Cabinet Pulls Last Longer
Durability starts before the first coat of paint. Clean thoroughly, sand lightly, prime when needed, and apply thin coats. After reinstalling the pulls, avoid harsh cleaners for the first several days. Use a soft damp cloth for regular cleaning instead of abrasive pads or strong chemicals.
If your cabinet pulls are in a heavy-use kitchen, choose a durable enamel or metal spray paint. You may also consider a clear protective topcoat if it is compatible with your paint. Always test compatibility first because some clear coats can change the color, shine, or texture of metallic finishes.
Quick Style Ideas for Painted Cabinet Pulls
Painted pulls can completely shift a room’s personality. On white cabinets, matte black pulls create contrast and definition. On navy cabinets, warm brass or bronze looks rich and inviting. On natural wood cabinets, satin nickel or soft black can feel updated without hiding the wood grain. For a playful laundry room or kids’ bathroom, colorful pulls can add charm without repainting the entire cabinet.
You can also coordinate painted pulls with faucets, light fixtures, towel bars, or appliance handles. The finishes do not have to match perfectly, but they should feel intentional. A kitchen with two or three related finishes usually looks more polished than one with every metal finish invited to the party.
Is Painting Cabinet Pulls Worth It?
Painting cabinet pulls is absolutely worth it when the hardware is in good shape and you want a fast, affordable update. It is not magic, and it will not make cheap, damaged hardware feel like solid brass. But it can make outdated pulls look fresh, coordinated, and surprisingly stylish.
The best part is that this project is beginner-friendly. You do not need advanced DIY skills. You need patience, a little cardboard, a good spray paint, and the emotional strength to let the paint cure before touching it. That last part is harder than it sounds.
Real-Life Experience: What Painting Cabinet Pulls Actually Feels Like
The first time you paint cabinet pulls, you may assume the painting part is the main event. Then you discover the real project is not the spraying. It is unscrewing twenty tiny pieces of hardware, trying not to lose the screws, cleaning years of invisible kitchen film, and realizing that cabinet pulls have more curves than expected. But once everything is lined up on cardboard, the transformation happens fast.
One practical lesson is that labeling matters. If your cabinet pulls are all the same size, you may not care where each one goes. But older cabinets can be quirky. Some screw holes may be slightly wider, some screws may be shorter, and one drawer may have been repaired by a previous homeowner with the energy of a raccoon holding a power tool. Keeping hardware grouped by location can save time during reinstallation.
Another lesson: cleaning is where the finish is won. A cabinet pull can look clean and still have a slippery layer of oil from cooking and hands. When the hardware is properly cleaned and lightly sanded, primer grips better and the paint lays down more evenly. If you rush straight to paint, the finish may look good for a week and then start chipping at the edges.
The cardboard trick is a genuine time-saver. Threading pulls onto their screws and standing them upright lets you spray multiple pieces in one pass. It also keeps your fingers away from wet paint. Without this setup, you may find yourself awkwardly holding a pull, spraying one side, and wondering how to put it down without creating a fingerprint fossil.
Light coats are another hard-earned rule. The first coat often looks unimpressive, almost like you did not apply enough paint. Resist the urge to fix it immediately. A misty first coat gives the next coat something to build on. By the second or third pass, the finish becomes smooth and even. Heavy coats, on the other hand, can sag around curves and pool near screw posts.
Curing time is the least glamorous part of the project, but it makes the biggest difference. Painted cabinet pulls may feel dry quickly, especially if the weather is warm and the coats are thin. Still, reinstalling them too soon can dent or scratch the finish. Waiting a full day or longer before handling them heavily is a small sacrifice for a result that looks cleaner and lasts longer.
The final reveal is usually more satisfying than expected. Cabinet pulls are small, but they sit right at eye and hand level. When the finish matches the room, the cabinets look more deliberate. A tired vanity can feel updated. A kitchen can look more modern. A dresser from a thrift store can suddenly look like it belongs in a styled guest room instead of a garage sale lineup.
In real homes, painted cabinet pulls are not indestructible. They can chip if hit with keys, tools, rings, or aggressive scrubbing. But when prepped correctly, they can hold up well under normal use. And if one pull gets scratched, touching it up is much easier than replacing an entire matching set.
The biggest experience-based takeaway is this: the fastest way to paint cabinet pulls is not to rush. It is to set everything up so the spraying takes seconds and the finish still has a fighting chance. Clean first, sand lightly, spray thin, wait patiently, and reinstall carefully. That is how a tiny DIY project earns a big visual payoff.
Conclusion
Painting cabinet pulls in seconds is possible when you understand what “seconds” really means. The spray passes are quick, but the success comes from proper prep, smart setup, and enough curing time. Remove the hardware, clean it well, scuff the surface, use primer when needed, and apply several thin coats of metal-friendly spray paint. With a simple cardboard station, you can refresh multiple pulls quickly and give cabinets a polished new look without replacing perfectly usable hardware.
Whether you choose matte black, satin nickel, bronze, brass, or a bold color, painted cabinet pulls can deliver a surprisingly dramatic update for very little money. It is one of those small DIY projects that makes you walk past the cabinets later and think, “Well, look at me being handy.”
Note: This article is written for general DIY guidance. Always follow the safety, ventilation, drying, and curing instructions on the specific primer and paint products you use.