
Table of Contents >> Show >> Hide
- Why Choose a Hamster Bin Cage?
- Before You Start: What Size Bin Does a Hamster Need?
- Materials You’ll Need
- How to Make a Hamster Bin Cage: 14 Steps
- Step 1: Pick the Right Plastic Bin
- Step 2: Measure the Interior Floor Space
- Step 3: Plan Your Ventilation Panels
- Step 4: Mark the Lid Opening
- Step 5: Cut Out the Lid Panel Carefully
- Step 6: Smooth All Rough Edges
- Step 7: Cut the Wire Mesh to Size
- Step 8: Attach the Mesh Securely
- Step 9: Add Side Ventilation If Needed
- Step 10: Wash and Dry the Bin
- Step 11: Add Deep, Safe Bedding
- Step 12: Install the Wheel, Water, and Food Area
- Step 13: Create Enrichment Zones
- Step 14: Do a Safety Check Before Moving Your Hamster In
- Best Bedding and Substrate Tips
- Common Mistakes to Avoid
- How to Clean a Hamster Bin Cage
- DIY Hamster Bin Cage Setup Example
- Extra Experience: What You Learn After Building a Hamster Bin Cage
- Conclusion
Building a hamster bin cage is one of the smartest upgrades you can make for a small pet with big housing needs. Store-bought hamster cages often look adorable on the shelf, complete with colorful tubes and tiny balconies, but many are too cramped for real hamster behavior. Hamsters are not decorative desk ornaments with whiskers. They are active, curious, nocturnal burrowers who want room to dig, run, hide, forage, and rearrange their bedding like tiny interior designers working the night shift.
A DIY hamster bin cage solves several common problems at once. It is usually more affordable than a large commercial enclosure, easier to customize, deep enough for generous bedding, and spacious enough to create separate areas for sleeping, eating, bathing, and exploring. With a large plastic storage bin, mesh, simple tools, and careful planning, you can create a safe, well-ventilated hamster habitat that supports your pet’s natural instincts.
This guide explains how to make a hamster bin cage in 14 practical steps, from choosing the right container to adding enrichment. The goal is not just to build a box with air holes. The goal is to create a comfortable hamster home where your pet can thrive, not just survive.
Why Choose a Hamster Bin Cage?
A hamster bin cage is a homemade enclosure made from a large plastic storage tote. Instead of using the solid lid as-is, you modify it with wire mesh for airflow. Some owners also add side ventilation panels, viewing windows, or extra access doors.
The biggest advantage is floor space. Hamsters need continuous, unbroken floor space more than tall climbing levels. They are ground-dwelling animals, not furry little mountaineers. A wide bin lets them run, dig, and explore safely. It also gives you enough room to add a proper wheel, hideouts, tunnels, chew toys, a sand bath, and deep bedding without turning the cage into a hamster traffic jam.
Bin cages are also budget-friendly. A large storage bin, hardware cloth, zip ties, and basic tools often cost less than many small pet-store cages. Plus, you can design the setup around your hamster’s species, size, habits, and personality. A shy dwarf hamster may love extra hides and tunnels, while an energetic Syrian hamster may need a larger wheel and more open running space.
Before You Start: What Size Bin Does a Hamster Need?
Choose the largest bin you can reasonably fit in your home. Many hamster welfare groups recommend large, uninterrupted floor space, often around 600 to 800 square inches or more. For Syrian hamsters, bigger is especially important because they are larger, stronger, and more likely to chew or attempt dramatic prison-break scenes if bored. Dwarf hamsters are smaller, but they still need plenty of space to roam and dig.
To calculate floor space, measure the inside length and inside width of the bottom of the bin, then multiply those numbers. Do not rely only on the manufacturer’s advertised size because storage bins often taper, meaning the top may be much wider than the usable base. For example, a bin labeled as 40 inches long may have a smaller interior base once you measure the bottom.
Height matters too. You need enough vertical room for 6 to 10 inches of bedding, a properly sized wheel, and a secure lid. Syrian hamsters usually need a wheel around 10 to 12 inches in diameter so their back stays straight while running. Dwarf hamsters often do well with an 8-inch wheel, though individual size matters. If the wheel causes the hamster’s back to curve, it is too small.
Materials You’ll Need
Gather your supplies before cutting anything. Your future self will thank you, especially when you are not wandering around with half a plastic lid and a confused look.
- Large clear plastic storage bin with a secure lid
- Wire mesh or hardware cloth with small openings
- Zip ties, bolts with washers, or safe fasteners
- Utility knife, box cutter, rotary tool, or jigsaw
- Drill and drill bits
- Sandpaper or a metal file
- Marker and measuring tape
- Wire cutters
- Pet-safe bedding such as unscented paper bedding or aspen shavings
- Solid-surface hamster wheel
- Hideouts, chew toys, sand bath, water bottle or water dish, and food dish
How to Make a Hamster Bin Cage: 14 Steps
Step 1: Pick the Right Plastic Bin
Start with a large, sturdy storage bin made from clear or translucent plastic. Clear plastic helps you see your hamster without constantly lifting the lid. Your hamster also gets a better view of the world, although whether it appreciates your furniture choices remains unknown.
Look for a bin with a flat base, smooth sides, and a lid that snaps on securely. Avoid brittle plastic that cracks easily. Also avoid bins with large molded handles or interior ridges that could give your hamster a chewing edge or climbing foothold. Hamsters are surprisingly determined escape artists. If there is a suspicious corner, they will inspect it like a tiny building inspector with snacks in their cheeks.
Step 2: Measure the Interior Floor Space
Use a measuring tape to measure the inside bottom length and width. Multiply the two numbers to calculate the usable floor area. For example, a bin with an interior base of 36 inches by 20 inches provides 720 square inches of floor space.
This step matters because many storage bins taper inward at the bottom. The top measurement may look impressive, but your hamster lives on the floor, not in the product description. Choose a bin that gives your pet as much continuous space as possible.
Step 3: Plan Your Ventilation Panels
Good ventilation is essential. A solid plastic bin traps humidity and odors, especially when filled with deep bedding. The simplest method is to cut a large opening in the lid and cover it with wire mesh. For extra airflow, you can add side panels near the upper portion of the bin.
Do not rely on a few drilled holes alone. Small holes may not provide enough air exchange, and drilling dozens of holes can weaken the plastic while still offering less ventilation than a mesh panel. A wide mesh lid is usually the safest and most effective approach.
Step 4: Mark the Lid Opening
Place the lid on a stable surface. Use a marker and ruler to draw a large rectangle on the lid, leaving at least 1 to 2 inches of plastic around the edges for strength. This border helps the lid stay rigid and gives you space to attach the mesh securely.
Keep the opening neat and centered if possible. It does not need to look like it was engineered by NASA, but straight lines make the mesh easier to attach and reduce sharp edges.
Step 5: Cut Out the Lid Panel Carefully
Use a utility knife, rotary tool, or jigsaw to cut along your marked lines. Work slowly. Plastic can crack if rushed, especially near corners. If using a knife, score the plastic several times rather than trying to slice through in one heroic pass.
Wear protective gloves and eye protection. Cut away from your body, and keep pets and children away from the work area. The hamster can supervise later, preferably from a safe temporary enclosure and not from inside the construction zone.
Step 6: Smooth All Rough Edges
After cutting, use sandpaper or a file to smooth the plastic edges. This protects your hands during cleaning and prevents sharp areas from damaging the mesh or injuring your hamster.
Run your fingers carefully around the cut edge. If it feels sharp, keep sanding. A finished bin cage should be safe for both the hamster and the human assigned to late-night water refills.
Step 7: Cut the Wire Mesh to Size
Cut a piece of wire mesh larger than the lid opening so it overlaps the plastic border by at least 1 inch on all sides. Hardware cloth with small openings works well. For dwarf hamsters, use especially small mesh openings because they can squeeze through gaps that look impossible. Hamsters appear to be 40 percent fluff and 60 percent escape strategy.
Use wire cutters and watch for sharp wire ends. Fold, trim, or cover sharp points so they do not stick out. The mesh should sit flat and secure against the lid.
Step 8: Attach the Mesh Securely
Drill small holes around the lid opening, spacing them every few inches. Thread zip ties through the holes and mesh, then tighten them firmly. You can also use small bolts, washers, and nuts for a stronger, cleaner finish.
Make sure the mesh is attached on the outside of the lid if possible, so your hamster cannot easily chew the plastic edge from inside. Trim the ends of zip ties and turn sharp edges outward. Check every corner. If your hamster can push, chew, or lift a loose section, reinforce it.
Step 9: Add Side Ventilation If Needed
If your bin is very tall or your room tends to be warm, consider adding mesh ventilation panels to the upper sides. Mark a rectangle high on one side of the bin, cut it out, smooth the edges, and attach mesh the same way you did with the lid.
Keep side panels above the bedding line. If you cut too low, bedding may spill out, and your hamster may treat the mesh edge as a chewing project. Deep bedding is wonderful inside the cage, less wonderful when it migrates across your floor like hamster confetti.
Step 10: Wash and Dry the Bin
Before adding supplies, wash the bin with mild dish soap and warm water. Rinse thoroughly to remove any residue. Dry it completely before adding bedding.
Avoid strong cleaners, scented sprays, bleach fumes, and disinfectants that leave chemical odors. Hamsters have sensitive respiratory systems, and a cage should smell clean, not like a lemon-scented science experiment.
Step 11: Add Deep, Safe Bedding
Fill the bin with a deep layer of safe bedding. Aim for at least 6 inches, and 10 inches or more is even better when the bin height allows. Hamsters naturally dig tunnels and chambers for sleeping, hiding, and food storage. Deep bedding gives them an outlet for this behavior and can reduce stress-related habits.
Good bedding options include unscented paper bedding and kiln-dried aspen shavings. Many owners mix paper bedding with hay or other safe nesting material to help tunnels hold their shape. Avoid cedar and untreated pine shavings because aromatic oils can irritate small animals. Also avoid scented bedding, dusty bedding, cotton fluff, and fluffy nesting products that can wrap around tiny limbs or cause digestive problems if swallowed.
Step 12: Install the Wheel, Water, and Food Area
Add a solid-surface exercise wheel large enough for your hamster to run with a straight back. Avoid wire wheels or wheels with rungs because they can injure feet. Place the wheel on a stable platform if deep bedding makes it wobble.
For water, use either a glass water bottle or a shallow, sturdy water dish. Bottles save space and reduce spills, but dishes allow a natural drinking posture. If using a dish, place it on a platform so bedding does not immediately dive into it like it has somewhere important to be. Add a small food dish or scatter-feed part of the daily food to encourage foraging.
Step 13: Create Enrichment Zones
A good hamster bin cage includes more than bedding and a wheel. Add at least one enclosed hideout, a sand bath, chew toys, cardboard tubes, cork logs, tunnels, sprays, and safe climbing textures kept low to the ground. Hamsters enjoy variety, but they also need clutter to feel secure. A totally open cage can make them feel exposed.
Use a sand bath with dust-free chinchilla sand or reptile sand without added calcium or dyes. Do not use dusty powder. Hamsters often roll in sand to keep their coat clean, and many use the sand area as a toilet, which makes spot-cleaning easier. That is not glamorous, but it is practical. Hamster housekeeping has its own logic.
Step 14: Do a Safety Check Before Moving Your Hamster In
Before introducing your hamster, inspect the entire cage. Check for sharp mesh edges, loose zip ties, unstable platforms, chewable plastic corners, gaps around the lid, and objects that could fall. Make sure the lid closes securely and the mesh cannot be pushed open.
Place the finished bin cage in a quiet area away from direct sunlight, drafts, heaters, loud speakers, and curious cats. Room temperature should stay comfortable and stable. Hamsters are sensitive to heat, cold, stress, and sudden changes. Once everything is ready, move your hamster in gently and give it time to explore without constant handling.
Best Bedding and Substrate Tips
Bedding is not just floor covering. It is your hamster’s bedroom, pantry, tunnel system, stress-relief tool, and personal construction material. The deeper and safer the bedding, the more natural behavior you are likely to see.
Paper bedding is soft and widely available, but choose unscented, low-dust varieties. Aspen shavings can also work well, especially when mixed with paper bedding for structure. Some owners add small amounts of orchard grass hay to help burrows stay open. The bedding should be dry, absorbent, and comfortable.
Spot-clean soiled areas every few days rather than replacing all bedding constantly. Full cleanouts can be stressful because they remove your hamster’s familiar scent. When you do a larger cleaning, keep a portion of clean old bedding and mix it into the fresh bedding. This helps the cage still smell like home instead of a suspiciously sterile hotel room.
Common Mistakes to Avoid
Using a Bin That Is Too Small
The most common mistake is choosing a bin based on convenience instead of usable floor space. A small bin may be easy to carry, but it can lead to boredom, stress, bar chewing if mesh is accessible, frantic pacing, or repeated escape attempts. Bigger is almost always better.
Skipping Proper Ventilation
A few air holes are not enough for most bin cages. Use a large mesh lid and consider side ventilation if needed. Airflow helps control moisture and odor while keeping the enclosure healthier.
Choosing Unsafe Bedding
Scented bedding, dusty bedding, cedar, and fluffy cotton nesting products can cause problems. Stick with safe, low-dust materials that allow burrowing.
Adding Tall Fall Risks
Hamsters are not great judges of height. Avoid tall platforms, steep ladders, and hard objects directly below climbing areas. If you add levels, keep them low and make sure bedding cushions the surrounding area.
Forgetting Chew Safety
Hamsters chew because their teeth grow continuously. Provide safe wooden chews, cardboard, whimzees-style chews made for pets when appropriate, and natural textures. Also inspect the bin regularly for chewed plastic. If your hamster starts gnawing aggressively at one corner, reinforce the area or upgrade the enclosure.
How to Clean a Hamster Bin Cage
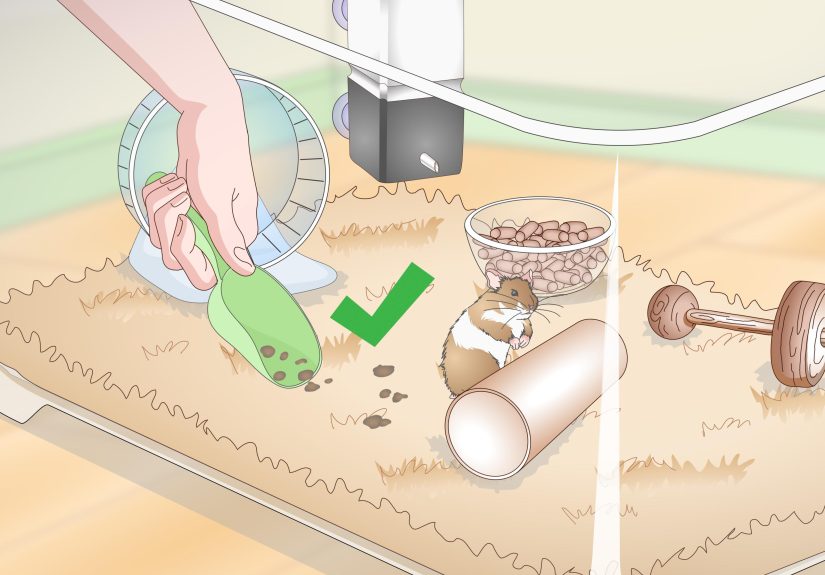
Daily care is simple. Remove wet bedding, check the water, refresh food, and pick out obvious messes. Every few days, clean the sand bath if your hamster uses it as a toilet. Once the enclosure needs deeper cleaning, remove your hamster to a secure playpen or carrier, take out accessories, and replace only the dirty bedding if possible.
Avoid over-cleaning. Hamsters rely heavily on scent, and removing every trace of familiar smell can make them anxious. Wash accessories with mild soap and warm water, rinse well, and dry completely. The bin itself can be wiped down as needed, but it should not constantly smell like strong cleaners.
DIY Hamster Bin Cage Setup Example
Here is a simple layout for a large bin cage:
- One end: 10 inches of bedding for burrowing
- Middle area: cork tunnel, cardboard tubes, and sprays for foraging
- One corner: sand bath on a stable platform
- Opposite corner: wheel on a platform
- Back wall: water bottle attached with industrial-strength hook-and-loop tape or a safe bottle stand
- Scattered around: chew toys, hides, seed sprays, and small bridges kept low
This layout gives your hamster choices. It can sleep underground, run at night, forage for food, bathe in sand, chew safely, and hide when it wants privacy. A good enclosure is not just about what looks cute to humans. It is about what makes sense to the hamster.
Extra Experience: What You Learn After Building a Hamster Bin Cage
The first thing many owners learn after making a hamster bin cage is that hamsters use space differently than expected. A human may look at a big bin and think, “Wow, that is huge for such a small animal.” A hamster looks at the same space and thinks, “Excellent. I shall now build an underground kingdom, move all bedding to one corner, and run on my wheel at 2:17 a.m.”
One practical experience is that deeper bedding changes everything. In shallow bedding, a hamster may mostly hide in a house or run on the wheel. With deeper bedding, you may start seeing tunnels, secret entrances, food storage chambers, and more relaxed behavior. Some hamsters disappear into their burrows for long naps, then pop out looking innocent, as if they were not just remodeling the entire lower level of their home.
Another lesson is that cage layout improves over time. Your first setup may look beautiful, but your hamster will tell you what works. If bedding keeps getting kicked into the water dish, move the dish to a platform. If the wheel sinks, place it on a sturdy stand. If your hamster ignores a plastic hide but loves a cardboard box, congratulations: your pet has chosen budget interior design. Many great hamster accessories are simple, cheap, and recyclable.
Ventilation is another area where experience matters. A bin cage with a large mesh lid usually works well, but room conditions still matter. In a humid room, you may notice bedding gets damp faster, especially near water areas. In that case, more airflow or better platform placement can help. In a dry room, bedding may stay fresh longer, but you still need to spot-clean regularly. The cage should never smell strongly. A healthy hamster setup has a mild bedding scent, not a “something happened in the corner” warning cloud.
You also learn that hamsters have different personalities. Some are bold and come out the moment they hear the food bag. Others act like you are a suspicious giant who may or may not be trusted after three months of snack-based diplomacy. A bin cage helps both types. Shy hamsters benefit from deep bedding and lots of hides. Confident hamsters enjoy open exploring areas, foraging toys, and different textures.
Cleaning becomes easier once you understand your hamster’s habits. Many hamsters choose one toilet area, often in the sand bath or a specific corner. Once you find that spot, maintenance becomes much simpler. Instead of tearing apart the whole cage, you can clean the chosen area and preserve the rest of the bedding. This keeps your hamster calmer and saves money on bedding.
One of the biggest surprises is how much enrichment matters. A plain bin with bedding and a wheel is functional, but a thoughtfully arranged bin is far better. Cardboard tubes, grapevine wood, cork logs, seed sprays, safe herbs, chew sticks, and hidden food encourage natural behaviors. Scatter-feeding is especially useful because it turns dinner into a treasure hunt. Your hamster may not thank you directly, but the enthusiastic snuffling says plenty.
Finally, building a hamster bin cage teaches you that good small-pet care is not about buying the fanciest cage. It is about meeting the animal’s real needs. A bin cage may not look like a miniature castle from a pet-store display, but it can offer more space, deeper bedding, safer enrichment, and a happier daily routine. And if your hamster immediately kicks bedding into the exact place you just cleaned, take it as a compliment. Clearly, your cage has inspired creativity.
Conclusion
Learning how to make a hamster bin cage is a practical, affordable way to give your pet a safer and more natural home. With a large bin, strong mesh ventilation, deep bedding, a proper wheel, secure accessories, and thoughtful enrichment, you can build an enclosure that supports digging, running, hiding, chewing, and foraging.
The best hamster bin cage is spacious, well-ventilated, escape-resistant, and easy to maintain. More importantly, it gives your hamster the freedom to behave like a hamster. That means burrows, tunnels, midnight workouts, snack stashes, and the occasional dramatic rearrangement of bedding. Build it well, check it often, and keep improving the setup based on your hamster’s behavior.






