
Table of Contents >> Show >> Hide
- Why Cookies Stick to a Baking Sheet in the First Place
- The Best Surfaces for Easy Cookie Release
- How to Prep a Baking Sheet So Cookies Don’t Stick
- Cookie Dough Habits That Prevent Sticking
- Baking-Time Tricks That Keep Cookies Releasing Cleanly
- What to Do Between Batches (This Part Matters More Than You Think)
- Troubleshooting: Why Your Cookies Still Stick
- Best Practices by Cookie Type
- Final Takeaway
- Experience-Based Notes From Real Kitchens (Extended Section)
Nothing humbles a home baker faster than a beautiful batch of cookies that refuses to leave the pan. You did everything right (or at least felt like you did), and thenbamhalf a chocolate chip cookie stays behind like a crime scene. The good news: stuck cookies are usually a pan-prep problem, not a baking-talent problem.
If you’ve been wondering how to keep cookies from sticking to a baking sheet, the fix is usually a combo of the right surface, the right temperature, and the right timing. In this guide, we’ll break down what causes sticking, how to prevent it, and what to do if your cookies are already acting clingy. We’ll also cover parchment paper vs. silicone mats, greasing mistakes, pan color, and the one small cooling habit that saves a lot of heartbreak.
Why Cookies Stick to a Baking Sheet in the First Place
Cookies don’t stick for just one reason. They stick because several little things gang up on you at once: sugar caramelizes, butter melts, dough spreads, and the pan gets hot enough to turn “soft and sweet” into “welded to metal.”
1. Too much direct heat on the bottom
When the bottom of the cookie gets more concentrated heat than the top, the sugars can caramelize too quickly and glue themselves to the pan. This is one reason foil-lined pans often cause trouble: foil is highly conductive, so bottoms brown faster and can scorch or stick before the center is done.
2. The pan wasn’t prepped for the recipe
Some cookie recipes are designed for an ungreased sheet (like many chocolate chip cookies), while others need a lightly greased pan or a liner. If you grease when you shouldn’t, cookies can spread too much. If you skip prep when it’s needed, they can stick. Recipes are bossy for a reasoncookie chemistry is real.
3. Residual heat from the previous batch
A hot baking sheet makes fresh dough start melting before it even hits the oven. That leads to excessive spread, thinner cookies, and more sticky bottoms. If your second batch always looks worse than your first, this is usually the culprit.
4. Old residue or damaged pan surface
Burnt sugar, grease buildup, or a scratched nonstick coating can all create rough spots that grab onto dough. Even a “clean enough” pan can sabotage release if it has invisible grease film or baked-on residue.
5. Cookies moved too early (or too late)
This is the sneaky one. Pull cookies too soon and they’re too soft to release cleanly. Leave them on the hot pan too long and the bottoms continue cooking, which can make them stick or over-crisp. The sweet spot is usually a short rest on the pan, then transfer to a cooling rack.
The Best Surfaces for Easy Cookie Release
If your main goal is “cookie comes off pan in one piece,” your baking surface matters more than most people think. Here’s the practical breakdown.
Parchment paper (the MVP for most bakers)
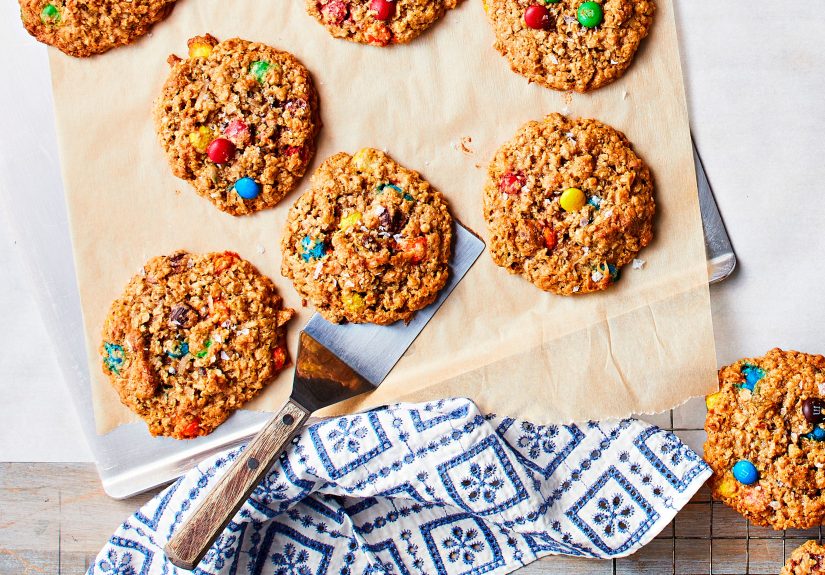
For most cookies, parchment paper is the easiest win. It creates a nonstick barrier, helps with cleanup, and usually gives consistent browning without making the cookies spread too much. It’s especially helpful for sticky doughs, high-sugar cookies, and delicate cookies that crack when moved.
It also makes batch baking easier: you can slide the parchment and cookies off the pan onto a cooling rack (or counter), then reuse the sheet pan once it cools. Bonus: if the parchment isn’t too greasy or burned, you can often reuse it for another round.
Silicone baking mats (helpful, but not always ideal)
Silicone mats are nonstick and reusable, which sounds perfect. And for some bakers, they work great. But there’s a catch: they can change how cookies spread and brown. In many tests, silicone mats produce flatter cookies with darker bottoms or uneven texture, especially for cookies that already spread easily.
Translation: silicone mats are great for convenience, but they’re not automatically the best choice for every cookie recipe. If your cookies keep coming out too flat or greasy on a silicone mat, switch to parchment and compare.
Bare baking sheet (works well for some recipes)
A clean, quality baking sheetespecially a light-colored, well-maintained onecan bake cookies beautifully. Some bakers even prefer a bare sheet for the best texture. The downside is cleanup, and if your pan isn’t truly nonstick or is worn out, sticking becomes much more likely.
If you love baking directly on the pan, make sure the sheet is clean, dry, fully cooled between batches, and not overly greased. A good pan can absolutely work; a tired pan can absolutely betray you.
Foil (usually not the best choice for cookies)
Foil is handy for plenty of kitchen jobs, but cookie baking isn’t its strongest performance. It can cause over-browning and crisp or burned bottoms because it transfers heat quickly. It also doesn’t release cookies as reliably as parchment. If your cookies are sticking and you’re using foil, that’s your sign to break up with foil and move on.
How to Prep a Baking Sheet So Cookies Don’t Stick
Here’s the no-drama setup that works for most home bakers.
Step 1: Start with the right pan
Choose a light-colored metal baking sheet whenever possible. Dark pans absorb more heat and can brown the bottoms too fast, which increases the risk of sticking. Light aluminum pans (or aluminized steel pans with good heat performance) tend to give more predictable results.
If your pan warps dramatically, has a rough surface, or has flaking nonstick coating, it’s time for a replacement. No amount of positive thinking can fix a pan that has entered its villain era.
Step 2: Line with parchment paper
This is the simplest and most reliable option. Cut a sheet of parchment to fit the pan. No need to grease the parchment for most cookie recipes. The cookies should release easily, and cleanup becomes a 10-second job instead of a sink-side negotiation.
Step 3: If you grease, grease lightly
If your recipe specifically calls for a greased sheet, use a very thin layer. Too much grease can cause spreading and greasy bottoms. For some cookie recipes, shortening is preferred over butter for pan-greasing because it melts more slowly.
Also, if you’re using a nonstick-coated pan, check the recipe first. Extra spray on a nonstick surface can make some cookies spread more than expected.
Step 4: Use the right paper (parchment, not wax paper)
Wax paper and parchment paper are not interchangeable in the oven. Wax paper is great for wrapping or rolling dough, but not for direct oven heat. For baking cookies, use parchment paper only.
Cookie Dough Habits That Prevent Sticking
A lot of sticking problems are really dough problems in disguise.
Don’t eyeball ingredients
Too much sugar or too little flour can make cookies extra tender, extra spread-y, and extra sticky. Measuring accurately matters, especially for drop cookies and thin cookies.
Don’t over-soften the butter
Butter should be softened, not melty. If the dough starts overly warm, cookies spread more, and thin cookies are more likely to stick. If your kitchen is warm, chill the dough for 10–20 minutes before baking.
Chill sticky doughs before baking
Chilling helps the fat firm up and slows spreading. This is especially useful for:
- Chocolate chip cookies with a high butter ratio
- Sugar cookies with intricate cutout shapes
- Cookies with mix-ins like caramel, toffee, or marshmallows
- Very soft doughs mixed in a warm kitchen
Leave enough space between cookies
Overcrowded pans cause cookies to spread into each other, and once the edges fuse, removal gets messy. Give each cookie room to breathe. Crowded cookies are like airline seats: nobody wins.
Baking-Time Tricks That Keep Cookies Releasing Cleanly
Bake one sheet at a time if your oven runs uneven
If your oven has hot spots, one pan at a time is safer and more consistent. If you bake multiple sheets, rotate them as needed so bottoms don’t overcook on one side.
Use the middle rack
The middle rack usually gives the most even heat. Too low, and the cookie bottoms get extra blast heat. Too high, and tops may brown before the centers set.
Watch for doneness cues, not just the timer
Cookies are often ready when the edges are set and lightly golden while the centers still look slightly soft. If you wait until the entire top looks fully done, the bottoms may be overbaked and more likely to stick.
Let cookies rest briefly on the pan
Most cookies need a short restusually 1 to 3 minutesbefore transfer. This helps them firm up so they don’t tear when lifted. For some recipes, the rest may be slightly longer. Follow the recipe, but as a general rule: let them set, then move them.
What to Do Between Batches (This Part Matters More Than You Think)
A lot of bakers focus on the dough and forget the pan. But the pan is half the game.
Cool the baking sheet completely
Before adding the next round of dough, let the sheet cool fully. Even slight residual heat can make cookies spread too fast. If you’re in a hurry, cool the pan safely by running cool water over the bottom (not the top), then dry it thoroughly before reusing.
Remove crumbs and grease
Tiny burnt crumbs from the previous batch can stick to the next batch and create rough spots. Wipe or rinse the pan (once cooled) and dry it well before starting again. Clean pan, clean release.
Keep a second baking sheet on hand
If you bake often, two sheet pans are a sanity saver. One can cool while the other is in the oven, and your dough won’t sit around waiting while the first pan cools down.
Troubleshooting: Why Your Cookies Still Stick
“I used parchment and they still stuck a little.”
It happens. A few cookie typesespecially very buttery or sugary cookiescan still cling slightly. Usually, the fix is one of these:
- Let them cool 1 extra minute before lifting
- Use a thin spatula instead of fingers
- Try a different parchment brand
- Lower the oven temperature by 10–15°F if bottoms are overbrowning
- Chill the dough so the cookies spread less
“My cookies only stick on the second batch.”
Your pan is too hot. That’s the whole mystery. Cool the sheet completely, then try again.
“My cookies release, but the bottoms are too brown.”
Use a lighter-colored pan, switch from foil to parchment, move the rack to the middle position, or check your oven temperature with an oven thermometer. Bottom browning is often a heat-distribution issue.
“My nonstick pan suddenly stopped being nonstick.”
Nonstick coatings wear out over time, especially with high heat, metal tools, and harsh cleaning. If the coating is scratched or patchy, line the pan with parchment or replace the pan.
Best Practices by Cookie Type
Chocolate chip cookies
- Usually best on parchment or a clean ungreased sheet
- Avoid over-greasing (spreading risk)
- Cool 2 minutes on the pan, then transfer
Sugar cookies and cutouts
- Use parchment for easy release and shape protection
- Chill dough before baking to reduce spreading
- Let cookies set briefly before moving to avoid breakage
Thin, crispy cookies (lace, tuile-style, etc.)
- Parchment is your friend
- Watch carefullyhigh sugar means fast caramelization
- Use a thin spatula and move quickly once they set
Cookies with sticky mix-ins (caramel, marshmallow, jam)
- Definitely line the pan
- Space cookies well apart
- Expect some ooze and use a spatula to separate gently
Final Takeaway
If you want a one-line answer to how to keep cookies from sticking to a baking sheet, here it is: Use a light-colored baking sheet lined with parchment paper, bake on a fully cooled pan, and let cookies rest briefly before transferring.
That simple routine solves most sticking problems instantly. From there, small adjustmentslike chilling the dough, avoiding foil, and not over-greasinghelp you dial in the perfect batch. Cookie baking doesn’t need to feel like a science fair, but a few smart habits go a long way toward beautiful, non-stuck cookies and a much happier cleanup.
Experience-Based Notes From Real Kitchens (Extended Section)
If you bake cookies often, you start noticing patterns that no recipe card fully explains. One of the most common experiences is the “first batch vs. second batch” mystery. The first tray comes out perfectgolden edges, soft centers, easy release. Then the second tray spreads more, browns faster, and sticks. Most bakers assume the dough changed, but it’s usually the sheet pan temperature. Once people start cooling the pan completely between batches, the problem almost magically disappears. It’s one of those tiny habits that feels boring but makes a huge difference.
Another very real kitchen experience: switching to parchment paper and wondering why nobody mentioned it sooner. A lot of home bakers spend years greasing pans, scrubbing caramelized sugar, and sacrificing at least two cookies per batch to “the pan tax.” Then they try parchment and suddenly cookies slide off like they have somewhere else to be. Cleanup improves, cookie bottoms bake more evenly, and the stress level drops. It’s not glamorous advice, but it works.
There’s also the silicone mat learning curve. Many bakers buy silicone mats expecting instant perfection because they’re reusable and nonstick. Sometimes that happens. But sometimes the cookies spread more than expected, or the bottoms brown differently, or the texture comes out a little denser. That doesn’t mean silicone mats are badit just means they behave differently. Experienced bakers often keep both on hand: parchment for most cookies, and silicone for recipes that clearly work well on it.
People also underestimate how much pan color affects results. A baker may use the same dough recipe at a friend’s house and wonder why the cookies suddenly look better. Then they notice the friend uses a light sheet pan instead of a dark one. That one detail can change bottom browning, spread, and overall release. It’s a classic “I thought it was me, but it was the pan” moment.
One more common experience: trying to move cookies too soon because the kitchen smells amazing and patience has officially left the building. Fresh cookies often look done before they’re fully set. If you scoop them up immediately, they can tear, fold, or leave half their bottoms behind. Letting them sit for just a minute or two makes a surprising difference. The structure firms up, the bottoms release more cleanly, and the cookies keep their shape.
Finally, many seasoned bakers develop a simple personal system: two sheet pans, a roll of parchment, a cooling rack, and a timer. One pan bakes while the other cools. The parchment gets swapped if needed. Cookies rest briefly, then move to the rack. Crumbs get wiped off before the next round. It’s not fancy, but it’s efficient and it’s the kind of routine that turns cookie baking from “why is this sticking again?” into “I’ve got this.” In other words, less pan drama, more cookies.





