Table of Contents >> Show >> Hide
- Why Water Damaged Wood Is Such a Headache
- First Things First: What to Do Immediately
- Tools and Supplies You May Need
- How to Fix Water Damaged Wood Step by Step
- Step 1: Assess the Type and Severity of the Damage
- Step 2: Dry the Wood Thoroughly
- Step 3: Clean the Surface
- Step 4: Fix Minor Water Stains
- Step 5: Sand Raised Grain, Swelling, or Surface Damage
- Step 6: Fill Cracks, Gouges, and Small Soft Spots
- Step 7: Refinish and Reseal
- Step 8: Replace Wood That Cannot Be Saved
- How to Repair Specific Types of Water Damaged Wood
- Common Mistakes to Avoid
- When to Call a Professional
- How to Prevent Water Damage in Wood in the Future
- Final Thoughts
- Real-World Experiences and Lessons Learned from Fixing Water Damaged Wood
- SEO Tags
Wood and water have a complicated relationship. Wood looks gorgeous, feels warm, and makes a home feel expensive even when your budget says, “Please be serious.” But once water sneaks in, that same beautiful material can swell, stain, warp, cup, crack, or start rotting like it has given up on life. The good news is that not all water damaged wood is doomed. In many cases, you can fix it yourself if you move quickly, dry it properly, and choose the right repair method for the kind of damage you’re dealing with.
This guide walks you through exactly how to fix water damaged wood step by step. You’ll learn what to do first, how to tell whether the wood can be saved, what tools you need, how to repair floors, furniture, cabinets, and trim, and when replacement is smarter than heroic DIY optimism. Think of this as your practical, no-nonsense rescue plan for wet wood.
Why Water Damaged Wood Is Such a Headache
Wood is porous, which means it absorbs moisture. When that happens, it expands. As it dries, it shrinks. If the moisture exposure is uneven or prolonged, the wood can twist, buckle, cup, split, or develop ugly stains. Surface damage may be cosmetic, but deeper water intrusion can affect the finish, the fibers, the glue in engineered products, and even the subfloor underneath.
That’s why the first question is not, “What stain should I buy?” It’s, “How wet is this wood, and where did the water come from?” A spilled plant tray on a side table is very different from a leaking dishwasher soaking hardwood flooring for three days. One may need a light cleanup and refinishing. The other may need drying equipment, board replacement, and a hard conversation with your wallet.
First Things First: What to Do Immediately
If you’re dealing with fresh water damaged wood, speed matters. The faster you remove water and start drying, the better the odds that the wood can be saved.
- Stop the source of the water. Shut off the supply line, fix the leak, cover the roof opening, or move the furniture away from the spill zone.
- Remove standing water. Use towels, a mop, or a wet/dry vacuum.
- Move rugs, boxes, and furniture. Let the wood breathe.
- Start drying the area. Use fans, air circulation, and a dehumidifier.
- Do not trap moisture. Avoid putting down mats, plastic, or furniture until the wood is fully dry.
One important note: if the water came from sewage, storm flooding, or contaminated gray water, the repair process gets more serious. In that case, safety comes first. Wear gloves, eye protection, and a mask, and be ready to discard materials that cannot be cleaned thoroughly.
Tools and Supplies You May Need
- Wet/dry vacuum
- Fans and a dehumidifier
- Soft cloths and microfiber towels
- Mild wood-safe cleaner
- Sandpaper in multiple grits
- Putty knife
- Wood filler or epoxy wood repair compound
- Stain marker or matching wood stain
- Polyurethane, sealant, or matching finish
- Utility knife, pry bar, or oscillating tool for replacement work
- Moisture meter if you want to be extra sure the wood is dry
You may not need every item on this list. A small white water ring on a wood table is a much easier problem than a buckled hardwood floor near a washing machine. Still, having the basics ready makes the job much smoother.
How to Fix Water Damaged Wood Step by Step
Step 1: Assess the Type and Severity of the Damage
Start by figuring out what kind of damage you’re looking at. Here are the most common signs:
- White or cloudy spots: Moisture trapped in the finish
- Dark stains: Water has penetrated deeper into the wood
- Raised grain: The surface feels rough or fuzzy after drying
- Cupping or crowning: Boards no longer sit flat
- Swelling: Doors, drawers, planks, or trim have expanded
- Soft or crumbly areas: Possible rot
- Delamination: Veneer, laminate, or engineered layers are separating
If the wood is still hard and structurally sound, repair is usually possible. If it feels soft under a screwdriver, crumbles easily, smells musty, or shows signs of fungal decay, replacement may be the better choice.
Step 2: Dry the Wood Thoroughly
This is the step people rush, and that’s exactly how they end up repairing wet wood that decides to misbehave again a week later. Drying is not glamorous, but it is everything.
For floors, run fans across the room and a dehumidifier nearby. For furniture, let it dry in a ventilated space out of direct sunlight. For cabinets, open the doors and remove drawers if possible. The goal is steady drying, not aggressive baking. High heat can cause wood to dry unevenly, which increases the risk of warping and splitting. In other words, don’t try to bully wet wood into obedience with a space heater on full blast.
If you have a moisture meter, use it. If not, be patient. Large pieces of wood furniture and thick hardwood flooring can take days or even weeks to dry fully, especially after major exposure.
Step 3: Clean the Surface
Once the wood is dry enough to work on, clean it well. Dirt, residue, and mildew can interfere with sanding, staining, and finishing.
Use a soft cloth and a wood-safe cleaner for routine cleanup. If the piece has mildew or flood grime, clean more thoroughly according to the type of contamination. Avoid soaking the wood again during cleanup. You are repairing water damage, not renewing the subscription.
Step 4: Fix Minor Water Stains
If the damage is mostly cosmetic, like a watermark on a tabletop or vanity, you may be able to repair it without major refinishing.
For white stains: These often sit in the finish rather than the wood itself. Gentle methods such as low heat, a non-gel white toothpaste treatment, or other finish-safe stain lifting methods can help. Test first in an inconspicuous area.
For dark stains: These usually mean the water penetrated deeper. Light sanding and refinishing are often more effective than miracle internet hacks involving mayonnaise, mystery oils, or vibes.
Step 5: Sand Raised Grain, Swelling, or Surface Damage
When wood fibers swell and then dry, the surface may feel rough. Light sanding can smooth the texture and prepare the area for stain or sealant.
Start with a medium grit and finish with a finer grit. Always sand with the grain. On hardwood floors, feather the edges so the repaired section blends in with the surrounding boards. On furniture, use a light touch. The goal is to smooth the damage, not accidentally redesign the piece.
If the finish is still intact and only slightly dulled, a buff-and-refinish approach may be enough. But if the finish is peeling, flaking, or discolored, strip or sand the damaged section until you reach a stable surface.
Step 6: Fill Cracks, Gouges, and Small Soft Spots
After drying and sanding, you may find shallow cracks, chips, or missing material. This is where wood filler or epoxy wood repair compound comes in.
Use wood filler for small cosmetic repairs on unfinished or sanded wood. Use epoxy repair products for deeper damage, exterior trim, windows, or areas that need extra durability. Apply the filler with a putty knife, let it cure completely, then sand it flush with the surrounding surface.
Match the stain as closely as possible. For finished floors or furniture, a stain marker can help fine-tune the color so your patch doesn’t scream, “Hello, I am the repair.”
Step 7: Refinish and Reseal
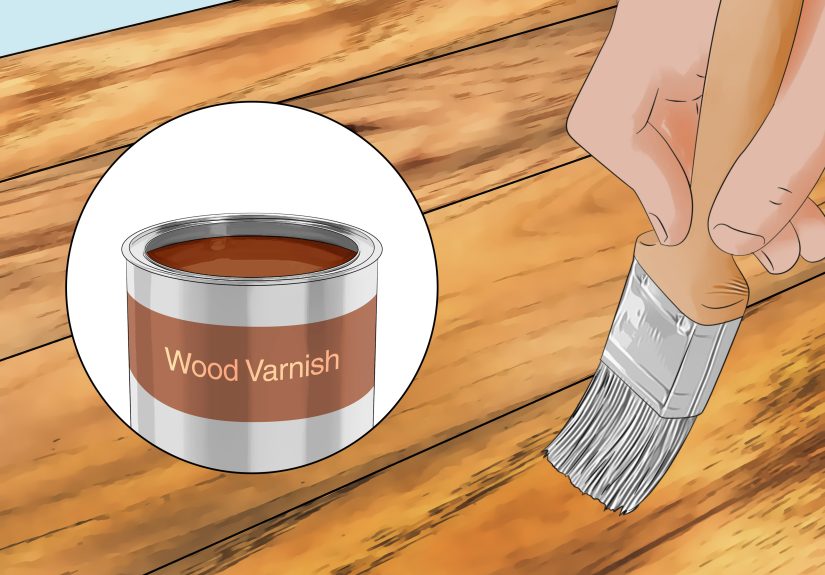
Once the wood is dry, smooth, and repaired, lock in the work with a fresh finish. This might mean stain and polyurethane on hardwood flooring, a matching topcoat on furniture, or a protective sealant on trim and countertops.
Choose a finish that matches the original sheen as closely as possible, whether that’s matte, satin, semi-gloss, or gloss. If the damaged section is large, refinishing the whole board, tabletop, or cabinet face often looks better than spot-treating a small patch.
Step 8: Replace Wood That Cannot Be Saved
Sometimes repair is no longer the smart move. Replace the wood if:
- It is soft, punky, or rotten
- It stays swollen after thorough drying
- Veneer or laminate is peeling badly
- Engineered boards have delaminated
- The cabinet frame is separating
- The floorboards are buckled across a large area
Solid hardwood planks can often be replaced individually if the damage is localized. Laminate and some engineered products are less forgiving. Once those layers swell, the fix is usually replacement, not refinishing.
How to Repair Specific Types of Water Damaged Wood
Hardwood Floors
Water damaged wood flooring usually shows up as cupping, crowning, stains, lifted edges, or buckling. Start by fixing the leak and drying the room thoroughly. Then reassess.
If the boards flatten back out after drying, you may only need sanding and refinishing. If a few planks remain swollen or stained, replace those boards. If the entire floor ripples like a potato chip convention, the damage may extend to the subfloor, and a larger replacement becomes more likely.
Example: A dishwasher leak wets a small patch of oak flooring near the sink. After drying for several days, the boards are still slightly raised but hard. Sanding, stain matching, and a new coat of finish may solve it. If the tongue-and-groove joints have blown apart or the boards remain cupped, replacing a few planks is the cleaner fix.
Wood Furniture
Furniture needs patience. Dry it slowly in a shaded, ventilated area. Remove drawers, open doors, and allow air to circulate. Do not force swollen joints apart. Once dry, clean it, tighten loose hardware, reglue joints if needed, and repair finish damage.
Tables and dressers often respond well to light sanding and refinishing. Antiques or veneered pieces need more caution because aggressive sanding can remove the surface layer quickly.
Cabinets and Vanities
Cabinet bases around sinks are notorious for water damage. If the floor panel or toe kick is swollen but the frame is solid, you may be able to patch or replace only the damaged portion. Use epoxy or filler for minor localized issues. If the face frame is separating or particleboard has turned into oatmeal with attitude, replacement is the better use of your time.
Trim, Window Sills, and Exterior Wood
Localized rot in trim or sills can sometimes be repaired with epoxy after all loose, damaged wood is removed. But if moisture keeps returning, the repair will fail. Always fix the cause, such as cracked caulk, failed flashing, clogged gutters, or poor drainage, before refinishing the wood.
Common Mistakes to Avoid
- Repairing before the wood is dry: This leads to peeling finishes and recurring damage.
- Using too much heat: Fast, uneven drying can crack or warp wood.
- Ignoring the source of moisture: A repaired board will get wet again if the leak remains.
- Using filler on rotten wood: Filler is not magic. It needs sound wood around it.
- Sanding veneer aggressively: Thin veneers can be ruined fast.
- Assuming all wood products behave the same: Solid wood, laminate, MDF, veneer, and engineered flooring all respond differently to water.
When to Call a Professional
DIY works best for minor to moderate water damage. Call a pro if the water came from flooding or sewage, the damage covers a large area, mold is visible, the subfloor may be affected, or the piece is valuable enough that you really do not want your first epoxy experiment happening on it.
You should also get professional help when structural wood is involved, such as support framing, stairs, exterior sheathing, or window framing with widespread rot. That is no longer a cosmetic repair. That is a “let’s keep the house functional” repair.
How to Prevent Water Damage in Wood in the Future
Prevention is much cheaper than another weekend spent kneeling on the floor with sandpaper and regret.
- Clean up spills quickly
- Use water alarms near sinks, dishwashers, washing machines, and water heaters
- Seal wood surfaces properly
- Maintain caulk, flashing, and grout
- Keep gutters and downspouts clear
- Check under sinks and around appliances regularly
- Use mats where splashes are common, but don’t let moisture sit underneath them
- Control indoor humidity with ventilation and dehumidifiers when needed
Final Thoughts
Learning how to fix water damaged wood is really about learning the right order: stop the water, dry the wood, clean the surface, repair the damage, and seal the result. Skip the drying stage, and everything after that becomes much less effective. But when you move quickly and match the repair method to the actual damage, you can save a surprising amount of wood flooring, furniture, cabinets, and trim.
So yes, water damaged wood can look dramatic. It can puff up, stain, and make you imagine your home is falling apart one board at a time. But a lot of it is repairable. And with a little patience, the right materials, and the refusal to panic, you can bring it back from soggy disaster to “nobody will ever know.” Which is really the dream.
Real-World Experiences and Lessons Learned from Fixing Water Damaged Wood
One of the most common experiences homeowners talk about is how small water problems pretend to be harmless at first. A slow drip under the kitchen sink looks like no big deal until the cabinet floor starts bubbling, the doors stop closing cleanly, and the wood smells faintly like a wet cardboard box. The lesson here is simple: tiny leaks create big damage when they are ignored. People often say they wish they had investigated sooner instead of tossing down a towel and hoping for the best.
Another frequent lesson comes from hardwood floors. Someone notices a few boards near the refrigerator looking slightly raised and assumes a quick sanding job will fix it. Then they discover the real problem is not the finish on top but the moisture trapped below. Experienced DIYers often say the biggest turning point in successful repair was learning patience. Once they stopped trying to rush the process and focused on drying the wood first, the repair quality improved dramatically. In many cases, boards that looked terrible on day one looked far less dramatic after several days of proper dehumidifying.
Furniture repair brings a different kind of experience. People often panic when a wooden table or dresser gets soaked and want to attack it immediately with heat, polish, or a random internet remedy. But the homeowners who get the best results usually do less, not more, during the first phase. They dry the piece slowly, keep it out of direct sun, and resist the urge to pry swollen drawers loose like they are trying to open a treasure chest. Later, when the furniture settles, they can sand, reglue, refinish, and restore it with much better results.
Cabinet damage teaches another useful lesson: not every material deserves the same level of hope. Solid wood trim and hardwood flooring are often repair-friendly. Particleboard cabinet bases, cheap veneers, and badly swollen laminate are much less cooperative. Many people discover this the hard way after spending hours patching a vanity that should have been replaced from the start. Experience tends to make homeowners better at asking an important question early: “Is this actually repairable, or am I emotionally negotiating with ruined material?”
There is also a strong emotional side to this kind of repair. Water damage feels invasive. It makes a home feel fragile. But many people come away from the experience more confident because they learn how their house actually works. They learn where shutoff valves are, how to spot early warning signs, how to dry materials correctly, and how to seal vulnerable wood surfaces. In that sense, fixing water damaged wood is not just a repair project. It is a crash course in becoming a sharper, calmer homeowner. And while nobody asks for that lesson on purpose, it is still a useful one to keep.