Table of Contents >> Show >> Hide
- Before You Start: The “Don’t Regret This Later” Rule
- Step 1: Set Up a Non-Destructive Workflow (So You Can Undo Your Chaos)
- Step 2: Fix Lens Distortion and Perspective (The Sneaky Reason Photos Look “Off”)
- Step 3: Make Light Work for You (Without Changing Anyone’s Shape)
- Step 4: Clean Up Distractions (Because Background Clutter Is the Real Villain)
- Step 5: Natural Retouching (Keep Texture, Keep Life)
- Step 6: Color That Looks Expensive (Even If the Photo Was Taken in a Hallway)
- Step 7: Export for Social Media Without Weird Color Shifts
- Ethics: When “Fixing the Photo” Becomes “Changing the Person”
- FAQ
- Real-World Editing Scenarios (Common Experiences) What People Learn the Hard Way
- Final Takeaway
Let’s be real: most “I look bigger in this photo” moments aren’t your body suddenly doing plot twists.
It’s usually a messy combo of wide-angle lenses, bad lighting, awkward camera height, and the cruel
magic of perspective. The good news? You can make an image look cleaner, more confident, and more
“yes, that’s me on a good day” in Adobe Photoshopwithout shrinking anyone’s waistline,
warping limbs, or creating a fake version of reality.
This guide focuses on edits that are both common in professional workflows and kinder to your future self:
lens/perspective corrections, non-destructive adjustments, background cleanup,
and natural retouching. Think “camera did me dirty” fixesnot “turn me into a different person.”
Before You Start: The “Don’t Regret This Later” Rule
If an edit would make your real-life self feel like an “after” photo, it’s probably too far. Instead, aim for:
correcting technical issues, simplifying distractions, and improving clarity. Your goal is to make the photo
look like it was shot betternot like you were built in a character creator.
What counts as body-neutral editing?
- Fixing lens distortion (wide-angle stretch, curved lines, “why does the wall look like it’s melting?”)
- Correcting perspective (tilted camera, weird angles, slanted horizons)
- Lighting and color (exposure, white balance, contrast, shadows, highlights)
- Cleanup (lint, distracting objects, wrinkles in clothing, flyaway hairskept reasonable)
- Skin retouching that keeps texture and looks human (not “plastic doll in a perfume ad”)
Step 1: Set Up a Non-Destructive Workflow (So You Can Undo Your Chaos)
The fastest way to end up with regrets is editing directly on your only layer until the file becomes a museum
of irreversible decisions. Non-destructive editing keeps your options open and your stress level down.
Quick setup checklist
- Duplicate your background (or convert it to a Smart Object).
- Name layers (yes, even if it’s boringFuture You will send a thank-you note).
- Use adjustment layers for tone/color instead of Image > Adjustments.
- Retouch on a new blank layer set to “Sample All Layers” when using healing tools.
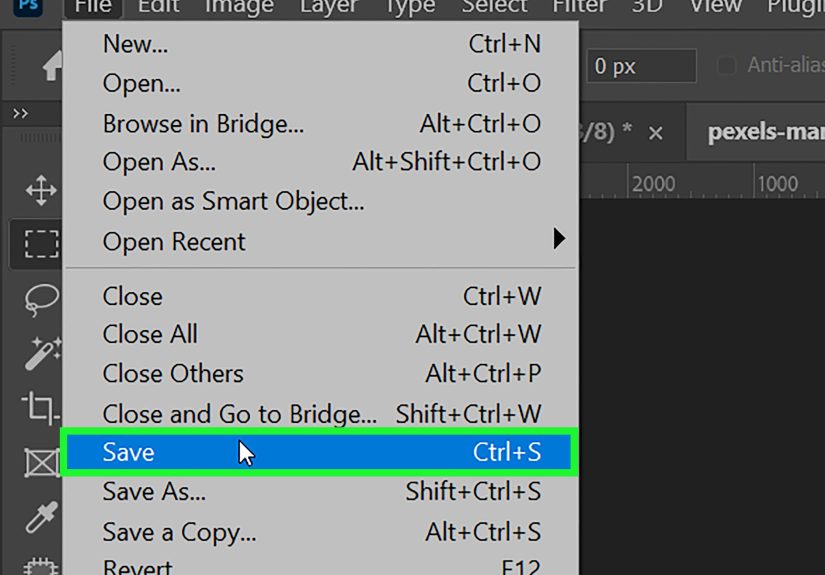
- Save versions (e.g.,
portrait_v1.psd,portrait_v2.psd) before major changes.
Step 2: Fix Lens Distortion and Perspective (The Sneaky Reason Photos Look “Off”)
If a photo was taken close-up on a phone (especially the wide lens), perspective can exaggerate whatever is
closest to the camera. That effect can make faces, shoulders, or foreground objects look largerwithout
anything about your body actually changing.
Do this first in Camera Raw
- In Photoshop, go to Filter > Camera Raw Filter.
- Open the Optics section and enable Lens Corrections if available.
- Go to Geometry (or perspective controls) and try Auto / Level / Vertical corrections.
- Use Guided correction if lines (doors, walls, buildings) need manual help.
- Use Crop and Straighten to fix tilted horizons or slanted framing.
This step alone often removes that “I swear I don’t look like that” feelingbecause you’re correcting the camera’s math,
not your body.
Step 3: Make Light Work for You (Without Changing Anyone’s Shape)
Light shapes perception. Harsh overhead lighting can carve shadows in unflattering ways; flat lighting can remove
depth and make everything look “pancaked.” The fix is subtle tone control, not body warping.
Global tone adjustments (fast and safe)
- Exposure: get skin into a natural brightness range (avoid glowing).
- Highlights/Shadows: tame shiny hotspots and lift muddy dark areas.
- Whites/Blacks: set a clean tonal range so the image has contrast without crunch.
- Texture/Clarity: tiny amounts go a long way (especially on faces).
Local adjustments (the pro move)
If your version of Photoshop supports masking in Camera Raw, use it for gentle targeted adjustmentslike lifting shadows
under eyes or softening a harsh forehead shine. Keep changes small enough that nobody can point at the photo and say,
“What filter is that?” in a worried tone.
Step 4: Clean Up Distractions (Because Background Clutter Is the Real Villain)
A busy background can pull attention away from the subject and make the whole image feel chaotic. Cleaning it up
doesn’t change anyone’s bodyit just makes the photo easier to read.
Remove objects with Content-Aware Fill
- Select the distraction using Object Selection, Lasso, or Quick Selection.
- Right-click inside the selection and choose Content-Aware Fill.
- Adjust the sampling area if needed, then apply.
- Zoom in and check edgesfix artifacts with a gentle healing pass.
Use the right “fix-it” tool
- Spot Healing Brush: tiny blemishes, lint specks, small distractions.
- Healing Brush: better control for areas with texture (skin, fabric).
- Clone Stamp: when you need precision (patterns, edges, repeating texture).
- Patch Tool: larger areas where you can swap texture cleanly.
Pro tip: zoom out often. If you can only see your edit at 300% zoom, it probably doesn’t need to exist.
Step 5: Natural Retouching (Keep Texture, Keep Life)
Retouching is best when it’s invisible. The goal is not “erase pores,” it’s “reduce temporary distractions.”
A good rule: remove things that will be gone in a week, keep things that make someone recognizable.
A simple, realistic skin workflow
- Create a new layer called Retouch.
- Use Spot Healing for small blemishes and stray lint.
- Use Healing Brush for areas with repeating texture, sampling from nearby clean skin.
- If needed, add a very light smoothing step using a Smart Filterbut keep pores visible.
Teeth and eye whites: don’t go full sci-fi
- Brighten gently with a masked adjustment layer (Curves/Levels), then reduce opacity.
- Avoid making whites pure whitenatural whites have shadows and tone.
Step 6: Color That Looks Expensive (Even If the Photo Was Taken in a Hallway)
Color grading can make an image feel intentional. The secret is subtle white balance and consistent skin tone.
If skin looks gray/green, nothing else matters.
Fast color improvements
- White Balance: fix too-warm “orange lamp” or too-cool “blue aquarium” vibes.
- Vibrance: safer than Saturation for natural skin.
- HSL: small tweaks to oranges/reds can clean up skin without making it neon.
- Curves: tiny contrast lift can make photos pop without looking crunchy.
Step 7: Export for Social Media Without Weird Color Shifts
Nothing hurts like exporting a perfect edit… only for it to look different everywhere else. For web and most social platforms,
sRGB is the safest color space.
Export checklist
- Convert to sRGB if needed (common for web delivery).
- Use File > Export > Export As (or your preferred export workflow).
- Choose JPEG for photos (quality ~70–85 is often a good balance).
- Resize thoughtfully (don’t upload a 9000px file unless you enjoy slow-loading pages).
- Sharpen lightly after resizing, not before.
Ethics: When “Fixing the Photo” Becomes “Changing the Person”
Here’s a simple gut-check: if the edit changes someone’s body in a way that affects how they might feel about themselves,
it’s no longer just a photo improvement. It becomes a pressure generator.
Keep it responsible
- Correct camera distortion and lighting before touching anything else.
- Avoid edits that reshape bodies, faces, or proportions.
- If you’re editing for clients or publication, follow the platform’s retouching rules and labeling policies.
- When in doubt: “Would I say this person needs fixing?” If the answer is “yikes,” step away from the Liquify menu.
FAQ
“My phone made the edges of the photo look stretchedcan Photoshop fix that?”
Yes. That’s often a lens/perspective issue. Use Camera Raw lens corrections and geometry adjustments, then crop slightly if needed.
“What’s the fastest way to look better in photos without changing my body?”
Fix exposure/white balance, correct distortion, clean the background, and use subtle local tone adjustments. Those four steps do more than most people realize.
“How do I keep edits from looking fake?”
Use adjustment layers, reduce opacity, zoom out often, and keep texture. If the edit is the first thing you notice, it’s too strong.
Real-World Editing Scenarios (Common Experiences) What People Learn the Hard Way
People usually come to Photoshop for “confidence fixes,” but what they discover is that most issues are technical. Here are
common scenarios editors run intoand what they learn after a few rounds of trial and error.
1) The “Why does this selfie feel weird?” moment
This is classic wide-angle and close distance. The face can look slightly stretched, and anything closer to the camera gets emphasized.
Many editors first assume it’s a body or face problemthen realize lens correction and a small crop solves 80% of it. The big lesson:
the camera has opinions, and they’re not always accurate.
2) The overhead-lighting disaster (aka: cafeteria lighting)
Overhead lighting can create under-eye shadows and highlight texture in ways that don’t show up in real life. Beginners try to “blur away”
the problem and end up with waxy skin. More experienced editors learn to lift shadows gently and reduce highlightskeeping pores intact.
The win isn’t “perfect skin.” The win is “skin that still looks like skin.”
3) The cluttered background that steals the whole photo
Someone’s taking a great picture, but the background is a laundry pile, a random trash can, and a mystery cord that looks like it’s attacking
someone’s head. Content-Aware Fill becomes the hero here. Editors learn a second lesson too: removing distractions can make the subject look more
confidentwithout changing the subject at all.
4) The “I exported it and now it looks different everywhere” surprise
Color management is the silent chaos gremlin. People edit until the photo looks perfect, then post it and wonder why skin looks off. After a few
frustrated cycles, they learn to standardize exports for the web (especially sRGB) and to check their work at normal viewing sizes. The big lesson:
the last 5% of polish is often about exporting correctly, not adding more effects.
5) The slippery slope of “just one more tweak”
Many editors admit the hardest part isn’t learning toolsit’s knowing when to stop. You fix one thing, then notice another, and suddenly you’re
editing like you’re trying to win a “Most Edited Photo” award. With time, people develop a practical rule: edits should reduce distractions, not
create a new standard you have to live up to. The best compliments are “That’s a great photo,” not “Wow, you look… different.”
If you take one idea from these experiences, let it be this: your most powerful Photoshop skills are often the boring oneslens correction,
careful tone, simple cleanup, and subtle color. Those are the edits that make images feel better while keeping people real.
Final Takeaway
You don’t need to reshape yourself to make a photo work. Start by correcting what the camera messed up: distortion, perspective, exposure, and color.
Then clean distractions and retouch lightly. You’ll end up with images that feel more confident, more professional, and more youwithout turning your
body into a design project.