Table of Contents >> Show >> Hide
- Before You Start: Know What Kind of Rug You Have
- Supplies You’ll Need
- How to Clean a Large Area Rug: 11 Steps
- Step 1: Remove Furniture and Clear the Area
- Step 2: Read the Care Label and Inspect the Rug
- Step 3: Shake, Beat, or Sweep Out Loose Dirt
- Step 4: Vacuum Both Sides Thoroughly
- Step 5: Spot Treat Stains Before Washing
- Step 6: Choose the Right Cleaning Method
- Step 7: Mix a Gentle Cleaning Solution
- Step 8: Wash the Rug in Sections
- Step 9: Rinse Until the Water Runs Clear
- Step 10: Remove Excess Water
- Step 11: Dry the Rug Completely
- How Often Should You Clean a Large Area Rug?
- Common Mistakes to Avoid
- Special Tips for Different Rug Materials
- Extra Experience-Based Advice for Cleaning a Large Area Rug
- Conclusion
A large area rug is basically the living room’s unsung hero. It catches crumbs, cushions feet, absorbs pet drama, and somehow becomes the official landing zone for coffee, muddy shoes, cereal, glitter, and mysterious “what is that?” stains. The good news: you can clean many large area rugs at home without turning your weekend into a disaster movie. The trick is knowing your rug’s material, using the right amount of water, and drying it properly so it smells fresh instead of “wet basement chic.”
This guide walks you through how to clean a large area rug in 11 practical steps, from checking the care label to vacuuming, spot treating, washing, rinsing, drying, and maintaining it afterward. The process works best for many synthetic, cotton, washable, and outdoor-style rugs. Wool, silk, antique, hand-knotted, jute, sisal, and delicate rugs need extra cautionand sometimes a professional cleaner is cheaper than replacing a rug you accidentally turned into a sad carpet taco.
Before You Start: Know What Kind of Rug You Have
The safest way to clean a large area rug starts with the tag. Look for material, backing type, and care instructions. Synthetic fibers like polypropylene, polyester, nylon, and some acrylic rugs are usually more forgiving with water. Cotton rugs may be washable but can shrink or wrinkle. Wool rugs can handle careful maintenance but dislike harsh detergents, scrubbing, and oversaturation. Natural fiber rugs like jute and sisal should not be soaked because moisture can stain, warp, or encourage mildew.
If there is no label, test before you commit. Dampen a white cloth with water and a tiny amount of mild cleaner, then blot a hidden corner. If color transfers to the cloth, stop. That rug is not ready for a backyard spa day.
Supplies You’ll Need
- Vacuum cleaner with hose or upholstery attachment
- Broom, rug beater, or clean mop
- Soft-bristle brush or sponge
- Bucket
- Mild rug shampoo or gentle carpet cleaner
- White microfiber cloths or towels
- Garden hose or clean water source, if washing outdoors
- Squeegee or wet/dry vacuum, optional but helpful
- Fans or dehumidifier for indoor drying
- Tarp or clean driveway/patio surface
How to Clean a Large Area Rug: 11 Steps
Step 1: Remove Furniture and Clear the Area
Start by moving coffee tables, chairs, baskets, toys, pet beds, and anything else sitting on the rug. Check for small objects hiding in the fiberscoins, hairpins, LEGO pieces, and the occasional snack fossil. These items can damage your vacuum or scratch the rug during cleaning.
If the rug is too large to move easily, clean it in sections. Move furniture to one side, clean half, let it dry, then repeat. This is not as glamorous as rolling the rug into the yard like a home-improvement champion, but it works.
Step 2: Read the Care Label and Inspect the Rug
Look at the care tag before applying any cleaner. A rug labeled “dry clean only,” “professional clean,” or “do not wet clean” should not be soaked. Also inspect the backing. Rubber-backed rugs can deteriorate with harsh cleaners or too much heat, while glued rugs may separate if soaked for too long.
Check for loose threads, fraying edges, weak seams, or stains that need special attention. If the rug is antique, handmade, silk, or has unstable dye, skip the DIY deep clean and call a professional rug cleaner. Some rugs are heirlooms; they deserve better than your experimental bucket chemistry.
Step 3: Shake, Beat, or Sweep Out Loose Dirt
Large rugs hold an astonishing amount of dry soil. Before adding water, remove as much dirt and debris as possible. If you can take the rug outside, hang it over a railing, sturdy fence, or outdoor chairs and gently beat it with a broom or rug beater. Wear old clothes unless you enjoy looking like you fought a dust cloud and lost.
If the rug is too heavy to hang, sweep the surface with a clean broom or take it outside and shake one end at a time with help. Dry soil is easier to remove now than after it turns into mud during washing.
Step 4: Vacuum Both Sides Thoroughly
Vacuum the top of the rug slowly, using overlapping passes. Go in one direction, then vacuum again at a right angle. This helps lift embedded grit from different sides of the fibers. Pay extra attention to high-traffic paths, edges, and corners.
Next, flip the rug and vacuum the back. This step is especially useful because dirt often works its way down into the foundation. Vacuum the floor underneath as well. If you use a rug pad, shake or vacuum it before putting everything back. A clean rug on a dirty pad is like taking a shower and putting on yesterday’s socks.
Step 5: Spot Treat Stains Before Washing
Stains need attention before the full clean. Blot fresh spills with a white cloth, working from the outside of the stain toward the center. Avoid scrubbing because scrubbing can spread the stain and fuzz the fibers.
For many water-based stains, a small amount of mild detergent mixed with cool water can help. Apply the solution to a cloth, not directly to the rug, then blot. Rinse by blotting with a clean damp cloth and follow with a dry towel. For grease, ink, red wine, pet accidents, or old mystery stains, use a cleaner made for carpets and rugs and follow the label carefully. Always test first in a hidden area.
Step 6: Choose the Right Cleaning Method
Not every rug wants the same cleaning treatment. For synthetic rugs that are water-safe, an outdoor wash with mild rug shampoo may work well. For wool rugs, use minimal moisture and a wool-safe cleaner. For jute, sisal, seagrass, and other plant-fiber rugs, stick with vacuuming and careful spot cleaning because soaking can cause browning, shrinkage, or mildew.
If you plan to use a carpet cleaning machine, check that the rug can handle wet extraction. Some carpet cleaners are designed for synthetic area rugs, but delicate wool, silk, viscose, antique, or hand-knotted rugs often require professional cleaning. When in doubt, choose the gentler option.
Step 7: Mix a Gentle Cleaning Solution
Fill a bucket with cool or lukewarm water and add rug shampoo or a mild carpet cleaner according to the product directions. More cleaner does not mean a cleaner rug. It often means more residue, faster resoiling, and a rug that feels slightly sticky under bare feet. That is not “fresh”; that is a dirt magnet in disguise.
Avoid bleach, ammonia, laundry detergent, strong degreasers, and all-purpose cleaners unless the rug manufacturer specifically says they are safe. Harsh products can fade dyes, damage fibers, or leave residue that attracts grime.
Step 8: Wash the Rug in Sections
Lay the rug flat on a clean tarp, driveway, patio, or washable indoor floor. If cleaning indoors, protect hardwood or laminate floors from moisture. Dip a soft brush, sponge, or clean mop into the cleaning solution and work in small sections. Use light pressure and move with the direction of the pile when possible.
The goal is to clean the fibers, not drown the rug. Oversaturating a large area rug can make drying difficult and may cause odor, mildew, dye bleeding, or backing damage. If the rug is only lightly dirty, a surface clean may be enough. For heavy soil, work slowly and give the cleaner a few minutes to loosen grime, but do not let it dry on the rug.
Step 9: Rinse Until the Water Runs Clear
If the rug is outdoors and water-safe, rinse it with a garden hose using gentle water pressure. Start at one end and move steadily across the rug. Keep rinsing until the water looks clear and there are no suds. Soap residue left in the rug can attract dirt and make the rug look dull sooner.
If you are cleaning indoors, rinse by blotting with clean damp cloths or using a carpet cleaner filled with clean water only, if appropriate for your rug. Work patiently. Rinsing is not the exciting part, but it is the difference between a rug that feels clean and one that quietly collects grime like it has a side hustle.
Step 10: Remove Excess Water
After rinsing, remove as much water as possible. Use a squeegee and push in the direction of the pile. A wet/dry vacuum can also help pull out moisture from sturdy, water-safe rugs. If you used a carpet cleaning machine, make several dry passes to extract more water.
Do not twist or wring a large rug. That can stretch the shape, damage the backing, or create waves that never quite relax. Pressing, extracting, and air movement are safer than brute force.
Step 11: Dry the Rug Completely
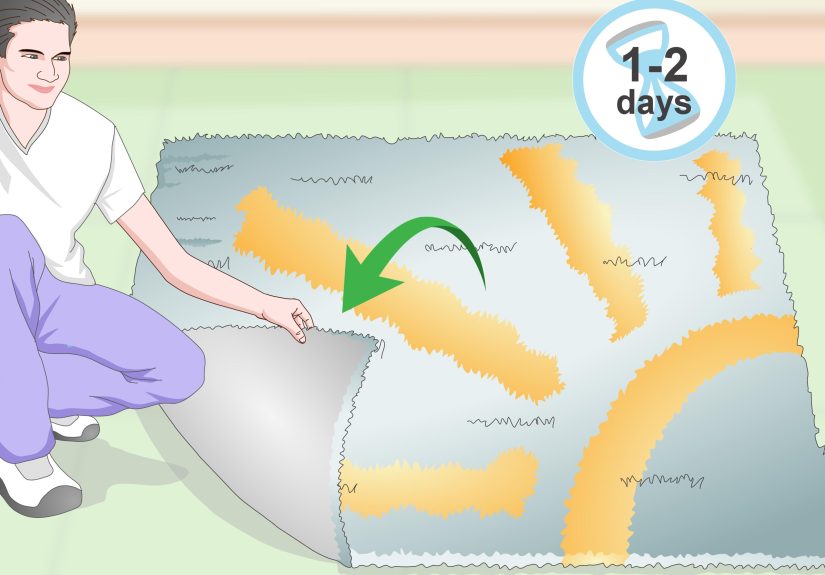
Drying is the step you cannot rush. Lay the rug flat in a well-ventilated area, or hang it over a sturdy railing where air can circulate on both sides. Avoid leaving a wet rug bunched up or sitting directly on a wood floor. Flip the rug once the top feels mostly dry so the underside can dry too.
Use fans, open windows, or a dehumidifier indoors. The rug should be completely dry before you place it back under furniture. A damp rug can develop odors or microbial growth, especially in humid rooms. If it still smells musty after drying, it probably was not dried fast enough or thoroughly enough.
How Often Should You Clean a Large Area Rug?
Vacuum large area rugs at least once a week, and more often in homes with pets, kids, shoes indoors, or heavy foot traffic. Rotate the rug every few months so wear and sunlight exposure are more even. Spot clean spills immediately. Deep clean most everyday rugs every 12 to 18 months, or sooner if the rug looks dull, smells stale, or has visible traffic lanes.
Wool and delicate rugs may benefit from professional cleaning every one to three years, depending on use. Entryway rugs, dining room rugs, and pet-favorite rugs usually need attention more often than the decorative rug in a quiet guest room.
Common Mistakes to Avoid
Using Too Much Water
Large rugs can take a long time to dry. Too much water can soak the backing, loosen adhesives, encourage mildew, or cause dyes to bleed. Use only the amount of moisture the rug can safely handle.
Scrubbing Stains Like You’re Sanding a Deck
Scrubbing can damage fibers and push stains deeper. Blot, lift, rinse, and repeat. Your rug is not a cast-iron pan.
Skipping the Colorfast Test
A hidden colorfast test takes two minutes and can prevent a very dramatic rug tragedy. Always test water and cleaner before treating a visible area.
Putting Furniture Back Too Soon
Furniture legs can trap moisture and leave dents, rust marks, or stains. Wait until the rug is fully dry, then replace furniture. Use furniture coasters if needed.
Special Tips for Different Rug Materials
Synthetic Rugs
Synthetic area rugs are usually the easiest to clean at home. Many can handle mild shampoo, careful rinsing, and outdoor drying. Still, check the backing and care label first.
Wool Rugs
Wool is durable but sensitive to harsh chemicals and overwetting. Vacuum regularly, blot spills quickly, and use wool-safe products. For full washing, professional cleaning is often the smartest choice.
Jute and Sisal Rugs
Natural fiber rugs dislike moisture. Vacuum frequently, rotate often, and treat spills immediately with minimal liquid. Do not hose them down.
Shag Rugs
Shag rugs hide crumbs like tiny carpet forests. Use suction-only vacuuming or an upholstery attachment, shake them outside when possible, and avoid aggressive beater bars that can pull fibers.
Extra Experience-Based Advice for Cleaning a Large Area Rug
After cleaning more than a few large area rugs, one lesson becomes obvious: preparation matters more than muscle. The first instinct is often to grab soap and start scrubbing, but the best results usually come from removing dry dirt first. A rug that has been thoroughly vacuumed and shaken is already halfway cleaner before water touches it. This is especially true in dining rooms, where crumbs migrate deep into the pile, and in living rooms, where pet hair weaves itself into the fibers like it signed a long-term lease.
Another practical tip is to plan your drying space before washing. Many people successfully wash the rug, then realize they have nowhere to dry a heavy, wet, oversized textile. A soaked 8-by-10 rug is not a cute laundry item; it is a floppy beast. Before you begin, check the weather if drying outside, clear a safe railing or patio area, and make sure the rug will not sit in a puddle. If you live in a humid climate, indoor fans and a dehumidifier can make a huge difference.
For homes with pets, odor control is often just as important as stain removal. Vacuuming slowly, treating accidents immediately, and drying thoroughly are the big three. If a pet stain has soaked into the backing, surface cleaning may not be enough. In that case, an enzyme cleaner made for carpets and rugs can help, but always test it first. If odor returns after cleaning, the problem may be deeper than the fibers, and professional cleaning may be needed.
One mistake people make with large area rugs is cleaning only the visible top. The underside matters too. Dust, grit, and allergens settle beneath the rug and grind against the fibers every time someone walks over it. Vacuuming the back of the rug and the floor underneath helps extend the rug’s life. A quality rug pad also helps by reducing friction, improving airflow, and keeping the rug from sliding around like it is training for a home Olympics event.
When cleaning in sections, keep the borders slightly overlapping so you do not create clean and dirty stripes. This is especially important on light-colored rugs. Work from the farthest edge toward your exit path so you are not stepping on damp sections. If using a carpet cleaner, move slowly and evenly. Fast passes may feel efficient, but they often leave behind moisture and soil. Follow with extra dry passes whenever possible.
Finally, do not underestimate routine maintenance. A large area rug rarely becomes filthy overnight. It gets there one dusty shoe, one snack crumb, and one “I’ll clean that later” spill at a time. Vacuum weekly, rotate seasonally, treat stains quickly, and schedule deeper cleaning before the rug looks exhausted. Your reward is a fresher room, longer rug life, and fewer moments where you stare at the floor wondering whether that stain is coffee, mud, or modern art.
Conclusion
Cleaning a large area rug is not complicated, but it does require patience and the right method. Start with the care label, remove dry soil, vacuum both sides, spot treat stains, wash gently, rinse thoroughly, extract excess water, and dry the rug completely. The biggest rule is simple: match the cleaning method to the rug material. A synthetic rug may be ready for a careful wash, while wool, silk, antique, jute, and sisal rugs need a gentler approach.
With regular vacuuming, quick spill response, proper drying, and the occasional deep clean, your large area rug can stay fresh, comfortable, and good-looking for years. And yes, your rug will still catch crumbs tomorrow. That is its destiny. But now you know how to fight back.
Note: Always follow the manufacturer’s care label first. When a rug is antique, handmade, silk, heavily stained, or not colorfast, professional cleaning is the safest choice.