
Table of Contents >> Show >> Hide
- Before You Start: What “Fingerprint Analysis” Really Means
- Step 1: Start With the Right Mindset (and a Clean Process)
- Step 2: Identify What Kind of Print You Have
- Step 3: Assess Image Quality and “Usable Area”
- Step 4: Determine Pattern Type (Level 1 Detail)
- Step 5: Find Key Landmarks (Core, Delta, and Ridge Flow)
- Step 6: Map Minutiae (Level 2 Detail)
- Step 7: Look for Additional Ridge Features (Beyond Minutiae)
- Step 8: Compare Systematically (Don’t Cherry-Pick)
- Step 9: Account for Distortion (Because Fingers Are Not Stamps)
- Step 10: Evaluate the Findings (Identification, Exclusion, or Inconclusive)
- Step 11: Document Like Someone Else Will Read It (Because Someone Should)
- Step 12: Verify the Work (The “V” in ACE-V Is Not Decorative)
- Common Mistakes (and How Pros Avoid Them)
- Mini Case Study: The Smudgy Glass Scenario
- Conclusion
- Real-World Lessons from the Fingerprint Trenches (Experience-Based Insights, 500+ Words)
Fingerprints are the ultimate “I was here” receipt. They show up on doorknobs, phones, coffee mugs, and basically every surface humanity has ever lovingly smudged. But analyzing fingerprints isn’t a magic zoom-and-enhance montage. Real fingerprint examination is a structured, documented process that balances pattern recognition, careful comparison, and a healthy respect for what a print can’t tell you.
This guide walks you through 12 practical steps used in modern friction ridge (fingerprint) examination, written in plain English, with just enough humor to keep your brain from slipping into “crime show narrator” mode. One important note: if you’re dealing with legal evidence, this work should be done by trained professionals using proper procedures and oversight. Your curiosity is welcome; your DIY evidence handling is not.
Before You Start: What “Fingerprint Analysis” Really Means
In forensic science, fingerprint work is often called friction ridge examination. Examiners typically use a structured workflow known as ACE-V: Analysis, Comparison, Evaluation, and Verification. The goal is to determine whether an unknown print (often a latent fingerprint) and a known print (an exemplar or “tenprint”) can be associated to the same source, excluded, or deemed inconclusive.
Fingerprint detail is often described in “levels”:
- Level 1: Overall ridge flow and pattern type (loops, whorls, arches).
- Level 2: Minutiae (ridge endings, bifurcations, dots, enclosures) and their spatial relationships.
- Level 3: Fine features (pores, ridge edge shapes, scars), when image quality allows.
Your job in analysis is not to “find a match at all costs.” It’s to be systematic: assess quality, identify meaningful features, compare those features carefully, and document everything so another qualified person can follow your logic.
Step 1: Start With the Right Mindset (and a Clean Process)
Think like a scientist, not a contestant on a game show
Fingerprint examination is evidence-based decision-making. That means you begin by controlling variables: good lighting, proper image handling, consistent viewing tools, and meticulous notes. If you’re in a professional setting, it also means chain of custody, case documentation, and quality assurance practices.
Practical tip: When you first open a print image, resist the urge to “hunt” for a match. Your first task is to understand what you’re looking atclarity, distortion, and usable areabefore you ever compare it to anything else.
Step 2: Identify What Kind of Print You Have
Not all fingerprints arrive looking like a perfect inked stamp. In the real world, you’ll commonly see:
- Latent prints: invisible or barely visible residue impressions (often partial, messy, or both).
- Patent prints: visible prints made in a substance (like grease, ink, or blood).
- Plastic prints: 3D impressions in soft materials (like wax or putty).
Knowing the print type helps you interpret artifacts. For example, a plastic impression may show ridge depth and shape, while a latent print might be partial and dependent on how it was developed or photographed.
Step 3: Assess Image Quality and “Usable Area”
Quality first. Confidence later.
Before comparing anything, evaluate whether the print contains enough clear detail to support an opinion. Look for:
- Clarity: Are ridges distinct from furrows (valleys), or is everything a gray mush?
- Continuity: Do ridges flow cleanly, or do they break due to smears or surface texture?
- Distortion: Is the print stretched, compressed, doubled, or twisted by motion/pressure?
- Background noise: Does the surface pattern (wood grain, fabric weave) compete with ridge detail?
A high-quality print can support Level 2 (and sometimes Level 3) detail. A low-quality print may only support broad pattern observationsor it may be unsuitable for comparison altogether. Calling a print “inconclusive” is not a failure; it’s often the most honest outcome.
Step 4: Determine Pattern Type (Level 1 Detail)
Pattern type is the big-picture ridge flow. The classic categories are:
- Loops: ridges enter from one side, curve, and exit the same side.
- Whorls: circular or spiral ridge flow (often with two deltas).
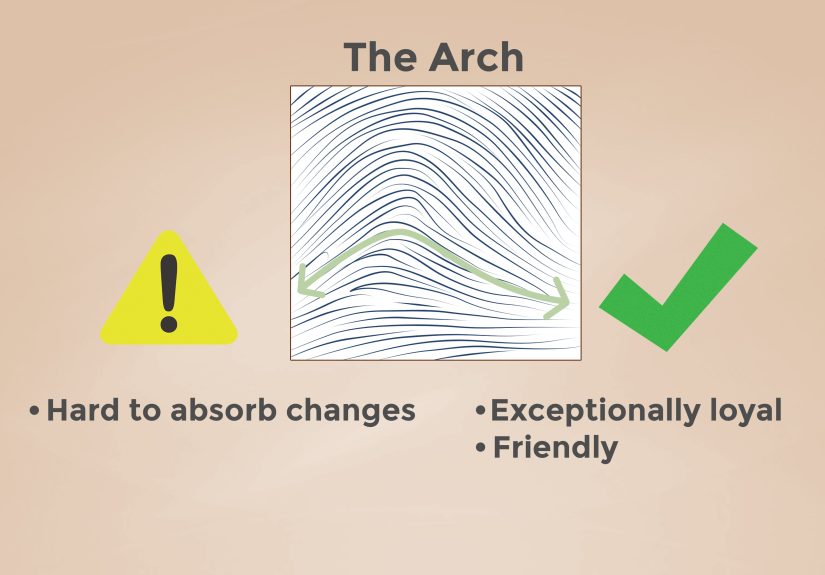
- Arches: ridges enter one side and exit the other, rising in the middle (plain or tented).
Pattern type helps you orient the print and narrow searches in systems like AFIS (Automated Fingerprint Identification System), but it rarely proves identity by itself. Think of it like saying, “The suspect drives a sedan.” Helpful? Yes. A unique ID? Not even close.
Step 5: Find Key Landmarks (Core, Delta, and Ridge Flow)
Landmarks help you consistently describe and compare a print. Common landmarks include:
- Core: the approximate center of the pattern area (often near the innermost recurve in a loop).
- Delta: a triangular region where ridge flow diverges (commonly seen in loops and whorls).
- Ridge count and tracing: sometimes used for classification and orientation support.
Even if a latent print is partial, noticing ridge flow direction and any hint of a delta can prevent basic orientation mistakes (like comparing a rotated print and calling differences “exclusions”).
Step 6: Map Minutiae (Level 2 Detail)
This is where the “fingerprint identity” magic actually lives
Minutiae are small ridge events. The most common are:
- Ridge endings (a ridge stops).
- Bifurcations (a ridge splits into two).
- Dots/islands (very short ridges).
- Enclosures/lakes (a ridge splits and rejoins).
When you map minutiae, focus on:
- Type: ending, bifurcation, etc.
- Position: where it sits relative to other minutiae and ridge flow.
- Orientation: the direction the ridge is running at that point.
- Spatial relationships: distance and angles between features (the “constellation” effect).
A single minutia is not persuasive. A consistent cluster of minutiae with the same relationships is where comparisons become meaningful.
Step 7: Look for Additional Ridge Features (Beyond Minutiae)
Modern friction ridge work may consider more than “points.” Depending on quality and standards used, examiners can note:
- Ridge edge shape (straight, wavy, notched).
- Ridge width and contour patterns in local areas.
- Creases, scars, and permanent features (helpful, but can also distort ridge flow).
- Pores (Level 3 detail) when resolution supports it.
The key is to use features that are clear, repeatable, and not artifacts. If a “feature” disappears when you zoom out, change lighting, or compare another capture, it may be noisenot information.
Step 8: Compare Systematically (Don’t Cherry-Pick)
Comparison is a process, not a vibe
In the Comparison phase of ACE-V, you compare the unknown print and the known exemplar side-by-side:
- Align orientation (pattern flow, core/delta hints, and ridge direction).
- Compare ridge flow in corresponding regions.
- Compare minutiae clusters (not one-off points).
- Compare relationships (sequence and spacing of features).
A practical way to avoid bias is to start by analyzing the latent print on its own, documenting features and quality, then analyzing the exemplar, and only then performing side-by-side comparison. This helps prevent your brain from “seeing” features that aren’t actually supported by the print.
Step 9: Account for Distortion (Because Fingers Are Not Stamps)
Fingers are flexible. Surfaces are textured. People move. That means friction ridge impressions can be distorted by:
- Pressure (too hard = smeared ridges; too light = faint ridges).
- Twist or lateral motion (stretched or doubled ridge paths).
- Surface curvature (bottles, doorknobs, steering wheels).
- Development/capture artifacts (overexposure, glare, compression).
Distortion doesn’t automatically kill a comparison. But it changes what you can rely on. In a distorted area, you may trust broader ridge flow more than tiny minutiae, or you may treat certain features as “present but questionable.”
Step 10: Evaluate the Findings (Identification, Exclusion, or Inconclusive)
In the Evaluation phase, you decide what the comparison supports:
- Identification (source association): the agreement of detail is sufficient, and there is no unexplained disagreement in corresponding areas.
- Exclusion: there is clear, significant disagreement in corresponding areas that cannot be explained by distortion or artifacts (and the correct region is being compared).
- Inconclusive: not enough information to identify or exclude, or mixed quality prevents a reliable call.
If you only remember one thing, make it this: inconclusive is a valid result. Forcing certainty from weak data is how errors happen.
Step 11: Document Like Someone Else Will Read It (Because Someone Should)
Fingerprint analysis isn’t complete until it’s documented clearly enough for technical review and courtroom explanation. Strong documentation typically includes:
- What was examined (images, lifts, cards, digital captures).
- Observed quality (limitations, distortion, unclear regions).
- Features relied upon (minutiae clusters, ridge flow regions, notable Level 3 detail if used).
- Your conclusion and the reasoning behind it.
- Any tools or methods used (magnification, software, imaging stepswhere relevant and permitted).
Bonus reality check: documentation protects everyone. It helps reviewers, investigators, juries, and the examiner (yes, you) understand exactly why a conclusion was reached.
Step 12: Verify the Work (The “V” in ACE-V Is Not Decorative)
Verification means an appropriately qualified second examiner reviews the work to determine whether the conclusion is supported by the data. Labs may have procedures for blind or non-blind verification, technical review, and other quality assurance steps. The point is simple: friction ridge examination is too important to be a solo sport.
Common Mistakes (and How Pros Avoid Them)
1) Falling in love with one “perfect” minutia
A single feature can look convincinguntil you notice the surrounding ridges don’t agree. Pros rely on clusters and relationships, not lone “gotcha” points.
2) Comparing the wrong area
Partial latents can trick you into comparing a similar-looking region that isn’t actually the same part of the finger. Always re-check ridge flow and landmarks before treating differences as exclusions.
3) Ignoring distortion
Distortion is the uninvited guest at every fingerprint party. The fix isn’t denialit’s careful evaluation of what’s reliable.
Mini Case Study: The Smudgy Glass Scenario
Imagine a partial latent print from a drinking glass. The pattern area is incomplete, but ridge flow suggests a loop. The print has one reasonably clear region with about a dozen visible minutiae, while the rest fades into blur.
You compare it to a known exemplar from a suspect. You align the ridge flow and find a cluster where:
- Two bifurcations appear in the same sequence along a ridge path.
- A ridge ending sits at a consistent offset from a nearby enclosure.
- Spacing between three adjacent minutiae stays proportional, even though one edge shows slight stretch.
In evaluation, you note the distorted margin and rely primarily on the clearer core region. If there’s no unexplained disagreement in that corresponding area, you may reach an identification. If the agreement is strong but limited in scope, you may reasonably land on inconclusive depending on your lab’s procedures and the sufficiency of detail. The lesson: good calls come from structured reasoning, not heroic confidence.
Conclusion
Learning how to analyze fingerprints is about discipline: assess quality, identify reliable features, compare systematically, evaluate fairly, and verify responsibly. The “secret sauce” isn’t fancy software or TV magicit’s consistent methods, careful documentation, and the courage to say “inconclusive” when the print doesn’t earn a stronger conclusion.
Real-World Lessons from the Fingerprint Trenches (Experience-Based Insights, 500+ Words)
If you talk to people who do friction ridge work for a living, you’ll notice something funny: the most confident examiners are often the quickest to admit uncertainty. That isn’t impostor syndromeit’s competence. One of the most common “aha” moments in training is realizing that fingerprints are not always dramatic. Many are partial, distorted, and annoyingly faint, like a shy ghost that only haunts the left side of the doorknob.
A frequent experience for trainees is learning to slow down. At first, it’s tempting to zoom in and start circling minutiae like you’re drawing a treasure map. But seasoned examiners tend to begin with calm, boring questions: “Is the ridge flow even clear here?” “Do I have enough area to compare?” “Is that a bifurcation, or did the image compression just prank me?” This shiftfrom “feature hunting” to “quality judgment”is a major milestone.
Another real-world lesson is that surfaces are opinionated. Glass can give you gorgeous ridge detail, but it also loves glare. Painted metal might hold prints well, until the texture turns your ridges into a topographic map of sadness. Paper can be cooperative, unless it’s glossy or heavily patterned. Examiners get used to the idea that they’re not just analyzing a fingerprintthey’re analyzing a fingerprint plus the behavior of the surface, the capture method, and sometimes the lighting choices of whoever photographed it. (Yes, lighting can make or break your day.)
People also learn that distortion is not an occasional annoyanceit’s a core fact of life. Fingers bend. Skin stretches. Someone grabs a curved object, twists their hand, and the print politely records that chaos. A common “experience moment” is seeing the same finger produce impressions that look different from one another, even though they’re from the same source. That’s why examiners emphasize relationships among features rather than expecting a perfect overlay.
One of the most helpful habits professionals develop is writing notes that explain what they relied on and what they intentionally ignored. That sounds small, but it matters. If a region is smudged, say so. If a feature is ambiguous, label it as questionable instead of pretending it’s crystal clear. Good examiners don’t just build a case for a conclusionthey also document the limitations that keep them honest.
Then there’s the human side: cognitive bias is real, and labs actively work to reduce it. In practice, examiners often talk about keeping analysis “clean” before comparison, limiting exposure to irrelevant case details, and welcoming verification as a safeguard, not an insult. The vibe is less “I’m right” and more “Let’s prove this is supported by the print.” That culture is part of why ACE-V is treated as a disciplined workflow rather than a catchy acronym.
Finally, an experience-based truth: the best fingerprint work is sometimes the least exciting. It’s the careful exclusion that prevents a wrong suspect from being pursued. It’s the inconclusive call that refuses to overpromise. It’s the well-documented identification that another examiner can review and agree withwithout needing to read your mind. In friction ridge examination, boring and reproducible beats dramatic and fragile every time.






