
Table of Contents >> Show >> Hide
- Why Blanch Cabbage in the First Place?
- What You Need Before You Start
- How to Blanch Cabbage: 10 Steps
- Step 1: Pick the Right Cabbage
- Step 2: Wash It Properly
- Step 3: Decide How You Will Use It
- Step 4: Bring a Large Pot of Water to a Rolling Boil
- Step 5: Make the Ice Bath Before the Cabbage Hits the Water
- Step 6: Add the Cabbage in Small Batches
- Step 7: Time It Carefully
- Step 8: Transfer Immediately to Ice Water
- Step 9: Drain and Dry Thoroughly
- Step 10: Use It or Store It the Smart Way
- Common Mistakes to Avoid
- Best Ways to Use Blanched Cabbage
- Does Blanching Change Flavor?
- Extra Kitchen Experience: What Blanching Cabbage Teaches You
- Final Thoughts
Cabbage is one of those vegetables that quietly waits in your fridge like a dependable friend. It is affordable, versatile, and surprisingly hardworking. Toss it into soups, shred it into slaws, fold it into dumplings, or wrap it around savory fillings for cabbage rolls. But when you want cabbage that is just a little softer, brighter, easier to store, or more freezer-friendly, blanching is the move.
If the word blanch sounds fancy, do not worry. It is basically the culinary version of a quick spa treatment: hot bath, cold plunge, done. In practical terms, blanching cabbage means briefly cooking it in boiling water and then cooling it fast in ice water. This helps preserve color, tame bitterness, soften the leaves, and make the cabbage easier to freeze or use in recipes.
In this guide, you will learn exactly how to blanch cabbage in 10 simple steps, plus when to use it, what mistakes to avoid, and how to get the best results without turning your beautiful cabbage into a soggy, sad pile of boiled confetti.
Why Blanch Cabbage in the First Place?
Blanching cabbage is useful for more than one reason. If you are prepping cabbage for the freezer, blanching helps slow the enzymes that can mess with flavor, texture, and color over time. If you are making cabbage rolls, blanching softens the leaves so they bend instead of cracking like tiny green drywall sheets. If you are planning to sauté, roast, or stir-fry cabbage later, a quick blanch can shorten cooking time and smooth out some of its stronger raw edge.
It also gives cabbage a cleaner, fresher look. The leaves often turn brighter and slightly more tender, which is exactly what you want when texture matters. In short, blanching cabbage is one of those low-effort kitchen tricks that makes you look more organized than you probably feel.
What You Need Before You Start
- 1 head of fresh cabbage: green, red, savoy, or napa all work
- A large pot
- Plenty of water
- A large bowl filled with ice water
- Tongs, slotted spoon, or a strainer
- A cutting board and knife
- Clean kitchen towels or paper towels
Choose a firm, compact head of cabbage with crisp leaves and no obvious mold, slime, or mystery bruises. A cabbage that feels heavy for its size is usually a good sign.
How to Blanch Cabbage: 10 Steps
Step 1: Pick the Right Cabbage
Start with fresh cabbage. Green cabbage is the classic all-purpose choice. Red cabbage works too, though it may bleed some color into the water. Savoy cabbage is more delicate and great for wraps because the leaves soften beautifully. Napa cabbage is tender and excellent for quick cooking.
Whatever type you choose, avoid heads with wilted outer leaves, soft spots, or a funky smell. If your cabbage looks like it has been through an emotional week, pick another one.
Step 2: Wash It Properly
Rinse the cabbage under cool running water. Do not use soap, detergent, or a commercial produce wash. Just water is enough. Remove any damaged or coarse outer leaves first, then rinse again if needed. Since you will be cutting into it, washing before slicing helps reduce the chance of transferring dirt from the outside to the inside.
Step 3: Decide How You Will Use It
This matters because the shape affects how you blanch cabbage.
- For freezing: shred it, cut it into strips, or separate leaves
- For cabbage rolls: keep leaves as intact as possible
- For roasting or sautéing later: wedges can work well
- For soups and stir-fries: rough shreds or chopped pieces are fine
If you are working with a whole head, cut out the core first. Then separate leaves or slice the cabbage into the size you want. Smaller pieces blanch faster and more evenly than giant chunks that act like they own the pot.
Step 4: Bring a Large Pot of Water to a Rolling Boil
Fill a large pot with plenty of water and bring it to a full rolling boil. The classic home-preservation guideline is to use about 1 gallon of water per pound of prepared vegetables. That sounds like a lot, but there is a reason: if you overcrowd the pot, the water temperature drops too much and the cabbage will not blanch evenly.
This is not the moment to be stingy with pot size. Give the cabbage room to move around.
Step 5: Make the Ice Bath Before the Cabbage Hits the Water
Before you blanch a single leaf, fill a large bowl with cold water and plenty of ice. This is called shocking the cabbage, and yes, it sounds dramatic because it is. The purpose is to stop the cooking immediately so the cabbage stays tender-crisp instead of drifting into mush territory.
A good rule is simple: hot water starts the job, ice water stops it.
Step 6: Add the Cabbage in Small Batches
Drop the prepared cabbage into the boiling water in manageable batches. Do not dump the entire head in unless you are working with loose leaves and a very large pot. Small batches help the water return to a boil quickly, which is important for consistent results.
If the water looks confused and stops bubbling for too long, you added too much. Reduce the amount and work in batches. Kitchen patience beats cabbage regret.
Step 7: Time It Carefully
Here is the part where blanching cabbage becomes less “whatever feels right” and more “please use a timer.” For most prepared cabbage meant for freezing, about 1 1/2 minutes is a reliable benchmark. Start timing when the water returns to a boil, not the second the cabbage goes in.
If you are blanching larger cabbage leaves or wedges for a recipe rather than freezer storage, you may go a little longer, usually around 2 to 3 minutes, depending on thickness and how soft you want them. The goal is not fully cooked cabbage. The goal is slightly softened cabbage that still has structure.
If you overshoot the time, your cabbage will move from crisp and useful to limp and apologetic.
Step 8: Transfer Immediately to Ice Water
As soon as the blanching time is up, use tongs, a slotted spoon, or a strainer to move the cabbage into the ice bath. Do not let it sit in the hot water while you answer a text or admire your own efficiency. Prompt cooling is one of the most important parts of the process.
Let the cabbage cool completely. A simple rule of thumb is to cool it for about the same amount of time you blanched it.
Step 9: Drain and Dry Thoroughly
Once cooled, drain the cabbage well. Then spread it on clean towels or paper towels and pat it dry. This step is especially important if you plan to freeze it. Excess water can lead to ice crystals, freezer burn, and cabbage that tastes like it had a rough winter.
If you are using the cabbage right away for a recipe, drying still helps. Less water means better browning, better seasoning, and fewer sad puddles in your pan.
Step 10: Use It or Store It the Smart Way
At this point, your blanched cabbage is ready to go.
- For immediate cooking: use it in stir-fries, soups, sautés, casseroles, or stuffed cabbage
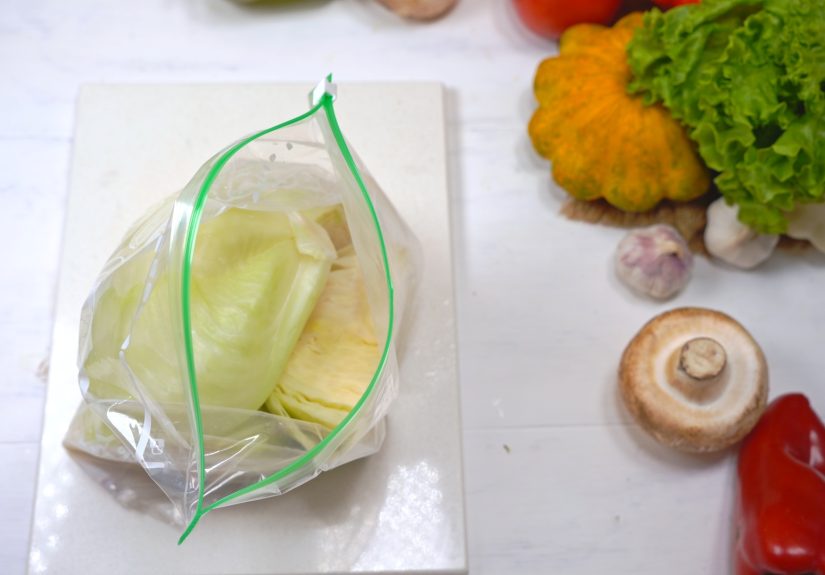
- For freezing: pack it into freezer-safe bags or containers, press out as much air as possible, label it, and freeze
- For meal prep: refrigerate it in an airtight container and use it within a few days for best quality
Frozen blanched cabbage is especially handy for cooked dishes later. It may not be ideal for a super crisp coleslaw, but it works beautifully in soups, braises, stir-fries, and casseroles.
Common Mistakes to Avoid
Overcrowding the Pot
Too much cabbage at once lowers the water temperature and leads to uneven blanching. Work in batches and keep the water boiling.
Skipping the Ice Bath
This is the classic shortcut that backfires. Without the cold-water stop, the cabbage keeps cooking from residual heat.
Blanching Too Long
Blanching is not boiling dinner. It is a quick treatment. Go too long, and the texture starts to collapse.
Freezing It While Wet
Drying matters. Wet cabbage in the freezer is a fast track to clumps of ice and texture problems.
Using Old Cabbage
Blanching improves fresh cabbage. It does not perform miracles on cabbage that is already halfway to compost.
Best Ways to Use Blanched Cabbage
Once you know how to blanch cabbage, your options open up nicely.
- Cabbage rolls: softened leaves wrap around fillings more easily
- Freezer meal prep: portion out cabbage for future soups and stir-fries
- Quick sautés: blanched cabbage cooks faster in a skillet
- Roasted cabbage wedges: blanching first can help soften dense wedges before roasting
- Noodle and dumpling fillings: slightly softened cabbage is easier to mix and fold
Blanched cabbage is one of those quiet prep wins. It does not look flashy, but it saves time and improves texture where it counts.
Does Blanching Change Flavor?
Yes, a little, and usually in a good way. Raw cabbage can taste peppery, sharp, or slightly bitter depending on the variety. Blanching mellows that edge without wiping out its personality. Think of it as turning the volume down, not muting the song.
This is especially helpful if you are serving cabbage to people who claim they “do not like cabbage” but mysteriously enjoy it in dumplings, soups, or skillet dinners. Funny how that works.
Extra Kitchen Experience: What Blanching Cabbage Teaches You
The first time many people blanch cabbage, they expect something dramatic. Steam, triumph, orchestral music, maybe a cooking-show close-up. In reality, it is a humble kitchen task. But like a lot of humble tasks, it teaches you more than you expect.
For one thing, blanching cabbage teaches timing. Not the vague “I think this looks done” kind of timing, but actual, clock-respecting timing. Ninety seconds to a couple of minutes can completely change the result. That makes you more attentive, and honestly, better at cooking in general. You begin to notice texture in a new way. You feel the difference between crisp, tender, limp, and overworked.
It also teaches preparation. When you blanch cabbage, you learn quickly that the ice bath cannot be an afterthought. If the cabbage comes out of the pot and your cold-water bowl is still just a dream in your head, the leaves keep cooking. That tiny lesson sneaks into other parts of kitchen life too. Set up first. Then cook. It is not glamorous advice, but it saves dinner with impressive regularity.
There is also something satisfying about how practical the process feels. A whole head of cabbage can seem like a commitment. It is large. It takes up drawer space. It stares at you with quiet pressure. Blanching turns that giant vegetable into ready-to-use portions. Suddenly, future you has options. Soup night gets easier. Stir-fry night gets faster. Stuffed cabbage becomes possible on a weeknight instead of only when you are feeling unusually ambitious.
Another experience people often notice is how blanching changes their opinion of cabbage itself. Raw cabbage is crunchy and assertive. Blanched cabbage is gentler, more cooperative, and easier to pair with other flavors. Garlic likes it. Butter likes it. Soy sauce likes it. Tomato sauce absolutely has a good thing going with it. A quick blanch does not erase cabbage’s identity; it just helps it play well with others.
For home cooks who freeze produce, blanching cabbage can also feel like a small act of domestic genius. Instead of watching half a head of cabbage linger in the fridge until it becomes a science project, you preserve it while it is still in good shape. That kind of kitchen habit saves money, cuts waste, and makes you feel like the sort of person who has their life together, even if your sock drawer says otherwise.
Then there is the confidence factor. Once you know how to blanch cabbage, other vegetables become less intimidating. Green beans, broccoli, asparagus, leafy greens, peas: the same basic rhythm applies. Boil, shock, dry, store. Cabbage is often a gateway vegetable into smarter meal prep and better freezer habits.
And maybe the biggest experience of all is this: blanching reminds you that simple techniques matter. Not every cooking upgrade requires fancy equipment, expensive ingredients, or restaurant tricks. Sometimes the best improvement is just knowing what to do with a pot of boiling water and a bowl of ice. That is not flashy. It is better. It is useful.
Final Thoughts
If you want an easy kitchen technique that improves texture, makes meal prep easier, and helps preserve cabbage for later, blanching is absolutely worth learning. It is fast, beginner-friendly, and practical. With the right timing, a proper ice bath, and a little drying before storage, you can turn a simple head of cabbage into a flexible ingredient for everything from soups to cabbage rolls.
So the next time a cabbage lands on your counter and dares you to do something interesting with it, you will know exactly where to start. Give it a quick hot bath, a cold plunge, and a well-earned second life.





