
Table of Contents >> Show >> Hide
- Why Recycling Plaster of Paris Is a Little Tricky
- When Plaster of Paris Can Be Reused, Recycled, or Disposed Of
- Easy Ways to Recycle Plaster of Paris: 11 Steps
- Step 1: Identify what kind of plaster waste you actually have
- Step 2: Keep plaster out of sinks, floor drains, and storm drains
- Step 3: Save clean, unused powder in an airtight container
- Step 4: Donate extra plaster instead of throwing it away
- Step 5: Let wet leftovers harden completely
- Step 6: Separate clean gypsum from contamination
- Step 7: Break large cured pieces into manageable chunks
- Step 8: Reuse hardened plaster in creative, low-stakes ways
- Step 9: Check for local gypsum or C&D recycling programs
- Step 10: Use gypsum in soil or other beneficial uses only when local rules allow
- Step 11: Trash the fully hardened remainder the right way
- Common Mistakes to Avoid
- Real-World Experiences With Recycling Plaster of Paris
- Final Thoughts
- SEO Tags
Plaster of Paris is one of those wonderfully dramatic materials that starts as a fluffy powder, turns into a creamy paste, and then hardens like it has a personal grudge against your mixing bowl. It is cheap, useful, and wildly popular for crafts, sculpture, school projects, mold-making, and light repair work. It is also the reason many sinks have seen things they can never unsee.
If you want to recycle Plaster of Paris the smart way, the good news is that you usually have more options than people think. The bad news is that tossing wet plaster in a drain, storm gutter, or regular curbside recycling bin is not one of them. Real Plaster of Paris disposal and gypsum recycling depend on one simple rule: keep the material clean, dry, and separated from contaminants whenever possible.
This guide walks through practical, easy ways to recycle or responsibly reuse Plaster of Paris in real life. That includes saving unused powder, donating extra supplies, separating clean gypsum scraps, finding local construction-and-demolition recyclers, and disposing of the leftovers without turning your plumbing into a limestone-themed escape room. Here are 11 steps that actually make sense.
Why Recycling Plaster of Paris Is a Little Tricky
Plaster of Paris is made from gypsum, a calcium sulfate material that behaves very differently from paper, plastic, glass, or aluminum. Once it sets, it does not belong in your household recycling cart. In many places, clean gypsum from construction or studio work can be diverted into special recycling or beneficial-use streams, but only if it is source-separated and not mixed with paint, glue, fasteners, joint compound, food waste, or mystery garage dust.
That means “recycling Plaster of Paris” usually does not mean tossing it into the blue bin and walking away like a sustainability hero in slow motion. In the real world, it means reducing waste, reusing clean material, donating what you will not use, and sending clean gypsum to the right local program when available. It also means accepting that some plaster, once contaminated, is headed for trash after it has fully hardened.
When Plaster of Paris Can Be Reused, Recycled, or Disposed Of
Best-case material
Clean, dry, uncontaminated plaster or gypsum scraps are the most recyclable. Unopened bags, extra dry powder, and clean construction-style gypsum waste have the highest value because they are easier to donate, reuse, or process through specialty recycling streams.
Middle-ground material
Hardened plaster from art projects, classroom molds, and home crafts may still be reusable in creative ways even if it is not ideal for formal recycling. If it is free from paint, adhesives, glitter explosions, and metal hardware, you may be able to repurpose it or check whether a local C&D recycler accepts it.
Least recyclable material
Wet sludge, sink washout, painted plaster, plaster mixed with glue, plaster fused to wood or fabric, and material contaminated by demolition debris are much harder to recycle. At that point, your goal is no longer “perfect circular economy magic.” Your goal is “responsible handling with minimal mess,” which is still a win.
Easy Ways to Recycle Plaster of Paris: 11 Steps
-
Step 1: Identify what kind of plaster waste you actually have
Before you do anything, sort the material into three categories: unused dry powder, wet leftover mix, and hardened plaster pieces. This matters because each one has a different best option. Dry powder can often be saved or donated. Wet plaster needs to be allowed to set. Hardened plaster may be reusable, recyclable through a local specialty stream, or ready for disposal.
Do not treat every bucket of white dust like it has the same future. One container might still be useful next weekend. Another might be one dramatic sneeze away from becoming a house-wide weather event.
-
Step 2: Keep plaster out of sinks, floor drains, and storm drains
This is the non-negotiable rule. Do not wash Plaster of Paris down the sink, even in small amounts. Wet or dry, plaster and similar cementitious materials can settle, harden, and clog plumbing. They also do not belong in stormwater systems, where they can create pollution and cleanup headaches.
Instead, use a rinse bucket when cleaning tools. Let the solids settle, decant only the clearer water if your local rules allow it, and keep the plaster residue contained so it can dry and harden. Your future self, your landlord, and your plumber will all send silent thank-you notes.
-
Step 3: Save clean, unused powder in an airtight container
If the bag is still usable and the powder is dry, this is the easiest recycling move of all: do not waste it. Transfer Plaster of Paris into a sealed, labeled container if the original bag is torn. Keep it in a cool, dry area away from moisture. Once humidity gets involved, plaster starts losing its charm and sometimes its performance.
Using what you already have is the first and best form of waste reduction. It is not flashy, but neither is paying for the same bag twice.
-
Step 4: Donate extra plaster instead of throwing it away
Have unopened bags or usable supplies you no longer need? Donate them. Schools, theater groups, makerspaces, community art programs, and hobby clubs often appreciate basic sculpture and casting supplies. This is especially smart if you overbought for one project and now have a lonely half-stack of craft ambition sitting in the garage.
Donation works best for dry, clearly labeled, uncontaminated material. If the packaging is damaged, re-bag it neatly, label it honestly, and only give it away if the product is still in good condition. Nobody wants a “mystery white powder starter kit.”
-
Step 5: Let wet leftovers harden completely
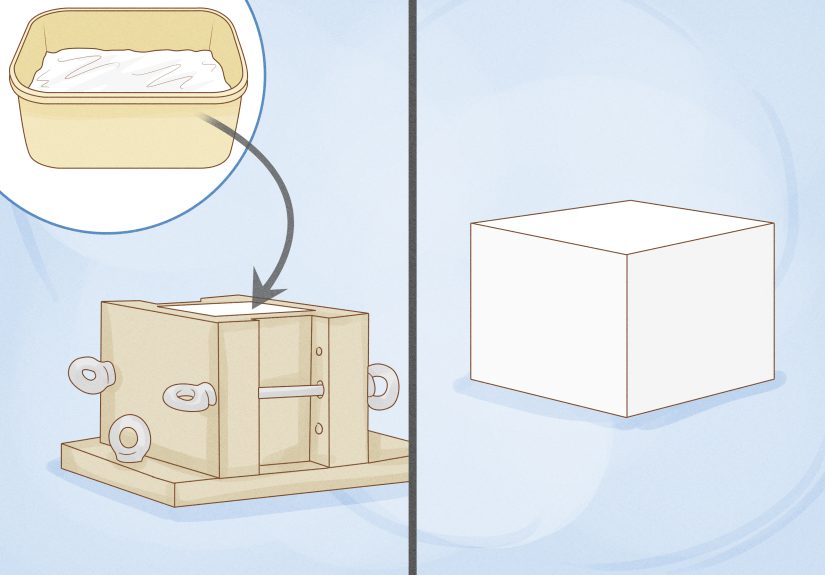
Do not try to “get rid of” wet plaster by diluting it with water. That is how people accidentally create a plumbing fossil. Instead, pour leftovers into a lined tray, flexible tub, or disposable container and let the material set fully. Small amounts often harden quickly, while thick mixes may take longer.
Once the plaster has cured, it becomes much easier to handle. At that point, you can inspect it for reuse, bag it for disposal, or prepare it for a local recycling option if one is available. The key is patience. Not exciting, but neither is calling emergency drain service on a Tuesday.
-
Step 6: Separate clean gypsum from contamination
If your goal is true gypsum recycling, cleanliness matters. Remove obvious contaminants like tape, screws, nails, wire, plastic, paper backing, paint-heavy coatings, adhesives, and wood scraps. Clean gypsum has the best chance of being accepted by a local recycler or beneficial-use program.
This step is especially important for workshop leftovers, mold-making debris, and renovation scraps. Source-separated material is far more valuable than mixed debris. Once plaster gets blended with everything else in a cleanup pile, its recycling odds usually drop fast.
-
Step 7: Break large cured pieces into manageable chunks
After plaster is fully hardened, break oversized pieces into smaller, manageable sections. This makes storage, transport, and sorting much easier. Use gloves, eye protection, and a dust mask if there is any chance of airborne dust. Plaster dust is irritating, and nobody wants a cleanup session that feels like a low-budget snowstorm inside the garage.
Bag or box the pieces securely. If you are transporting material to a recycling facility, keeping it dry and contained improves your chances of having it accepted.
-
Step 8: Reuse hardened plaster in creative, low-stakes ways
Not every piece of cured plaster needs to be “recycled” through an industrial channel to avoid waste. Clean hardened pieces can be repurposed for practice carving, texture samples, scenic mockups, display bases, material tests, classroom demonstrations, or small non-structural craft applications. Artists and makers often keep a bin of offcuts for this exact reason.
This is one of the easiest ways to reduce Plaster of Paris waste at home. You are not turning it back into brand-new plaster, but you are extending its useful life. That still counts as smart material management, and frankly, it is a lot more realistic for most households.
-
Step 9: Check for local gypsum or C&D recycling programs
If you have a decent amount of clean plaster or gypsum-based material, look for local construction-and-demolition recycling facilities, drywall recyclers, or county solid-waste programs that accept gypsum. Search terms like “gypsum recycling near me,” “drywall recycling,” or “construction debris gypsum disposal” usually get you closer than a generic household recycling search.
Call before you haul. Ask whether they accept small quantities, whether the material must be dry, and whether painted or mixed material is rejected. Some facilities only want clean new scrap. Others accept more, but with conditions. A two-minute phone call can save you a very annoying trunk full of rejected white rocks.
-
Step 10: Use gypsum in soil or other beneficial uses only when local rules allow
Yes, clean gypsum can have beneficial uses. In some regulated settings, recovered gypsum is used in agriculture, cement-related products, or even new wallboard manufacturing. But this is not a free pass to scatter every broken art project across your backyard like eco-confetti.
If you are considering any soil-amendment use, make sure the material is truly clean and that local regulations allow it. Painted, glued, waterproofed, or otherwise contaminated material is a bad candidate. For homeowners, the safest rule is simple: if you cannot verify what is in it, do not put it in the garden.
-
Step 11: Trash the fully hardened remainder the right way
Sometimes the most responsible answer is also the least glamorous one. If the plaster is contaminated, too small in quantity for specialty recycling, or not accepted locally, let it harden completely, bag it securely, and place it in the trash according to your local waste rules. That is still far better than washing it away or tossing wet sludge into a curbside bin.
Responsible disposal is not failure. It is what good waste management looks like when reuse and recycling are no longer realistic options. Sustainability is not about pretending every material becomes a butterfly. Sometimes it becomes a bagged, hardened lump that leaves your house without damaging pipes, soil, or recycling loads. That is still progress.
Common Mistakes to Avoid
Assuming all white powder is recyclable
Not necessarily. Clean gypsum is one thing. Plaster mixed with paint, glue, or demolition debris is another.
Trying to rehydrate set plaster back into fresh plaster
Once Plaster of Paris has cured, adding water does not magically return it to its original easy-to-use state. True closed-loop recycling exists, but it is a specialized process, not a weekend kitchen trick.
Leaving loose dust everywhere
Plaster dust can irritate eyes and lungs, and it makes cleanup much harder. Work dry when you must, but clean smart and keep dust contained.
Treating local rules like optional reading
Waste programs vary by city, county, and facility. One area may accept clean gypsum. Another may refuse it unless it is from a specific source. Always check first.
Real-World Experiences With Recycling Plaster of Paris
Anyone who has worked with Plaster of Paris more than once usually learns the same lesson in a very hands-on way: the material is cheap, forgiving at first, and then suddenly not forgiving at all. A lot of first-time users mix too much because the dry powder looks harmless in the bucket. Ten minutes later, they are holding a container of rapidly setting optimism and making eye contact with the sink like it might solve everything. It will not.
In classrooms, studios, theater shops, and home craft rooms, the biggest improvement usually comes from changing the cleanup routine, not the material itself. People who switch to lined tubs, rinse buckets, and “let it set first” habits waste less plaster and avoid a shocking amount of mess. The setup is simple, but the effect is huge. Instead of scraping hardened plaster off tools with the emotional energy of a defeated archaeologist, they can pop cured leftovers out of a flexible container and sort them calmly.
Another common experience is discovering that “extra material” is often a planning problem. Once makers start measuring water and powder more carefully, they stop producing random leftover slabs the size of paving stones. That sounds obvious, but it is one of the most effective recycling strategies available. The less waste you create, the less you have to donate, crush, bag, transport, or explain to confused family members who thought the garage floor was a floor.
People who work on repeated projects also learn that keeping a reuse bin is surprisingly effective. Small cured samples can help test paint colors, carving techniques, textures, mounting ideas, or classroom demos. Unopened or lightly used bags can move quickly through donation channels when they are still dry and clearly labeled. What looked like trash on Friday becomes useful inventory on Monday.
The biggest frustration usually happens when someone assumes local recycling will be simple. Sometimes it is. Sometimes it absolutely is not. A facility may accept clean gypsum board but reject painted plaster. Another may take construction scrap but not household craft leftovers. That is why experienced DIYers and artists eventually become phone-call people. They stop guessing, start asking, and avoid unnecessary trips with dusty cargo that nobody will accept.
So the real experience of recycling Plaster of Paris is not glamorous. It is practical. It is a mix of better measuring, better cleanup, better storage, and a healthy respect for local waste rules. But once you get that system down, the process becomes much easier. You waste less money, you keep more material out of the drain, and you stop treating every leftover batch like a tiny household emergency. That alone is worth the effort.
Final Thoughts
If you want the easiest way to recycle Plaster of Paris, think in layers. First, buy and mix only what you need. Second, save or donate dry usable material. Third, let wet leftovers harden and keep them out of drains. Fourth, separate clean gypsum and check for local recycling or construction-debris options. Finally, dispose of contaminated leftovers only after they are fully hardened.
That approach is practical, cleaner, and much more realistic than pretending every plaster project ends in perfect zero-waste glory. Plaster of Paris may be dramatic, but your cleanup routine does not have to be. With a little planning, you can handle gypsum waste responsibly, protect your plumbing, and keep usable material in circulation longer.






