
Table of Contents >> Show >> Hide
- Why Make a DIY Bunny Pen Holder From a Plastic Bottle?
- Materials You Will Need
- Choosing the Right Plastic Bottle
- Safety Note Before You Start
- Step-by-Step Instructions
- Creative Design Ideas
- Common Mistakes and How to Avoid Them
- How to Use Your Bunny Pen Holder
- Why This Craft Is Great for Kids
- Cleaning and Care Tips
- Experience: What I Learned Making a DIY Bunny Pen Holder With a Plastic Bottle
- Conclusion
Some craft projects look cute but secretly require a hardware store, three emotional support coffees, and a mysterious tool your garage has never met. This is not one of them. A Diy Bunny Pen Holder With Plastic Bottle is simple, budget-friendly, kid-friendly with adult help, and charming enough to make your desk look like it has its life togethereven if your inbox strongly disagrees.
This project turns an empty plastic bottle into a cheerful bunny pencil cup for pens, markers, colored pencils, scissors, paintbrushes, or tiny desk items that otherwise migrate into the drawer abyss. It is a great recycled craft for spring, Easter, back-to-school season, classroom activities, homeschool art time, or a rainy afternoon when everyone has announced they are “bored” with dramatic theatrical commitment.
Best of all, this DIY bunny pen holder proves that upcycling does not have to look like an emergency art project. With a clean bottle, acrylic paint, paper or foam ears, a little glue, and a few smart finishing touches, you can create a sturdy desk organizer that is practical, adorable, and surprisingly giftable.
Why Make a DIY Bunny Pen Holder From a Plastic Bottle?
A plastic bottle is lightweight, easy to cut, easy to paint, and already shaped like a container. That means half the engineering is done before you even pick up the scissors. Instead of buying another pencil cup, you can reuse something already in your home and give it a second job. The bottle gets promoted from “trash candidate” to “desk mascot.” Not bad for a former water bottle.
This craft is also wonderfully flexible. You can make a white bunny with pink ears, a pastel Easter bunny, a gray classroom bunny, a cartoon bunny with giant eyelashes, or a minimalist bunny for a modern desk. Children can decorate it with stickers and pom-poms, while adults can give it a cleaner look with matte paint, felt details, and a sealed finish.
As a desk organizer, the bunny pen holder helps reduce clutter. Pens stand upright, markers become easier to find, and scissors stop disappearing under notebooks like they are training for a spy movie. For children, it also creates a sense of ownership over their study space. When they make the organizer themselves, they are more likely to use it.
Materials You Will Need
You do not need fancy supplies to make this recycled bunny pencil holder. Most materials are common household or classroom craft items.
- One clean plastic bottle, preferably 16 to 20 ounces
- Permanent marker or washable marker for tracing
- Scissors
- Craft knife or utility knife for adult use only
- White acrylic paint or spray paint
- Pink acrylic paint, felt, foam sheet, or colored paper
- Black marker or paint pen
- Craft glue, tacky glue, or low-temperature hot glue with supervision
- Sandpaper or nail file for smoothing edges
- Cardboard, felt, or foam for the base
- Optional: googly eyes, pom-pom tail, ribbon, yarn, stickers, sealant
Choosing the Right Plastic Bottle
The best bottle for this DIY bunny pen holder is one that has a stable bottom and a smooth middle section. A bottle with deep ridges can still work, but it may be harder to paint neatly. A round water bottle creates a classic pencil cup shape. A wider sports drink bottle creates a sturdier holder for markers, rulers, and scissors.
Before crafting, remove the label and wash the bottle thoroughly. Sticky residue can make paint peel or glue refuse to cooperate, which is rude but common. If the label leaves adhesive behind, rub it with a little cooking oil, dish soap, or rubbing alcohol, then rinse and dry completely. Paint sticks much better to a clean, dry surface.
Safety Note Before You Start
Note: Adults should handle the first cut into the bottle because plastic can bend, slip, or create sharp edges. Children can help trace, paint, decorate, and glue lightweight pieces. If using hot glue, keep the glue gun on a protected surface and never let young children use it unsupervised. For a classroom or younger-child version, use tacky glue, glue dots, or double-sided tape instead.
Step-by-Step Instructions
Step 1: Wash, Dry, and Prepare the Bottle
Start with a clean, dry bottle. Remove the cap, label, and any sticky glue marks. Let the bottle air-dry fully. If water remains inside, it can drip out later and turn your painting session into a tiny weather event.
For better paint grip, lightly scuff the outside of the bottle with sandpaper. You do not need to sand aggressively. A gentle roughening gives the paint something to hold onto, especially if the bottle is glossy.
Step 2: Draw the Bunny Shape
Use a marker to draw the cutting line around the bottle. The front should be lower, forming the cup opening, while the back can rise into two bunny ears. Think of it as drawing a simple crown shape: low curve in front, tall ears in back.
A good height is about 4 to 5 inches for the main cup. Make the ears taller, but not so tall that they flop or make the holder unstable. Rounded ears are easiest to cut. Pointy or super-thin ears may bend, crease, or look less bunny and more confused cactus.
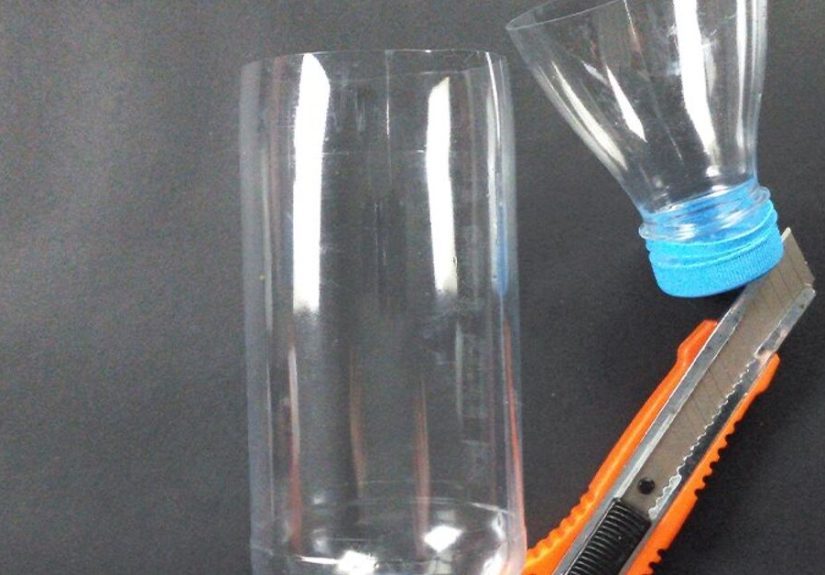
Step 3: Cut the Bottle
An adult should make the first opening with a craft knife. After that, scissors can usually cut along the traced line. Cut slowly, turning the bottle as you go. Do not worry if the edge is not perfect. Handmade projects are allowed to have personality.
Once cut, smooth the edge with sandpaper or a nail file. You can also cover the rim with washi tape, ribbon, felt, or a thin strip of foam. This makes the holder safer and gives it a polished finish.
Step 4: Add a Base for Stability
Plastic bottles are lightweight, so they can tip when filled with heavy pens or scissors. To fix this, glue the bottle bottom to a circle of cardboard, foam board, or thick felt. Make the base slightly wider than the bottle.
For extra stability, place a few small stones, glass gems, or dry beans inside the bottom before adding supplies. If making this for very young children, seal any small weights under a glued cardboard insert so loose pieces do not become a choking hazard.
Step 5: Paint the Bunny Body
Paint the outside of the bottle with white acrylic paint. Two thin coats usually look better than one thick coat. Let the first coat dry before adding the second. Thick paint may streak, drip, or peel like it has somewhere better to be.
If you prefer a faster finish, spray paint can work, but it should only be used by adults in a well-ventilated area. For kids, acrylic craft paint and a foam brush are easier and safer. Matte white creates a soft bunny look, while glossy white gives a toy-like finish.
Step 6: Decorate the Ears
Paint the inside of each ear pink, or glue on pink felt, paper, or foam. Foam sheets are great because they add dimension and hide uneven cuts. Felt gives the bunny a soft handmade look. Paper works well for a quick classroom version.
If the ears bend backward, reinforce them by gluing a second layer of foam or cardstock behind them. You can also tape a toothpick or craft stick behind each ear, but only if the holder will be used by older children or adults.
Step 7: Create the Bunny Face
Use a black marker or paint pen to draw two eyes, a small nose, whiskers, and a smiling mouth. Keep the face simple. A tiny triangle nose and three whisker lines on each side are enough to create a recognizable bunny.
For a playful look, add googly eyes. For a softer look, paint closed eyes with little lashes. For a kawaii-style bunny, make the eyes round and add pink cheeks. A cotton swab dipped in pink paint makes perfect blush circles.
Step 8: Add the Finishing Details
Now comes the fun part: personality. Tie a ribbon around the bunny like a bow tie. Glue a pom-pom to the back for a tail. Add paper flowers, tiny carrots, name labels, glitter accents, or stickers. If this is a school project, let each child write their name on the base.
If the holder will be used daily, brush on a thin coat of clear craft sealer after the paint dries. This helps protect the design from fingerprints, pencil marks, and the general chaos of desk life.
Creative Design Ideas
Classic White Easter Bunny
Use white paint, pink ears, black eyes, and a pastel ribbon. This version is perfect for Easter baskets, spring classroom crafts, or a cheerful homework desk.
Rainbow Bunny Pen Holder
Paint the body in soft rainbow stripes or pastel color blocks. Use matching markers inside the holder for a bright art-table display.
Minimalist Desk Bunny
Paint the bottle matte white and draw only closed eyes, a tiny nose, and thin whiskers. Add a neutral beige or gray bow for a cleaner office-friendly look.
Storybook Bunny
Give the bunny rosy cheeks, a felt vest, tiny paper buttons, and a carrot name tag. This makes a sweet handmade gift for teachers, librarians, or young readers.
Family Bunny Set
Use bottles of different sizes to make a bunny family. A large bottle can hold markers, a medium bottle can hold pens, and a small bottle can hold paper clips or erasers.
Common Mistakes and How to Avoid Them
Cutting the cup too short: If the holder is too shallow, pens will fall out. Keep the main body at least 4 inches tall for regular pens and pencils.
Skipping edge smoothing: Freshly cut plastic can be sharp. Sand the rim or cover it with tape, felt, or ribbon.
Painting over sticky residue: Label glue can cause bumps and peeling. Clean the bottle thoroughly before painting.
Using too much glue: Hot glue can warp thin plastic, and liquid glue can slide before it dries. Use small amounts and hold pieces in place for a few seconds.
Forgetting stability: A light bottle can tip over when loaded with scissors or markers. Add a wider base or a little weight inside the bottom.
How to Use Your Bunny Pen Holder
This DIY bunny pen holder is more than decoration. Use it on a child’s homework desk to separate pencils from markers. Place it on a craft table to hold paintbrushes. Keep it near the phone for quick notes. Use it in a classroom art station, office cubicle, dorm room, or homeschool supply shelf.
It also works as a small gift container. Fill it with colored pencils, stickers, mini erasers, or wrapped candy for a spring party favor. Teachers can use it as a reward cup. Parents can use it to organize family command-center supplies. Creative adults can even make a set for craft fairs or handmade holiday gifts.
Why This Craft Is Great for Kids
A recycled plastic bottle craft teaches more than cutting and painting. It encourages children to look at everyday materials differently. A bottle is not only a bottle; it can become a bunny, a planter, a rocket, a vase, or a pencil holder. That kind of thinking builds creativity and problem-solving skills.
The project also supports fine motor practice. Children paint small areas, place decorations, draw facial features, and decide how to arrange colors. They learn patience while paint dries. They learn planning when choosing the height and shape. They learn resilience when one ear looks slightly different from the other and the world somehow continues spinning.
Cleaning and Care Tips
To keep the bunny pen holder looking fresh, wipe it with a dry or slightly damp cloth. Avoid soaking it in water, especially if it has paper, felt, or pom-pom decorations. If the inside collects pencil dust, remove the supplies and shake the holder gently over a trash can.
If the paint chips, touch it up with a small brush. If a ribbon or ear comes loose, reattach it with craft glue. The beauty of a handmade organizer is that repairs are easy. There is no warranty department, but there is probably glue in the drawer.
Experience: What I Learned Making a DIY Bunny Pen Holder With a Plastic Bottle
The first time I made a bunny pen holder from a plastic bottle, I assumed the project would be almost too easy. Bottle, scissors, paint, facedone. Five minutes, maybe ten if I got fancy. Naturally, the bottle had other plans. The label peeled off in one heroic strip, but the adhesive stayed behind like it had signed a long-term lease. That was lesson one: clean the bottle properly before doing anything artistic. A few minutes of scrubbing saved the paint from turning lumpy later.
Lesson two was about height. I cut my first holder too short because it looked cute as a tiny bunny cup. Then I put pens in it, and they leaned out like they were trying to escape. A good bunny pen holder needs enough body height to support the supplies. Around 4 to 5 inches works well for pencils, pens, and markers. If you want to store scissors or rulers, go taller and use a wider bottle.
The ears were the most charming part and also the easiest part to overthink. My first pair of ears was tall and dramatic, like a bunny auditioning for Broadway. They looked adorable until they bent backward. Cardstock or foam reinforcement fixed the problem. After that, I started making the ears rounded and medium-height, which looked better and lasted longer.
Painting also taught me patience, which is annoying but useful. One thick coat of acrylic paint looked streaky and took forever to dry. Two thin coats looked smoother and felt more durable. If the bottle surface was lightly sanded first, the paint behaved much better. Without sanding, paint sometimes scratched off when I handled the bottle too soon. The best finish came from sanding lightly, painting thin coats, and letting each coat dry fully.
The biggest practical improvement was adding weight to the bottom. Empty plastic bottles are light, and a handful of markers can make them tip. A cardboard base helped, but a few small stones sealed inside the bottom made the holder feel much sturdier. For a child’s version, I prefer gluing a cardboard circle over the weights so nothing loose can fall out.
Decoration is where the project becomes personal. Kids usually love googly eyes, bright cheeks, stickers, and big bows. Adults often prefer simple painted eyes and a clean ribbon. Both versions work. The funny thing is that the less perfect the bunny looks, the more personality it seems to have. A slightly crooked smile can make it look cheerful. Uneven whiskers can make it look curious. Handmade charm is not a flaw; it is the entire point.
After using the bunny holder on a desk, I noticed it did exactly what a good craft should do: it made organization feel fun. Pens were easier to grab, the desk looked friendlier, and the recycled bottle became a conversation piece. It is a small project, but it changes how you see ordinary materials. The next empty bottle no longer looks like waste. It looks like a bunny waiting for ears.
Conclusion
A Diy Bunny Pen Holder With Plastic Bottle is the kind of craft that checks all the right boxes: affordable, useful, creative, customizable, and cute enough to make even a messy desk look intentional. It transforms a simple plastic bottle into a practical organizer while giving kids and adults a chance to reuse materials in a hands-on way.
Whether you make it for Easter, back-to-school season, a classroom project, a handmade gift, or your own desk, this bunny pencil holder is easy to personalize and fun to use. Start with a clean bottle, cut safely, smooth the edges, paint in thin coats, add a stable base, and decorate with confidence. In the end, you will have a sweet little bunny ready to guard your pens with silent, floppy-eared dedication.





