
Table of Contents >> Show >> Hide
- What is thoracentesis?
- Why would someone need a thoracentesis?
- How to prepare for a thoracentesis
- What happens during a thoracentesis? Step-by-step
- What happens to the fluid?
- Risks and possible complications of thoracentesis
- Recovery and aftercare
- Thoracentesis vs. other chest procedures
- Living through thoracentesis: real-world experiences and tips
If you have ever heard a doctor say, “We need to tap your chest,” they were probably talking about
thoracentesis. It sounds dramatic, but in modern medicine this is a common, carefully controlled
procedure that can help you breathe easier and give your care team crucial diagnostic information. Think of it as
both a pressure release valve and a detective tool for the space around your lungs.
In this guide, we will walk through what thoracentesis is, why it is done, what actually happens during the
procedure, the most important risks to know about, and what recovery is like. We will also share practical, real-world
experiences to help you feel more prepared and less anxious if you or a loved one has this procedure on the calendar.
What is thoracentesis?
Thoracentesis (sometimes called thoracocentesis) is a procedure where a healthcare
professional uses a needle or thin catheter to remove fluid from the pleural space the thin gap
between the lung and the inside of the chest wall. Under normal circumstances, only a tiny amount of fluid sits there
to lubricate your breathing. When something goes wrong, that space can fill with fluid, making it hard for the lung to
expand and for you to catch your breath.
Thoracentesis can be:
-
Diagnostic: A smaller amount of fluid is removed and sent to the lab to figure out why it
accumulated in the first place (for example, heart failure, infection, cancer, autoimmune disease, or liver disease). -
Therapeutic: A larger volume of fluid is drained mainly to relieve symptoms such as shortness of
breath, chest pressure, or cough.
Many patients have both goals at once: the procedure helps them breathe easier and provides valuable clues about the
underlying condition.
Why would someone need a thoracentesis?
The most common reason for thoracentesis is a pleural effusion an abnormal build-up of fluid in the
pleural space. This can happen for many reasons, including:
- Heart failure, where fluid backs up into the lungs and surrounding tissues.
- Pneumonia or other lung infections that cause inflamed, leaky pleural surfaces.
- Cancer, such as lung cancer, breast cancer, or lymphoma that spreads to the pleura.
- Liver disease or kidney disease, which can change fluid balance in the body.
-
Inflammatory or autoimmune conditions, such as lupus or rheumatoid arthritis, that can involve the
pleura.
Less commonly, thoracentesis may be part of the evaluation or management of:
- Hemothorax (blood in the pleural space).
- Chylothorax (lymphatic fluid in the pleural space).
-
Complex or recurrent effusions that come back after treatment and need repeated drainage or a more permanent
solution like a tunneled catheter or pleurodesis.
Your provider will usually confirm that fluid is present with imaging (most often a chest X-ray or ultrasound, and
sometimes CT) before recommending thoracentesis.
How to prepare for a thoracentesis
Preparation is usually straightforward, but it is important for safety. Before the procedure, your healthcare team
will typically:
-
Review your medical history, especially any bleeding disorders, prior lung surgery, or history of
lung collapse. -
Ask about medications, including blood thinners (warfarin, apixaban, rivaroxaban, clopidogrel),
aspirin, and nonsteroidal anti-inflammatory drugs (NSAIDs). Some of these may need to be held or adjusted. -
Order basic blood tests (such as platelet count and clotting studies) if needed to assess bleeding
risk. - Review or obtain imaging, often ultrasound, to locate the fluid and choose the safest entry site.
In many cases, thoracentesis can be done at the bedside or in a procedure room without general anesthesia. You can
usually eat and drink normally unless your provider gives different instructions. Wear comfortable clothing and be
ready to sit up and lean forward during the procedure.
What happens during a thoracentesis? Step-by-step
1. Positioning and marking the site
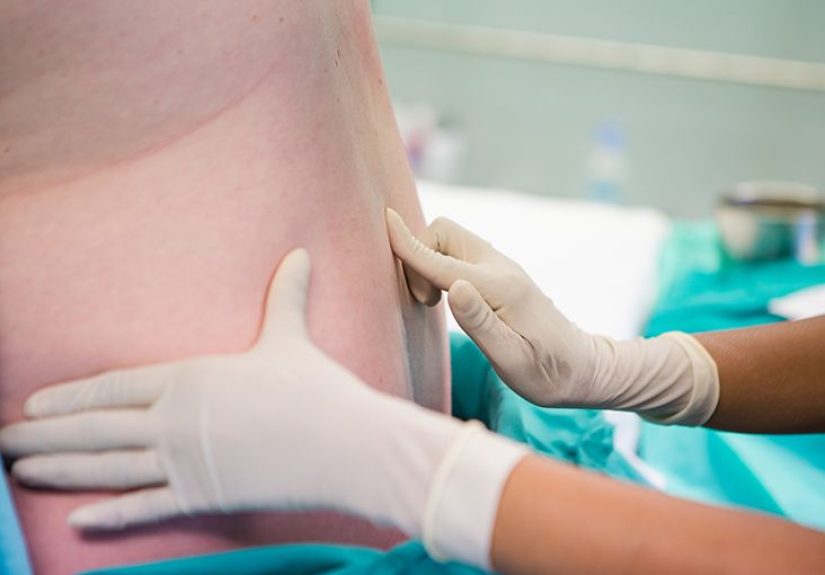
You are typically asked to sit on the edge of the bed or chair, leaning slightly forward with your arms resting on a
table or pillow. This opens up the spaces between your ribs and makes it easier to access the pleural space.
The clinician uses ultrasound or careful physical examination to identify where fluid has collected.
Ultrasound guidance is now standard in many hospitals because it improves success and reduces complications like
puncturing the lung.
2. Cleaning and numbing the area
The skin over the chosen spot is scrubbed with an antiseptic solution to reduce infection risk. Sterile drapes are
placed. Then, a local anesthetic (numbing medicine) is injected into the skin and deeper tissues down toward the
pleural space.
This numbing step can cause brief stinging or burning, but it is usually the most uncomfortable part. Once the area is
numb, you should only feel pressure, not sharp pain.
3. Inserting the needle or catheter
When the area is numb, the clinician inserts a thin needle or a needle-over-catheter between your ribs into the
pleural space. Many providers use a special thoracentesis kit with safety features and tubing that connects to
collection bottles or vacuum containers.
As the tip enters the pleural space, fluid begins to flow out through the tubing. The clinician may collect:
- Small vials of fluid for laboratory tests (diagnostic thoracentesis).
- Larger volumes of fluid in vacuum bottles to relieve pressure and improve breathing (therapeutic thoracentesis).
You will be asked to breathe gently, avoid coughing or sudden movements, and let the team know if you feel dizziness,
chest pain, or sudden shortness of breath.
4. Finishing the procedure
Once enough fluid has been removed, the needle or catheter is withdrawn and a small bandage is placed over the site.
No stitches are usually required. The whole process often takes less than 30 minutes, with the actual fluid removal
portion lasting just a few minutes.
Afterward, you may have a chest X-ray or ultrasound to confirm that the lung looks okay and to check for complications
such as a pneumothorax (collapsed lung), depending on your hospital’s protocol and your symptoms.
What happens to the fluid?
The collected fluid is not just tossed out like old dishwater. It goes to the lab for a detailed analysis that may
include:
- Appearance: Clear, cloudy, bloody, or milky.
- Cell counts: How many white and red blood cells are present, and what types.
-
Chemistry tests: Protein, LDH, glucose, pH, and sometimes cholesterol or triglycerides to help
classify the effusion and distinguish “transudative” (usually due to pressure or volume problems like heart failure)
from “exudative” (usually due to inflammation, infection, or cancer). - Microbiology: Cultures and stains to look for infection.
- Cytology: Examining cells under a microscope to check for cancer.
Together with your symptoms, imaging, and other labs, these results help your healthcare team decide on the best
treatment plan, such as diuretics for heart failure, antibiotics for infection, or oncologic therapies for cancer.
Risks and possible complications of thoracentesis
Thoracentesis is generally considered a safe procedure when performed by trained professionals, especially with
ultrasound guidance. However, like any invasive procedure, it carries risks. It is important to understand these so you
can give informed consent without losing sleep unnecessarily.
Common and mild side effects
-
Local pain or soreness: Mild discomfort at the needle site is common for a few hours to a couple of
days. Over-the-counter pain relievers are usually enough. -
Coughing: As the lung re-expands, some patients experience temporary coughing. It is usually brief
and self-limited. -
Feeling light-headed: Removing a large volume of fluid can sometimes cause brief dizziness or drop
in blood pressure, which is why you are closely monitored.
Less common but more serious risks
-
Pneumothorax (collapsed lung): If the needle accidentally punctures the lung, air can leak into the
pleural space. Small pneumothoraces may resolve on their own; larger ones can require a chest tube. Ultrasound
guidance greatly reduces this risk. -
Bleeding: Injury to small blood vessels in the chest wall or pleural space can cause bleeding. Most
cases are minor, but rarely a significant bleed or a hemothorax (blood in the pleural space) may occur and require
additional procedures. -
Infection: Any time the skin is punctured, there is a small risk of infection at the site or in the
pleural space (empyema). Sterile technique helps keep this risk low. -
Injury to organs below the diaphragm: Very rarely, if the needle is placed too low, it could injure
the liver or spleen. Careful site selection and ultrasound imaging help avoid this. -
Re-expansion pulmonary edema: If a very large volume of fluid is removed quickly, fluid can seep
into the lung tissue as it re-expands. This is uncommon, and clinicians usually limit how much fluid they remove at
one time to reduce the risk.
Your personal risk depends on your overall health, how much fluid needs to be removed, your anatomy, and the
experience and tools (like ultrasound) your care team uses. Do not hesitate to ask your provider how often they
perform thoracentesis and what they do to minimize complications.
Recovery and aftercare
After thoracentesis, you will usually stay in the clinic or hospital area for a short observation period. Staff will
watch your breathing, oxygen levels, blood pressure, and heart rate. You may have a chest X-ray or repeat ultrasound,
especially if a large amount of fluid was removed or you have symptoms.
Once you go home, your provider may recommend:
-
Taking it easy for the rest of the day. Light activity is usually fine, but skip heavy lifting or
strenuous exercise until cleared. - Keeping the bandage clean and dry. You can generally remove it after a day unless told otherwise.
-
Using over-the-counter pain relievers like acetaminophen for mild soreness (always confirm what is
safe for your situation).
Contact your healthcare team or seek urgent care if you notice:
- Sudden or worsening shortness of breath.
- Sharp chest pain that does not improve.
- Fever, chills, or signs of infection around the puncture site.
- Coughing up blood or severe dizziness.
Many people feel better very quickly after thoracentesis because their lung has room to expand again. Others notice
gradual improvement over a day or two, especially if the underlying condition (like pneumonia) is still being treated.
Thoracentesis vs. other chest procedures
Thoracentesis is just one tool in the chest-care toolbox. Your provider may mention related procedures, and it is easy
to mix them up:
-
Chest tube (thoracostomy): A flexible tube that stays in place for hours to days to continuously
drain air or fluid. Thoracentesis is usually a single, shorter procedure. -
Tunneled pleural catheter: A semi-permanent catheter placed for patients who have recurrent pleural
effusions, allowing fluid to be drained at home on a regular schedule. -
Pleurodesis: A procedure that intentionally irritates the pleural surfaces so they stick together,
reducing the space where fluid can collect. It is often used for recurrent malignant effusions. -
Thoracoscopy or video-assisted thoracic surgery (VATS): Minimally invasive surgeries done in the
operating room to directly visualize the pleura, obtain biopsies, or perform more complex interventions.
Thoracentesis is often the first step a relatively low-risk way to get information and relief before moving
on to more invasive approaches, if needed.
Living through thoracentesis: real-world experiences and tips
Beyond the textbooks and clinical guidelines, there is the lived experience: the night before the procedure when you
are Googling every possible outcome, the chilly feeling of antiseptic on your back, and the mix of relief and fatigue
afterward. While each person’s journey is unique, some themes come up again and again when patients describe
thoracentesis.
First, many patients say that the anticipation is worse than the procedure itself. The idea of a
needle near the lung is understandably scary. However, with numbing medicine and a calm, experienced team, the process
is often described as “uncomfortable but manageable” rather than truly painful. People frequently compare the numbing
shots to getting dental anesthesia in terms of intensity, though in a more awkward location.
Second, there is often a noticeable sense of relief as fluid is removed, especially when the
effusion was large. Patients sometimes describe feeling like they can finally “take a full breath” again, or that a
tight band around their chest has loosened. Not everyone feels instant improvement if the underlying disease is
severe, breathing might still be hard but when fluid is a major culprit, the difference can be dramatic.
Third, it is very normal to experience odd sensations during and after thoracentesis. Some people
feel pressure radiating to the shoulder or back, or a sudden need to cough when the lung re-expands. Mild pain with a
deep breath or a yawn for several days afterwards can happen as tissues settle. These sensations should gradually
improve; your team wants to know if they suddenly get worse instead.
Emotionally, thoracentesis can be a turning point. For some, it is the moment they realize that heart failure, cancer,
or another chronic condition is more serious than they thought. For others, it is the first step toward finally
getting answers after weeks of unexplained shortness of breath. It is okay to feel anxious, frustrated, or even
relieved all at once. Asking a trusted friend or family member to go with you, when allowed, can make the day feel
less overwhelming.
A few practical tips from patient experiences:
-
Wear loose, comfortable clothing that is easy to adjust so your back or side can be exposed without
a wrestling match with your hospital gown. -
Practice slow, steady breathing before the procedure. Simple breathing exercises can double as
anxiety management and help you stay still while the needle is in place. -
Do not be shy about speaking up if you feel sharp pain, shortness of breath, or sudden dizziness
during the procedure. The team can pause, adjust, or stop if needed. -
Plan for a quiet recovery day afterward. Arrange transportation if you feel too tired or sore to
drive, and give yourself permission to rest.
Finally, remember that thoracentesis is only one chapter in your story. The most important part comes afterward, when
your healthcare team uses the information gained from the procedure to tailor treatment: adjusting medications,
treating infections, exploring cancer therapies, or recommending further interventions if the fluid keeps coming back.
Staying informed, asking questions, and keeping follow-up appointments are just as vital as the procedure itself.
Thoracentesis may never make your bucket list, but with modern techniques and careful monitoring, it can be a powerful
tool to improve breathing, clarify diagnoses, and help guide you toward the right next steps in your care.





