Table of Contents >> Show >> Hide
- Why Restoring an Antique Bed Is Worth the Effort
- Start With a Careful Inspection
- Safety First: Old Beds Can Have Old Surprises
- Tools and Materials You May Need
- Step-by-Step Antique Bed Restoration
- 1. Photograph and Label Everything
- 2. Disassemble With Patience
- 3. Clean Before You Sand
- 4. Repair Loose Joints and Rails
- 5. Fix Cracks, Chips, and Missing Bits
- 6. Strip Only When Necessary
- 7. Sand Like a Civilized Person
- 8. Test Stain Before Committing
- 9. Choose the Right Finish
- 10. Wax for Protection, Not as a Magic Potion
- Making an Antique Bed Fit a Modern Mattress
- Common Mistakes to Avoid
- How Long Does Antique Bed Restoration Take?
- Experience Notes: What Restoring an Antique Bed Feels Like in Real Life
- Conclusion: Antique Bed Restoration Is Completely Doable
- SEO Tags
Editor’s Note: This guide is written for homeowners, DIY beginners, and vintage-furniture lovers who want to bring an antique bed back to life without turning the garage into a dramatic historical crime scene.
Why Restoring an Antique Bed Is Worth the Effort
An antique bed has something modern flat-pack furniture often lacks: personality, craftsmanship, and the quiet confidence of a piece that has survived more house moves than most of us have survived group chats. Whether it is a carved walnut bed, a spindle Jenny Lind-style frame, an iron bed with chippy paint, or a family heirloom that has been hiding in the attic, restoration can transform it from “old thing in the corner” into the centerpiece of a bedroom.
The good news? Antique bed restoration is usually not as scary as it sounds. Most projects come down to a sensible sequence: inspect, clean, repair, refinish, protect, and reassemble. You do not need a museum lab, a celebrity designer, or a wizard with a belt sander. You need patience, a few basic tools, and the ability to stop yourself from saying, “I’ll just sand aggressively for five minutes.” That sentence has ruined more furniture than toddlers with markers.
This guide walks through how to restore an antique bed while preserving its character. The goal is not to erase every nick, scratch, or age mark. A few scars are part of the story. The trick is knowing which flaws are charming and which ones mean the bed may collapse the moment your dog jumps on it like a furry cannonball.
Start With a Careful Inspection
Before buying stain, paint, wax, or anything with the word “miracle” on the label, inspect the bed from top to bottom. Look at the headboard, footboard, side rails, slats, posts, joints, hardware, finish, and any decorative carvings. Take photos before disassembly. Label hardware in small bags so you do not later ask the classic DIY question: “Was this screw important?” Spoiler: yes, usually.
Check the Structure First
A bed is furniture, but it is also a load-bearing object. Loose joints, cracked rails, missing slats, stripped bolt holes, and weak corner brackets matter more than cosmetic scratches. Push gently on the headboard and footboard. If they wobble, identify whether the movement comes from loose joinery, missing hardware, damaged wood, or rails that no longer fit tightly.
Look for Signs of Insects or Moisture
Small holes, powdery dust, soft wood, musty odors, or staining may indicate old insect activity or moisture damage. A few ancient exit holes do not automatically mean disaster, but fresh dust beneath the piece is a warning sign. Isolate the bed and get professional advice if you suspect active infestation.
Decide Whether to Restore or Refinish
Restoration and refinishing are not the same thing. Restoration means making the bed stable, clean, useful, and attractive while preserving as much original material as possible. Refinishing means removing or significantly altering the old finish. If the finish is mostly intact, try cleaning and reviving it first. If it is flaking, sticky, badly alligatored, water-damaged, or covered in six mysterious paint layers, refinishing may make sense.
Safety First: Old Beds Can Have Old Surprises
If the bed has old paint, especially if it may date from before 1978, test for lead before sanding, scraping, or stripping. Lead dust is not a “vintage feature.” It is a health hazard. If lead is present, the safest choice is to hire a lead-safe certified professional, especially for large painted surfaces or complicated details.
For any restoration project, work in a well-ventilated area, wear eye protection and gloves, and use a respirator appropriate for dust or chemicals. Avoid working in basements when using chemical strippers because fumes may linger. Keep kids, pets, snacks, and your favorite hoodie away from the work zone. Nothing says “bad weekend” like realizing the cat walked through stripper residue and then across the sofa.
Also be careful with antique hardware. Old screws can be brittle, slotted heads can strip easily, and decorative metal parts may be plated or patinated. Clean them gently rather than polishing them into shiny modern confusion.
Tools and Materials You May Need
You probably will not need every item below, but this list covers most antique bed restoration situations:
- Soft cloths, cotton rags, and tack cloth
- Mild dish soap, distilled water, and a small bucket
- Soft brushes, toothbrushes, and cotton swabs for carvings
- Painter’s tape, labels, and resealable bags for hardware
- Screwdrivers, small wrench set, rubber mallet, and clamps
- Wood glue or hide glue for appropriate joint repairs
- Wood filler, grain filler, or matching wood shavings for cracks
- Fine sandpaper, sanding sponges, and sanding blocks
- Chemical stripper if the finish truly needs removal
- Wood stain, shellac, lacquer, polyurethane, or another chosen finish
- Paste wax for stable, finished surfaces
- Replacement slats, brackets, or bed rail hardware if needed
One important rule: choose the gentlest method that solves the problem. Antique furniture rewards restraint. It does not enjoy being attacked like a backyard deck in July.
Step-by-Step Antique Bed Restoration
1. Photograph and Label Everything
Take clear photos of the bed before you remove a single screw. Capture how rails attach, how brackets face, where washers sit, and which side is left or right. Antique beds are not always symmetrical, and handmade or modified pieces may have tiny differences that matter during reassembly.
2. Disassemble With Patience
Remove the mattress, box spring, slats, rails, and hardware carefully. If a screw refuses to move, do not immediately reach for maximum force. Try a properly fitting screwdriver, gentle pressure, and patience. A stripped antique screw head is not the end of the world, but it does add twenty minutes of muttering.
3. Clean Before You Sand
Many old beds look worse than they are because they are covered in dust, wax build-up, skin oils, and attic grime. Start with dry dusting. Then test a mild cleaning solution on a hidden area. A lightly damp cloth with a tiny amount of mild soap may remove decades of residue from a stable finish. Do not soak the wood. Water can raise grain, cloud finishes, and creep into joints.
For carved details, use cotton swabs or a soft brush. If the bed has a stable old finish, cleaning alone may reveal enough beauty that full stripping becomes unnecessary. That is the furniture equivalent of finding money in a jacket pocket.
4. Repair Loose Joints and Rails
Loose joinery is common in antique beds because wood expands and contracts over time. Carefully separate failed joints only if they already move or have opened. Remove loose old glue, test the fit, apply appropriate glue, and clamp evenly. Do not over-tighten clamps; extreme pressure can squeeze out too much glue or damage fragile wood.
Bed rails deserve special attention. They carry the mattress and sleeper weight, so weak rails should be repaired or replaced before cosmetic work begins. If original rails are missing, consider reproduction rails, metal converter rails, or a custom support system that does not visibly damage the headboard and footboard.
5. Fix Cracks, Chips, and Missing Bits
Small cracks can often be stabilized with glue and clamps. Larger gaps may require matching wood shavings, dutchman patches, or stainable filler. Use filler sparingly on visible antique wood. A huge smear of filler can look like beige toothpaste, and nobody wants a toothpaste bed.
For decorative chips, decide whether the missing piece truly needs replacement. Some wear adds authenticity. Missing structural material, however, should be repaired. If a carved element is gone, a skilled woodworker can replicate it, but many DIY projects look better with honest, tidy repair rather than theatrical over-restoration.
6. Strip Only When Necessary
If the old finish is beyond saving, stripping may be the right move. Choose a well-ventilated workspace and follow the product instructions exactly. Gel strippers are often useful on vertical parts such as bedposts and headboards because they stay in place longer. Work in small sections, give the stripper time to soften the finish, and remove residue gently with scrapers that will not gouge the wood.
Many nineteenth- and early twentieth-century furniture pieces were finished with shellac. Shellac can sometimes be revived or removed with alcohol-based methods rather than harsh sanding. When in doubt, test in a hidden spot and proceed slowly.
7. Sand Like a Civilized Person
Sanding should smooth the surface, not reshape the bed. Use a sanding block on flat areas and flexible sanding pads on curves. Avoid rounding crisp edges, carvings, turnings, or molded details. Start only as coarse as needed and move to finer grits. Always sand with the grain where possible.
After sanding, remove dust thoroughly with a vacuum brush attachment and tack cloth. Dust left behind can ruin stain and finish, giving the surface the delightful texture of toast crumbs under varnish.
8. Test Stain Before Committing
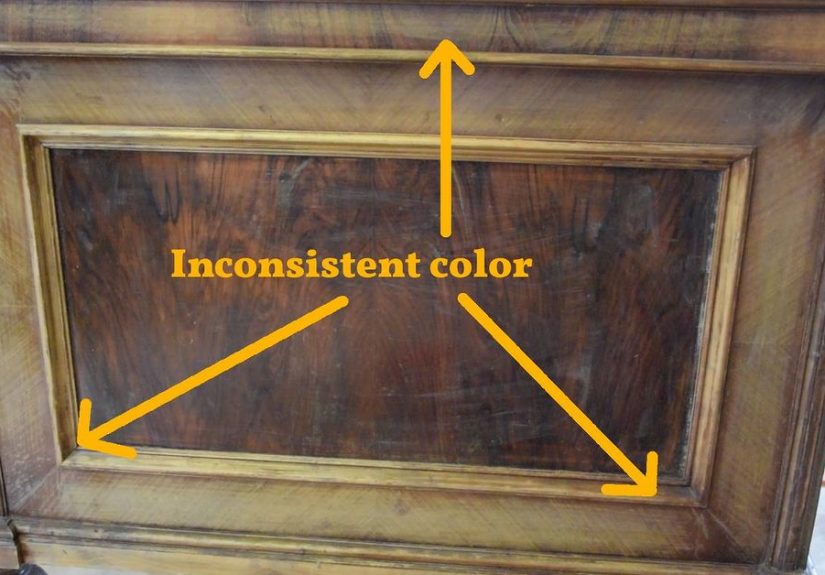
Antique beds may be built from more than one wood species. Rails might be poplar, posts might be walnut, and veneers might be mahogany. Stain can help even out color differences, but it can also exaggerate blotching. Test your stain on a hidden spot or scrap of similar wood before applying it to the entire bed.
Open-grain woods such as oak or mahogany may benefit from grain filler if you want a smooth, formal finish. If you prefer a more rustic, aged look, you may skip grain filler and let the texture remain visible.
9. Choose the Right Finish
The best finish depends on the bed’s style, age, use, and your desired look. Shellac can be historically appropriate for many older wood beds and gives a warm glow. Lacquer offers a refined appearance but requires good technique and ventilation. Polyurethane is durable and practical, though it can look too modern if applied heavily. Wipe-on finishes are friendly for beginners because thin coats reduce brush marks.
Apply multiple thin coats rather than one thick, heroic coat. Thick finish often drips, pools in carvings, and announces itself from across the room. Light sanding between coats can improve smoothness, but follow the finish manufacturer’s instructions.
10. Wax for Protection, Not as a Magic Potion
Paste wax can protect a stable clear finish and add a soft sheen. Apply it sparingly, let it haze, and buff it with a clean cloth. Too much wax turns sticky and attracts dust, which is exactly the opposite of what you want. Avoid silicone-heavy sprays because they can create problems for future refinishing.
Making an Antique Bed Fit a Modern Mattress
One of the most common antique bed problems is size. Older beds were often made before today’s standardized mattress expectations. Some are slightly narrower or shorter than modern full, queen, or king sizes. Measure the inside width and length carefully before buying a mattress or modifying the frame.
There are three common solutions. First, you can order a custom mattress, which preserves the bed’s original proportions. Second, you can use converter rails or a metal support frame that connects to the antique headboard and footboard. Third, you can have a professional modify the rails or create hidden support plates. The best solution is strong, reversible when possible, and visually respectful of the bed.
Do not rely on two sad slats and optimism. A restored antique bed needs proper mattress support. Use enough slats, a platform insert, or a center support system with legs if the mattress requires it. Modern foam and hybrid mattresses often need closer support than old box springs did.
Common Mistakes to Avoid
Sanding Away the History
Patina is not dirt. Patina is the mellow color, soft wear, and depth that develop over time. Once you sand it away, you cannot buy it back in a jar, no matter what the label at the hardware store claims.
Ignoring Lead Paint
Old painted beds can be beautiful, but they require caution. Never dry-sand old paint without testing and proper safety planning. If lead is present, professional help is often the smartest and safest move.
Using the Wrong Hardware
Random modern screws can split old wood or look out of place. When replacing fasteners, match size, function, and appearance as closely as possible. For structural bed hardware, strength matters more than romance.
Over-Polishing Metal Parts
Hardware does not need to shine like a trumpet in a marching band. Gentle cleaning and a soft buff usually look more authentic than aggressive polishing.
How Long Does Antique Bed Restoration Take?
A simple clean-and-wax project may take one afternoon. A full restoration with disassembly, joint repair, stripping, staining, finishing, and reassembly can take several days or a few weekends because drying and curing time matter. The actual hands-on work is often manageable; the waiting is what tests your character.
Costs vary widely. A basic DIY refresh may require only cleaning supplies, wax, glue, and sandpaper. A more involved project may include stripper, stain, finish, clamps, replacement slats, converter rails, or professional help. Even then, restoring a quality antique bed can be more rewarding than buying a new bed that has all the soul of a cardboard sandwich.
Experience Notes: What Restoring an Antique Bed Feels Like in Real Life
The first thing you learn when restoring an antique bed is that the bed has opinions. It will not come apart in the order you expect. One rail will slide free like it has been waiting politely for a century, while the other behaves as if it signed a lifelong contract with the headboard. This is normal. Do not panic. Take a breath, take more photos, and remember that antique furniture rewards slow hands.
Cleaning is often the most satisfying stage because the transformation starts quickly. A headboard that looked dull and tired may suddenly reveal warm grain, carved details, or a finish that only needed kindness instead of total demolition. Many beginners are surprised by how much improvement comes from careful cleaning and paste wax. It is the furniture version of washing your car and deciding maybe you do not need a new one after all.
The repair stage teaches humility. A loose joint may seem simple until you realize old glue, dust, and warped wood are having a tiny meeting inside the mortise. The goal is not to force perfection. The goal is a clean fit, stable support, and a repair that respects the original construction. Clamps are helpful, but they are not medieval torture devices. Gentle, even pressure usually does better than cranking until the bed begs for mercy.
Choosing a finish is where personality enters the room. Some people love a deep, glossy finish that makes walnut glow like old piano keys. Others prefer a satin sheen that says, “I am elegant, but I do not need applause.” Both can work. What usually looks wrong is a finish that is too thick, too plastic, or too obviously modern for the bed’s age. Thin coats, patient drying, and light rubbing between layers are boring steps that create beautiful results. Boring is underrated in restoration.
Reassembly is the victory lap, but it is also the final test. This is when your labeled bags of hardware become heroic. The bed should stand square, the rails should seat securely, and the slats or platform should support the mattress without shifting. If something rattles, fix it before putting the bed into daily use. Antique charm is wonderful; antique surprise collapse is less wonderful.
The best moment comes when the bed is finally dressed with a mattress, sheets, pillows, and maybe a quilt that looks like it knows family secrets. Suddenly the project stops being a pile of parts and becomes a room anchor. You see the old craftsmanship again. You notice the curve of the posts, the glow of the grain, the little marks that survived decades. That is when you realize restoration is not just repair. It is a conversation with the past, conducted with rags, glue, sandpaper, and occasional muttering.
Conclusion: Antique Bed Restoration Is Completely Doable
Restoration of an antique bed is really not hard when you approach it in the right order. Start with safety and inspection. Clean before you strip. Repair structure before you fuss over color. Sand gently. Choose a finish that suits the bed instead of burying it under modern plastic shine. Make sure the mattress support is practical and secure. Above all, preserve the character that made the bed worth saving in the first place.
An antique bed does not need to look brand new to look beautiful. In fact, it usually looks better when it keeps a little age, a little glow, and a few polite reminders that it has been around longer than your favorite streaming service. With patience and common sense, you can turn a forgotten frame into a strong, handsome, everyday piece of furniture. And yes, you can absolutely brag about it when guests ask where you bought it.