Table of Contents >> Show >> Hide
- What you’ll learn
- What is the Oxocard Connect?
- Why CircuitPython on the Oxocard Connect?
- Setup: install CircuitPython and pick a workflow
- Core projects: LED, button, and PWM dimming
- Display fun: drawing without turning your code into spaghetti
- Sensors + cartridges: load cells, servos, and expanding the system
- Wi-Fi projects: HTTP logging, dashboards, and cloud control
- Debugging and troubleshooting (a.k.a. the “why is nothing happening?” section)
- Project ideas that feel “Oxocard-native”
- Field Notes: Real-World Experiences Programming the Oxocard Connect (Extra )
- Conclusion
The Oxocard Connect is basically a tiny “plug-in-a-cartridge-and-go” computer for electronics projectslike a game console,
except instead of defeating bosses you’re defeating bad wiring and mysterious sensor readings. Pair it with CircuitPython
and you get a friendly, fast feedback loop: edit a file, run it, smile (or troubleshoot, but still).
This guide walks through a practical CircuitPython workflow on the Oxocard Connect, then builds up from “Blinky” to buttons,
PWM dimming, drawing on the display, reading a load cell, driving a servo, and posting data over Wi-Fi. Along the way, you’ll
pick up the “why” behind the codenot just the “copy/paste and pray” part.
What is the Oxocard Connect?
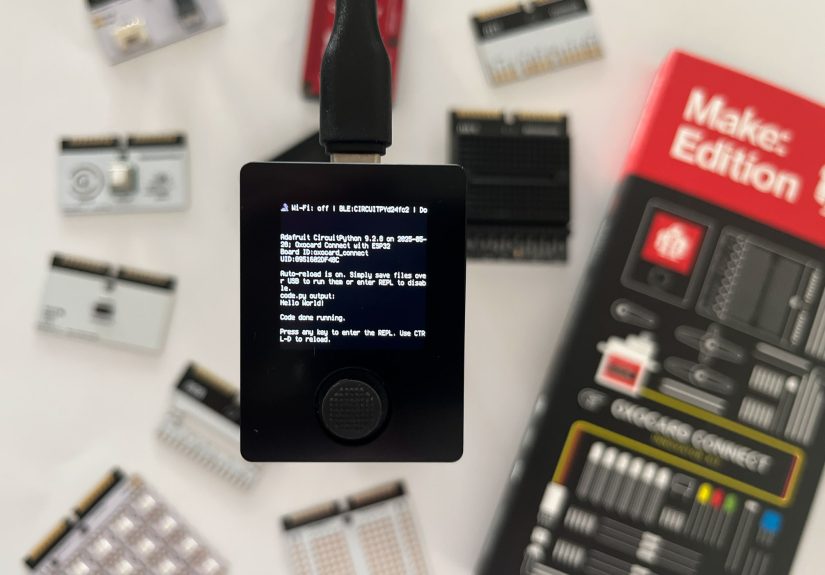
The Oxocard Connect is a compact ESP32-based microcontroller system with a screen, controls, USB-C, and a cartridge-style
expansion port. The whole “cartridge” idea is the star: instead of rebuilding your wiring every time, you can swap modules
and instantly run example appsvery “insert cartridge, press start.”
The Make: Oxocard Innovator Kit leans into that idea with a breadboard cartridge and a pile of parts (LEDs, buttons, sensors,
a micro-servo, and more) so you can prototype quickly. Even better, the cartridge system is open hardware, so you can design
your own boards (or adapt the cartridges to other microcontrollers).
Why the cartridge port is a big deal
The Innovator Kit documentation highlights that the cartridge ecosystem exposes practical signals you’ll actually use:
multiple PWM-capable IO pins, analog inputs (ADC), plus I2C and SPI. Translation: you can build real projects without feeling
like you’re coding inside a sealed plastic toy.
Why CircuitPython on the Oxocard Connect?
CircuitPython is designed to make microcontroller programming approachable: you write Python, run it directly on the board,
and iterate quickly. No toolchain spelunking. No “compile for 12 minutes, flash, realize you missed a semicolon, repeat.”
The practical benefits
- Fast iteration: edit
code.py(ormain.py) and re-run instantly. - Solid hardware APIs:
digitalio,analogio,pwmio,displayio,wifi, and more. - Huge library ecosystem: sensors, displays, networking helpers, motor drivers, debouncing utilities, etc.
- Readable code: perfect for learning, teaching, and debugging at 1 a.m. with snacks.
One “gotcha” you should know upfront
Many CircuitPython boards show up as a USB drive (often called CIRCUITPY) so you can drag-and-drop files.
Some ESP32-class boards instead rely on serial or web workflows for file transfer. That’s not a dealbreakerit just changes your routine:
you’ll usually use an IDE like Thonny, a web-based editor, or a supported web installer plus serial access.
Setup: install CircuitPython and pick a workflow
Step 1: Install CircuitPython for the Oxocard Connect
The easiest path is the official CircuitPython build for the Oxocard Connect and the browser-based installer. In general,
you’ll connect the board over USB-C, put it in the right mode if needed, and let the installer flash the correct firmware.
After that, the board boots into CircuitPython and runs whatever is in your main script file.
Step 2: Choose how you’ll edit and transfer code
You have three common workflows. Pick the one that matches how you like to work (and how your board exposes storage):
-
Thonny IDE (recommended for “I want a normal editor” vibes):
edit files on-device and run them, with a built-in REPL for quick tests. -
Web editor workflow:
great when you want minimal setup and you’re already in a browser mindset. -
Command-line tooling:
awesome for power users (and for people who think “shell scripts” is a love language).
Step 3: Understand libraries (so your imports don’t explode)
CircuitPython’s “secret sauce” is its library ecosystem. Many advanced features live in separate libraries (installed into a
/lib directory on the device). The standard move is: download the official library bundle for your CircuitPython
major version, then copy only what you need. This keeps memory usage friendlybecause microcontrollers are adorable, but not infinite.
Core projects: LED, button, and PWM dimming
Project 1: “Blinky” (but make it educational)
The classic starter is blinking an LED. The “real” lesson isn’t just flashing lightsit’s learning how a pin becomes an output,
and how timing loops behave on embedded hardware.
If your LED is wired “active-low” (common when sinking current), the logic may feel flipped. Don’t panic. Your code isn’t wrong.
Your LED is just being dramatic.
Project 2: Button input without the “my button is haunted” problem
Physical buttons bounce. That means a single press can look like multiple presses unless you debounce. You can do it manually,
but a debouncing helper keeps your logic clean and readable.
Notice the rhythm: update() every loop, then react to events like pressed. This structure scales really well
once you start juggling multiple inputs.
Project 3: PWM dimming (a.k.a. “brightness without sadness”)
LEDs don’t dim by lowering voltage in a simple way. Instead, you pulse the output quickly and vary the on/off ratio (duty cycle).
CircuitPython makes PWM straightforward.
Pro tip: if you see flicker, increase PWM frequency (within reason) and make sure your wiring is solid.
Display fun: drawing without turning your code into spaghetti
The Oxocard Connect includes a built-in display, and CircuitPython supports display drawing through displayio.
The key concept: you build a scene (groups, bitmaps, shapes), then update parts of it instead of re-creating everything each frame.
A simple “random squares” style demo (with a clean mental model)
Instead of creating hundreds of shape objects, we can draw into a small bitmap grid and update random cells. This is fast,
memory-friendly, and feels like painting pixelsbecause it is.
Why this approach rocks: the bitmap stays the same object, and you only change tiny pieces. That’s the embedded graphics version of
“work smarter, not harder.”
UI controls: joystick directions as “events”
Once you’re comfortable with debounced buttons, you can treat joystick directions similarly: update inputs every loop,
then convert raw states into actions (move a cursor, scroll a menu, control a game, etc.).
Sensors + cartridges: load cells, servos, and expanding the system
The Innovator Kit includes classic components you’ll see in real projects: a thermistor, a photoresistor, a PIR motion sensor,
a potentiometer, and a micro-servo. The cartridge/breadboard format makes experiments quick: wire, test, swap, repeat.
Reading a load cell with an HX711 amplifier
Load cells output tiny analog changes, so you typically pair them with an HX711an ADC designed for scales. In CircuitPython,
you’ll usually use a dedicated driver library. The core idea is always the same:
- Tare: measure the baseline with no weight.
- Scale factor: calibrate using a known weight.
- Read: convert raw readings into grams (or whatever unit you like).
Calibration is where the magic happens. If your readings drift, focus on stable power, firm mounting, and averaging multiple samples.
Driving a micro-servo (smoothly)
Servos are controlled with PWM pulses. CircuitPython’s motor libraries make this painless, and you can map joystick movement to angles.
If the servo jitters: reduce mechanical load, ensure the servo has adequate power (often separate from the microcontroller),
and share grounds. “Servo gremlins” are frequently “power gremlins wearing a servo costume.”
Designing your own cartridge: a practical roadmap
If you want to go full maker-mode, start simple:
- Prototype on the breadboard cartridge first (prove the circuit and the code).
- Move to a small perfboard that fits the cartridge footprint (validate physical layout).
- Design a PCB once you’re confident (keep traces short for I2C/SPI reliability).
- Ship your cartridge with a demo program so it feels “console-like” when inserted.
Wi-Fi projects: HTTP logging, dashboards, and cloud control
The Oxocard Connect includes Wi-Fi and can handle common IoT patterns: read sensors, make HTTPS requests, publish MQTT messages,
or update a dashboard. The trick is to keep secrets out of your main code and to build robust retry logic.
Where to store Wi-Fi credentials and API keys
A common pattern is to store credentials in settings.toml (or a separate secrets.py) and load them at runtime.
That way your code stays shareable and you don’t accidentally publish your Wi-Fi password to the internet. (Which is a bad way to make friends.)
Example: post a sensor value to a web service (HTTPS)
This example shows the shape of a typical HTTPS request flow in CircuitPython: connect Wi-Fi, create a socket pool,
wrap it with SSL, then use a requests-style helper.
For services like Adafruit IO, you’ll use their feed/key structure, but the mental model is the same: authenticated HTTP requests,
clean JSON payloads, and graceful retries.
Reliability tips (because Wi-Fi is… Wi-Fi)
- Retry with backoff: if a request fails, wait 2s, then 5s, then 10s.
- Time out requests: hanging forever is not a personality trait you want in embedded code.
- Log to serial: print status codes and short responses so you can debug fast.
- Keep payloads small: microcontrollers appreciate minimalism.
Debugging and troubleshooting (a.k.a. the “why is nothing happening?” section)
1) Nothing runs when you hit “Run”
- Confirm you’re connected to the right interpreter/device in your IDE.
- Open the serial console/REPL and look for tracebacks.
- Try a soft reboot (often
Ctrl+Din the REPL).
2) ImportError when importing a library
- Verify the library file/folder is in
/lib. - Make sure you downloaded the bundle that matches your CircuitPython major version.
- Check for dependencies (some libs require helper libs like ticks).
3) Random resets or “brownouts”
- Servos and LEDs can draw more current than you thinkpower them properly.
- Use a good USB cable and stable power source.
- Common fix: separate power for motors/servos, shared ground.
4) Display updates are slow
- Update small parts of the scene instead of rebuilding the whole display tree.
- Disable auto-refresh and call refresh intentionally.
- Prefer bitmap updates for repeated effects.
Project ideas that feel “Oxocard-native”
- Cartridge-based weather station: plug in a sensor cartridge and auto-launch a dashboard UI.
- Kitchen scale + cloud log: HX711 load cell readings sent to a spreadsheet-like endpoint.
- Joystick-controlled servo rig: pan/tilt platform with on-screen angle display.
- Light meter game: use a photoresistor to “charge” powers and show animations.
- Motion-triggered notifier: PIR sensor triggers on-screen alerts and Wi-Fi pings.
The best Oxocard projects lean into the cartridge workflow: plug something in, immediately see a demo, then modify the code to make it yours.
That’s the difference between “a board” and “a system.”
Field Notes: Real-World Experiences Programming the Oxocard Connect (Extra )
Makers who jump into the Oxocard Connect with CircuitPython often report the same first impression: it feels unusually “complete.”
You’re not staring at a bare microcontroller wondering where to startyou’ve got a screen, controls, Wi-Fi, and a cartridge ecosystem that
practically begs you to experiment. That changes your behavior in a good way. Instead of spending an hour building a perfect setup,
you’re more likely to write a quick test, watch it run, and then improve it step by step.
One common experience is realizing that the “workflow” matters as much as the code. On boards that show up as a USB drive, file management is
drag-and-drop simple. On ESP32-style boards, you may use a serial-based approach (often through an IDE) or a browser workflow. The upside is that
once your editor and serial console are working, iteration can be just as fastsometimes fasterbecause you can run snippets in the REPL,
inspect variables, and confirm pin behavior in real time. The first time you type a couple of lines into the REPL and instantly see a pin toggle,
it’s hard not to grin. It’s like turning hardware debugging into a conversation.
Another classic “maker moment” is the button bounce lesson. People will swear their joystick button is double-clicking or that the board is
“missing presses.” It’s almost always bounce. Once you introduce a debouncer (or an event-based keypad approach), suddenly your UI feels
professional. That’s a repeated theme with CircuitPython: a small library can turn a finicky prototype into something that behaves like a product.
Display work tends to be the next learning curve. The first attempt is often “I’ll just redraw everything, every loop,” which can work for tiny
demos but can get slow or memory-hungry as you add shapes, text, and animations. The better experience comes from building a stable scene once
(groups + bitmaps), then changing only what needs to change. Makers who adopt that mindset quickly start making “console-like” programs: menus,
mini games, animated status screens, and cartridge demos that launch automatically and look polished.
Hardware expansion via cartridges brings its own set of experiencesmostly good, occasionally comedic. The good part: swapping a cartridge is
incredibly motivating. You can keep multiple projects “alive” without tearing down your breadboard jungle. The comedic part: you’ll eventually
plug something in backward, or forget that a servo wants more current than your USB port is feeling generous enough to provide. The fix is usually
straightforward: respect power budgets, keep grounds common, and test in small increments. Makers who treat power as a “first-class feature” (not an
afterthought) have dramatically fewer mysterious resets.
Finally, Wi-Fi projects tend to be where the Oxocard Connect starts feeling like a tiny connected computer instead of “just a dev board.” The
experience most people like best is building something that’s useful beyond the bench: a sensor logger, a remote-controlled gadget, or a cartridge
that posts data and shows a live status screen. Once you’ve shipped even a simple HTTP post loop reliablytimeouts, retries, and allyou’ve learned a
real IoT skill. And when you pair that with the cartridge concept (“insert module → auto-run demo”), you’re not just programming a board. You’re
designing an experience.