
Table of Contents >> Show >> Hide
- What Is a Wet Roller Set?
- Best Rollers for Wet Setting Hair
- How to Wet Set Hair Rollers: 13 Steps
- Step 1: Start with Clean Hair
- Step 2: Towel-Dry Gently
- Step 3: Detangle from Ends to Roots
- Step 4: Apply Setting Product
- Step 5: Decide Your Curl Pattern
- Step 6: Section Your Hair
- Step 7: Match Section Size to Roller Size
- Step 8: Keep Hair Smooth and Taut
- Step 9: Roll in the Right Direction
- Step 10: Secure Each Roller Properly
- Step 11: Let Hair Dry Completely
- Step 12: Remove Rollers Gently
- Step 13: Style and Set the Finished Look
- Wet Set Hair Rollers by Hair Type
- Common Wet Roller Set Mistakes
- How Long Should You Leave Wet Set Rollers In?
- How to Make a Wet Roller Set Last Longer
- Extra Experience: Real-Life Lessons from Wet Setting Hair Rollers
- Conclusion
Wet setting hair rollers is one of those classic beauty techniques that refuses to retire, and honestly, good for her. Before curling irons became the default shortcut and blowout brushes started acting like tiny jet engines, people were getting soft waves, bouncy curls, polished volume, and vintage-inspired styles with a handful of rollers, a little patience, and hair that was dampnot dripping like it just survived a thunderstorm.
If you want curls that look intentional instead of “I slept weird and decided to call it fashion,” learning how to wet set hair rollers properly can make a huge difference. A wet roller set works by shaping damp hair around rollers and allowing it to dry completely in that form. Once dry, the hair remembers the shape, giving you curl, movement, lift, or smoothness depending on roller size, direction, product, and technique.
This guide breaks the process into 13 clear steps, with practical tips for different hair types, common mistakes, and a few real-life lessons from the land of frizz, flat roots, and rollers that mysteriously launch themselves across the bathroom floor.
What Is a Wet Roller Set?
A wet roller set is a heat-minimal styling method where damp hair is wrapped around rollers and left to dry. The result can be tight curls, loose waves, smooth volume, or old-Hollywood bounce. Unlike hot tools, wet setting relies mostly on water, styling product, tension, and drying time.
The key phrase here is damp hair. Hair that is too wet may take forever to dry and can collapse into frizz. Hair that is too dry may not reshape enough to hold the curl. The sweet spot is towel-dried, lightly damp hair that still feels flexible but not soggy.
Best Rollers for Wet Setting Hair
Before you start rolling, choose the right tools. The type and size of roller will decide whether your final look says “soft romantic waves,” “bouncy salon set,” or “accidental poodle audition.”
Magnetic Rollers
Magnetic rollers are popular for classic wet sets. They create smooth, defined curls and are often used with clips. They work especially well when you want a polished finish and even tension.
Foam Rollers
Foam rollers are soft and comfortable, making them useful for overnight sets. However, they can absorb moisture, so hair must not be overly wet. Use them when your hair is damp and product is evenly distributed.
Velcro Rollers
Velcro rollers are great for volume and loose shape, especially on fine or medium hair. They are less ideal for very wet hair or highly textured hair because they may snag. Use them carefully and remove them gently.
Flexi Rods
Flexi rods create spirals and more defined curls. They are excellent for curly, coily, and textured hair when paired with a styling foam, mousse, or setting lotion.
How to Wet Set Hair Rollers: 13 Steps
Step 1: Start with Clean Hair
Begin with freshly washed hair or hair that has been lightly refreshed. Clean hair responds better to a roller set because excess oil, heavy creams, and old hairspray can weigh the hair down. Use a shampoo and conditioner that fit your hair type. Fine hair usually benefits from lightweight formulas, while thick, curly, or textured hair may need more moisture before styling.
Step 2: Towel-Dry Gently
After washing, blot your hair with a microfiber towel or soft cotton T-shirt. Do not rub aggressively. Wet hair is more fragile than dry hair, so treat it like expensive silk, not a kitchen counter. Your goal is to remove dripping water while keeping enough moisture for the hair to reshape around the rollers.
Step 3: Detangle from Ends to Roots
Use a wide-tooth comb or gentle detangling brush. Start at the ends and work upward in small sections. This prevents knots from tightening and reduces breakage. If your hair tangles easily, apply a lightweight leave-in conditioner or detangling spray before combing.
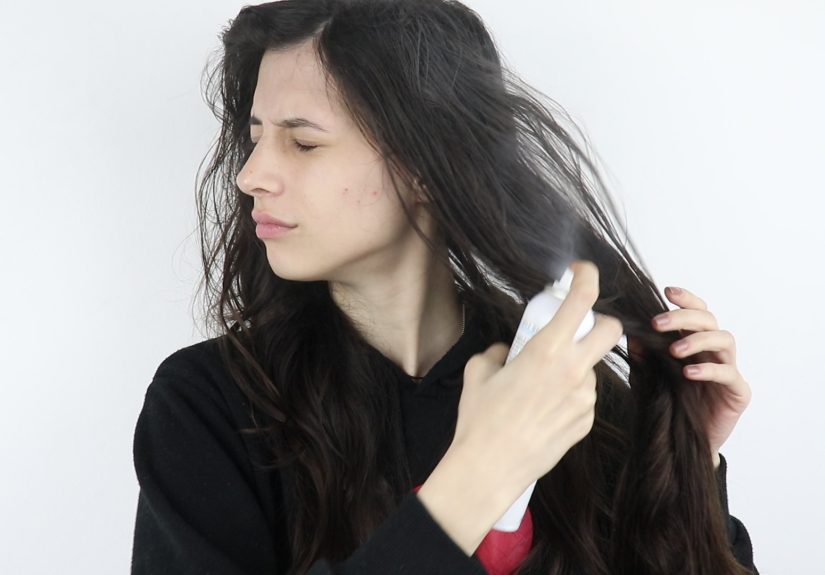
Step 4: Apply Setting Product
A good wet set needs product support. Use setting lotion, styling foam, mousse, or a light curl cream depending on your hair type. Fine hair usually does best with mousse or setting lotion. Thick or textured hair may prefer foam with a little leave-in underneath. Avoid applying too much heavy oil or cream before rolling because it can slow drying and weaken the set.
Step 5: Decide Your Curl Pattern
Before grabbing rollers, decide what you want. For big volume, use large rollers and roll away from the face. For tighter curls, use smaller rollers. For vintage waves, roll sections in the direction you want the final wave to fall. For smooth body, use medium rollers and keep the sections neat.
Step 6: Section Your Hair
Divide your hair into clean sections using clips. A simple method is to create a top mohawk section from the forehead to the crown, two side sections, and two or three back sections. Clean sectioning may feel fussy, but it is the difference between a salon-looking set and a “where did that bump come from?” situation.
Step 7: Match Section Size to Roller Size
Each hair section should be no wider than the roller. If the section is too wide or too thick, the hair may dry unevenly, frizz, or lose curl quickly. A thinner section dries faster and wraps more smoothly. When in doubt, use smaller sections rather than trying to make one heroic roller do the job of three.
Step 8: Keep Hair Smooth and Taut
Comb each section smooth before rolling. Hold the hair with gentle tension, place the ends neatly on the roller, and wrap the hair evenly. The ends matter. If they fold, bend, or stick out, they may dry that way. Smooth ends create a polished curl; messy ends create drama, and not the glamorous kind.
Step 9: Roll in the Right Direction
For volume at the crown, roll the top sections backward and slightly upward. For face-framing softness, roll side sections away from the face. For a classic curled-under look, roll the ends under. For flipped-out ends, roll upward. The roller direction controls how the hair falls when released.
Step 10: Secure Each Roller Properly
Use roller clips, duckbill clips, pins, or built-in fasteners depending on the roller type. Secure firmly enough that the roller stays in place but not so tight that it pulls your scalp. If a roller feels painful, redo it. Beauty should not feel like a tiny construction crane is attached to your head.
Step 11: Let Hair Dry Completely
This is the step that tests everyone’s character. Your hair must be completely dry before removing the rollers. Not mostly dry. Not “dry enough because I’m impatient.” Fully dry. If you remove rollers too soon, the curls may collapse, puff, or frizz. You can air-dry, sit under a hooded dryer, or use a bonnet dryer on a comfortable setting.
Step 12: Remove Rollers Gently
Once your hair is dry, remove each roller carefully. Unclip first, then unwind the curl without tugging. Do not yank Velcro rollers straight out, especially if your hair is fine, long, curly, or fragile. Slow removal protects the curl shape and your hair.
Step 13: Style and Set the Finished Look
Use your fingers to separate curls for a modern look, or brush gently with a soft brush for vintage waves. Add a light mist of hairspray if you need hold. For shine, smooth a tiny amount of serum over the surface, focusing on the ends. The word “tiny” is important here. Too much serum can turn fresh curls into sad spaghetti.
Wet Set Hair Rollers by Hair Type
Fine Hair
Fine hair often needs lightweight hold. Use mousse or setting lotion and avoid heavy creams. Smaller sections help the set last longer. If your curls fall quickly, try using smaller rollers and leaving them in longer.
Thick Hair
Thick hair needs extra drying time. Use smaller sections, strong clips, and enough styling foam to coat each piece evenly. A hooded dryer can make the process more predictable.
Curly or Coily Hair
Curly and coily hair may benefit from a leave-in conditioner followed by foam or setting lotion. Smooth each section carefully before rolling. Magnetic rollers, flexi rods, or perm rods can help create defined results.
Short Hair
Short hair usually works best with small or medium rollers. Use clips to secure each roller close to the scalp. For volume, lift the roots as you roll.
Long Hair
Long hair may need larger rollers for waves or smaller sections for defined curls. Make sure the ends are smooth before rolling, and avoid overloading one roller with too much hair.
Common Wet Roller Set Mistakes
Using Hair That Is Too Wet
Soaking wet hair takes too long to dry and may not set cleanly. Blot first, then roll when hair is damp.
Using Sections That Are Too Large
Large sections may feel faster at first, but they usually create weak curls, frizz, or damp roots. Smaller sections are more reliable.
Skipping Product
Water alone may not give enough hold. A setting product helps the hair keep its new shape after drying.
Removing Rollers Too Early
This is the number-one curl killer. If the hair is still cool or damp inside the roller, wait longer.
Brushing Too Aggressively
After removing rollers, start with fingers. Brush only when you want softer waves, and use gentle strokes.
How Long Should You Leave Wet Set Rollers In?
Drying time depends on hair thickness, roller size, product amount, humidity, and drying method. Fine hair may dry in one to two hours with airflow. Thick or dense hair may need several hours or a hooded dryer. Overnight foam roller sets can work, but only if the hair is damp rather than wet. If your hair is still damp in the morning, use less water, smaller sections, or fewer heavy products next time.
How to Make a Wet Roller Set Last Longer
To extend your style, sleep with a silk or satin scarf, bonnet, or pillowcase. Avoid brushing too much after the first day. Refresh curls by wrapping a few sections around your finger with a tiny mist of water or lightweight spray. For volume, flip your hair upside down and gently lift the roots with your fingers.
If humidity is your personal villain, finish with an anti-humidity hairspray or lightweight finishing spray. Keep products flexible so your curls move naturally instead of turning into crunchy museum exhibits.
Extra Experience: Real-Life Lessons from Wet Setting Hair Rollers
The first thing most people learn about wet setting hair rollers is that patience is not optional. You can own the best rollers, the fanciest setting lotion, and a comb that looks like it belongs in a professional kit, but if you take the rollers out before your hair is completely dry, the style will betray you before lunch. The curls may look promising for five minutes, then slowly deflate like a party balloon with commitment issues.
One practical experience is that the dampness level matters more than beginners expect. Hair should feel cool and flexible, but it should not drip. If water runs down your neck while you are rolling, your hair is too wet. Blot again. On the other hand, if the hair dries while you are sectioning, keep a spray bottle nearby. Lightly mist each section before adding product and rolling. This keeps the set even from front to back.
Another helpful lesson is to treat the ends like royalty. The ends of the hair are the oldest and most fragile part, and they are also the part that shows mistakes first. When the ends are tucked smoothly around the roller, the finished curl looks polished. When they are bent or crumpled, the curl may come out with odd hooks. A little extra combing and smoothing before rolling saves a lot of styling frustration later.
Product amount also takes experimentation. Fine hair often needs less product than you think. Too much mousse or setting lotion can make it stiff or sticky. Thick, curly, or textured hair may need more product, but it should still be applied evenly. A good rule is to start light and add more only when needed. Hair should feel coated, not shellacked.
Sectioning is another area where experience teaches humility. Random sections can still curl, but neat sections dry better and style better. If one curl is huge and another is tiny, the finished shape may look uneven. Taking five extra minutes to create clean parts can make the entire set look more professional.
Finally, do not judge the set immediately after removing the rollers. Freshly released curls can look too tight, too round, or slightly old-fashioned. Give them a moment. Separate them gently with your fingers, let them relax, then shape them. Many roller sets look best after ten minutes of soft styling, not the second the last roller comes out.
The beauty of wet setting is that it gets easier every time. You start to learn how your hair behaves, how damp it should be, how much product it likes, and which roller direction gives the most flattering shape. Once you understand those details, wet rollers become less like a mysterious vintage ritual and more like a dependable styling trick you can use whenever you want curls with bounce, polish, and personality.
Conclusion
Learning how to wet set hair rollers is really about mastering four things: moisture, product, tension, and drying time. Start with clean damp hair, use a styling product that matches your hair type, roll smooth sections with even tension, and wait until everything is fully dry before removing the rollers. That is the formula.
Whether you want soft waves, defined curls, root volume, or a glamorous vintage-inspired finish, a wet roller set can give you beautiful results without relying heavily on direct heat. It may take practice, but once you get the rhythm, the process feels almost relaxing. Almost. There will still be clips hiding under the sink. That is simply the roller-set lifestyle.
Note: This article is written from synthesized, real-world hair-care guidance and common salon styling practices. Adjust products, drying time, and roller size based on your hair texture, density, length, and comfort.





