Table of Contents >> Show >> Hide
- Why Replace a Bathroom Exhaust Fan?
- Before You Buy a New Fan
- Tools and Materials You May Need
- How To Replace a Bathroom Exhaust Fan Step by Step
- Step 1: Turn off the power
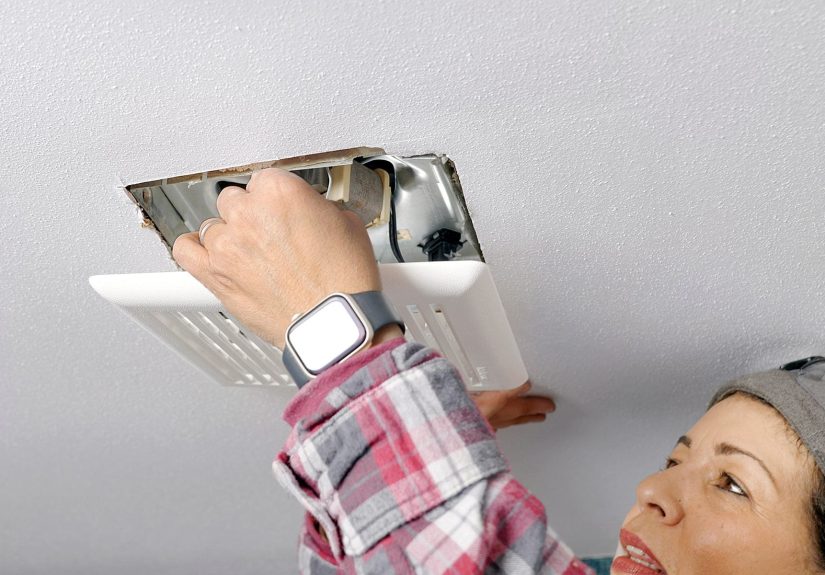
- Step 2: Remove the old grille
- Step 3: Disconnect the fan motor or remove the old housing
- Step 4: Inspect the opening, duct, and wiring
- Step 5: Adjust the ceiling opening if necessary
- Step 6: Connect the duct
- Step 7: Wire the new fan
- Step 8: Mount the new housing
- Step 9: Install the blower assembly and grille
- Step 10: Restore power and test the fan
- Common Mistakes to Avoid
- When To Call a Professional
- How To Keep Your New Fan Working Well
- Hands-On Experiences and Lessons Homeowners Commonly Learn
- Conclusion
Replacing a bathroom exhaust fan is one of those home projects that sounds wildly more dramatic than it really is. The name alone makes it feel like you should be wearing a hard hat, holding blueprints, and speaking only in contractor jargon. In reality, many bathroom fan replacements are manageable for a confident DIYer, especially when you are swapping an old unit for a new one of similar size and duct setup.
A working bathroom exhaust fan does more than hush embarrassing post-shower fog. It helps remove moisture, reduce odors, and protect your bathroom from peeling paint, mildew, and the kind of damp gloom that makes walls look permanently disappointed. If your current fan rattles like a shopping cart, barely moves air, or sounds like it is preparing for takeoff, it may be time for an upgrade.
In this guide, you will learn how to replace a bathroom exhaust fan step by step, how to choose the right replacement, what mistakes to avoid, and when it makes sense to wave the white flag and call a pro. Grab your screwdriver and your patience. The ceiling awaits.
Why Replace a Bathroom Exhaust Fan?
Bathroom fans wear out slowly, which is why many homeowners ignore them until the room turns into a tropical rainforest every morning. Common signs that your exhaust fan needs replacing include loud grinding noises, weak airflow, a motor that hums without spinning properly, visible rust, frequent breaker trips, or moisture lingering on mirrors and walls long after a shower ends.
Sometimes the issue is not total failure. Sometimes the fan is simply outdated. Older units are often louder, less efficient, and worse at moving humid air. A modern replacement can be quieter, more energy-efficient, and better sized for your bathroom. That means less steam, less mold risk, and a far lower chance of starting your day by towel-drying the mirror like it owes you money.
Before You Buy a New Fan
1. Match the fan size to the room
One of the biggest mistakes in bathroom ventilation is choosing a fan that is too weak. A fan that looks nice but cannot keep up with the moisture load is basically a decorative noise machine. For many bathrooms, a good rule of thumb is at least 1 CFM per square foot of floor area, with a minimum of 50 CFM for small bathrooms. Larger bathrooms with multiple fixtures may need more airflow.
2. Pay attention to sones
Sones measure sound level. Lower is quieter. If your old fan sounds like a leaf blower hiding in the ceiling, upgrading to a fan with a lower sone rating can dramatically improve the room. Many homeowners find that once they install a quieter fan, they are more willing to run it long enough to actually remove moisture.
3. Check housing size and duct size
The easiest replacement happens when the new fan fits the existing ceiling opening and uses the same duct diameter. Many retrofit and room-side installation models are designed specifically for this reason. If the housing dimensions are close and the duct connection matches, your day gets much easier.
4. Decide whether you need extra features
Some replacement fans come with lights, night lights, humidity sensors, timers, or heaters. Those upgrades can be useful, but they may also require different wiring or more power than your old fan used. A straightforward replacement is easier when you keep the new unit similar to the old one.
Tools and Materials You May Need
Before starting, gather what you need so you are not climbing up and down the ladder every six minutes like a confused housecat. Typical tools and materials include:
- Step ladder
- Screwdrivers
- Voltage tester
- Drill or driver
- Pliers
- Utility knife
- Drywall saw if trimming is needed
- Foil HVAC tape
- Duct clamp if required
- Wire connectors
- Work gloves
- Safety glasses
- New bathroom exhaust fan
How To Replace a Bathroom Exhaust Fan Step by Step
Step 1: Turn off the power
Start at the breaker panel, not just the wall switch. Turn off the circuit that powers the fan and test the wiring with a voltage tester before touching anything. This is not the moment for optimism. Electricity loves surprises, and you do not.
Step 2: Remove the old grille
Most fan grilles pull down slightly and release by pinching the spring clips. Set the grille aside. If it is coated in fuzzy gray dust, congratulations, you have confirmed that bathroom fans are secretly lint museums.
Step 3: Disconnect the fan motor or remove the old housing
Some fans allow you to replace only the motor and blower assembly. If a compatible upgrade kit exists, that can save time and avoid cutting drywall. If not, you will need to remove the full housing. Disconnect the wiring, loosen mounting screws or brackets, and detach the duct connection carefully.
If your fan is mounted between joists, you may need access from the attic. However, many modern replacement fans are designed for room-side installation, which allows you to remove and install the unit from below the ceiling. That is very good news for anyone who considers attic crawling a deeply unnecessary character-building exercise.
Step 4: Inspect the opening, duct, and wiring
With the old fan out, inspect the ceiling opening and surrounding area. Look for mold, water staining, damaged drywall, loose ductwork, and brittle wiring. This is also the time to confirm that the duct actually vents outdoors. If it dumps moist air into the attic, that needs to be corrected before or during the replacement.
Check whether the existing duct diameter matches the new fan. Also look at the wiring setup. A basic fan usually has a simple power connection, but fan-light or fan-heater combos may need additional switched conductors. If the wiring does not match the new unit’s requirements, stop and bring in an electrician.
Step 5: Adjust the ceiling opening if necessary
Hold the new housing up to the ceiling opening and test the fit. If the opening is slightly too small, carefully trim it with a drywall saw. If it is too large, you may need to patch and reinforce the surrounding drywall or add blocking so the new fan can mount securely. A snug fit matters for both appearance and performance.
Step 6: Connect the duct
Attach the duct connector or damper assembly according to the manufacturer’s instructions. Then connect the duct using a clamp or foil HVAC tape. Avoid the old-school temptation to use cloth duct tape. Despite the name, it is not the hero of this story.
Keep the duct run as short and straight as possible. Fewer bends usually mean better airflow and less noise. If you have access to the attic, this is a great time to check that the duct is not kinked, crushed, or sagging badly. Good airflow is the whole point, after all.
Step 7: Wire the new fan
Feed the electrical cable through the fan’s wiring knockout and secure it with the proper clamp. Match the wires according to the wiring diagram that came with the fan, usually black to black, white to white, and ground to ground. Cap the connections with approved wire connectors and tuck them neatly into the wiring compartment.
Do not improvise here. Follow the installation manual exactly. If your fan includes a light, humidity sensor, or heater, the wiring may be more complex than the old unit. When in doubt, bring in a licensed electrician. Pride is nice, but not as nice as not rewiring your bathroom incorrectly.
Step 8: Mount the new housing
Secure the housing to the joist, bracket, or framing support as instructed by the manufacturer. Make sure the housing sits flush with the finished ceiling so the grille will lie flat. If the fan is crooked, the finished look will forever whisper, “close enough,” which is not the vibe we want overhead.
Step 9: Install the blower assembly and grille
Insert the blower assembly, plug it in if the model uses a quick-connect, and fasten it into place. Then attach the grille or cover. This is the part where the project starts looking finished instead of like you temporarily opened a portal in the ceiling.
Step 10: Restore power and test the fan
Turn the breaker back on and test the fan. Listen for rattling, scraping, or excessive vibration. Hold a square of toilet paper near the grille to see whether the fan pulls air. If the paper flutters toward the fan, that is a promising sign. If it hangs there with emotional detachment, something still needs attention.
Common Mistakes to Avoid
Buying the wrong size fan
Too little airflow means poor moisture control. Too much fan without the right setup can be louder and more expensive than necessary. Size the fan properly instead of guessing.
Venting into the attic
This is one of the most common and most damaging mistakes. Moist bathroom air belongs outside, not drifting into attic insulation like a tiny mold delivery service.
Ignoring duct condition
A powerful new fan cannot perform well if the duct is crushed, disconnected, undersized, or full of sharp bends. Replacing the fan without checking the duct is like buying new running shoes and then tying them together.
Skipping the breaker
Never assume the wall switch makes the wiring safe. Always shut off power at the electrical panel and verify it.
Choosing noise over function
Many homeowners put off replacement because they assume all fans are loud. They are not. A quieter unit with appropriate CFM can make a big difference in comfort and performance.
When To Call a Professional
Not every bathroom exhaust fan replacement is a simple swap. You should strongly consider hiring a pro if:
- You need new ductwork or a new vent cap through the roof or wall
- The existing fan does not vent outdoors
- The wiring is old, damaged, or incompatible
- You are adding a fan where none existed before
- The ceiling opening or framing needs significant modification
- You are installing a fan with a heater or other advanced electrical features
There is no shame in calling for backup. Replacing a basic fan is one thing. Running new electrical and venting through a roof is another thing entirely. That is where home improvement can quickly turn into home improvisation, and that is rarely where the best stories begin.
How To Keep Your New Fan Working Well
Once your new bathroom exhaust fan is in place, help it live a long and useful life. Clean the grille regularly, vacuum dust from the housing when needed, and run the fan during showers and for at least 15 to 20 minutes afterward. If your household always forgets, a timer switch or humidity-sensing fan can save the day without requiring everyone to suddenly become responsible.
Also pay attention to new noises. A smooth, steady hum is normal. Grinding, rattling, or airflow that seems weaker than before can signal loose parts, blocked ducting, or buildup that needs cleaning.
Hands-On Experiences and Lessons Homeowners Commonly Learn
One of the most common experiences people report when replacing a bathroom exhaust fan is discovering that the “simple swap” is simple only after the first 20 minutes of mild confusion. The grille comes off easily, which creates a dangerous sense of confidence. Then the homeowner looks up into the housing and realizes the old fan was installed sometime during the geological past, using hardware choices that make absolutely no emotional sense in the present.
Another common lesson is that noise does not always equal power. Plenty of old fans sound like they are doing heroic work when they are actually moving very little air. After replacement, homeowners are often shocked by how quiet a modern unit can be. The first reaction is sometimes, “Wait, is it on?” followed by the oddly satisfying test with a square of tissue paper that gets gently pulled toward the grille.
Many people also discover how important ductwork is. They start out thinking the fan motor is the whole story, only to find a sagging flexible duct in the attic, a loose connection, or a vent line that never made it outdoors properly. That moment tends to change how they think about the project. It stops being just a fan replacement and starts becoming a moisture-control upgrade for the whole bathroom.
There is also the experience of sizing regret. Some homeowners replace an old fan with the exact same CFM simply because it is convenient, then realize later that the old unit was undersized all along. The mirror still fogs up, the room still feels damp, and the new fan, while technically new, does not solve the real problem. The smarter experience is measuring first, then buying.
Room-side retrofit models earn a lot of praise because they spare people from crawling through hot attics, dodging nails, insulation, and the general mood of overhead misery. Homeowners who use these models often describe the replacement as much more approachable than expected. It is still work, but it feels like organized work rather than an obstacle course.
Another lesson that comes up again and again is that the fan cover affects the final impression more than expected. A clean, modern grille can make the whole ceiling look fresher, even if the rest of the bathroom did not change. It is a small detail, but it gives the project a satisfying finish that feels bigger than the budget.
Finally, many homeowners come away from the project with a new respect for ventilation in general. Before replacement, the fan was just background equipment. Afterward, they notice how much faster the room dries out, how much less condensation collects, and how the bathroom smells cleaner and feels less clammy. That is the sneaky magic of a good exhaust fan: it is not glamorous, but once it works properly, the entire room behaves better.
Conclusion
If you want a bathroom that dries out faster, smells fresher, and sounds less like a helicopter pad, replacing the exhaust fan is a smart upgrade. The best results come from choosing the right CFM, venting the fan outdoors, making secure duct and wiring connections, and resisting the urge to rush. A bathroom exhaust fan is not the flashiest feature in your home, but it quietly protects paint, drywall, trim, and air quality every single day.
And that is the beauty of this project. When done right, nobody walks in and says, “Amazing fan replacement.” Instead, they notice a bathroom that feels cleaner, drier, and better maintained. That is the kind of behind-the-scenes success every home can use.