Table of Contents >> Show >> Hide
- Before You Start: Know What You’re Removing
- What You’ll Need
- How to Remove Gorilla Glue from Wood in 7 Steps
- Step 1: Identify the glue type and test the surface first
- Step 2: Remove wet glue the right way before it cures
- Step 3: Let the glue reach the right stage, or soften it gently
- Step 4: Scrape off the bulk of the glue without gouging the wood
- Step 5: Treat the remaining residue based on the wood finish
- Step 6: Sand with the grain and blend the area
- Step 7: Clean, touch up, and protect the wood
- Mistakes to Avoid
- When You Should Call a Professional
- Conclusion
- Experiences and Lessons from Real Gorilla Glue Cleanup Jobs
Gorilla Glue has a well-earned reputation: when it bonds, it bonds. That is terrific when you are fixing a chair leg, building a cutting board, or pretending you are the kind of person who always finishes weekend projects on schedule. It is far less charming when the glue ends up on the wood surface instead of in the joint. Suddenly your beautiful tabletop has a crusty amber blob, your cabinet door has a shiny smear, and your DIY confidence starts packing a suitcase.
The good news is that removing Gorilla Glue from wood is usually possible. The less-fun news is that there is no one magical trick for every situation. The right method depends on three things: whether the glue is wet or cured, whether you are dealing with Original Gorilla Glue, Gorilla Wood Glue, or Gorilla Super Glue, and whether the wood is finished or unfinished. In other words, this is not a “dump mystery liquid on it and hope for the best” kind of job.
This guide breaks the process into seven practical steps that help you get dried glue off wood while keeping the surface in one piece. You will learn when to scrape, when to soften, when to sand, and when to stop before turning a small glue mess into a full refinishing project. Let’s rescue your wood before the glue wins.
Before You Start: Know What You’re Removing
“Gorilla Glue” is often used as a catch-all phrase, but the product matters. Original Gorilla Glue is a polyurethane adhesive that expands as it cures. Gorilla Wood Glue behaves more like a traditional wood glue. Gorilla Super Glue is cyanoacrylate, which dries fast and can leave a hard, glassy residue. Each one responds a little differently to cleanup.
Also, check the wood itself. Unfinished wood gives you more freedom to scrape, sand, and spot-treat. Finished wood is fussier. Solvents can dull the sheen, soften the finish, or leave a pale halo that says, “Yes, I absolutely panicked and grabbed nail polish remover.” That is why testing in a hidden area matters so much.
What You’ll Need
- Plastic scraper, old credit card, or plastic putty knife
- Sharp putty knife, razor blade, or cabinet scraper for careful use
- Clean cloths or paper towels
- Warm water and mild dish soap
- Acetone or acetone-based nail polish remover for spot treatment
- Mineral oil, olive oil, or a commercial adhesive remover for sticky residue
- Hair dryer
- Fine-grit sandpaper, usually 180 to 320 grit depending on the wood and finish
- Mineral spirits for checking hidden glue spots before refinishing
- Gloves and good ventilation if you use solvents
How to Remove Gorilla Glue from Wood in 7 Steps
Step 1: Identify the glue type and test the surface first
Start by figuring out whether the glue is still wet, partly cured, or fully hardened. If it is still tacky, cleanup is easier. If it has dried into a hard lump, you will likely need a mechanical approach first. Also decide whether the wood is finished, stained, sealed, painted, or bare. This tells you how aggressive you can safely be.
Before using acetone, adhesive remover, oil, or even a hair dryer for extended heat, test a tiny hidden area. The underside of a table, the back edge of a shelf, or the inside of a cabinet door works well. If the finish gets sticky, dull, blotchy, or discolored, stop and switch to a gentler method.
This step is not glamorous, but it is the one that separates “problem solved” from “why is there now a shiny bald spot on my dresser?”
Step 2: Remove wet glue the right way before it cures
If the glue is still wet, do not give it time to settle in and become a permanent personality trait. Blot and lift it immediately. For Original Gorilla Glue, wipe uncured squeeze-out with a dry cloth first. For Gorilla Wood Glue, a clean damp cloth usually works well on fresh squeeze-out. For Gorilla Super Glue, blot carefully and use only a small amount of acetone or isopropyl alcohol if the surface can handle it.
The key word here is blot, not smear. If you rub aggressively, you can spread glue over a larger area and force it into the grain or along the finish. Use a fresh part of the cloth with every pass so you are removing glue instead of just redecorating with it.
If you catch the spill early, you may only need soap and water after blotting. If you miss that window, congratulations: you have now entered the scraping phase.
Step 3: Let the glue reach the right stage, or soften it gently
For many wood glues, the easiest time to remove excess is not when it is dripping wet and not when it has turned into a tiny concrete slab. It is when the glue has set up enough to become rubbery or “green.” At that stage, it often lifts off more cleanly and is less likely to smear across the wood.
If the residue is fully dried, soften it only as much as needed. A hair dryer on a low setting can help loosen sticker-like residue or super glue haze on finished wood. Keep the nozzle moving, stay a few inches away, and avoid overheating the surface. On hardened Gorilla Super Glue residue, warm soapy water sometimes helps, and careful spot treatment with acetone may soften the bond. On finished wood, go slowly and use the least aggressive method that works.
For bare wood, a tiny amount of acetone may help break down stubborn super glue residue. For finished wood, it is safer to treat acetone like hot sauce: a little may help, too much can ruin dinner.
Step 4: Scrape off the bulk of the glue without gouging the wood
Once the glue is firm enough, remove the raised material before you think about sanding. This matters because sanding a thick glue lump can spread residue, clog paper, and create a wider, uglier problem. Think shaving, not demolition.
On finished wood, begin with a plastic scraper, credit card edge, or plastic putty knife. Work slowly from the outside edge of the glue toward the center. Use light pressure and keep the angle low so you are lifting the glue instead of digging into the finish.
On unfinished wood or on thick, foamed Original Gorilla Glue, you can use a sharp putty knife, razor blade, or cabinet scraper more effectively. Hold the tool nearly flat and shave thin layers off the top. Do not stab at the glue like you are settling a personal dispute. Controlled passes are safer and leave less damage behind.
If you are working near veneer, decorative edges, or soft woods like pine, slow down even more. These surfaces dent and tear easily, and one impatient scrape can create repair work that lasts longer than the original glue problem.
Step 5: Treat the remaining residue based on the wood finish
After the lump is gone, you may still have a thin film, shiny patch, or sticky residue. This is where the method changes depending on the type of wood surface.
For finished wood: start with the gentlest options. Warm soapy water and a soft cloth may be enough for light residue. If that does not work, try a hair dryer and plastic scraper again. For sticker-like or gummy residue, a small amount of mineral oil or olive oil on a cloth may help loosen it. Wipe the area clean afterward so the surface does not stay oily. If you move to a commercial adhesive remover, spot-test first and follow the product directions carefully.
For unfinished wood: you have more options. Super glue residue may respond to a tiny amount of acetone on a cotton swab or cloth. Work in short applications, let it soften the residue, and wipe or scrape gently. Do not flood the wood. Too much liquid can spread the stain, raise the grain, or create a wider repair area.
Vinegar is sometimes suggested as a milder alternative for glue residue, and it can help in some cases, but it is slower. For stubborn Gorilla Super Glue on bare wood, acetone usually works faster. For dried Original Gorilla Glue or Gorilla Wood Glue, you will often get farther with careful scraping followed by light sanding than with soaking.
Whatever method you choose, be patient. Glue removal is usually a repeat-the-process job, not a one-swipe miracle. That is annoying, yes, but still better than stripping the whole tabletop because one blob of glue got you emotional.
Step 6: Sand with the grain and blend the area
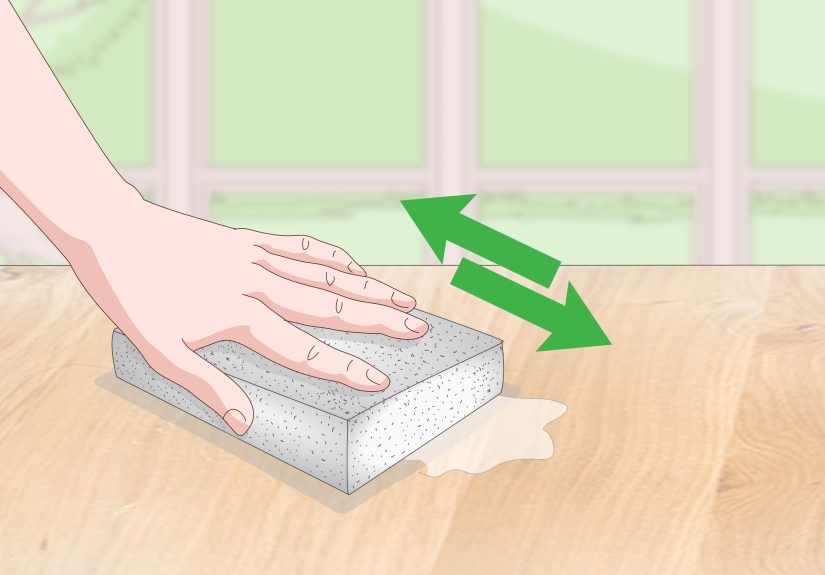
Once the visible residue is gone, sand lightly to level the area and remove the last haze. Always sand with the grain. Start finer than you think you need; you can always step down if the residue remains. On unfinished wood, 180- to 220-grit paper often works well. On wood that will be refinished, match the grit you used for the rest of the project so the sheen and stain absorption stay even.
Be careful not to oversand one small spot. That creates a dip or a lighter patch that becomes glaringly obvious after stain or topcoat. Blend your sanding into the surrounding area. Feather the edges outward instead of grinding straight down into the problem spot like you are drilling for oil.
If the wood will be stained or clear-coated, wipe the area with mineral spirits or a damp cloth to reveal hidden glue spots. Glue often hides until finish hits it, at which point it shows up like a spotlight on a bad decision. If you still see shiny patches, scrape or sand again before moving on.
Step 7: Clean, touch up, and protect the wood
After the glue is gone, wipe away dust and residue. Let the wood dry fully before applying stain, polish, or a new topcoat. If the finish was dulled during cleanup, you may need a small touch-up rather than a full refinish. On finished furniture, that might mean a little polish to even out the sheen. On raw or sanded wood, it may mean stain and a compatible clear coat.
If you removed glue from a high-visibility area like a tabletop, cabinet door, or hardwood floor edge, inspect it in angled light. A surface that looks perfect straight-on can reveal a film or scratch the second sunlight hits it like a judgmental spotlight.
To prevent a repeat performance next time, use painter’s tape near glue lines when possible, apply glue sparingly, and clean squeeze-out before it fully hardens. Gorilla Glue is strong, but your cleanup plan should be stronger.
Mistakes to Avoid
- Do not start with aggressive sanding. Remove the bulk first or you will spread the mess.
- Do not use metal scrapers carelessly on finished wood. They can gouge, scratch, and chip fast.
- Do not flood wood with acetone or adhesive remover. More product does not equal more wisdom.
- Do not skip the hidden test spot. Finishes react differently, and surprises are rarely good.
- Do not rush refinishing. Let the area dry fully before applying stain or topcoat.
- Do not ignore glue haze. If you can see it now, finish will make it more obvious later.
When You Should Call a Professional
If the glue is on antique furniture, thin veneer, a delicate specialty finish, or a large section of hardwood flooring, it may be smarter to call a furniture restoration or flooring pro. The same goes for big spills that seeped into open grain or glue that was “fixed” previously with random chemicals from the garage. At some point, the cheapest solution is no longer more elbow grease. It is an expert with the right tools and fewer regrets.
Conclusion
Removing Gorilla Glue from wood is absolutely doable, but the safest method depends on the type of glue and the condition of the wood. Wet glue should be blotted and lifted fast. Dried glue should usually be scraped first, then softened or spot-treated only if needed, and finally sanded lightly with the grain. Finished wood deserves extra caution, bare wood gives you more room to maneuver, and every surface benefits from a hidden test before you bring out the strong stuff.
If there is one takeaway worth taping to your toolbox, it is this: patience beats force. A slow, careful cleanup is far more likely to save your wood than an aggressive one-minute attack. Gorilla Glue may be stubborn, but it is not unbeatable. It just enjoys making you prove how much you want your table back.
Experiences and Lessons from Real Gorilla Glue Cleanup Jobs
In real-life DIY situations, the biggest lesson people learn about removing Gorilla Glue from wood is that the first impulse is usually the worst one. Many people see a hardened blob on a table, shelf, or floorboard and immediately reach for coarse sandpaper. That feels productive for about thirty seconds. Then the glue smears, the surrounding finish gets scratched, and the repair area suddenly triples in size. The smarter approach is almost always to remove the raised glue first, then deal with the thin film afterward.
Finished furniture tends to teach this lesson the fastest. A common scenario is a small Gorilla Super Glue drip on a stained end table. At first glance it looks tiny, but because it dries clear and glossy, it becomes very obvious in daylight. People who go straight to acetone often discover that the finish softens before the glue completely does. The better experience usually comes from starting with warm soapy water, a plastic scraper, gentle heat, and only the smallest possible spot treatment if necessary. Slow, yes. But much safer.
Workshop projects create a different kind of mess. With unfinished wood, especially during glue-ups, the most common experience is discovering dried squeeze-out right before staining. Everything looks fine until mineral spirits or finish hits the board, and then those glue spots appear like pale ghosts across the joint line. Woodworkers learn quickly that scraping at the “green” stage saves a lot of frustration later. They also learn that careful prep beats last-minute panic. A few extra minutes during glue-up can save an entire afternoon of sanding and color correction.
Original Gorilla Glue brings its own drama because it expands. That expansion fools people into thinking more glue equals a stronger bond, when in reality it often just means more foam to trim off later. Many DIYers describe the same experience: they clamp a repair, come back later feeling proud, and find a hardened ridge puffing out of the joint like the glue baked itself a little muffin top. The good news is that once cured, it usually responds well to shaving and scraping. The bad news is that it rarely looks better when ignored.
Hardwood floors and butcher-block surfaces also teach caution. People are often tempted to use stronger solvents to save time, but experience shows that preserving the wood matters more than winning the battle quickly. Gentle scraping, minimal moisture, limited solvent use, and light sanding are what usually produce the cleanest final result. In other words, the best success stories are not the dramatic ones. They are the patient ones, where someone resists the urge to go full demolition mode and instead works in small, careful steps until the glue disappears and the wood still looks like wood.