Table of Contents >> Show >> Hide
- Bearded Iris Basics (So the Rest Makes Sense)
- When to Plant Bearded Iris (Timing That Actually Works)
- Site Selection: The “Bloom or Bust” Checklist
- How to Plant Bearded Iris Rhizomes (Step-by-Step)
- Watering: Enough to Establish, Not Enough to Drown
- Feeding Bearded Iris (Without Overdoing It)
- Seasonal Care: What to Do After the Flowers Finish
- Dividing Bearded Iris for More Blooms (and More Plants)
- Common Problems (and Fixes That Don’t Require a Crystal Ball)
- Design Tips: Make Iris Look Great Even After Bloom
- Growing Bearded Iris in Pots (Yes, It’s Possible)
- At-a-Glance: The Bearded Iris “Do This, Not That” List
- Gardeners’ Experience Notes (Extra of Real-World “What It’s Like”)
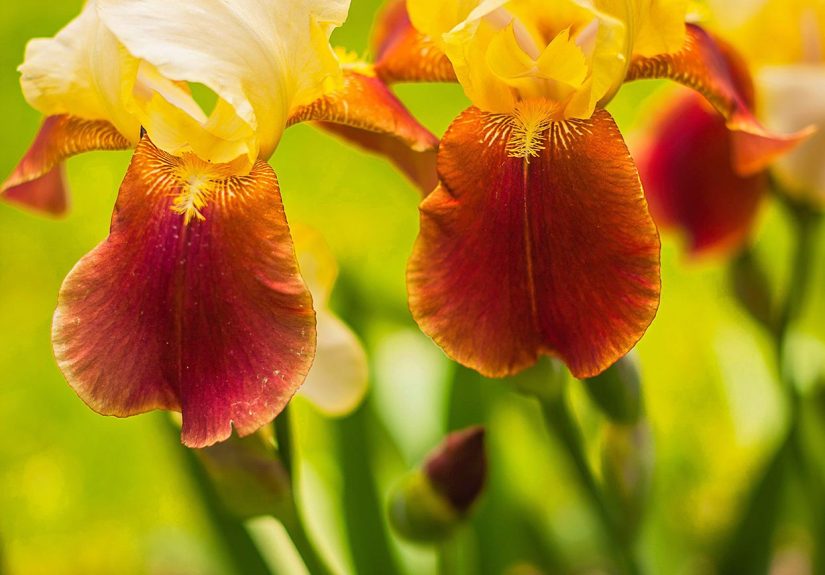
Bearded iris are the overachievers of the spring garden: dramatic ruffles, runway colors, and that fuzzy “beard” that makes each bloom look like it’s wearing a tiny feather boa. The best part? They’re not high-maintenance divasmore like low-drama celebrities who just want good lighting, dry feet, and a little personal space.
This guide walks you through exactly how to plant and grow bearded iris (typically Iris × germanica and relatives) for bigger blooms, healthier clumps, and fewer “why does this smell weird?” rhizome surprises. You’ll get practical steps, timing tips, troubleshooting, and a longer real-life-style experience section at the end so you can avoid the most common iris facepalms.
Bearded Iris Basics (So the Rest Makes Sense)
Bearded iris grow from thick, fleshy underground stems called rhizomes. Think of rhizomes as part storage pantry, part launch pad: they hold energy and push up fans of sword-like leaves and, later, flower stalks.
- Rhizome: The chunky stem at (or near) the soil surface.
- Fan: The upright bundle of leaves that grows from a rhizome.
- Offset: A “baby” rhizome that forms from the original and eventually becomes its own plant.
When to Plant Bearded Iris (Timing That Actually Works)
The classic best window is late summer into early fall. Planting then gives rhizomes time to grow roots before winter and sets you up for stronger bloom performance later. In many regions, that means roughly July through Septemberoften about 6–8 weeks after flowering.
Can you plant in spring?
You can plant in spring if you bought rhizomes then, but bloom timing may be delayed while the plant focuses on roots and recovery. If spring is your only option, just nail the site and planting depth, and don’t overwater.
Site Selection: The “Bloom or Bust” Checklist
Bearded iris thrive when you give them the three things they crave: sun, drainage, and airflow. Miss any of those, and you’ll get fewer blooms and more disease headaches.
Sunlight
Aim for full sun (at least 6 hours). More sun usually means sturdier plants, better flowering, and fewer leaf diseases. Light shade is tolerated, but heavy shade is the fastest way to grow gorgeous leaves… and zero flowers.
Soil and drainage
Drainage matters more than fancy soil. Bearded iris dislike soggy conditions, especially around rhizomes. If you have heavy clay, improve it with organic matter and consider a slightly raised bed so water doesn’t puddle.
Mulch caution (yes, really)
Mulch is great for many plantsbut bearded iris often respond to thick mulch like it’s a wet blanket at a flu convention. Too much coverage around the rhizome can encourage rot. If you mulch at all, keep it pulled back from the rhizomes.
How to Plant Bearded Iris Rhizomes (Step-by-Step)
The #1 mistake with bearded iris is planting too deeply. Rhizomes are not shythey generally want to be at the surface, sometimes even slightly exposed.
- Prep the spot: Remove weeds, loosen soil, and create a planting area that drains well. If water sits after rain, fix drainage first.
- Dig a shallow hole and make a mound: Create a low mound in the center of the hole. This helps spread roots naturally.
- Position the rhizome: Lay the rhizome horizontally on the mound with roots draped down the sides. Point the fan in the direction you want growth to expand (many gardeners point fans outward).
- Set the depth: Backfill so the top of the rhizome is visible or barely covered (deeper planting increases rot risk and reduces bloom). In very hot climates or very light soil, a thin cover of soil may help prevent sunscaldstill keep it shallow.
- Firm and water: Press soil gently so the rhizome doesn’t wobble (new roots hate loosey-goosey plants). Water thoroughly once after planting.
- Spacing: Space rhizomes about 12–24 inches apart (18 inches is a common sweet spot). Crowding leads to fewer blooms and more disease.
Quick planting depth reality check
If you finish planting and your iris looks like it’s wearing a turtleneck of soil… pull it up and reset it. Rhizomes should not be buried like tulip bulbs.
Watering: Enough to Establish, Not Enough to Drown
Right after planting, water well once. After that, keep watering modest until you see new growth, especially if conditions are cool. In hot, dry weather, water more regularly for the first few weeksthen taper.
- Newly planted: Even moisture, but never soggy.
- Established clumps: Drought-tolerant in many climates; water during prolonged dry spells for best bloom and growth.
- Avoid: Constantly wet soil around rhizomes (prime rot conditions).
Feeding Bearded Iris (Without Overdoing It)
Bearded iris generally prefer a low-nitrogen fertilizer. Too much nitrogen can push lush foliage while increasing rot risk and reducing flowers. Think “bloom support,” not “leaf bodybuilding competition.”
Simple fertilizing schedule
- Early to mid-spring: A light application of a low-nitrogen fertilizer (examples often include ratios like 6-10-10).
- After bloom: Another light feeding about a month after flowering can help build rhizome energy.
If you compost, use it lightly and keep it from smothering rhizomes. The goal is improved soil structure and gentle nutritionnot a rhizome sauna.
Seasonal Care: What to Do After the Flowers Finish
Deadheading and cleanup
After blooms fade, snap or cut off spent flowers to keep things tidy. When a flower stalk is finished, remove the stalk near the base. This helps the plant redirect energy back into the rhizome instead of seed production.
Foliage management
Keep leaves as long as they’re healthythose fans are solar panels charging next year’s bloom budget. In fall (or when frost has knocked things back), remove dead foliage and garden debris to reduce disease and pest problems.
Dividing Bearded Iris for More Blooms (and More Plants)
If your iris clump looks crowded, blooms less than it used to, or has rhizomes stacking like pancakes, it’s time to divide. Many gardens benefit from division every 3–5 years.
Best time to divide
A widely recommended window is 6–8 weeks after bloom, often July through September (adjust for your climate so plants can re-root before hard cold).
How to divide (without turning it into a wrestling match)
- Lift the clump: Use a garden fork or spade to gently lift rhizomes.
- Inspect and sort: Keep firm rhizomes with healthy roots and a fan. Discard mushy, foul-smelling, or heavily damaged pieces.
- Trim leaves: Many gardeners trim fans back (often to about 4–6 inches) to reduce water loss while roots re-establish.
- Cut into divisions: Separate natural joints or cut cleanly with a sanitized knife.
- Replant shallow: Same planting method as aboverhizome top visible or barely covered.
Common Problems (and Fixes That Don’t Require a Crystal Ball)
“My bearded iris won’t bloom.”
- Too much shade: Move to a sunnier spot.
- Planted too deep: Reset rhizomes so the top is visible/near-surface.
- Overcrowding: Divide the clump after bloom season.
- Too much nitrogen: Switch to low-nitrogen feeding; avoid heavy lawn fertilizer drift.
- Immature divisions: Some new divisions need a season to settle before flowering heavily.
Rhizome rot (a.k.a. “Why does my iris smell like regret?”)
Soft, mushy rhizomesespecially with a foul odoroften point to bacterial soft rot or secondary rot following damage. Wet conditions, poor drainage, and pests can make it worse.
- Fix: Dig up affected rhizomes, cut away rot to firm tissue, and allow healthy portions to dry before replanting in a better-drained site.
- Prevent: Improve drainage, avoid burying rhizomes deeply, and don’t pile mulch over them.
Iris borers (the sneaky villains)
Iris borers are larvae that chew into leaves and tunnel down into rhizomes, sometimes setting the stage for rot. Early signs can include streaking, chewed leaf edges, and declining fans.
- Prevention: Remove and destroy old iris foliage and debris in fall or early spring (eggs overwinter on old leaves).
- Early action: Monitor new growth in spring; controls work best before larvae tunnel deeply.
- If severe: Dig and inspect rhizomes after flowering; remove damaged parts and destroy infested material.
Leaf spot diseases
Leaf spot can show up as small spots that enlarge and cause foliage to look tired and speckledoften becoming more obvious after bloom. It’s usually managed with sanitation and airflow.
- Do: Remove badly infected leaves, clean up debris, and avoid overhead watering late in the day.
- Consider: Fungicides only if the problem is chronic and severefollow label directions carefully.
Design Tips: Make Iris Look Great Even After Bloom
Bearded iris flowers are a spring headline act, but the foliage can look a little “been-there-done-that” by midsummer. Pair them with plants that fill in gracefully without smothering rhizomes.
- Good companions: catmint, salvia, sedum, yarrow, ornamental grasses, and daylilies (placed so they don’t shade rhizomes).
- Spacing trick: Leave a small open ring around iris rhizomes for airflow and sun exposure.
Growing Bearded Iris in Pots (Yes, It’s Possible)
Containers work best if they’re wide (room for rhizomes to spread) with excellent drainage. Use a gritty, well-draining mix, plant rhizomes shallow, and avoid keeping the pot constantly wet. In colder areas, protect pots from deep freezing (pots freeze faster than garden soil).
At-a-Glance: The Bearded Iris “Do This, Not That” List
- Do plant in full sun with well-drained soil.
- Do keep rhizomes near the surfacetops visible or barely covered.
- Do divide every few years for better blooms.
- Do clean up foliage and debris to reduce borers and disease.
- Don’t bury rhizomes like bulbs.
- Don’t pile mulch over rhizomes.
- Don’t blast them with high-nitrogen fertilizer.
- Don’t overwater established plants in heavy soil.
Gardeners’ Experience Notes (Extra of Real-World “What It’s Like”)
If you’ve never grown bearded iris before, here’s the part nobody tells you until you’re standing in the yard holding a rhizome like a weird potato, thinking, “This is… a plant?” Bearded iris are wonderfully straightforward, but they do have a personality, and most gardeners run into the same handful of “learning moments.”
First: the planting depth anxiety is real. Many people’s instinct is to tuck rhizomes safely under the soil like you would with bulbs. Then spring arrives and you get a gorgeous fan of leaves… and no blooms. The fix is often almost comically simple: lift and replant shallower. Gardeners who switch from “buried” to “rhizome-top-visible” planting often see a noticeable improvement in flowering the following season, especially when the clump also gets more sun and breathing room.
Second: mulch is not always your friend with bearded iris. Plenty of gardeners are dedicated mulchers (and for good reason), so it’s surprisingly easy to smother iris rhizomes without realizing it. The common experience goes like this: you mulch beautifully in fall, feel very accomplished, and then notice soft, unhappy rhizomes laterespecially after a wet spring. People who keep mulch pulled back from the rhizomes (or use a very light layer only between plants) tend to have fewer rot episodes. This is also why raised beds and gritty drainage amendments feel like cheatingin the best way.
Third: division feels scary the first time, but quickly becomes addictive. The first divide usually happens after blooms shrink, the center looks tired, and the rhizomes start piling up. Gardeners often expect a delicate surgical procedure. What they discover is closer to a practical reset: lift, inspect, keep the firm healthy pieces, toss the mushy ones, trim the fans, and replant shallow. A nice bonus is how quickly a refreshed planting looks intentional againlike you planned it all along. (Pro tip people learn the hard way: label varieties right after bloom or take photos, because once you’re dividing, everything looks the same shade of “rhizome.”)
Fourth: iris borers can be a mystery until they aren’t. Many gardeners only realize borers are present after foliage declines or rhizomes rot. The “aha” moment tends to come when someone digs up a struggling plant and finds tunneling damage. The experience most people report is that sanitationremoving and destroying old foliage and keeping beds cleanmakes the biggest difference over time, and early spring monitoring is far easier than trying to rescue heavily infested rhizomes later.
Finally: gardeners often notice that bearded iris respond to a few small “respect the plant” habits: keep them in sun, don’t keep them wet, don’t bury them, and don’t crowd them. When those basics are right, iris are the kind of perennial that makes you look like a gardening wizard. When those basics are wrong, they’ll still survivejust with fewer flowers and more drama. The good news is that most problems are fixable with a shovel, a sunny spot, and the confidence to let rhizomes be a little bit exposed.