Table of Contents >> Show >> Hide
- Why Homeowners Choose St. Augustine Sod
- Before You Plant: Check the Three Big Things
- Tools and Materials You Will Want
- How to Plant St Augustine Sod Step by Step
- Step 1: Clear the Area Completely
- Step 2: Test and Improve the Soil
- Step 3: Grade the Site for Drainage
- Step 4: Lightly Moisten the Soil
- Step 5: Lay the First Row Along a Straight Edge
- Step 6: Stagger the Seams Like Brickwork
- Step 7: Trim Around Curves and Obstacles
- Step 8: Roll the Lawn if You Can
- Step 9: Water Immediately and Thoroughly
- How to Care for New St. Augustine Sod During the First 30 Days
- Common Mistakes to Avoid
- How to Tell Your Sod Is Establishing Well
- Experience and Practical Lessons From Real St. Augustine Sod Projects
- Conclusion
- SEO Tags
Planting St. Augustine sod is one of the fastest ways to make a yard go from “abandoned parking lot energy” to “someone here definitely owns a hose and has opinions about edging.” If you live in a warm part of the United States and want a thick, attractive lawn that can handle some heat and a bit of shade, St. Augustine is often high on the shortlist. It is popular for a reason: it fills in quickly, has a lush texture, and gives Southern lawns that soft, established look that seed often takes forever to deliver.
But here is the catch: sod is not a magic carpet. You cannot toss it on hard dirt, squirt it with a garden hose twice, and expect it to live a long, green life. St. Augustine sod needs proper timing, smart soil prep, tight installation, and careful watering during the first few weeks. Do those things right, and your lawn can establish quickly. Skip them, and your expensive green squares may become expensive beige regrets.
This guide walks you through exactly how to plant St. Augustine sod, from choosing the right time to lay it down to caring for it during the critical first month. Whether you are sodding a new yard, fixing a damaged lawn, or finally replacing that patchy weed convention happening outside your window, this step-by-step article will help you do it the right way.
Why Homeowners Choose St. Augustine Sod
St. Augustine grass is a warm-season turfgrass prized for its broad blades, dense growth, and ability to create a full lawn relatively quickly. It spreads by stolons, which are above-ground runners that help the grass knit together into a thick surface. That spreading habit is one reason it is so popular in warm, humid regions.
Another big selling point is that St. Augustine handles moderate shade better than many other warm-season grasses. That does not mean it can grow happily in deep, all-day darkness under a jungle of oak branches, but it generally performs better than bermudagrass in yards with partial sun. If your lawn gets a blend of morning sun, filtered light, and some afternoon shade, St. Augustine is often a strong candidate.
It is also usually established by sod or plugs rather than seed, which makes sodding the preferred method for homeowners who want a finished look quickly. Instead of waiting for a lawn to germinate, fill in, and defend itself from every weed in the county, sod gives you immediate coverage and helps reduce erosion from day one.
Before You Plant: Check the Three Big Things
1. Make Sure the Timing Is Right
The best time to plant St. Augustine sod is when warm-season turf is actively growing. In practical terms, that usually means late spring through summer in many Southern climates. Warm soil and active growth help sod root in faster and recover more smoothly from the stress of harvest, transport, and installation.
Yes, sod can sometimes be installed outside peak season, especially in mild climates. But for most homeowners, active growing weather is the easier path. Roots establish faster, mistakes are easier to correct, and you will spend less time hovering over your lawn like a worried plant parent.
2. Be Honest About Sunlight
St. Augustine is more shade-tolerant than many warm-season grasses, but it still needs light. A partly shaded lawn can work well. A deeply shaded area where sunlight is mostly a rumor can still fail. Before buying sod, look at the area across the day. If the lawn gets several hours of direct sunlight or quality filtered light, you may be in good shape. If it stays dim from breakfast through sunset, consider a different landscape solution for that section.
3. Measure Carefully
Measure the lawn area in square feet and order a little extra. It is far better to have a small amount left over than to end up six pieces short with a half-finished corner mocking you from across the yard. Extra sod also helps if you need to trim awkward shapes around beds, curves, drains, or walkways.
Tools and Materials You Will Want
- St. Augustine sod
- Rake and hard rake
- Shovel or sod cutter if removing old turf
- Wheelbarrow
- Garden hose and sprinkler or irrigation system
- Lawn roller, if available
- Utility knife or spade for trimming pieces
- Compost or soil amendment if your soil needs improvement
- Soil test results, ideally
You do not need a garage full of professional equipment, but you do need enough gear to prep the surface well. Good sod laid over bad prep is still bad installation wearing a green disguise.
How to Plant St Augustine Sod Step by Step
Step 1: Clear the Area Completely
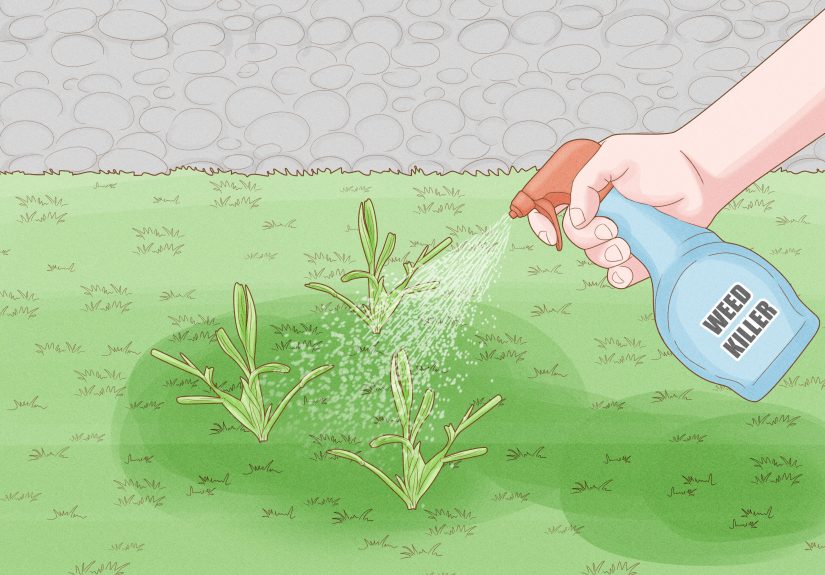
Start by removing weeds, old grass, rocks, debris, and leftover construction junk. If the site has an existing lawn in terrible shape, do not lay new sod directly over it. That creates competition, uneven rooting, drainage issues, and disappointment. Strip the area clean so the new sod can root into real soil rather than trying to negotiate a peace treaty with dying turf underneath.
This is also the time to deal with obvious problems such as buried rubble, low spots, compacted clay, or drainage trouble. It is much easier to fix these before installation than after the sod is down and you are emotionally attached to it.
Step 2: Test and Improve the Soil
If you can, do a soil test before planting. St. Augustine generally prefers well-drained soil with moderate fertility and a slightly acidic to neutral pH. A soil test gives you a smarter starting point than random guesswork and fertilizer optimism.
In many yards, especially new construction sites, the top layer of soil has been compacted, scraped, or mixed with subsoil. Loosen the top several inches so roots can move into it. If the soil is poor, adding quality organic matter or a suitable amendment can improve structure and help with moisture movement. Just do not go overboard. The goal is a stable, workable planting surface, not a fluffy layer cake that settles unevenly later.
Step 3: Grade the Site for Drainage
Rake the soil smooth and shape the surface so water drains away from the house. Fill low pockets, shave high bumps, and create a final grade that looks clean and even. This matters more than people think. Uneven grading leads to puddles, dry humps, mowing headaches, and a lawn that always looks just slightly annoyed.
A lightly compacted, smooth surface is ideal. You want the ground firm enough to hold grade, but not so hard that roots act like they are trying to grow through a parking slab.
Step 4: Lightly Moisten the Soil
Before laying sod, lightly moisten the soil. Damp soil helps the sod make contact and reduces stress during installation. Do not turn the site into mud. If the ground is squishy, you will create ruts and footprints that are frustrating to fix later.
Step 5: Lay the First Row Along a Straight Edge
Begin along a driveway, sidewalk, patio, fence line, or another straight edge. That gives you a clean starting point and helps keep rows aligned. Lay each piece flat on the soil, not stretched, not overlapped, and definitely not tossed down like pizza boxes at a party.
Handle sod as quickly as possible after delivery. Fresh sod is perishable. The longer it sits stacked on a pallet in heat, the greater the stress. Install it promptly, especially in warm weather.
Step 6: Stagger the Seams Like Brickwork
As you lay additional rows, stagger the joints in a brick-like pattern. This helps stability, improves appearance, and reduces the chance of long seams drying out or separating. Fit edges tightly together so there are no open gaps. Gaps dry out fast and invite weeds. Overlaps are just as bad because they create bumps and weak rooting areas.
Think “snug, not smashed.” The pieces should touch without being forced into each other like puzzle parts from the wrong box.
Step 7: Trim Around Curves and Obstacles
Use a sharp knife or spade to cut pieces neatly around sprinkler heads, beds, trees, and walkways. Avoid leaving tiny scraps around the edges because they dry out quickly. It is better to use solid pieces where possible and save trimmed sections for small filler areas only when they fit well.
Step 8: Roll the Lawn if You Can
Once the sod is down, a lawn roller helps press the roots into contact with the soil and smooth out air pockets. This step is especially helpful on newly prepared ground. If you do not have a roller, you can still succeed, but rolling adds a little professional polish and improves contact.
Step 9: Water Immediately and Thoroughly
This is the part you do not delay. As soon as the sod is installed, water it thoroughly so moisture reaches into the soil below. The sod itself should not just look wet on top; the root zone and underlying soil need moisture too. The goal is to prevent drying and encourage the first stages of rooting.
That first watering is not a polite sprinkle. It is the opening handshake between the sod and the soil, and it needs to be firm.
How to Care for New St. Augustine Sod During the First 30 Days
Watering Schedule
The first few weeks determine whether the sod establishes well or merely survives. In the beginning, newly laid St. Augustine needs frequent watering so it does not dry out before roots anchor into the soil below.
A practical approach is to keep the sod consistently moist during the first phase, then gradually reduce frequency and encourage deeper rooting. Early on, that may mean short, repeated irrigations or daily watering, depending on heat, wind, soil type, and local conditions. After the initial establishment window, cut back to fewer, deeper waterings. By the time the lawn is rooted, you want irrigation to be less frequent and more purposeful.
Watch the lawn, not just the calendar. Sandy soil dries faster than heavier soil. Full sun dries faster than partial shade. A breezy week can turn your watering plan into fiction. Lift a corner carefully in one spot if needed and check that moisture is reaching the soil below without leaving the area soggy.
Keep Foot Traffic Off
New sod is not ready for backyard football, patio furniture shuffling, or a parade of curious neighbors. Limit walking on it until roots begin to anchor. If the sod shifts underfoot, it is not ready. The more you protect it early, the better it knits together.
This applies to pets too. Dogs are not always moved by your lawn goals, but your lawn certainly will be.
First Mowing
Do not mow immediately. Wait until the sod has rooted enough that it resists lifting and the grass has grown to mowing height. Use a sharp blade and never remove more than one-third of the leaf blade in a single mow.
St. Augustine generally does better when kept on the taller side. For many home lawns, mowing around 3 to 4 inches works well, with about 3.5 inches being a commonly recommended target. Scalping it low can stress the grass, reduce density, and make the lawn more vulnerable to weeds and heat stress. In other words, this is not the grass to buzz-cut out of impatience.
Hold Off on Fertilizer
One of the most common mistakes with new sod is fertilizing too soon. Freshly installed St. Augustine usually does not need immediate fertilizer, and applying it before roots establish can increase nutrient loss rather than helping the lawn. In many cases, waiting about 30 to 60 days is the smarter move. Some lawn managers also wait until the turf is actively growing and has been mowed more than once before making the first meaningful fertilizer application.
Translation: do not try to speed-run establishment with extra fertilizer. That is not lawn care. That is impatience with a spreader.
Common Mistakes to Avoid
- Laying sod over existing grass: It looks faster, but it usually causes rooting and drainage problems.
- Ignoring soil prep: Hard, compacted soil is one of the biggest reasons sod struggles.
- Leaving gaps between pieces: Cracks dry out and invite weeds.
- Overwatering after the first phase: New sod needs moisture, but constant saturation can cause trouble.
- Mowing too early or too low: Weak roots plus scalping equals stress.
- Fertilizing too soon: Fresh sod needs roots first, not a chemical pep talk.
- Choosing St. Augustine for deep shade: Shade-tolerant does not mean cave-tolerant.
How to Tell Your Sod Is Establishing Well
Healthy new St. Augustine sod should begin looking less like separate pieces and more like a lawn. Seams become less noticeable. Color stays reasonably consistent. The grass starts growing upward and outward. Most importantly, the sod begins resisting gentle lifting because roots are attaching to the soil below.
If sections stay loose, dry out quickly, or turn patchy while surrounding pieces look fine, check for irrigation coverage problems, poor soil contact, compacted spots, or installation gaps. Most early problems are not mysterious. They are usually the result of water, contact, or prep.
Experience and Practical Lessons From Real St. Augustine Sod Projects
Anyone who has planted St. Augustine sod more than once will tell you the same thing: the installation day gets all the attention, but the real story is what happens the next two to four weeks. That is where lawns are won, lost, or slowly negotiated into something decent.
One common experience is that homeowners underestimate how fast sod can dry out in warm weather. The lawn may look green at delivery, green during installation, and still start stressing if watering is delayed or too light. This is especially true in open yards with reflected heat from driveways, walls, or patios. The lesson is simple: when the sod goes down, watering is not a “later this evening” task. It is a “right now” task.
Another real-world lesson is that prep work feels annoyingly slow until you compare it with redoing a failed lawn. People often want to hurry past clearing, grading, and smoothing because it does not look exciting. But after a few projects, it becomes obvious that good prep creates easier mowing, better drainage, smoother rooting, and a much better-looking finished lawn. The boring parts are often the parts that save the job.
There is also the classic mistake of buying beautiful sod for a terrible site. St. Augustine can handle moderate shade, but it still needs usable light. In many yards, the grass does well until shrubs mature, tree canopies thicken, or a fence line starts blocking more sun than expected. What looked like a turf area on day one may slowly become a landscape bed in disguise. Experienced homeowners learn to watch the light first and shop for sod second.
Water management is another place where experience matters. New installers often think more water is always better. Then they discover squishy seams, fungus concerns, and roots that never seem motivated to grow downward. The smarter approach is consistent moisture at first, followed by a gradual shift toward deeper, less frequent watering. In short, baby the lawn early, then teach it some independence.
Mowing is often the moment when confidence returns. Once the sod roots and the first proper mow happens, the yard starts looking intentional instead of temporary. But experienced lawn owners know not to scalp St. Augustine for a “cleaner” look. Keeping it a bit taller usually pays off with better color, denser coverage, and less stress in summer heat. This grass likes a little dignity.
Perhaps the biggest shared experience is that St. Augustine rewards consistency more than heroics. You do not need a dramatic lawn-care ritual. You need timely watering, sensible mowing, patience with fertilizer, and the discipline to fix little issues before they become big ones. A missed sprinkler head, a low corner that stays wet, or a seam that separated in the first week can all be corrected quickly if noticed early.
In the end, the people happiest with their St. Augustine sod are usually not the ones who chased perfection on day one. They are the ones who respected the basics, watched the lawn closely, and adjusted as conditions changed. It is a practical grass for practical people. Treat it well during establishment, and it usually returns the favor with a lawn that looks lush, thick, and very much worth the effort.
Conclusion
If you want to plant St. Augustine sod successfully, focus on the fundamentals: choose the right season, make sure the site has enough light, prepare and grade the soil carefully, install the sod quickly, fit the pieces tightly, water immediately, and be patient through establishment. Those steps are not glamorous, but they are what turn fresh sod into a healthy lawn.
The good news is that St. Augustine rewards solid technique. Once it roots in and begins spreading, it can create a dense, attractive lawn with a classic Southern look. The bad news is that it also punishes shortcuts with impressive honesty. So take the extra time on prep, keep up with watering, mow it high, and resist the urge to overdo fertilizer too soon. Your lawn will not write you a thank-you note, but it will look like it wanted to.