
Table of Contents >> Show >> Hide
- Can You Really Paint Linoleum Flooring?
- Why Paint an Outdated Linoleum Floor?
- Before You Start: Check the Condition of the Floor
- Tools and Materials You Will Need
- Step-by-Step Guide: How to Paint Outdated Linoleum Floor
- Step 1: Remove Everything From the Room
- Step 2: Deep Clean the Floor
- Step 3: Repair Small Damage
- Step 4: Lightly Sand or Degloss the Surface
- Step 5: Tape Off Edges and Fixed Objects
- Step 6: Apply Bonding Primer
- Step 7: Paint the First Coat
- Step 8: Add a Pattern or Stencil, If Desired
- Step 9: Seal the Painted Floor
- Step 10: Let the Floor Cure
- Best Paint Colors for Outdated Linoleum Floors
- Common Mistakes to Avoid
- How Long Does Painted Linoleum Last?
- How to Maintain a Painted Linoleum Floor
- Painted Linoleum Floor Ideas That Actually Look Good
- When You Should Replace Instead of Paint
- Real-World Experience: What Painting an Outdated Linoleum Floor Teaches You
- Conclusion
Note: This article is written for web publishing in clean HTML body format, based on real DIY flooring and paint-preparation practices from reputable U.S. home-improvement, paint, and interior-design sources.
If your linoleum floor looks like it was personally selected by someone wearing shoulder pads in 1987, you are not alone. Old linoleum and vinyl floors have a special talent for making an otherwise decent kitchen, bathroom, laundry room, or mudroom feel tired. The good news? You do not always have to rip it out, haul it away, and emotionally recover from a full flooring renovation. In many cases, you can paint an outdated linoleum floor and give the room a fresh, surprisingly stylish second life.
Painting linoleum flooring is not the same as painting a wall. Walls stand there politely. Floors get walked on, mopped, scraped by chair legs, attacked by shoes, splashed by water, and judged by guests. That means preparation matters more than the paint color itself. A rushed floor-painting project can peel, scratch, or look patchy. A careful one can make a dated floor look intentional, clean, and custom.
This guide explains how to paint outdated linoleum floor step by step, what products to use, what mistakes to avoid, and how to make the finish last as long as possible.
Can You Really Paint Linoleum Flooring?
Yes, you can paint linoleum flooring, but with one important reality check: painted floors are a budget-friendly cosmetic update, not an indestructible factory finish. If the floor is badly torn, loose, bubbling, water-damaged, or crumbling at the edges, paint will not magically turn it into luxury tile. Paint is talented, but it is not a licensed flooring therapist.
True linoleum is made from natural materials such as linseed oil, wood flour, cork dust, resins, and pigments. Many people casually use the word “linoleum” to describe sheet vinyl flooring, which is a different material made largely from PVC. The painting process is similar for both because the main challenge is the same: the surface is smooth, often glossy, and designed to resist stains. Unfortunately, that also means it resists paint unless you prepare it correctly.
The best candidates for painting are floors that are firmly attached, relatively smooth, cleanable, and free from major holes or curling seams. A laundry room, powder room, pantry, craft room, or low-traffic kitchen can be a great place to try this project.
Why Paint an Outdated Linoleum Floor?
There are several good reasons to paint instead of replace. First, it is much cheaper. New flooring may require demolition, disposal, underlayment repair, adhesive, transition strips, trim work, and tools you did not know existed until they started judging you from the hardware-store aisle.
Second, painting is less disruptive. You can often complete the main work over a weekend, although the floor still needs time to cure before heavy use. Third, paint gives you design freedom. You can choose a soft neutral, bold checkerboard, faux cement tile stencil, painted border, or modern matte finish. Instead of being stuck with beige swirls, yellowed faux stone, or mysterious speckles, you can create a floor that matches your actual style.
Before You Start: Check the Condition of the Floor
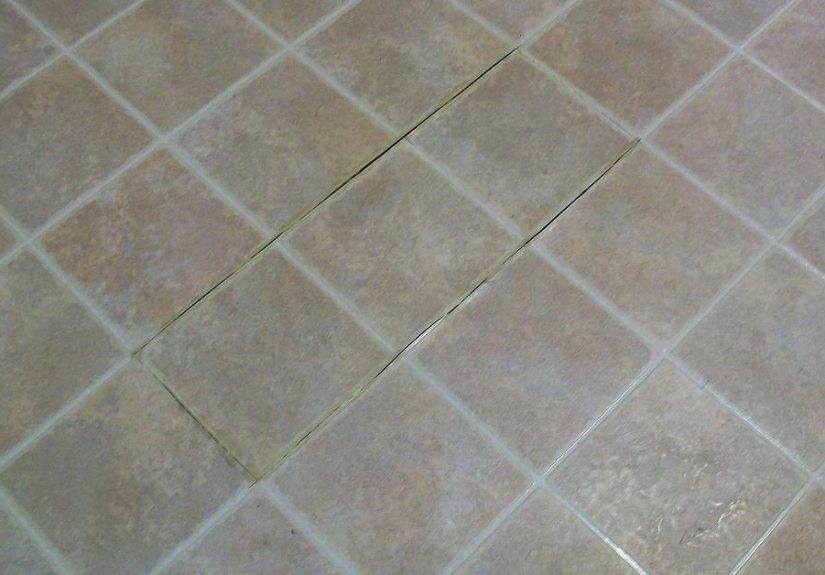
Before buying primer and paint, inspect the floor carefully. Look for peeling corners, lifted seams, deep gouges, soft spots, sticky residue, wax buildup, mildew, and water damage. Press gently around the toilet, sink, dishwasher, washing machine, and exterior doors. These areas often reveal moisture problems.
If the floor feels spongy or smells musty, solve the moisture issue before painting. If seams are lifting, glue them down with the proper flooring adhesive and let them dry fully. If small dents or holes exist, fill them with a suitable floor patch or flexible filler recommended for resilient flooring. Sand rough patches smooth after they cure.
Also consider age. Some older flooring and adhesives may contain asbestos, especially in homes built before the 1980s. Do not sand, cut, scrape, or disturb suspicious old flooring until it has been evaluated by a qualified professional. Painting over a stable old floor may be safer than demolition, but sanding unknown material is not worth the risk.
Tools and Materials You Will Need
Basic Supplies
Gather your tools before starting so you do not have to run to the store mid-project wearing one sock and a look of regret.
- Broom, vacuum, and mop
- Degreasing cleaner or heavy-duty floor cleaner
- Bucket, sponge, and clean rags
- Painter’s tape
- Drop cloths or plastic sheeting
- Sandpaper or sanding block, usually 120- to 220-grit
- Liquid deglosser, optional but helpful
- Bonding primer made for slick surfaces
- Porch and floor paint, floor enamel, or durable acrylic floor paint
- Water-based polyurethane or clear floor sealer
- Angled brush for edges
- High-quality roller with a smooth or low-nap cover
- Paint tray and liners
- Optional stencil, painter’s ruler, chalk line, or template
- Optional anti-slip additive for wet areas
Step-by-Step Guide: How to Paint Outdated Linoleum Floor
Step 1: Remove Everything From the Room
Take out rugs, chairs, small appliances, trash cans, storage baskets, and anything else sitting on the floor. If possible, remove floor registers and low furniture. For bathrooms, you may choose to paint around the toilet, but removing it creates a cleaner result if you are comfortable doing so. If not, tape carefully around the base.
Clean access matters. You want to paint the whole floor evenly, not perform acrobatics around a laundry basket and a suspiciously heavy cabinet.
Step 2: Deep Clean the Floor
This is the most important step, and sadly, it is also the least glamorous. Old linoleum floors often carry layers of grease, wax, floor polish, soap residue, dust, pet hair, and mystery kitchen history. Paint will not stick well to any of that.
Sweep and vacuum thoroughly. Then scrub the floor with a degreasing cleaner, focusing on corners, edges, seams, and areas near appliances. Rinse with clean water to remove cleaner residue. Let the floor dry completely. If the surface still feels slick or greasy, clean it again. A floor that is “mostly clean” is a floor that is mostly planning to peel.
Step 3: Repair Small Damage
Paint will change the color of the floor, but it will not hide dents, cracks, seams, or texture. If anything, a fresh coat of paint can make imperfections more visible. Fill small gouges or holes with a patching compound that works with resilient flooring. Press lifted seams flat with adhesive if appropriate. Once repairs are dry, sand them smooth.
If your linoleum has a strong embossed pattern, you can still paint it, but the pattern may show through. Some DIYers like that subtle texture. Others skim-coat the surface with an embossing leveler before painting. That extra step takes more skill but can create a smoother, more modern finish.
Step 4: Lightly Sand or Degloss the Surface
Linoleum and vinyl floors often have a protective top layer. That shiny layer is great when you spill coffee. It is less great when you want primer to grip. Lightly sand the entire surface with fine-grit sandpaper to dull the shine. You are not trying to grind off the flooring; you are simply scuffing the surface so the primer has something to hold onto.
After sanding, vacuum carefully and wipe the floor with a damp cloth or tack cloth. Any dust left behind can create bumps in the paint. If you prefer not to sand, a liquid deglosser can help dull the surface, but follow the product directions exactly and ventilate the room well.
Step 5: Tape Off Edges and Fixed Objects
Use painter’s tape along baseboards, cabinets, tubs, toilets, thresholds, and built-ins. Press the tape down firmly to reduce bleeding. If you are creating a stencil, checkerboard, stripe, or border, take extra time to measure. Floors reveal crooked lines faster than walls because you see the whole pattern at once.
For a small room, a simple solid color may be easiest. For a larger room, a stencil can add charm, but it also adds time. Be honest about your patience level. A painted floor stencil can look amazing, but it is not the project to start at 10 p.m. with loud music and unrealistic optimism.
Step 6: Apply Bonding Primer
A bonding primer is essential for slick flooring. Choose a primer designed for glossy, difficult, or nonporous surfaces. Start by cutting in around the edges with a brush, then roll the primer over the main floor area in thin, even coats. Avoid puddles, heavy roller marks, and thick buildup.
Let the primer dry according to the label. Some primers feel dry quickly but need more time before topcoating. Do not rush. If the primer fails, every beautiful layer on top of it is just decoration on a weak foundation.
Step 7: Paint the First Coat
Use a durable floor paint, porch and floor enamel, or acrylic floor paint made for foot traffic. Regular wall paint is not tough enough for floors. Begin at the farthest corner and work toward the exit, unless you enjoy painting yourself into a corner and contemplating your choices.
Apply thin coats with a roller. Thin coats dry harder and more evenly than thick coats. Use a brush for edges and tight spaces. Let the first coat dry fully before applying the next one. Depending on the paint, color, and original floor pattern, you may need two or three coats.
Step 8: Add a Pattern or Stencil, If Desired
If you want a patterned linoleum floor, wait until the base coat is dry. Use a stencil adhesive or painter’s tape to hold the stencil in place. Load the roller lightly and remove excess paint before rolling over the stencil. Too much paint causes bleeding under the edges.
Popular painted linoleum floor ideas include black-and-white checkerboard, soft gray faux cement tile, navy and white geometric patterns, warm terracotta squares, sage green borders, or simple cream floors with a narrow painted frame. For small rooms, a medium-scale pattern often looks better than a tiny busy design.
Step 9: Seal the Painted Floor
Once the paint is completely dry, protect it with a clear water-based polyurethane or floor sealer. This step helps resist scratches, moisture, and daily wear. Apply two to three thin coats, letting each coat dry as directed. Light sanding between sealer coats can improve adhesion, but only do this if the product instructions allow it and the paint is fully dry.
Avoid oil-based polyurethane over light colors because it may amber over time. Water-based sealers are usually a better choice for white, cream, gray, or pastel floors.
Step 10: Let the Floor Cure
Dry and cured are not the same thing. A painted floor may feel dry within hours, but the finish can remain soft underneath for days or even weeks. Keep traffic light at first. Avoid dragging furniture, placing rugs too soon, or mopping aggressively. The longer you let the floor cure, the better it will perform.
When you move furniture back, add felt pads to chair and table legs. For kitchens, use washable mats near the sink after the finish has cured. In bathrooms, choose breathable rugs and avoid rubber-backed mats that may trap moisture or stick to the finish.
Best Paint Colors for Outdated Linoleum Floors
Color can make or break this project. If the room is small or dark, soft warm white, pale gray, greige, light taupe, or muted sage can make the space feel cleaner and larger. If you want drama, charcoal, deep green, navy, or black-and-white checkerboard can look bold and classic.
For kitchens with white cabinets, a charcoal or slate-gray painted floor creates contrast without feeling chaotic. For laundry rooms, a patterned stencil can turn a boring utility space into a cheerful surprise. For bathrooms, consider soft blue-gray, warm stone, or a small-scale tile-inspired pattern.
Do not choose a color only because it looks cute on a paint chip. Floors collect dust, lint, crumbs, and footprints. Very dark floors show dust. Very white floors show everything else. A medium tone with a slight pattern is often the most forgiving option.
Common Mistakes to Avoid
Skipping the Cleaning
If you paint over wax, grease, or residue, the finish may peel. Cleaning is not optional. It is the handshake agreement between your floor and the primer.
Using Wall Paint
Wall paint belongs on walls. Floor paint is designed for abrasion, foot traffic, and cleaning. Use a product made for floors or expect disappointment.
Applying Thick Coats
Thick paint may look satisfying at first, but it dries slowly and can stay soft. Thin coats are stronger and smoother.
Skipping the Sealer
A clear sealer gives the painted floor extra protection. In high-use areas, it can be the difference between “Wow, you painted that?” and “Oh no, you painted that.”
Walking on It Too Soon
Patience is part of the project. Let the paint and sealer cure before heavy use. Your future self will appreciate the restraint.
How Long Does Painted Linoleum Last?
A painted linoleum floor can last months or several years depending on preparation, product quality, traffic, moisture, and maintenance. A powder room may stay beautiful for a long time because it gets light use. A busy kitchen with kids, pets, rolling chairs, and frequent spills will wear faster.
The good news is that painted floors can be touched up. Keep a small container of leftover paint and sealer for repairs. If one area chips, sand the spot lightly, clean it, repaint, and reseal. This is one of the advantages of painted flooring: it is flexible, affordable, and easy to refresh.
How to Maintain a Painted Linoleum Floor
Maintenance should be gentle. Sweep or vacuum regularly with a soft attachment. Mop with a mild cleaner and avoid harsh chemicals, abrasive pads, steam mops, or soaking water. Wipe spills quickly. Use felt pads under furniture and lift items instead of dragging them.
If the floor is in a bathroom or laundry room, manage moisture carefully. Good ventilation helps the finish last longer. After showers, laundry leaks, or wet shoes, dry the floor instead of letting water sit.
Painted Linoleum Floor Ideas That Actually Look Good
Classic Checkerboard
A checkerboard floor works in kitchens, breakfast nooks, and laundry rooms. Black and white is timeless, but cream and taupe or sage and ivory feel softer.
Faux Cement Tile
A stencil can mimic expensive encaustic or cement tile. This is a great option for small bathrooms or entryways where a little pattern goes a long way.
Solid Matte Neutral
A simple painted floor in warm gray, beige, or mushroom can make old flooring disappear visually. This is ideal if you want the cabinets, walls, or furniture to be the star.
Painted Border
A border adds detail without covering the whole floor in pattern. Try a narrow charcoal stripe around a cream floor for a tailored look.
Soft Coastal Blue
Blue-gray or dusty aqua can freshen a bathroom, laundry room, or cottage-style kitchen. Pair it with white trim and natural baskets for an easy, breezy look.
When You Should Replace Instead of Paint
Painting is not always the right solution. Replace the floor if it is loose across large areas, badly torn, moldy, water-damaged, or installed over a failing subfloor. Also consider replacement if you need a long-term upgrade for resale value or if the room handles heavy daily traffic.
Peel-and-stick vinyl tiles, floating vinyl plank flooring, sheet vinyl, and new linoleum are all affordable alternatives. Painting is best when you want a low-cost improvement and understand that it may need future touch-ups.
Real-World Experience: What Painting an Outdated Linoleum Floor Teaches You
The first thing you learn when painting an outdated linoleum floor is that the actual painting is the easy part. The preparation is where the project succeeds or quietly starts plotting against you. Many DIYers begin with a fantasy: roll on a pretty color, sip iced coffee, admire the transformation, and post a dramatic before-and-after photo. Reality adds a few extra scenes involving scrubbing corners, waiting for primer to dry, and discovering that the floor under the refrigerator has been collecting crumbs since the invention of Wi-Fi.
One of the biggest lessons is that clean does not mean “looks clean from standing height.” A linoleum floor can appear clean and still have wax, polish, grease, or soap residue sitting on the surface. When you kneel down and scrub, you may find dull patches, sticky spots, and old stains that were hiding in plain sight. This is why degreasing and rinsing matter so much. Paint sticks best when the surface is boringly clean.
Another useful experience is learning to respect drying time. It is tempting to touch the floor every 15 minutes like checking cookies through an oven door. But floor paint and sealer need time. A coat may feel dry to your fingers but still be vulnerable to dents, rug marks, shoe prints, or chair legs. The most successful painted floors usually come from people who give each layer more time than the minimum listed on the can, especially in humid rooms.
Patterned floors teach their own lessons. A stencil can turn old linoleum into a boutique-looking surface, but it requires patience. The trick is using very little paint on the roller or stencil brush. If the roller is too wet, paint bleeds under the stencil and the crisp design becomes fuzzy. It is better to apply two light passes than one heavy one. Also, perfection is not required. Once the entire floor is finished, tiny flaws usually disappear into the overall pattern.
Color choice is another area where experience helps. Pure white floors look fresh online, but in real life they can show dust, hair, lint, and every crumb from every snack ever eaten in the house. Very dark floors can show dust and footprints. Medium colors, soft patterns, and slightly muted tones are often easier to live with. A warm gray, stone beige, muted green, or soft checkerboard can hide more daily life while still looking stylish.
Finally, painting linoleum teaches you that budget projects can still feel rewarding. No, it is not the same as installing handmade tile. No, it will not survive endless abuse without maintenance. But it can completely change how a room feels for a fraction of the cost of replacement. A painted floor can make a laundry room cheerful, a rental kitchen bearable, or an old bathroom feel intentionally vintage instead of accidentally outdated.
The best mindset is to treat the project as a smart cosmetic upgrade. Prepare carefully, use the right primer and paint, seal the surface, and give it time to cure. Add felt pads, clean gently, and keep leftover paint for touch-ups. With those habits, your painted linoleum floor can look charming, custom, and far more expensive than it really was. And honestly, any project that lets you defeat ugly flooring without demolition deserves a small round of applause.
Conclusion
Painting an outdated linoleum floor is one of the most affordable ways to refresh a tired room without committing to a full renovation. The secret is not a magic paint color or a fancy stencil. The secret is preparation: clean deeply, dull the glossy surface, use a strong bonding primer, apply thin coats of floor paint, seal everything, and let the finish cure properly.
If your floor is structurally sound, painting can give it a completely new personality. A dull beige sheet floor can become a crisp checkerboard. A faded bathroom floor can look like patterned tile. A laundry room can go from “forgotten utility zone” to “tiny design moment.” With patience and the right materials, you can turn outdated linoleum into a floor that looks fresh, intentional, and ready for its close-up.






