
Table of Contents >> Show >> Hide
- Step 1: Pick a Zoo Site and Theme
- Step 2: Plan a Layout Like a Real Zoo
- Step 3: Build Safe, Good-Looking Habitats
- Step 4: Capture and Transport Animals Without Losing Your Mind
- Step 5: Stock Exhibits the Smart Way (Breeding, Naming, Sorting)
- Step 6: Add the “Visitor Experience” (Paths, Signs, Shops)
- Step 7: Keep It Running (Lighting, Spawn-Proofing, Maintenance)
- Conclusion
- Extra: Real-World Build Experience (500+ Words of Practical Zoo Lessons)
Building a zoo in Minecraft is the perfect mix of “wholesome wildlife documentary” and “mildly chaotic blocky logistics simulator.”
One minute you’re designing a classy entrance with banners and fountains; the next you’re sprinting after a llama that just discovered
freedom is an option. The good news: with a solid plan (and a little patience), you can build a Minecraft zoo that looks awesome,
works smoothly, and doesn’t turn into an accidental petting-zoo jailbreak.
This guide breaks down exactly how to make a zoo in Minecraft in 7 practical stepsfrom choosing a location and
laying out paths to building escape-proof habitats, transporting animals, and adding the kind of “visitor experience” details that make
your build feel like a real destination. Along the way, you’ll pick up Minecraft zoo ideas, enclosure tricks, and low-stress ways
to keep your animals where they belong: inside the exhibits, not operating a new society in your storage room.
Step 1: Pick a Zoo Site and Theme
Choose a location that won’t make you hate yourself later
Zoos take space. Like, “I swear this looked smaller on the map” space. Pick a relatively flat area with room to expand, and try to keep it
close enough to your base that you’ll actually visit. If you build it a thousand blocks away, you’ll go once, feel proud, and then forget it
existslike a treadmill.
Good zoo locations include plains (easy building), savannas (great warm palette), and forests (instant landscaping). If you want a more dramatic
vibe, build along a coastline for aquarium zones and scenic bridges. Bonus points if your zoo sits near multiple biomes, because your “collection
missions” will be less “epic adventure” and more “quick errand, be right back.”
Pick a theme that guides your build decisions
A theme prevents your zoo from looking like seven random pens and a sign that says “ZOO LOL.” Choose a vibe:
- Modern city zoo: clean paths, glass viewing tunnels, signage, gift shop builds.
- Nature reserve: rustic wood, stone paths, lots of foliage, hidden barriers.
- Fantasy zoo: floating exhibits, magical lighting, dramatic cliffs, “why is there a waterfall in the cafeteria?” energy.
- Biome park: each exhibit mimics a biome (jungle house, arctic dome, swamp boardwalk).
Your theme makes material choices easier: modern zoos love glass and concrete; rustic zoos love logs and stone; fantasy zoos love everything that
glows like it’s sponsored by a mysterious wizard.
Step 2: Plan a Layout Like a Real Zoo
Build paths first (yes, really)
The fastest way to make a zoo feel legit is a well-planned path system. Real zoos guide visitors with loops, hubs, and clear sightlines.
Do the same: start with a main entrance, create a central plaza, and branch into themed zones. If your paths look intentional, the whole build
looks intentionaleven if you improvised half the exhibits at 2 a.m.
A simple layout that works almost every time:
- Main Entrance → Central Plaza (map wall, fountain, banner sign)
- Loop Path around the zoo so visitors can’t get lost
- Side Spurs for specialty exhibits (aquarium, aviary, “danger zone”)
- Staff Paths behind exhibits for maintenance and animal handling
Think about sightlines and “crowd flow”
Minecraft players don’t technically form crowds, but your eyes do. Give yourself viewing points: windows, balconies, raised walkways, and
little “lookout nooks” that frame an exhibit. A great zoo is basically a galleryexcept the art occasionally moo-screams and tries to climb fences.
Pro tip: build the zoo in phases. Start with three or four exhibits and one strong “anchor feature” (aquarium hall, panda garden, big cat habitat),
then expand. It’s more fun, and you won’t burn out halfway through a mega-project the size of a small nation.
Step 3: Build Safe, Good-Looking Habitats
Containment basics (without making everything ugly)
A zoo exhibit has two jobs: look cool and keep animals inside. In Minecraft, “looks cool” is easy. “Containment” is where the comedy happens.
Use barriers that match your theme:
- Fences and walls for classic pens
- Glass panes for modern viewing windows
- Moats and elevation changes for natural-looking containment
- Hedges and landscaping to hide “hard barriers” behind plants
Add a double-entry gate (an “airlock”) for exhibits you’ll enter often. That way, if something slips past gate one, gate two is waiting like,
“Nice try, buddy.”
Design habitats by “needs,” not just aesthetics
The best Minecraft zoo habitats feel like the animal belongs there. Even if it’s a square-headed cow with the emotional range of a toaster,
your build can still tell a story. Build to the animal’s environment and behavior:
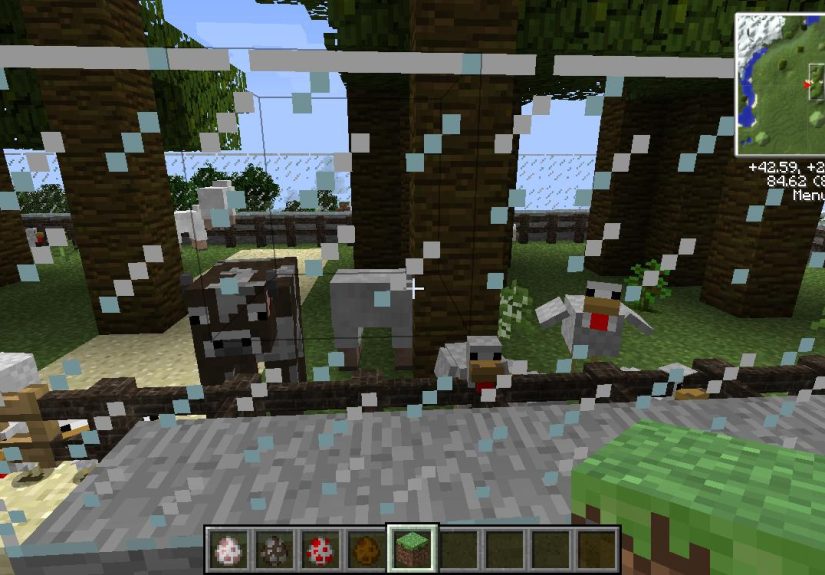
- Grassland Hoofstock: cows, sheep, horses, llamas in wide pastures with shelters and feeding areas.
- Jungle House: parrots and pandas with bamboo, vines, and layered terrain for depth.
- Arctic Dome: polar bears and snow foxes (if you’re using relevant versions/mods) behind ice-and-glass walls.
- Aquatic Zone: fish tanks, turtle beaches, dolphin lagoons with underwater viewing tunnels.
- Swamp Boardwalk: frogs and other swamp-adjacent mobs in shallow water with lily pads and mud.
Don’t underestimate micro-details: rocks, fallen logs, custom trees, feeding trough builds, and shade structures. Those little touches turn
“animal pen” into “zoo exhibit.”
Step 4: Capture and Transport Animals Without Losing Your Mind
Your animal transport toolkit
Moving animals is where most zoo builders discover new emotions. Specifically: bargaining, denial, and “why are you like this, chicken?”
Use these reliable methods:
- Leads: great for guiding many passive mobs over land and short distances.
- Boats: surprisingly good for hauling animals across water (and sometimes even across land if you’re patient).
- Minecarts: best for long-distance “shipping routes” once you build rails.
- Food lures: walk slowly with the right food and animals will follow (ideal early-game).
If you’re building a large zoo, consider making a “quarantine barn” near the entrance. Bring animals there first, then move them into exhibits
on a calmer schedule. It feels more organized, and it keeps your main paths from turning into a stampede lane.
Migration day checklist
- Clear a safe route (remove hazards, bridge rivers, block off cliffs).
- Bring building blocks and gates for emergency “temporary pens.”
- Carry food for the mob you’re transporting (it’s both lure and morale boost).
- Plan for night: have lighting ready or sleep to avoid “surprise zombies.”
If you’re transporting aquatic mobs, build water channels or contained tubes. It’s extra work, but it’s way less stressful than trying to
improvise “fish delivery” with vibes alone.
Step 5: Stock Exhibits the Smart Way (Breeding, Naming, Sorting)
Breeding turns “one panda” into “a panda program”
A zoo with single animals looks empty. A zoo with a small group looks alive. The simplest way to fill exhibits is to bring in at least two
animals per species and breed them inside the habitat. This also lets you keep your “wild capture” trips short.
Set up a small back-of-house pen for breeding pairs if you want tighter control, then move offspring into the public exhibit later. It’s also a
neat way to create “behind the scenes” staff areas that make your zoo feel real.
Use names and signs to prevent chaos
Once you have multiple species and habitats, everything starts to blur together. Add a naming system that’s fun and functional:
- Species signage: “Savanna Exhibit: Llamas & Horses”
- Individual names: optional, but hilarious (“Sir Mooington,” “Bitey (Not a Threat)”)
- Zone maps: simple signposts at intersections keep the zoo navigable
Naming also helps protect special animals you don’t want to lose. If you’re building a long-term world, treat your rare finds like VIPs:
label them, secure them, and don’t let them wander near anything that looks like it could explode.
Step 6: Add the “Visitor Experience” (Paths, Signs, Shops)
Make it feel like a place people would visit
What separates a random collection of enclosures from a true Minecraft zoo build? Guest experience. Add details that tell a story:
- Entrance gate: archway, ticket booth, big sign with banners
- Plaza centerpiece: fountain, statue, or themed monument
- Benches and shelters: small builds that add realism
- Viewing platforms: elevated decks, glass tunnels, bridge overlooks
Build simple “shops” that double as functional rooms
Your zoo shops don’t have to be purely decorative. Combine aesthetics with usefulness:
- Gift shop: storage for leads, food, and building supplies
- Snack stand: furnaces/smokers, food chests, honey bottles, bread stacks
- Staff office: beds, crafting, map wall, backup gear
- First-aid hut: potions, golden apples, “don’t ask why we need this” supplies
This is where your zoo becomes more than a buildit becomes a hub you actually use.
Step 7: Keep It Running (Lighting, Spawn-Proofing, Maintenance)
Light the zoo like you’re trying to impress a movie director
Lighting does two things: it looks great at night, and it reduces unwanted hostile mob drama. Use a mix of hidden light sources (under leaves,
behind trapdoors, inside lantern posts) and decorative lighting (streetlamps, glow gardens, aquarium glow).
For extra safety on paths and visitor areas, use blocks that naturally discourage spawning (like certain partial-height blocks) or design
patterns that reduce open “spawn-friendly” spaces. Your goal is simple: you should be able to take a calm nighttime stroll through your zoo
without a skeleton turning the penguin exhibit into a sharpshooting range.
Do routine “escape audits”
Animals don’t usually plot escapes, but Minecraft physics sometimes does. Every so often:
- Walk the perimeter of each habitat and check for gaps or climbable terrain.
- Verify gates and airlocks still function (especially if you renovated nearby).
- Remove blocks that let mobs hop out (small elevation steps near fences can be sneaky).
- Re-check aquatic enclosures for openings or current paths leading to freedom.
Then reward yourself by adding a new exhibit, because that’s the true Minecraft way: fix one problem, create three new projects.
Conclusion
If you want a zoo that feels purposefulrather than a collection of pensfocus on three things: layout (paths and zones),
habitats (safe and believable), and operations (transport, breeding, lighting, maintenance). Once those foundations
are in place, the fun detailssignage, viewing platforms, themed decor, shops, and “wow moments”become easy to add and incredibly satisfying.
Start small, build in phases, and don’t panic when a goat or llama does something deeply unprofessional. That’s not a failurethat’s
“immersive gameplay.”
Extra: Real-World Build Experience (500+ Words of Practical Zoo Lessons)
Here’s what tends to happen when players build their first Minecraft zoo: they build a gorgeous entrance, a couple of exhibits, and then
suddenly realize they’ve created a new full-time job called “Animal Logistics Manager.” That’s normal. In fact, it’s kind of the point.
A zoo build is one of the rare Minecraft projects that combines architecture, systems, and storytellingand it teaches
you a bunch of sneaky lessons along the way.
First lesson: paths are the glue. Players often spend hours perfecting habitats, then wonder why the zoo feels messy.
It’s usually because the paths don’t make sense. When you rebuild paths with clear loops, small plazas, and consistent materials, the entire
zoo suddenly “clicks.” Even a simple path upgradelike switching to a mixed pattern of stone and coarse dirt with lantern postscan make your
zoo feel like a finished destination rather than a construction site that never got approved by city hall.
Second lesson: natural barriers look better than fences… until you need to enter the exhibit. Moats, cliffs, and hedges are
gorgeous, but the moment you need to walk inside to feed, breed, or reorganize animals, you’ll want a clean, safe access point. The builders
who stay happiest long-term are the ones who quietly add a “staff entrance” behind each habitatsomething that blends with the landscaping but
functions like a reliable door. That’s the difference between “art build” and “playable build.”
Third lesson: animal transport is easier when you build infrastructure once. Early zoo projects feel exhausting because every
animal trip is a custom adventure. Later, players get smarter: they build a simple rail line to a few key biomes, place small waypoint shelters,
and create a quarantine area near the zoo. Once you have that “supply chain,” your zoo stops being a one-time flex and becomes an expandable
collection you can add to whenever inspiration hits.
Fourth lesson: exhibits should be designed for viewing, not just storage. It’s tempting to make a big square pen and call it
done, but the best zoos stage the animal like it’s the main character. You’ll notice builders adding elevation changes, “foreground” plants,
and framed windows so the animal is visible from multiple angles. Even simple trickslike creating a shaded cave corner for a habitat or adding
a shallow pond with stepping stonesmake an exhibit feel curated and alive.
Fifth lesson: your zoo should have personality. Some of the most memorable Minecraft zoos aren’t the biggestthey’re the ones
with little jokes and lore. A “Do Not Feed the Llamas” sign next to a suspiciously empty snack cart. A staff-only hallway with item frames that
show “approved food” for each species. A tiny “zookeeper break room” with a bed, a jukebox, and a chest labeled “emotional support cookies.”
Those details make your zoo feel like a living place, not a checklist.
Finally, the most important lesson: build your zoo for how you play. If you love survival efficiency, add functional farms in
back-of-house areas and make exhibits double as resource systems. If you love creative building, go all-in on themed architecture and landscaping.
If you play with friends, design wide paths, mini-games, and “tour routes” so the zoo becomes an experience you can share. In every case, a good
zoo isn’t just something you finishit’s something you keep coming back to, expanding one exhibit at a time, until it feels like a world landmark.
Research sources consulted (US-based or US-operated websites), synthesized and rewritten:
minecraft.net, gamespot.com, pcgamer.com, lifewire.com, learn.microsoft.com, feedback.minecraft.net,
bugs-legacy.mojang.com, gaming.stackexchange.com, bisecthosting.com, apexminecrafthosting.com,
minecraft.fandom.com, curseforge.com, youtube.com, reddit.com






