
Table of Contents >> Show >> Hide
- What You Need Before Installing Zulip
- Step 1: Update the Linux Server
- Step 2: Confirm Your Hostname and DNS
- Step 3: Download the Latest Zulip Server Release
- Step 4: Run the Zulip Installer
- Step 5: Create Your Zulip Organization
- Step 6: Configure Outgoing Email
- Step 7: Check Zulip Services
- Common Zulip Installation Problems and Fixes
- Post-Installation Security Tips
- Back Up Your Zulip Server
- How to Upgrade Zulip Later
- Should You Use Docker Instead?
- Practical Experience: What Installing Zulip on Linux Teaches You
- Conclusion
Installing Zulip on Linux is one of those projects that sounds intimidating until you realize the hard work is mostly handled by a well-designed installer. The catch? Like most server software, Zulip rewards preparation. A clean server, a real domain name, working DNS, a plan for email, and a little patience can turn the process from “why is this terminal yelling at me?” into a smooth self-hosted team chat setup.
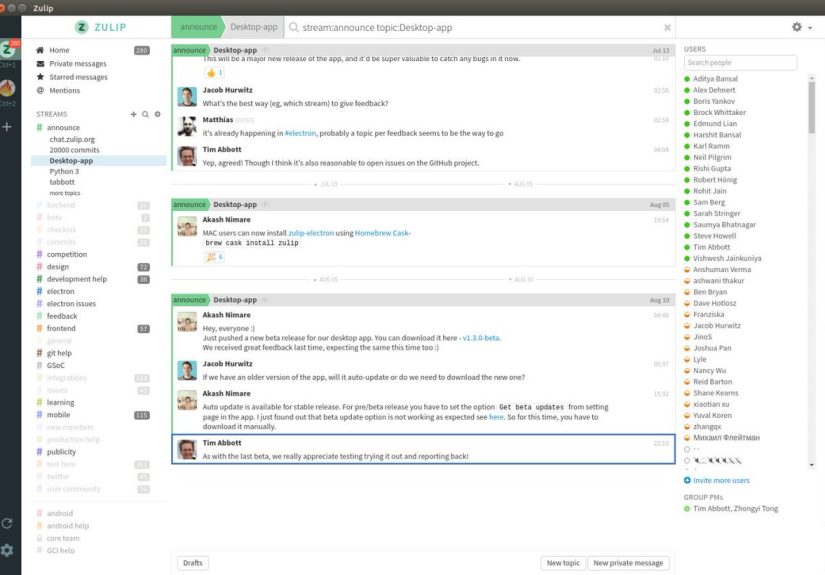
Zulip is an open-source team communication platform built around topic-based conversations. Instead of dumping every message into one endless stream, Zulip organizes chat into channels and topics, which makes it especially useful for engineering teams, communities, schools, nonprofits, startups, and remote organizations that want searchable, structured conversations. If Slack is a busy coffee shop, Zulip is the coffee shop where everyone labels their table. Delightful, honestly.
This guide explains how to install Zulip on Linux using the standard production installer. The recommended production path is a fresh Ubuntu or Debian server, because Zulip’s installer configures the application and its supporting services for you. You will learn what to prepare, which commands to run, how to handle SSL, how to configure outgoing email, and what to check after installation.
What You Need Before Installing Zulip
Before you install Zulip on Linux, start with the right foundation. Zulip is not a tiny single-binary app that politely lives in a corner. A production Zulip server uses several components, including PostgreSQL, Redis, RabbitMQ, memcached, Nginx, and application services managed by Zulip. The official installer expects to configure these services itself, so the best practice is to use a fresh machine or virtual private server.
Recommended Linux Distributions
For a production Zulip server, use a supported Ubuntu or Debian release. A safe modern choice is Ubuntu 24.04 LTS, Ubuntu 22.04 LTS, Debian 12, or Debian 13. Other Linux distributions may be possible through Docker, but the standard production installer is designed for Ubuntu and Debian. If you are setting up Zulip for a real organization, do not try to be heroic with an unsupported operating system. Heroism is great in movies; in server administration it usually becomes a 2 a.m. debugging session.
Hardware Requirements
For a small team, start with at least 2 GB of RAM, 2 GB of swap if memory is limited, and at least 10 GB of free disk space. In practice, a server with 2 CPU cores, 4 GB of RAM, and SSD storage gives you a more comfortable experience. If you expect more than 100 users, plan for at least 2 CPUs and 4 GB of RAM, and consider more memory as your daily active user count grows.
Disk speed matters because chat systems are database-heavy. Zulip stores messages, topics, users, settings, and uploads. A cheap server with slow storage may install correctly but feel sluggish later. If your users are going to live in Zulip all day, give the database a decent SSD-backed home.
Domain, DNS, and Firewall
You should have a domain or subdomain ready before installation, such as zulip.example.com or chat.example.com. Create an A record pointing that hostname to your server’s public IP address. Wait until DNS resolves correctly before running the installer with Certbot, because SSL certificate generation depends on the domain reaching your server.
At minimum, allow inbound traffic on ports 80 and 443. Port 80 is commonly used for certificate validation and HTTP-to-HTTPS redirection, while port 443 is used for secure Zulip access. If you use UFW, a simple starting point looks like this:
Do not expose internal service ports casually. Zulip uses services like RabbitMQ and PostgreSQL behind the scenes, but users should normally reach only the web interface over HTTPS.
Step 1: Update the Linux Server
Log in to your fresh Ubuntu or Debian server with SSH. Use a sudo-capable account or root access. Then update the package list and install basic tools:
On Ubuntu, make sure the Universe repository is enabled, because some dependencies may be available there:
If you are using a small VPS, add swap before installation. This is especially important on servers with less than 5 GB of RAM.
Swap is not magic RAM, but it helps prevent sudden out-of-memory failures during installation or upgrades. Think of it as a spare tire: not glamorous, but you will be grateful when you need it.
Step 2: Confirm Your Hostname and DNS
Before downloading Zulip, confirm that your hostname points to the server. Replace the example domain with your real one:
The command should return your server’s public IP address. You can also test from your local computer with ping or an online DNS checker. If DNS is wrong, fix it now. Running the installer before DNS is ready is a classic beginner mistake, right up there with forgetting semicolons and naming a folder “final-final-real-final.”
Step 3: Download the Latest Zulip Server Release
Zulip provides an official server release tarball. Work from a temporary directory, download the latest release, and extract it:
This gives you a directory named something like zulip-server-11.6, depending on the current stable release. You do not need to manually install PostgreSQL, Redis, RabbitMQ, Nginx, or Python packages first. The Zulip installer handles the required production dependencies.
Step 4: Run the Zulip Installer
Become root if you are not already root:
Then run the installer. Replace [email protected] with the maintainer email address and chat.example.com with your real hostname:
The --certbot option tells the installer to request and configure an SSL certificate automatically. For most public production installations, this is the simplest path. The --push-notifications option registers the server for Zulip’s mobile push notification service. If you do not want mobile push registration during setup, remove that flag and continue without it.
The installer may take several minutes. It installs packages, configures services, prepares the database, sets up Nginx, and applies Zulip’s production configuration. If the installer fails, read the error carefully, fix the issue, and run the installer again. The process is designed so that rerunning after a fix is usually safe.
Step 5: Create Your Zulip Organization
When installation finishes, the script prints a secure one-time organization creation link. Copy that link into your browser. You will be prompted to create the initial Zulip organization and administrator account.
Choose a clear organization name, create your admin user, and log in. At this point, your Zulip server should be reachable at your domain over HTTPS. Congratulations: your Linux server now has a full-featured team chat platform, and it did not even ask you to sacrifice a keyboard to the sysadmin gods.
If you lose the organization creation link, you can generate a new one from the server:
Step 6: Configure Outgoing Email
Zulip needs outgoing email for account confirmation, password resets, invitations, and notifications. Without email, users may be able to log in during testing, but real onboarding becomes clumsy fast.
Edit the Zulip settings file:
Find the outgoing email section and add your SMTP details. A typical configuration for a transactional email provider uses TLS on port 587:
Store the SMTP password in the secrets file, not directly in settings.py:
Add or update:
Then restart Zulip:
For reliable delivery, use a transactional email service such as Amazon SES, SendGrid, Mailgun, Postmark, or another SMTP provider that supports SPF, DKIM, and domain verification. Your future self will thank you when invitation emails do not land in spam next to fake lottery messages and suspicious “urgent invoice” attachments.
Step 7: Check Zulip Services
After installation, verify that Zulip’s services are running:
You can also check the web interface by visiting your hostname in a browser. If the page does not load, inspect Nginx, DNS, firewall rules, and SSL status. Most first-time problems come from one of four places: DNS not pointing to the server, ports 80 or 443 blocked, the wrong hostname in the installer command, or an incomplete SSL certificate challenge.
Common Zulip Installation Problems and Fixes
Problem: Certbot Fails During Installation
If certificate generation fails, confirm that your domain resolves to the server and that ports 80 and 443 are open. Also make sure no other web server is already occupying the ports. Zulip expects to manage Nginx on a fresh server, so installing it on a crowded machine can create conflicts.
Problem: The Server Runs Out of Memory
Small VPS plans can run out of memory during dependency installation. Add swap, reboot if needed, and rerun the installer. For a smoother experience, use at least 4 GB of RAM if the budget allows.
Problem: Email Does Not Send
Check your SMTP host, username, password, port, and TLS settings. Also verify SPF and DKIM records at your DNS provider. Many cloud providers block outbound port 25 by default, so use port 587 with authenticated SMTP whenever possible.
Problem: Browser Shows a Security Warning
If you used a self-signed certificate, browsers will warn users. That is acceptable for a private test but not for a production team. For public production servers, use a valid certificate through Certbot or your preferred certificate provider.
Post-Installation Security Tips
Once Zulip is live, secure the server like any other production Linux system. Keep SSH access limited to trusted administrators, use SSH keys instead of passwords, and disable root password login if your workflow allows it. Keep the operating system updated, and avoid installing unrelated services on the same machine.
Review who has administrator permissions inside Zulip. Configure authentication carefully, especially if you plan to use LDAP, SAML, Google authentication, GitHub authentication, or another single sign-on method. A chat server often contains private company discussions, customer context, internal planning, and technical details. Treat it like a serious business system, not a toy project wearing a party hat.
Back Up Your Zulip Server
A working chat server without backups is just a suspense movie waiting for the dramatic music. Zulip includes a backup tool that can create an archive of the data needed to restore the server state. Run backups regularly and store copies somewhere other than the same server.
For production use, test restoration on a separate machine. A backup you have never restored is more of a wish than a plan. If your organization depends heavily on Zulip, schedule backups, monitor disk space, and document the recovery process.
How to Upgrade Zulip Later
Zulip releases updates for security, performance, bug fixes, and new features. To upgrade, download the latest server tarball and run the official upgrade script as root:
Before upgrading, read the release notes, take a fresh backup, and choose a low-traffic time. Most upgrades are designed to be straightforward, but production systems deserve calm hands and a rollback plan.
Should You Use Docker Instead?
Zulip also offers Docker-based deployment. Docker can be a good choice if your team already manages services with containers, Docker Compose, Kubernetes, or infrastructure-as-code workflows. However, for many administrators, the standard Ubuntu or Debian installer is easier to install, maintain, and upgrade. Choose Docker because it fits your operations model, not because the word “container” sounds fashionable at meetings.
Practical Experience: What Installing Zulip on Linux Teaches You
The first practical lesson from installing Zulip on Linux is that preparation beats improvisation. Many installation issues are not really Zulip issues; they are server readiness issues. DNS must point to the correct IP address. The firewall must allow web traffic. The server must have enough memory. The hostname must match the certificate request. When those basics are done correctly, the installer usually feels surprisingly uneventful, which is exactly what you want from production software.
The second lesson is that email matters more than beginners expect. It is tempting to postpone SMTP setup because the web interface loads and the admin account works. But the moment you invite real users, email becomes central. People need confirmation links, password resets, and notifications. A clean SMTP setup with proper SPF and DKIM records makes Zulip feel polished. A broken email setup makes the platform look unreliable, even if the chat system itself is perfectly healthy.
The third lesson is to respect the “fresh server” recommendation. Administrators sometimes try to install Zulip beside existing websites, panels, databases, and reverse proxies. It can be done in advanced environments, but it is not the beginner-friendly path. Zulip’s installer wants to manage Nginx and related services. When another application already owns those pieces, the installation becomes less like following a recipe and more like negotiating a peace treaty between software packages.
The fourth lesson is that small servers are fine for testing but not always comfortable for real teams. A 2 GB server may work for a small group, especially with swap, but upgrades and bursts of activity can feel tight. If Zulip will become part of daily work, it deserves enough RAM, CPU, and disk performance. Saving a few dollars on hosting is not worth frustrating an entire team every time search feels slow or messages lag.
The fifth lesson is that Zulip’s topic-based model changes how teams communicate. After installation, the technical work is only half the story. The human setup matters too. Create sensible channels, teach users how topics work, and model good message organization from day one. A well-installed Zulip server with chaotic channel habits can still become noisy. A well-installed Zulip server with thoughtful topics becomes a searchable knowledge base that happens to chat back.
Finally, treat maintenance as part of the installation. Backups, updates, monitoring, and documentation should not be “later” tasks. Write down the hostname, OS version, install date, SMTP provider, backup location, and upgrade procedure. Future you may be brilliant, but future you may also be tired, holding coffee, and wondering who configured this thing six months ago. Leave that person a map.
Conclusion
Installing Zulip on Linux is straightforward when you use a supported Ubuntu or Debian server and follow the production installer workflow. The essential steps are simple: prepare a clean server, point a domain to it, open the correct firewall ports, download the latest Zulip server release, run the installer with your hostname and email address, create your organization, configure SMTP, and set up backups.
The best Zulip installations are not just technically successful; they are operationally ready. That means valid HTTPS, reliable outgoing email, enough server resources, restricted admin access, regular backups, and a clear upgrade process. Do those things well, and you will have a fast, structured, self-hosted communication platform that gives your team control over its data and conversations.





