
Table of Contents >> Show >> Hide
- What “Dedicated Video RAM” Means on an Intel Laptop
- Can You Really Increase Dedicated VRAM on an Intel Laptop?
- Method 1: Check BIOS or UEFI for Graphics Memory Settings
- Method 2: Use Intel Shared GPU Memory Override on Supported Systems
- Method 3: Upgrade Your Laptop’s System RAM
- Method 4: Switch to Dual-Channel Memory
- Method 5: Update Intel Graphics Drivers and Software
- Method 6: Lower the Right Graphics Settings
- What About the Registry Hack?
- How to Check Whether Your Changes Worked
- When You Should Stop Tweaking and Consider Better Hardware
- Real-World Experiences: What Actually Happens When People Try to Increase Dedicated Video RAM on an Intel Laptop
- Final Thoughts
If you have an Intel laptop GPU and a game or creative app is nagging you about low VRAM, welcome to one of PC gaming’s most confusing rabbit holes. You open Windows, see a tiny amount of “Dedicated Video Memory,” panic a little, and immediately wonder whether your laptop is starving its graphics chip like a cactus in July.
Here is the truth: on most laptops with Intel integrated graphics, you usually cannot add true dedicated VRAM the way a discrete NVIDIA or AMD graphics card has its own memory chips. What you can do is improve how much memory the Intel GPU can access, improve graphics bandwidth, raise the shared memory ceiling on supported systems, and make your laptop perform better in the real world. Those are not the same thing, and knowing the difference can save you from sketchy registry tricks and magical YouTube advice.
In this guide, I’ll break down what dedicated video RAM really means on Intel laptops, what methods actually work, what only changes a number on-screen, and what upgrades deliver the biggest payoff. The goal is simple: help your Intel GPU breathe a little easier without turning your laptop into a science fair disaster.
What “Dedicated Video RAM” Means on an Intel Laptop
On a laptop with Intel HD Graphics, Intel UHD Graphics, or Intel Iris Xe Graphics, the GPU is usually integrated into the processor package and relies on shared system memory. In plain English, your graphics chip borrows from your laptop’s main RAM instead of using a separate pool of VRAM soldered onto a graphics card.
That is why this topic causes so much confusion. Windows may show three categories: dedicated video memory, shared system memory, and total available graphics memory. On an Intel iGPU system, the “dedicated” figure is often small and does not mean your GPU is trapped in a tiny 128MB shoebox forever. The GPU can dynamically use more shared memory when the workload demands it.
So when people ask, “How do I increase dedicated video RAM on my laptop?” the more accurate question is usually:
How do I let my Intel GPU use memory more effectively and improve graphics performance?
That question has better answers.
Can You Really Increase Dedicated VRAM on an Intel Laptop?
Yes, sometimes a little. No, not in the way most people hope.
There are three realistic scenarios:
1. Your BIOS/UEFI lets you change iGPU memory allocation
Some laptops include a graphics memory option in BIOS or UEFI. If your manufacturer exposes that setting, you may be able to raise the pre-allocated amount. This is the closest thing to “increasing dedicated video RAM” on many Intel laptops. The catch? Many laptop makers hide or lock the option, and even when available, the gains are usually modest.
2. Your newer Intel system supports a shared memory control
Some newer Intel Core Ultra systems can use Intel’s Shared GPU Memory Override feature. This is not old-school VRAM in the classic sense, but it does let supported systems assign a larger chunk of system memory to graphics workloads. That can help specific apps that are memory-hungry, especially newer AI or graphics tasks.
3. You improve the iGPU’s environment instead of chasing the number
This is the big one. More system RAM, dual-channel memory, updated drivers, lower texture settings, and realistic expectations often deliver more benefit than obsessing over a tiny “dedicated” figure in Windows. In other words, you do not always need a bigger label; you need a faster kitchen.
Method 1: Check BIOS or UEFI for Graphics Memory Settings
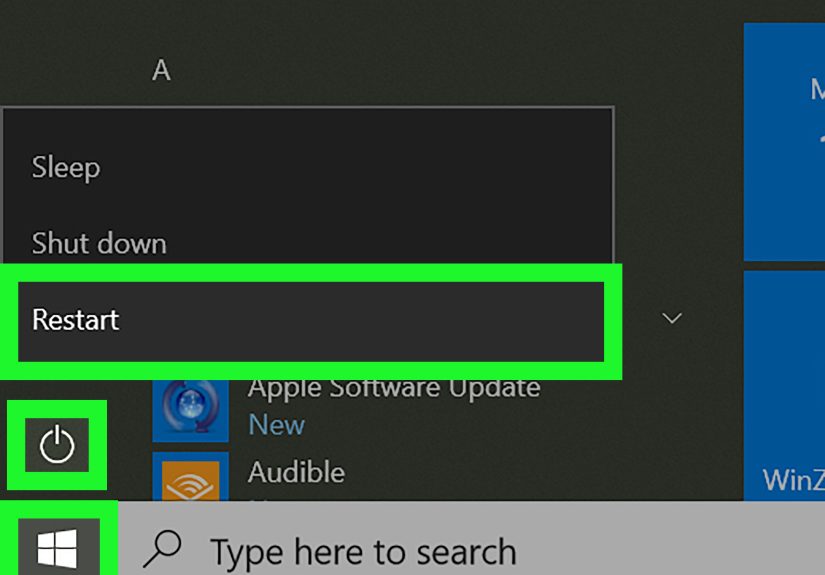
This is the first method to try because it is the cleanest and most legitimate. Restart your laptop and enter BIOS or UEFI by pressing the manufacturer’s key during startup. Common keys include F2, Del, Esc, or F10, though it varies by brand.
Once inside, look for menus related to advanced settings, chipset, system configuration, graphics, or integrated devices. If your laptop supports it, you might see an option related to integrated graphics memory. Manufacturers use different names, but it may appear as a graphics memory allocation setting, an integrated graphics setting, or a DVMT-style option.
If the setting exists, increase it carefully rather than going straight into “more is always better” mode. A modest bump is usually smarter than maxing it out. Why? Because every extra chunk reserved for the iGPU is memory your CPU and the rest of Windows cannot use as freely. If you overdo it, you may make your whole system feel slower just to gain a prettier number in a system window.
Best practice: change one step at a time, save, restart, test your game or app, and compare results. If nothing improves, roll it back. Your laptop deserves science, not superstition.
Method 2: Use Intel Shared GPU Memory Override on Supported Systems
If you have a newer Intel Core Ultra laptop and Intel Graphics Software supports it, you may see Shared GPU Memory Override. This is one of the few modern, official ways to give an Intel iGPU access to more memory for specific workloads.
On supported systems, the feature lets you adjust the memory limit for the integrated GPU, then apply the change after a restart. This is especially relevant for users running newer graphics tools, AI workloads, or apps that complain loudly when they think your available graphics memory looks too small.
However, there is a giant asterisk wearing sunglasses here: this feature is hardware-dependent. Many older Intel laptop GPUs will not have it. If your laptop runs older Intel UHD or Iris Xe graphics without support for this software control, no amount of wishful clicking will make the option appear.
Also, do not set it absurdly high unless you have plenty of RAM. Giving the GPU too much shared memory can leave Windows gasping for air during multitasking. That is like giving the guest room to your GPU and making your CPU sleep in the hallway.
Method 3: Upgrade Your Laptop’s System RAM
If there is one upgrade that actually helps many Intel integrated graphics laptops, it is adding more system RAM. Since the iGPU pulls from system memory, having 16GB instead of 8GB gives the system more headroom overall. In many cases, that means the GPU can access more shared memory when needed without squeezing the rest of the system into a tiny apartment.
This does not magically transform integrated graphics into a gaming monster. A laptop with Intel UHD Graphics and 16GB of RAM is still a laptop with Intel UHD Graphics. But adding RAM can reduce stuttering, improve responsiveness, and help memory-heavy games or creative apps run more smoothly.
This upgrade matters even more if you currently have just 8GB of RAM. On modern Windows laptops, 8GB can feel cramped once you open a game, a browser with too many tabs, Discord, Spotify, and whatever else your desktop has collected like an electronic junk drawer.
Quick advice: if your laptop supports upgrades, aim for at least 16GB total RAM for a better Intel iGPU experience.
Method 4: Switch to Dual-Channel Memory
This is one of the most overlooked upgrades, and often one of the best. Intel integrated graphics care a lot about memory bandwidth. If your laptop has one RAM stick and one empty slot, adding a matching module can enable dual-channel memory, which improves the speed at which the CPU and GPU access RAM.
That matters because integrated graphics do not just need memory capacity. They also need memory bandwidth. More bandwidth can improve frame rates, reduce dips, and make the system feel less strained under graphical workloads.
On some Intel Iris Xe systems, dual-channel memory is even more important because it affects how the graphics solution is configured and identified. So if your laptop supports dual-channel RAM and currently runs single-channel memory, this is one of the smartest moves you can make.
In practical terms, going from 8GB single-channel to 16GB dual-channel often delivers a more noticeable improvement than any registry tweak claiming to “unlock 2GB VRAM.” One method changes performance. The other often just changes your level of disappointment.
Method 5: Update Intel Graphics Drivers and Software
Driver updates are not glamorous, but they are often worthwhile. Updated Intel graphics drivers can improve game compatibility, fix rendering bugs, improve app detection, and enable newer graphics features. On supported systems, updated Intel software can also unlock memory-related controls that older driver versions did not expose.
Use the official Intel driver page or your laptop manufacturer’s support page. Avoid random driver sites that look like they were last redesigned during the MySpace era. That road leads to weird bugs and regret.
After updating, restart your laptop and test the specific game or application that prompted the VRAM concern. Sometimes the issue is not that your Intel GPU lacks usable memory; it is that the app is checking outdated driver information or running into a compatibility issue.
Method 6: Lower the Right Graphics Settings
If a game or app says you do not have enough dedicated VRAM, the most effective fix may be changing settings inside the software itself. Focus on the settings that hit memory hardest:
- Texture quality
- Resolution scale
- Shadow quality
- Anti-aliasing
- Ray tracing (if the app even offers it and your system somehow wandered into that menu)
Texture quality is usually the first lever to pull. High-resolution textures eat memory quickly. Lowering them from Ultra to Medium often has a bigger effect than tweaking flashy settings nobody notices during actual gameplay.
If your laptop also has a discrete GPU, make sure the game is using the high-performance GPU rather than defaulting to the integrated Intel GPU. But if your laptop is Intel-only, then your path is simple: lighten the memory load, improve RAM bandwidth, and keep drivers current.
What About the Registry Hack?
You have probably seen articles or videos telling you to open Registry Editor, create an Intel key, add a number, reboot, and celebrate your brand-new VRAM. This is the part where I gently take that idea outside and set it on the lawn.
For most Intel laptop users, registry edits do not create real extra graphics memory. At best, they may alter what some software reports or what certain apps think they see. At worst, they create confusion, waste time, or reduce usable system memory without delivering meaningful performance gains.
That is why official methods matter. BIOS changes, supported Intel software, more RAM, and dual-channel memory are grounded in how the hardware actually works. Registry fairy dust usually is not.
How to Check Whether Your Changes Worked
After making any change, verify it instead of trusting your hopes and dreams.
Use Windows Display Adapter Properties
Go to Settings > Display > Advanced display, then open your display adapter properties. You can review dedicated video memory, shared system memory, and total available graphics memory.
Use Task Manager
Open Task Manager > Performance > GPU. This view helps you watch dedicated and shared memory usage in real time while a game or app is running. This is more useful than staring at a static number and wondering why your frame rate still looks like a flipbook.
When You Should Stop Tweaking and Consider Better Hardware
Sometimes the honest answer is that your workload simply wants more GPU muscle than an Intel integrated graphics solution can provide. If a game recommends 4GB, 6GB, or 8GB of VRAM and expects modern GPU horsepower, no software trick can turn an entry-level iGPU into a high-end graphics card.
If your laptop supports it, an external GPU may be an option through a fast port such as Thunderbolt. Otherwise, the long-term answer may be a laptop with stronger integrated graphics, a laptop with a discrete GPU, or a desktop build if performance matters more than portability.
There is no shame in this. Sometimes optimization is the hero. Sometimes the hardware budget is the hero. Sometimes the hero is admitting that a thin-and-light office laptop was never meant to fight a modern AAA game on Ultra settings.
Real-World Experiences: What Actually Happens When People Try to Increase Dedicated Video RAM on an Intel Laptop
In real-world use, people usually fall into a few familiar camps. The first is the hopeful gamer who sees “128MB dedicated video memory” in Windows and assumes the laptop is broken. They spend an hour searching for a secret setting, watch three dramatic videos with neon thumbnails, and eventually discover that the Intel GPU is already using shared memory dynamically. The number looked scary, but it was not the full story.
The second is the BIOS explorer. This person gets lucky: their laptop actually includes an integrated graphics memory option. They bump the allocation up a notch, reboot, and feel triumphant. Sometimes the change helps an older game launch more reliably or reduces one specific warning message. More often, the improvement is small. The laptop does not suddenly gain superpowers, but the user at least made a real hardware-level adjustment instead of chasing fake magic.
Then there is the registry experimenter. This is where things usually get messy. The reported number may change, or it may not. A game might stop complaining, or it might continue to complain with even more attitude. Performance often stays basically the same, because the GPU did not become faster and the memory subsystem did not become wider. It is a classic case of changing the label on the jar without changing what is inside it.
The best real-world results usually come from the RAM upgrader. Someone with an 8GB Intel laptop adds more memory, especially in a dual-channel configuration, and suddenly the system feels less cramped. Frame pacing improves. Stutters are less severe. Multitasking becomes less painful. This is not as flashy as “unlocking 4GB VRAM,” but it is far more useful. Real performance improvements are often boring like that. They show up in smoother gameplay, not in brag-worthy screenshots of a settings window.
Another common experience involves newer Intel systems with better software tools. Users with supported hardware may find genuine shared memory controls in Intel software or vendor utilities. In these cases, increasing available graphics memory for a specific workload can help, especially when the machine has plenty of RAM. But even here, balance matters. Too much memory handed to the GPU can make the rest of the system sluggish, so the smartest users treat the setting like a wrench, not a religion.
The biggest lesson from all these experiences is simple: if your Intel laptop feels graphically limited, focus on the things that improve the whole platform. More RAM, dual-channel memory, better driver support, lower texture settings, and realistic expectations beat fake tweaks almost every time. The iGPU is not lazy. It is just working within the rules of integrated graphics. Once you understand those rules, the fixes become clearer, the myths get easier to ignore, and your laptop stops being blamed for crimes committed by misleading system labels.
Final Thoughts
If you want to increase dedicated video RAM on a laptop with an Intel GPU, start with reality, not rumors. On most Intel integrated graphics systems, there is no true VRAM upgrade waiting behind a hidden Windows checkbox. What you can do is check BIOS, use supported Intel memory controls if your hardware offers them, add more RAM, enable dual-channel memory, update drivers, and tune game settings intelligently.
That combination is what actually moves the needle. It may not sound as exciting as a one-click “VRAM booster,” but it is far more effective. And unlike shady tweaks from the darker corners of the internet, it will not leave you wondering why your laptop now behaves like it is haunted.





