Table of Contents >> Show >> Hide
- Sweet Potatoes 101: What Makes Them Different
- Pick the Right Variety (Because Climate Is a Bossy Roommate)
- When to Plant Sweet Potatoes
- Where Sweet Potatoes Thrive: Sun, Soil, and Bed Prep
- Slips: Buy Them or Grow Your Own
- How to Plant Sweet Potato Slips (So They Don’t Throw a Tantrum)
- Watering Sweet Potatoes: The “Goldilocks” Schedule
- Fertilizing Sweet Potatoes Without Growing a Vine Jungle
- Weeding and Vine Management
- Sweet Potatoes in Containers (Yes, You Can)
- Common Pests and Problems (And What to Do About Them)
- When to Harvest Sweet Potatoes (And How Not to Stab Your Dinner)
- Curing and Storing: The Step Most People Skip (And Then Regret)
- Troubleshooting: Quick Fixes for Common Sweet Potato Frustrations
- Wrap-Up: Your Sweet Potato Success Checklist
- Real-World Experiences: What Gardeners Learn After Growing Sweet Potatoes
Sweet potatoes are the laid-back overachievers of the garden: they sprawl, they shrug off heat, and they reward you with a hidden treasure chest of roots. The catch? They have opinions. They want warm soil, a long growing season, and they absolutely do not want you “helping” them with a bunch of nitrogen. (If you do, they’ll grow a lush vine jungle and give you about three toothpick-sized potatoes for your effort. Ask any gardener who’s been humbled.)
This guide walks you through the whole processchoosing slips, planting correctly, watering without overdoing it, managing pests, harvesting gently, and curing for maximum sweetnessso your sweet potato season ends with dinner, not disappointment.
Sweet Potatoes 101: What Makes Them Different
Sweet potatoes (Ipomoea batatas) aren’t grown from “seed potatoes” like Irish potatoes. They’re usually grown from slipsleafy sprouts that grow from a sweet potato and then get transplanted into the garden. They’re a warm-season crop that thrives when days are hot and nights are mild. Most varieties need roughly 90–120+ days (sometimes longer) from transplanting to harvest, depending on the cultivar and your weather.
Pick the Right Variety (Because Climate Is a Bossy Roommate)
In the U.S., you’ll commonly see orange-fleshed types, but there are also white and purple varieties. When choosing, consider: days to maturity, your summer length, and how you plan to cook them.
Popular choices gardeners often love
- Beauregard / Covington: Classic orange types known for dependable yields in many regions.
- Jewel / Garnet: Great flavor, often favored for baking and roasting.
- Purple varieties (like “Stokes Purple”): Dense texture and earthy sweetnessexcellent roasted.
- Compact/bush habits: If you’re growing in containers, look for varieties marketed as more compact.
If you’re unsure, start with a widely adapted orange variety from a reputable supplier. Sweet potatoes are generousgive them warmth and time, and they’ll usually show up for you.
When to Plant Sweet Potatoes
Timing is everything. Sweet potatoes are cold-sensitive, and slips can stall or rot if planted into chilly soil. A reliable rule: wait until after the last frost and until the soil is consistently warm.
Quick timing checklist
- Night temperatures are regularly above 50°F.
- Soil temperature is around 65–70°F (warm is the point).
- Your forecast isn’t playing prankster with cold snaps.
In many areas, that lands somewhere between late spring and early summer. In cooler regions, gardeners often transplant in late May or June. In warmer zones, it may be April through June. If your summer is short, choose earlier-maturing varieties and consider using black plastic or raised beds to warm soil faster.
Where Sweet Potatoes Thrive: Sun, Soil, and Bed Prep
Sun
Sweet potatoes want full sunthink 6–8 hours daily. They’ll grow in partial sun, but yields typically drop.
Soil texture (the real secret)
The best roots form in soil that’s loose, well-drained, and airy. Heavy clay can produce misshapen roots or smaller yields, so many gardeners use raised beds or mounded rows (ridges) to improve drainage and loosen the root zone. A slightly acidic soil is often ideal, but don’t stressgood structure matters more than perfection.
Prep steps that pay off
- Loosen deeply: Work the bed so roots can expand without fighting rocks and compaction.
- Add compost: Mix in finished compost for soil texture and steady nutrition.
- Go easy on nitrogen: Too much nitrogen = gorgeous vines, stingy roots.
- Skip fresh manure: It can encourage excessive vine growth and can contribute to misshapen roots.
Slips: Buy Them or Grow Your Own
You have two good options: buy slips from a reputable source (often simplest) or grow your own at home. Buying slips can reduce the risk of importing problems from grocery-store roots, and it saves time. Growing your own is fun and frugalplus it makes you feel like a plant wizard when sprouts appear.
How to grow sweet potato slips at home
- Start early: Begin 6–10+ weeks before outdoor planting time (earlier if your home is cool).
- Use a healthy sweet potato: Firm, unblemished roots sprout best.
- Bed it in moist mix: Lay the sweet potato in shallow potting mix and cover lightly.
- Keep warm and bright: Warmth speeds sprouting; bright light keeps sprouts sturdy.
- Harvest slips: When sprouts are about 6–10 inches long, gently twist/pull them off.
- Root them: Place slips in water or moist media until roots form, then harden off before transplanting.
Pro tip: slips should look sturdy, not pale and floppy. If yours are pale, give them brighter light for a few days before transplanting.
How to Plant Sweet Potato Slips (So They Don’t Throw a Tantrum)
Planting is where most “I tried sweet potatoes once…” stories begin. Slips need moisture while they establish, but they hate sitting in soggy soil. The goal is a smooth transition: moist, warm, and gently firmed in.
Spacing and depth
- In-row spacing: about 8–12 inches apart (12 inches is a common sweet spot).
- Row spacing: roughly 3–4 feet apart (36–48 inches), especially for sprawling vines.
- Planting depth: set slips so several inches of stem are buried; firm soil around them.
Step-by-step planting
- Choose a warm day (cloudy evening planting can reduce stress).
- Pre-water the bed so soil is evenly moist, not muddy.
- Make a hole deep enough to bury the slip’s lower stem.
- Plant and firm the soil around the slipgood soil contact helps it root.
- Water in thoroughly to settle soil around roots.
- Mulch lightly once plants are established (straw or shredded leaves help regulate moisture).
If you’re planting in ridges, place slips along the top or shoulder of the ridge for drainage and easy root expansion.
Watering Sweet Potatoes: The “Goldilocks” Schedule
Sweet potatoes do best with consistent moisture early on, then moderate watering once vines take off. Think: establish first, then cruise. Overwatering can encourage rot and weak rooting, while drought stress can reduce yields or cause cracking later.
The simple watering rhythm
- Week 1: Keep soil consistently moist (not swampy) while slips root in.
- Weeks 2–6: Water deeply when the top couple inches dry out.
- Midseason: Many gardens do well at about 1 inch per week from rain + irrigation, adjusted for heat and soil type.
- Last 2–3 weeks before harvest: Reduce watering to help prevent splitting and to toughen skins.
How to tell if you’re watering right
- Too dry: leaves look dull, vines slow down, soil pulls from the bed edges.
- Too wet: soil stays soggy, slips don’t perk up, growth looks weak, or you smell “bog.”
- Just right: steady vine growth, leaves look lively, soil is damp but crumbly.
Sandy soil needs more frequent watering; clay needs less frequent but deeper watering (and better drainage). A soaker hose under mulch is one of the easiest ways to keep moisture even without turning your bed into a puddle party.
Fertilizing Sweet Potatoes Without Growing a Vine Jungle
Sweet potatoes can be surprisingly productive without heavy feedingespecially if your soil has organic matter. If you fertilize, aim for balanced nutrition and avoid dumping nitrogen on them like you’re raising a lawn.
Smart feeding options
- Compost at planting: often enough for many home gardens.
- Soil test approach: best for precision (and fewer mystery problems).
- Side-dress lightly on sandy soils: a modest nitrogen boost midseason can help, but don’t overdo it.
If vines look stunning but roots disappoint, excess nitrogen is a usual suspect. Next season, reduce fertilizer, improve soil looseness, and ensure full sun.
Weeding and Vine Management
Weed earlysweet potato slips don’t love competition while they’re small. Once vines spread and shade the soil, weeds usually lose the battle. Try to avoid deep hoeing near plants; developing roots can be closer to the surface than you expect.
Should you lift the vines?
You may hear advice to lift vines so they don’t root at nodes. In home gardens, it’s often best to keep disturbance minimal. Vines naturally root where they touch soil; it can make harvest more “adventurous,” but constant fiddling can stress plants. If your vines are aggressively rooting everywhere and you want easier digging, gently reposition them occasionallydon’t wage war on them daily.
Sweet Potatoes in Containers (Yes, You Can)
If your soil is heavy clay or your garden space is limited, containers can workjust go big. Sweet potato roots need room and a loose growing medium. A tiny pot will produce tiny results (and tiny results are emotionally rude).
Container setup that actually works
- Size: 15–20+ gallons is ideal; you can grow with 5-gallon containers, but yields are usually smaller.
- Planting rate: often 1 slip per large container (or 1–2 slips in a 5-gallon, depending on vigor).
- Soil mix: light, well-draining mix with compost; avoid heavy garden clay in pots.
- Watering: containers dry fastercheck moisture often in summer heat.
Expect vines to spill over like green hair. You can let them trail or guide them gently; a trellis can be used, but keep in mind that the plant’s priority is roots, not aerial stunts.
Common Pests and Problems (And What to Do About Them)
Sweet potatoes are fairly tough, but they’re not immune to hungry visitors. The best defense is usually a mix of healthy soil, crop rotation, and early vigilance.
Frequent troublemakers
- Wireworms & grubs: can chew holes in roots; rotate crops and avoid planting after grassy areas if possible.
- Sweet potato weevil (some regions): use clean planting material and follow local extension guidance if it’s common in your area.
- Deer & rabbits: may browse leaves; fencing is the most reliable fix.
- Voles: can snack underground; keep thick mulch pulled back from crowns and reduce hiding spots.
Disease prevention basics
- Start clean: healthy slips from reputable sources help prevent problems.
- Rotate beds: avoid planting sweet potatoes in the same spot year after year.
- Improve drainage: raised beds or ridges reduce rot risk.
- Handle gently at harvest: cuts and bruises invite storage rot.
When to Harvest Sweet Potatoes (And How Not to Stab Your Dinner)
Sweet potatoes are usually ready in the fall, often when vines begin to slow down and leaves yellow. Harvest before a hard frost whenever possiblecold can damage roots and reduce storage quality.
How to harvest
- Stop heavy watering about 2–3 weeks before harvest if you can.
- Cut back vines if they’re in your way (optional, but it helps you see where you’re digging).
- Dig wide: start 12–18 inches away from the crown to avoid slicing roots.
- Lift gently: use a garden fork or shovel and work slowly.
- Do not wash for storagebrush off loose soil and keep skins intact.
Expect a few “surprise giants” and a few “who ordered the baby potato?” moments. Both are normal.
Curing and Storing: The Step Most People Skip (And Then Regret)
Fresh-dug sweet potatoes can taste starchy and mild. Curing is what transforms them into the sweet, rich roots you actually want. It heals small scrapes, toughens the skin, and helps convert starches into sugars.
How to cure sweet potatoes
- Ideal conditions: about 80–85°F with high humidity for 7–10 days.
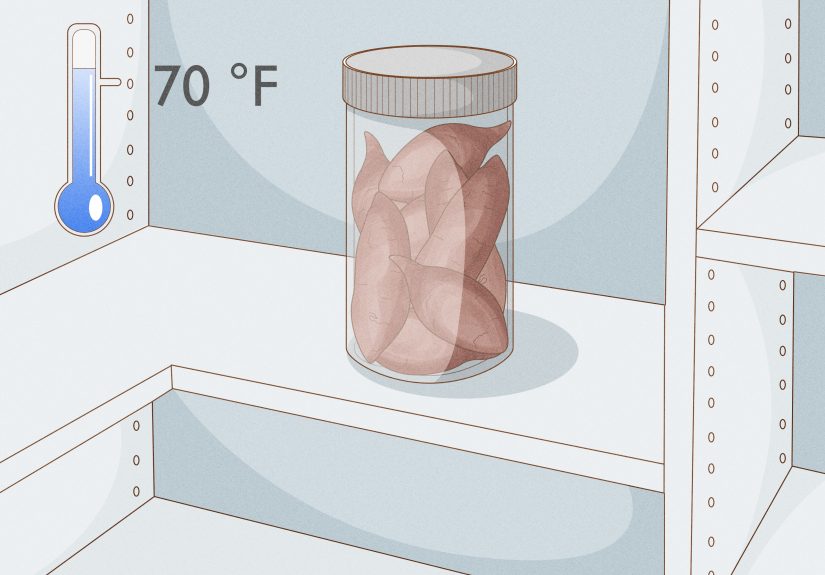
- If you can’t hit ideal: a longer cure at 70–75°F can still work (it just takes longer).
- Setup ideas: a warm utility room, a greenhouse corner, or a small enclosed space warmed safely (think “cozy,” not “campfire”).
Storage after curing
- Temperature: around 55–60°F, dark, and well-ventilated.
- Avoid the fridge: cold temperatures can cause hard centers and off flavor.
- Sort first: eat damaged roots early; store only uninjured ones long-term.
Stored well, cured sweet potatoes can last for monthsmeaning your fall garden can keep feeding you deep into winter.
Troubleshooting: Quick Fixes for Common Sweet Potato Frustrations
“I have epic vines and zero sweet potatoes.”
- Too much nitrogen (fertilizer or rich amendments).
- Not enough sun (aim for 6–8 hours).
- Soil too cool early on; plant later or warm beds with plastic/raised rows.
- Soil too compact; loosen deeper next season.
“My roots cracked or split.”
- Inconsistent wateringvery dry, then suddenly very wet.
- Heavy late-season irrigation; reduce watering closer to harvest.
“My sweet potatoes are long and skinny.”
- Compacted soil or obstacles underground.
- Plants crowded; space slips appropriately.
Wrap-Up: Your Sweet Potato Success Checklist
- Plant slips late (warm soil wins).
- Grow in loose, well-drained soil (raised beds help).
- Water steadily early, then aim for about 1 inch/week.
- Go easy on nitrogenroots over vines.
- Harvest gently before hard frost.
- Cure warm and humid, then store cool and dry-ish.
Do those things, and your garden will hand you a harvest that feels like finding buried treasureexcept you get to eat it.
Real-World Experiences: What Gardeners Learn After Growing Sweet Potatoes
Ask a group of gardeners how sweet potatoes went the first time, and you’ll hear a familiar theme: the vines looked incredible, the confidence was high, and then harvest day revealed either a mountain of roots… or a single sad potato the size of a glue stick. The difference is usually not luck. It’s the small, practical habits people pick up after one season in the trenches (or raised beds).
One common lesson is that sweet potato slips are tougher than they look, but only after they’re established. Gardeners often report that the first 7–10 days are the make-or-break window. The slip may wilt dramatically the first afternoon, like it just watched a tragic movie, but that doesn’t mean it’s doomed. When soil is warm and moisture is consistent (not soggy), many slips rebound within a few days. People who panic-water every hour sometimes end up with rot issues, while those who keep the bed evenly moist usually see new growth and a stronger plant.
Another repeated experience: soil texture changes everything. Gardeners with heavy clay often say their “roots” came out forked, twisted, or small, even when the vines were healthy. The next year, many switch to raised beds, add compost, loosen the bed deeper, or try a sandy/loamy mixand suddenly harvest looks like a produce aisle. Sweet potatoes can grow in imperfect soil, but they shine when roots can expand easily.
Watering stories are also consistent. A lot of people start the season perfectly… and then summer gets busy. The bed dries out for a while, then gets drenched with a heroic late watering (or a thunderstorm marathon). That “feast or famine” moisture pattern is where many gardeners notice cracking or splitting. Folks who switch to a soaker hose on a simple timer, tucked under mulch, often say it’s the single upgrade that made their harvest more uniform.
Fertilizer “confessions” are practically a tradition. Many gardeners admit they fed sweet potatoes like tomatoes and ended up with vines that could audition as a groundcoverbeautiful, vigorous, and completely unhelpful for dinner. After that, they tend to rely more on compost, a soil test, or a lighter-handed approach. The consistent takeaway: sweet potatoes don’t want to be pampered with nitrogen. They want warmth, room, and patience.
Then there’s curingthe step that turns “meh” into “wow.” Gardeners who skip curing often say the first baked sweet potato tasted bland or starchy, which is unfair because the garden did its job. The next year, they cure properly in a warm, humid spot and suddenly the flavor deepens, the texture improves, and the roots store longer. People get creative here: some use a small closet with a safe heat source, others use a warm garage corner, and many simply focus on keeping roots dry, unwashed, and protected from cold while they cure. The “aha” moment is realizing that curing isn’t optional finishingit’s part of growing.
Finally, there’s the pure joy factor. Gardeners often describe harvest day as a treasure hunt: you dig carefully, you think you found the biggest one, and then you find another one that makes it look like a practice potato. Even when yields are modest, sweet potatoes tend to teach useful gardening instincts warm-soil timing, moisture consistency, soil structure, and the virtue of leaving plants alone once they’re happy. If you want a crop that builds skill and pays you in carbs, sweet potatoes are a pretty excellent teacher.