
Table of Contents >> Show >> Hide
- Why an Origami Duck Is a Great Beginner Project
- Materials You Need
- Before You Start: Quick Origami Terms
- How to Fold an Origami Duck: 11 Steps
- Step 1: Start with a Square Sheet
- Step 2: Fold the Paper in Half Diagonally
- Step 3: Fold the Left and Right Edges to the Center Line
- Step 4: Fold the Top Point Down
- Step 5: Fold the Model in Half Lengthwise
- Step 6: Rotate the Model
- Step 7: Fold the Neck Up
- Step 8: Reverse Fold the Neck
- Step 9: Fold the Head Forward
- Step 10: Shape the Beak
- Step 11: Adjust the Body and Tail
- Troubleshooting Common Origami Duck Problems
- Creative Ways to Use Your Origami Duck
- Tips for Cleaner, Better-Looking Folds
- Why Origami Ducks Are Fun for Kids and Adults
- Personal Folding Experiences: What Making Origami Ducks Teaches You
- Conclusion
Learning how to fold an origami duck is one of those small creative projects that looks simple, feels relaxing, and somehow makes you emotionally attached to a square piece of paper. One minute it is flat and innocent. A few folds later, it has a beak, a neck, a tail, and enough personality to deserve a tiny pond.
This beginner-friendly guide walks you through an easy origami duck in 11 clear steps. You do not need expensive tools, fancy art supplies, or the patience of a museum curator. A single square sheet of paper is enough. Yellow paper is classic, of course, but orange, blue, patterned, or recycled notebook paper can all work. Ducks are not known for judging stationery choices.
The goal here is to help you fold neatly, understand the purpose of each crease, and avoid the common mistakes that make a duck look more like a confused paper banana. Whether you are making a craft with kids, decorating a classroom, adding a handmade touch to a card, or simply taking a peaceful break from screens, this origami duck tutorial is a cheerful place to start.
Why an Origami Duck Is a Great Beginner Project
An origami duck is ideal for beginners because it uses basic folding techniques without becoming overwhelming. Most versions rely on valley folds, mountain folds, diagonal creases, and simple shaping. These are the same foundational skills used in many other paper folding projects, including birds, fish, boats, and animals.
Origami also encourages patience and attention to detail. Each crease affects the next one, so the project teaches you to slow down and work carefully. That does not mean every fold must be perfect. In fact, slightly uneven folds often make handmade origami more charming. A duck with a crooked tail still has a future. It may even have character.
Paper folding is also a fun way to explore geometry without making it feel like homework wearing a fake mustache. When you fold a square into triangles, align corners, and create symmetry, you are using spatial reasoning in a hands-on way. For children, this can support fine motor skills and concentration. For adults, it can be a relaxing craft that gives the brain something calm and focused to do.
Materials You Need
Basic Supplies
To make this simple origami duck, gather the following:
- One square sheet of origami paper, preferably 6 x 6 inches
- A flat surface, such as a table or desk
- Optional: a ruler or bone folder for sharper creases
- Optional: a black pen for adding a tiny eye
Traditional origami usually uses only paper and folds, without cutting or glue. For this tutorial, you can complete the duck with one square sheet. If you want to decorate it afterward, a small drawn eye is perfectly fine, especially if the duck looks like it is waiting for a job interview.
Choosing the Best Paper
Thin origami paper works best because it folds cleanly and does not become bulky. Standard printer paper can work too, but you will need to cut it into a square first. If the paper is too thick, the neck and beak may feel stiff. If it is too flimsy, the duck may collapse like it just heard bad news.
For a classic look, use yellow paper with the colored side facing down at the start. This helps the finished duck show the colored side on the outside. However, double-sided paper can make the model look polished from every angle.
Before You Start: Quick Origami Terms
Valley Fold
A valley fold means folding the paper toward yourself so the crease dips inward like a valley. If you unfold it slightly, the crease forms a “V” shape. This is one of the most common origami folds.
Mountain Fold
A mountain fold is the opposite. The crease points upward like a mountain ridge. If a valley fold says, “Come closer,” a mountain fold says, “I am dramatic and standing tall.”
Crease Firmly
Whenever the instructions say to crease firmly, press along the fold with your fingernail, a ruler, or a bone folder. Crisp creases help the duck hold its shape and make later folds easier.
How to Fold an Origami Duck: 11 Steps
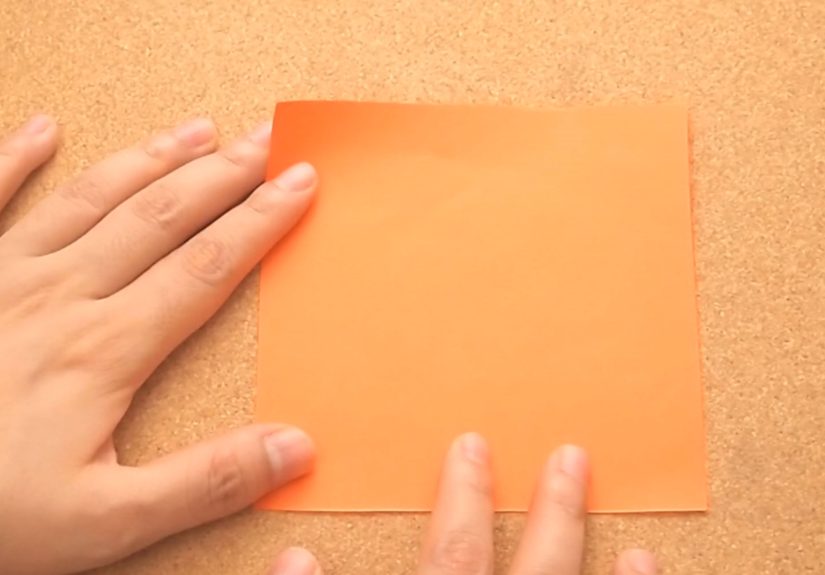
Step 1: Start with a Square Sheet
Place your square paper on the table like a diamond, with one corner pointing up and one corner pointing down. If your paper has color on only one side, place the colored side down. This setup helps the color appear on the outside of the finished origami duck.
Take a moment to check that your paper is truly square. Uneven paper can make the duck’s neck, body, and tail look lopsided. A little unevenness is fine, but if one side is clearly longer, trim it before you begin.
Step 2: Fold the Paper in Half Diagonally
Bring the bottom corner up to meet the top corner. Align the points carefully, then crease the fold from the center outward. You should now have a triangle.
This diagonal fold creates the main center line that guides the rest of the duck. Open the paper back up after creasing. You should see a clean crease running from the top corner to the bottom corner.
Step 3: Fold the Left and Right Edges to the Center Line
With the paper open and still positioned like a diamond, fold the lower left edge toward the center crease. Then fold the lower right edge toward the same center crease. The two folded edges should meet neatly in the middle.
Your paper should now look like a kite. This is a common origami base shape, and it will become the duck’s body and neck. Try not to overlap the edges at the center. If they overlap too much, the model may become bulky later.
Step 4: Fold the Top Point Down
Take the top point of the kite and fold it downward. The exact distance can vary, but aim to bring the top point toward the wider lower section of the model. Crease firmly.
This fold helps form the body area and creates layers that will later define the duck’s shape. If your fold is slightly higher or lower, do not panic. Origami ducks are forgiving. Real ducks also come in different shapes, and nobody sends them a memo.
Step 5: Fold the Model in Half Lengthwise
Now fold the entire model in half along the original center crease. The folded flaps should be on the outside. You should have a long, narrow shape with one pointed end and one thicker section.
Press the crease well. This step transforms the flat kite shape into the basic side profile of the duck. You are now moving from “paper geometry” into “tiny bird energy.”
Step 6: Rotate the Model
Turn the model so the long pointed section faces upward or diagonally upward. This long section will become the duck’s neck and head. The wider folded part will become the body.
At this point, the model may not look like much yet. That is normal. Many origami projects have an awkward middle stage where the paper seems to be questioning your leadership. Keep going.
Step 7: Fold the Neck Up
Choose the long pointed end and fold it upward at an angle from the body. Crease firmly. This creates the duck’s neck. The angle is up to you, but a gentle upward slant usually looks natural.
If the neck is too vertical, your duck may look surprised. If it is too flat, it may look sleepy. A middle angle gives the duck a balanced, swimming-on-a-pond appearance.
Step 8: Reverse Fold the Neck
Open the fold slightly, then push the neck fold inward so the paper reverses along the crease you just made. This is called an inside reverse fold. It may sound fancy, but it simply means the neck tucks neatly inside the body layers instead of sitting as an outside flap.
Pinch the paper gently until the neck stands up cleanly. This step gives the duck a stronger shape and helps it hold together better.
Step 9: Fold the Head Forward
Near the top of the neck, fold the tip forward to create the duck’s head. Make the fold small enough that the neck still looks long, but large enough that the duck has a clear head shape.
Crease the fold firmly, then open it slightly and reverse fold it inward, just as you did with the neck. This creates a clean head without loose flaps sticking out.
Step 10: Shape the Beak
Take the very tip of the head and fold it slightly outward or downward to form a small beak. Ducks have broad, noticeable bills, but in origami, a simple little point is enough to suggest the shape.
You can adjust the beak angle depending on the personality you want. A forward beak looks alert. A downward beak looks calm. A wildly oversized beak looks like the duck has opinions about bread.
Step 11: Adjust the Body and Tail
Finally, shape the back end of the model to create the duck’s tail. You can fold the rear point slightly upward for a perky tail or leave it flatter for a smoother swimming shape. Press the body gently so the duck sits evenly on the table.
If you want, draw a small eye on each side of the head. Keep it tiny. A huge eye can make your duck look like it just saw a goose with a gym membership.
Congratulations! You have folded an origami duck in 11 steps. It may be small, quiet, and made of paper, but it has achieved duckhood with dignity.
Troubleshooting Common Origami Duck Problems
The Duck Does Not Hold Its Shape
If your origami duck keeps opening up, the creases may not be sharp enough. Go back and press along the main folds, especially the center body crease, neck fold, and head fold. Thin paper also helps the model stay crisp.
The Neck Looks Too Thick
A bulky neck usually happens when the early kite folds overlap too much. When folding the sides to the center line, let the edges meet without crossing over each other. Precision at the beginning saves frustration later.
The Beak Looks Strange
The beak is a small detail, so tiny changes make a big difference. If it looks too long, fold less of the tip. If it disappears, fold a slightly larger section. You can experiment with different angles until the duck looks friendly instead of suspicious.
The Paper Tears
Paper usually tears when folds are forced too quickly or when thick paper is folded through too many layers. Move slowly during reverse folds. Open the paper just enough to guide the crease, then press it into place gently.
Creative Ways to Use Your Origami Duck
Once you know how to make an origami duck, you can use it in many creative ways. Make a small family of ducks in different sizes and colors. Place them on a blue sheet of paper to create a pond scene. Add them to greeting cards, classroom bulletin boards, spring decorations, baby shower crafts, or storytime activities.
You can also turn this project into a learning activity. Ask children to count the folds, identify triangles and symmetry, or compare different paper sizes. A 3-inch square creates a tiny duck, while an 8-inch square makes a larger display model. Folding the same design at different sizes helps beginners understand how paper thickness and proportion affect the final result.
For a seasonal craft, use pastel paper for spring, bright yellow for Easter-themed decorations, or patterned scrapbook paper for a more decorative look. A group of origami ducks can even become a handmade mobile if you attach thread carefully to the body. Just keep the hanging light and balanced so the ducks do not spin like they are training for a paper Olympics.
Tips for Cleaner, Better-Looking Folds
Fold on a Hard Surface
A table or desk gives you better control than folding in your hands. Soft surfaces can make creases uneven.
Match Corners Before Pressing
Before you commit to a crease, line up corners and edges carefully. Once everything looks right, then press the fold flat.
Use Light Pressure First
Make a gentle fold first, check the alignment, and then sharpen the crease. This prevents deep mistakes that are hard to undo.
Practice Reverse Folds Separately
The inside reverse fold is often the trickiest part for beginners. Try practicing it on scrap paper before shaping the duck’s neck and head.
Do Not Chase Perfection
Origami rewards accuracy, but it also rewards persistence. Your first duck may wobble. Your second will look better. By the fifth, you may start giving them names, which is not required but completely understandable.
Why Origami Ducks Are Fun for Kids and Adults
Origami ducks are simple enough for kids but satisfying enough for adults. Children enjoy seeing a recognizable animal appear from a plain square. Adults often enjoy the quiet rhythm of folding, creasing, adjusting, and finishing something with their hands.
This project can also support creativity without creating a mess. There is no paint water to spill, no glitter migrating into another dimension, and no glue bottle making dramatic noises. A stack of square paper can keep a group busy while still leaving the room mostly intact.
For teachers, parents, and craft leaders, the origami duck works well as a short activity because it can be completed quickly after a little practice. It is also easy to connect with lessons about animals, ponds, seasons, storytelling, or Japanese-inspired paper arts. For independent crafters, it is a pleasant model to fold while listening to music, relaxing after school, or taking a short creative break.
Personal Folding Experiences: What Making Origami Ducks Teaches You
The first time you fold an origami duck, the most surprising part is how much personality comes from small choices. A slightly raised neck makes the duck look curious. A lower head makes it look peaceful. A tiny beak gives it a sweet expression, while a longer beak makes it look like it is about to complain to the manager of the pond.
One useful experience is learning that the beginning matters more than beginners expect. If the first diagonal crease is clean and the side folds meet neatly at the center, the rest of the duck usually behaves. If those first folds are rushed, the neck may twist, the body may puff unevenly, or the tail may point in a direction no duck has ever chosen voluntarily. This is not failure. It is paper giving feedback.
Another lesson is that reverse folds feel confusing until they suddenly make sense. Many beginners pause at the neck and head because pushing part of the paper inside the model feels almost like breaking the rules. But once you do it carefully, the shape becomes cleaner and stronger. That moment is satisfying because you realize origami is not just folding paper flat; it is guiding paper into structure.
Folding several ducks in a row is also a great way to build confidence. The first duck teaches the sequence. The second duck improves alignment. The third duck is where you start experimenting. Maybe you make the neck longer, the beak shorter, or the tail perkier. By the fourth or fifth duck, you are no longer just following instructions. You are making design decisions.
Origami ducks are especially fun in groups. In a classroom or family craft session, every duck turns out slightly different even when everyone follows the same steps. Some look elegant. Some look sleepy. Some look like they have strong opinions about snack time. That variety is part of the charm. Handmade paper animals do not need to be identical to be successful.
A helpful practical tip from experience is to keep a “practice paper” nearby. Before making the final duck with pretty paper, fold one test duck using plain paper. This removes pressure and lets you understand the sequence. Once your hands know where the folds go, the nicer paper feels easier to manage.
It also helps to slow down during shaping. The final adjustments to the beak, head, and tail are where the duck gains character. Instead of smashing the folds flat immediately, try small changes first. Tilt the head. Raise the tail. Press the body gently. A few tiny adjustments can turn a flat-looking model into a lively paper duck.
Perhaps the best part of folding an origami duck is the sense of completion. It is a small project, but it gives you a finished object you can hold, display, or give to someone. In a world full of endless scrolling and unfinished tabs, making one complete little duck feels oddly rewarding. It is proof that creativity does not always need a huge plan. Sometimes it just needs a square of paper and eleven thoughtful folds.
Conclusion
Learning how to fold an origami duck is a simple, cheerful way to practice paper folding while creating something recognizable and fun. With one square sheet, a few basic folds, and a little patience, you can make a duck that works for crafts, decorations, classroom activities, or quiet creative time.
The key is to start with accurate folds, crease firmly, and treat the neck and head shaping with care. Do not worry if your first duck is not perfect. Origami improves quickly with repetition, and every model teaches your hands something new. Besides, a slightly quirky duck is still a duckand honestly, probably the most interesting one in the pond.





