Table of Contents >> Show >> Hide
- What Is a Shower Diverter?
- Signs Your Shower Diverter Needs Attention
- Repair or Replace: Which Is Better?
- Tools and Materials You May Need
- Safety First: Turn Off the Water
- How to Fix a Sticking Tub Spout Diverter
- How to Repair a Tub Spout Diverter Gate
- How to Replace a Tub Spout Diverter
- How to Fix a Three-Handle Shower Diverter
- How to Fix a Built-In Shower Diverter Valve
- Common Mistakes to Avoid
- When to Call a Plumber
- How Much Does It Cost to Fix a Shower Diverter?
- Maintenance Tips to Make a Shower Diverter Last Longer
- Real-World Experience: What Homeowners Learn While Fixing a Shower Diverter
- Conclusion
- SEO Tags
A shower diverter is one of those tiny bathroom heroes nobody appreciates until it starts misbehaving. One day, you pull the knob, twist the handle, or turn the valve expecting a glorious shower. Instead, half the water gushes from the tub spout, the showerhead dribbles like it is reconsidering its career, and your morning routine becomes a plumbing-themed escape room.
The good news? Many shower diverter problems are fixable with basic tools, patience, and a healthy respect for small screws that like to jump down drains. The better news? Even when replacement is the smarter move, the job is often less dramatic than it looksespecially if the problem is in the tub spout diverter rather than the valve hidden inside the wall.
This guide explains how to fix a shower diverter, how to tell whether you should repair or replace it, what tools you need, and when it is time to call a plumber instead of turning your bathroom into an indoor water park.
What Is a Shower Diverter?
A shower diverter is the part that redirects water from one outlet to another. In a tub-and-shower combination, it usually sends water either down through the bathtub spout or up to the showerhead. In more advanced shower systems, it may switch water between a fixed showerhead, handheld showerhead, body sprays, or a rain shower.
There are three common types of shower diverters:
1. Tub Spout Diverter
This is the familiar pull-up knob or lift gate on the bathtub spout. Pull it up, and water should travel to the showerhead. Push it down, and water should return to the tub spout. It is common, simple, and usually the easiest type to repair or replace.
2. Three-Valve Diverter
This older setup has separate hot and cold handles plus a third center handle that diverts water to the shower. These systems are often found in older homes and may require stem washers, seats, or valve components to be repaired.
3. Built-In Shower Valve Diverter
Modern showers may have a diverter built into the main valve or a separate transfer valve. These can control multiple shower outlets. They are convenient, but repairs may involve cartridges, trim plates, retaining clips, or internal valve parts.
Signs Your Shower Diverter Needs Attention
A bad shower diverter rarely keeps its complaints private. It usually announces the problem with one or more obvious symptoms:
- Water keeps running from the tub spout when the shower is on.
- The showerhead has weak water pressure.
- The diverter knob is stuck, loose, squeaky, or hard to pull.
- Water comes from both the spout and showerhead at the same time.
- The diverter handle turns but does not redirect water.
- There is visible corrosion, mineral buildup, or damaged rubber parts.
- The spout leaks around the wall or base.
A small amount of water escaping from the tub spout during shower use may not seem like a big deal, but it wastes water and reduces shower pressure. If your shower feels more like a polite mist than a proper rinse, the diverter may be the culprit.
Repair or Replace: Which Is Better?
The big question is whether to repair the shower diverter or replace it. The answer depends on the diverter type, the age of the fixture, the amount of corrosion, and whether replacement parts are easy to find.
Repair the Shower Diverter If:
- The diverter is only sticking because of mineral buildup.
- The rubber washer, gate, spring, or O-ring is worn but replaceable.
- The tub spout itself is still in good condition.
- The fixture is relatively new and parts are available.
- The problem is minor, such as squeaking or a stiff pull knob.
Replace the Shower Diverter If:
- The tub spout is corroded, cracked, or badly stained.
- The diverter gate is broken or missing.
- Water leaks heavily from the spout during shower use.
- The repair kit does not fit or does not solve the issue.
- The valve inside the wall is damaged or outdated.
- You want a cleaner look or a newer finish.
For a tub spout diverter, replacement is often more practical than repair. A diverter repair kit may cost only a few dollars, but a full replacement spout is also usually affordable. If the spout looks like it survived three decades of hard water and soap battles, replacing it may be the cleaner, faster choice.
Tools and Materials You May Need
Before you start, gather your supplies. Plumbing projects are much less stressful when you are not standing barefoot in the tub wondering where your wrench went.
- Adjustable wrench
- Phillips and flathead screwdrivers
- Hex key or Allen wrench
- Needle-nose pliers
- Plumber’s tape
- White vinegar
- Old toothbrush or small cleaning brush
- Steel wool or fine sandpaper
- Silicone plumber’s grease
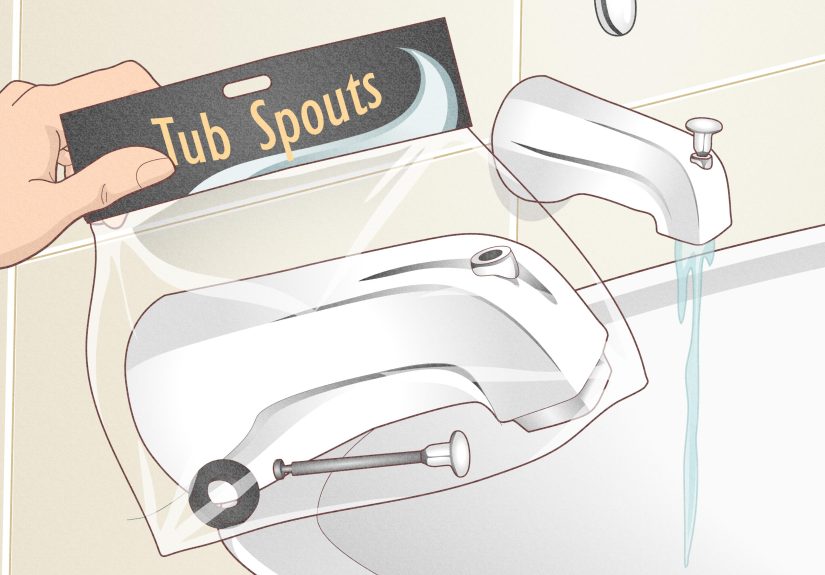
- Replacement diverter kit or tub spout
- Towel or drain cover
- Utility knife or razor scraper for old caulk
- Bathroom-safe silicone caulk
Always cover the drain before removing screws or small parts. The drain has one hobby: swallowing the exact piece you cannot replace quickly.
Safety First: Turn Off the Water
For a simple tub spout replacement, you may not always need to shut off the main water supply, but it is still smart to know where the shutoff valve is. If you are opening a wall valve, removing trim, replacing a cartridge, or working on a three-handle diverter, turn off the water before you begin.
After shutting off the water, open the faucet to release pressure and drain leftover water from the line. Place a towel in the tub to protect the surface and catch drips. If your shower has no local shutoff valves, use the main house shutoff.
How to Fix a Sticking Tub Spout Diverter
If the diverter knob pulls up but feels stiff, squeaks, or does not fully engage, mineral buildup may be the problem. Hard water leaves calcium and lime deposits inside the spout, making the gate or stopper stick.
Step 1: Clean Around the Diverter Knob
Pull the diverter knob up and down several times. Use a small brush to clean around the knob and opening. If you see white crusty buildup, that is mineral scale, not bathroom snow.
Step 2: Soak With Vinegar
Soak a cloth in white vinegar and wrap it around the diverter area. Let it sit for 30 minutes to an hour. Vinegar helps loosen mineral deposits without harsh chemicals.
Step 3: Work the Diverter
After soaking, move the knob up and down again. Flush water through the spout and test the shower. If the diverter now seals better, you may have avoided replacement.
Step 4: Lubricate Lightly
If the knob still sticks but is not broken, apply a small amount of silicone plumber’s grease to the moving part. Avoid heavy oils that can attract grime or damage rubber components.
How to Repair a Tub Spout Diverter Gate
Some tub spouts allow you to replace the diverter gate, washer, spring, or rubber seal. This is a good option if the spout finish still looks decent and the internal diverter parts are accessible.
Step 1: Remove the Diverter Assembly
Depending on the design, you may need to pry apart small tabs, remove a lift rod, or pull out the internal gate. Work gently. Plastic diverter parts can snap if treated like a rusty lug nut.
Step 2: Inspect the Washer and Gate
Look for cracked rubber, a bent gate, worn tabs, rusted springs, or missing pieces. If the washer no longer seals against the inside of the spout, water will continue escaping from the tub outlet.
Step 3: Install the Repair Kit
Follow the repair kit instructions for your brand or universal kit. Usually, the washer slides into the diverter gate, the lift rod passes through the top of the spout, and the gate snaps onto the rod.
Step 4: Test the Diverter
Run the water, pull the knob, and watch the flow. A successful repair should send most or all water to the showerhead with strong pressure.
How to Replace a Tub Spout Diverter
If the tub spout is old, ugly, corroded, or still leaking after a repair attempt, replacement is usually the better move. The most important step is identifying the spout type.
Thread-On Tub Spout
A threaded tub spout screws onto a pipe nipple. If you do not see a small screw underneath the spout, it may be threaded. To remove it, turn the spout counterclockwise. If it is stubborn, insert a screwdriver handle into the opening for leverage, but do not twist so aggressively that you damage the pipe inside the wall.
Slip-Fit Tub Spout
A slip-fit spout slides over a copper pipe and is secured with a set screw underneath. Look for a small hole on the bottom of the spout. Loosen the set screw with a hex key, then slide the spout off.
Step-by-Step Replacement
- Cover the drain and protect the tub surface with a towel.
- Remove old caulk around the spout with a utility knife.
- Identify whether the spout is threaded or slip-fit.
- Remove the old spout carefully.
- Clean the pipe with steel wool or fine sandpaper.
- Check pipe length and compare it with the new spout instructions.
- Apply plumber’s tape to threaded connections if required.
- Install the new diverter spout straight and snug.
- Do not overtighten, especially on threaded fittings.
- Test for leaks and proper shower flow.
- Apply a neat bead of bathroom-safe silicone caulk where the spout meets the wall.
If the new spout does not sit flush against the wall, the pipe may be too long or too short for that model. Do not force it. Check the manufacturer’s requirements and choose a spout designed for your pipe length and connection type.
How to Fix a Three-Handle Shower Diverter
A three-handle shower system uses a center diverter handle between the hot and cold controls. When this type fails, the issue is usually inside the diverter stem.
Step 1: Shut Off the Water
Turn off the water supply and open the faucet to drain pressure. Cover the drain so screws do not vanish into plumbing purgatory.
Step 2: Remove the Handle and Trim
Remove the decorative cap, handle screw, handle, and escutcheon plate. Keep parts in order so reassembly does not become a puzzle with wet hands.
Step 3: Remove the Diverter Stem
Use a socket wrench or shower valve wrench to remove the diverter stem. Inspect washers, seats, and threads. If the washer is cracked or flattened, replace it. If the stem is badly worn, replace the entire stem.
Step 4: Reassemble and Test
Install the repaired or new stem, reinstall the trim, turn the water back on, and test the diverter. If water still refuses to switch properly, the valve seat may be damaged or the system may need professional repair.
How to Fix a Built-In Shower Diverter Valve
Built-in diverter valves are more complicated because the working parts are behind the wall. The repair may be as simple as replacing a cartridge, but replacing the entire valve body can involve cutting tile, opening drywall, soldering copper, or working with PEX connections.
If your diverter uses a cartridge, remove the handle and trim plate, pull the retaining clip, and remove the cartridge according to the manufacturer’s directions. Bring the old cartridge to a plumbing supply store if you are unsure of the model. Shower cartridges are not universal, and guessing can turn one repair into three shopping trips.
If the valve body itself is leaking inside the wall, stop using the shower and call a licensed plumber. Hidden leaks can damage framing, drywall, insulation, flooring, and nearby rooms. This is not the place to be heroic with a wrench and a motivational playlist.
Common Mistakes to Avoid
- Buying the wrong spout: Threaded and slip-fit spouts install differently.
- Skipping the pipe measurement: New spouts require specific pipe lengths.
- Overtightening: Too much force can damage threads or stress pipes behind the wall.
- Forgetting plumber’s tape: Threaded fittings may leak without proper sealing.
- Ignoring corrosion: Rusted parts often need replacement, not a pep talk.
- Leaving old caulk: Old, cracked caulk can allow water behind the wall.
- Working with water on: This is how bathrooms become splash zones.
When to Call a Plumber
Some shower diverter repairs are excellent DIY projects. Others are plumbing traps wearing a friendly disguise. Call a plumber if you notice water behind the wall, loose pipes, severe corrosion, broken tile, inaccessible valves, soldered connections, or a diverter valve that requires opening the wall.
You should also call a professional if the water temperature changes unpredictably, if the shower valve is part of a pressure-balancing or thermostatic system, or if your repair attempt does not restore normal water flow. Modern shower valves protect comfort and safety, so it is worth getting them right.
How Much Does It Cost to Fix a Shower Diverter?
A simple repair can be inexpensive. A diverter repair kit may cost only a small amount, while a basic replacement tub spout is often affordable for most homeowners. A decorative or brand-specific spout may cost more. Replacing a cartridge usually costs more than a spout repair but less than replacing the entire valve body.
The expensive scenario is a failed valve inside the wall. Labor, tile access, pipe work, and finish repairs can raise the cost quickly. That is why diagnosing the problem correctly matters. If the issue is only the tub spout diverter, celebrate quietly and keep your wallet out of witness protection.
Maintenance Tips to Make a Shower Diverter Last Longer
To keep your shower diverter working smoothly, clean mineral buildup regularly, especially if you live in a hard-water area. Wipe the tub spout and diverter knob during routine bathroom cleaning. If the knob starts sticking, address it early before the gate or washer wears out.
After using the shower, release the diverter so water flows briefly from the tub spout before turning the faucet off. This helps reduce strain on the diverter mechanism and allows water to drain from the shower riser. It is a tiny habit, but plumbing appreciates tiny habits.
Real-World Experience: What Homeowners Learn While Fixing a Shower Diverter
Fixing a shower diverter teaches you several things very quickly. First, not every leak is a catastrophe. Many homeowners see water pouring from the tub spout during a shower and assume something major has failed inside the wall. Often, the problem is simply a worn rubber washer or a tired diverter gate inside the spout. That is the plumbing equivalent of needing new shoelaces, not new legs.
Second, identifying the tub spout type saves time, money, and colorful language. A common beginner mistake is trying to unscrew a slip-fit spout that is actually held by a tiny set screw underneath. The spout will not budge, frustration increases, and the pipe behind the wall quietly begs for mercy. Always look underneath first. If you see a small screw, loosen it before twisting anything. If there is no screw, the spout may be threaded and should turn counterclockwise.
Third, mineral buildup can make a perfectly normal part behave broken. In areas with hard water, calcium deposits collect around the diverter gate and lift rod. A vinegar soak, gentle brushing, and a little silicone plumber’s grease can sometimes restore smooth movement. This is especially useful when the diverter feels sticky but still redirects water somewhat. Do not underestimate cleaning. Plumbing parts, like people, sometimes just need a spa day.
Fourth, matching replacement parts matters. Universal tub spouts and repair kits are helpful, but “universal” does not always mean “magically fits every bathroom built since 1962.” Measure the pipe stub-out, check whether it is copper or threaded pipe, and compare the old spout with the new one before installation. If possible, take the old part to the store. It may feel silly carrying a bathtub spout through the plumbing aisle, but it is far less silly than buying the wrong part twice.
Fifth, caulk is not decoration. Once the new or repaired spout works, seal the gap where the spout meets the wall with bathroom-safe silicone caulk. That small bead helps prevent water from slipping behind the wall. A shower diverter repair should not end with hidden moisture damage just because the final finishing step felt optional.
Finally, know when to stop. If the pipe moves inside the wall, if the valve is corroded, if the handle assembly is unfamiliar, or if water appears where it should not, calling a plumber is not defeat. It is wisdom in work boots. A simple tub spout replacement is a great DIY project. A leaking in-wall valve is a different creature entirely. The best repair is not always the one you do yourself; it is the one that leaves the bathroom dry, functional, and free from surprise ceiling stains downstairs.
Conclusion
Learning how to fix a shower diverter starts with a simple diagnosis: is the problem in the tub spout, the diverter gate, the stem, the cartridge, or the valve behind the wall? If the issue is a sticking knob, mineral buildup, or a worn washer, a repair may be quick and inexpensive. If the spout is corroded, cracked, or still leaking after cleaning, replacement is usually the better choice.
For most homeowners, replacing a tub spout diverter is one of the friendlier bathroom repairs. It requires basic tools, careful identification of the spout type, and a gentle approach. For built-in valve problems, hidden leaks, or complicated shower systems, a licensed plumber can prevent expensive mistakes.
In the end, a working shower diverter does more than improve water pressure. It restores peace to your morning routineand keeps your shower from acting like it has commitment issues.
Note: This article is for general educational purposes. Always shut off water before opening shower valve components, follow the manufacturer’s instructions for your specific fixture, and call a licensed plumber for in-wall leaks, soldered connections, severe corrosion, or unsafe water temperature issues.