Table of Contents >> Show >> Hide
- What Makes a Paint Stripper “The Best”?
- Know the Main Types of Paint Strippers
- Safety First: The Label Is Not Decorative
- Check for Lead Paint Before You Strip
- How to Choose the Best Paint Stripper for Your DIY Project
- My Practical Testing Method Before Committing
- Tools That Make Paint Stripping Easier
- Step-by-Step: How to Use Paint Stripper the Smart Way
- What About Heat Guns and Infrared Paint Removal?
- The Best Paint Stripper I’ve Ever Used: What It Had in Common
- Common Mistakes to Avoid
- DIY Experience: What I Learned From Finding the Best Paint Stripper
- Conclusion
Finding the best paint stripper for a DIY project sounds simple until you are standing in the aisle, holding a can with seventeen warnings, three promises, and one suspiciously cheerful label that says “easy.” Paint removal is not glamorous. It is sticky, slow, oddly emotional, and capable of making a grown adult negotiate with a chair leg like it owes them money. But when you choose the right paint stripper, the job changes from “why did I start this?” to “look at me, I restore things now.”
The best paint stripper I have ever used was not simply the strongest one. It was the one that matched the surface, softened the finish without destroying the wood, stayed wet long enough to work, cleaned up without creating a chemical swamp, and did not make the garage smell like a haunted science lab. In DIY paint removal, “best” means effective, safe, practical, and appropriate for the job in front of you.
This guide explains how to choose a paint stripper for wood, metal, masonry, furniture, doors, cabinets, trim, and old painted projects. It also covers what to avoid, how to test products before committing, and why safety matters more than speed. A paint stripper should remove paint, not your patience, your skin, or your weekend plans.
What Makes a Paint Stripper “The Best”?
A great paint stripper does four things well: it breaks the bond between paint and surface, stays active long enough to lift the coating, works on the material you are stripping, and can be removed cleanly. That sounds obvious, but many DIY mistakes happen because people buy the strongest-looking product without checking whether it suits the project.
For example, a heavy-duty paint remover may be excellent on metal railings or masonry but too aggressive for delicate antique furniture. A citrus-style gel may cling beautifully to table legs and carved trim, but it may need more dwell time than a fast solvent-based remover. A paste stripper with paper covering may be ideal for thick old layers on architectural woodwork, while a liquid stripper may run right off a vertical surface and make you question every decision that led you to this moment.
The Best Paint Stripper Depends on the Surface
Before choosing a product, identify the material underneath the paint. Wood, metal, concrete, brick, plaster, fiberglass, and veneer do not react the same way. Wood can absorb chemicals and swell. Metal can tolerate stronger removers but may rust if cleanup is careless. Masonry has pores that trap residue. Veneer is thin and easy to damage. Old trim may have details that require a gel, paste, or brushable product rather than a runny liquid.
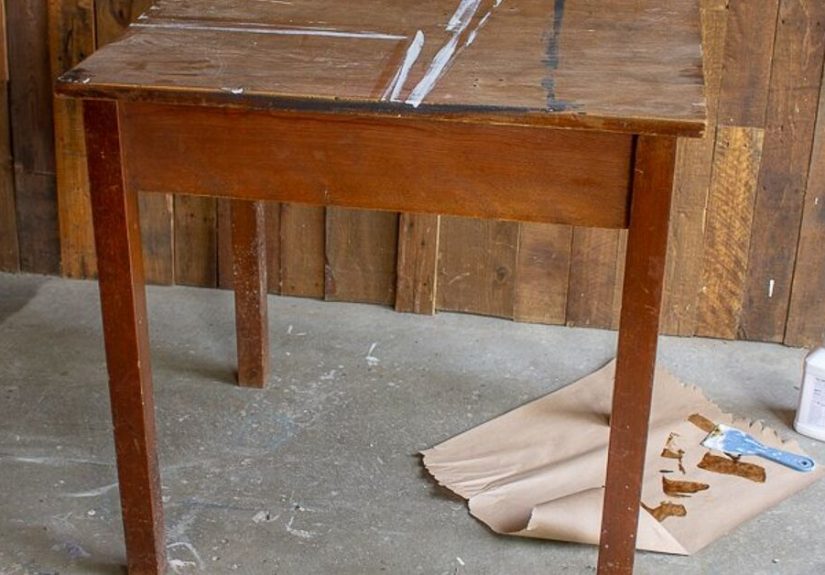
If you are stripping furniture, a gel paint stripper is usually easier to control. It clings to curves, legs, and vertical panels. If you are stripping a flat metal part outdoors, a faster liquid or sprayable remover may be practical. If you are removing paint from old house trim, a slower paste that stays wet under plastic or paper can be more forgiving.
Know the Main Types of Paint Strippers
Paint strippers are not all the same. They vary by chemistry, speed, odor, surface compatibility, and cleanup method. Reading the label is not optional. It is the part of the project where future-you sends present-you a thank-you card.
Gel Paint Strippers
Gel strippers are a favorite for DIY furniture and vertical surfaces because they do not run everywhere. They are often brushed on in a thick layer and left to sit until the paint wrinkles, bubbles, or softens. Many newer gel strippers are marketed as safer alternatives to older harsh formulas, but “safer” does not mean “wear flip-flops and vibe.” Gloves, eye protection, ventilation, and careful cleanup still matter.
Gel formulas are especially useful for chairs, doors, cabinets, railings, and detailed pieces. Their main downside is time. Some products need an hour; others may need several hours or even overnight dwell time for multiple coats. The reward is control. The mess stays where you put it, mostly, which is more than can be said for most home improvement projects.
Liquid Paint Strippers
Liquid strippers can work quickly, especially on flat surfaces or small parts. They spread easily, penetrate well, and can be useful for metal hardware or sturdy surfaces. However, they can drip, evaporate faster, and create more fumes depending on the formula. For vertical furniture or trim, liquid products can be frustrating unless the surface is small and easy to manage.
Paste Paint Strippers
Paste strippers are excellent for heavy build-up, carved details, and older architectural surfaces. Some systems are applied thickly and covered with special paper or plastic to keep the product wet. This gives the stripper more time to work through layers. Paste removers can be slower, but they are often more controlled and less splashy than liquid products.
Specialty Paint Removers
Some paint removers are designed for specific coatings such as epoxy, polyurethane, varnish, or graffiti. Others are labeled for masonry, metal, wood, or marine applications. Do not assume one product removes everything equally well. A remover that laughs at latex paint may struggle with old varnish. A product that attacks polyurethane may be too aggressive for delicate wood veneer.
Safety First: The Label Is Not Decorative
Paint strippers can contain hazardous chemicals. Some can irritate the skin, eyes, and lungs. Some can be absorbed through the skin or inhaled. Older products containing methylene chloride have been linked to severe health risks, and U.S. rules now prohibit consumer access to methylene chloride paint and coating removers. If you find an old can in a basement or workshop, do not assume it is safe because it has been sitting there since the era of shag carpet and questionable paneling.
Always work in a well-ventilated area. Outdoors is best when the product allows it. Indoors, open windows, use fans to move air out of the space, and keep children and pets away. Wear chemical-resistant gloves, splash-resistant goggles, long sleeves, and appropriate respiratory protection based on the label and safety data sheet. Ordinary dust masks do not protect against chemical vapors.
Never use chemical paint strippers in a tiny enclosed space such as a bathroom without understanding the product risks. Bathtub refinishing and stripping in confined spaces have been associated with serious injuries and deaths when highly hazardous chemicals were involved. No DIY result is worth gambling with your lungs.
Check for Lead Paint Before You Strip
If your home was built before 1978, assume lead-based paint may be present until testing proves otherwise. Sanding, scraping, heating, or stripping lead paint can create contaminated dust and chips. Lead dust is especially dangerous for children and pregnant people, and it can spread far beyond the work area if you are careless.
For pre-1978 homes, test first. Use an EPA-recognized lead test kit or hire a certified lead inspector. If the project involves significant disturbance, old windows, friction surfaces, peeling paint, or a home with children, strongly consider hiring a lead-safe certified contractor. DIY lead-safe work practices include containing the work area, minimizing dust, wearing protective gear, cleaning thoroughly, and controlling waste.
Here is the simple rule: if you do not know what is in the paint, do not attack it like a raccoon in a toolbox. Test, plan, and protect the space.
How to Choose the Best Paint Stripper for Your DIY Project
1. Match the Product to the Coating
Paint is only one possible coating. Your project may have latex paint, oil-based paint, enamel, shellac, lacquer, varnish, polyurethane, stain, primer, or a mystery finish applied by someone named “Uncle Dave” in 1986. The best paint stripper should clearly state what it removes.
For latex and oil-based paint on furniture, a general-purpose gel stripper may be enough. For polyurethane or epoxy, look for a product specifically labeled for tough coatings. For varnished furniture, a furniture refinisher or varnish remover may be more appropriate than a heavy paint stripper.
2. Consider Dwell Time
Dwell time is how long the stripper must sit before scraping. Faster is not always better. A product that works in 15 minutes may also dry quickly, smell stronger, or require more caution. A slower gel may be easier to control and safer for detailed work.
When comparing products, look at the recommended working time. If you are stripping a large door, you need a product that stays wet long enough for you to scrape before it dries. If it dries out, it can re-stick the softened paint into a gummy mess. That is not restoration. That is arts and crafts with regret.
3. Choose a Formula That Clings
For vertical surfaces, curves, spindles, carved trim, and cabinet frames, cling matters. A thick gel or paste is easier to apply evenly and less likely to drip onto the floor. Dripping wastes product and creates cleanup problems. For flat tabletops, panels, or removable hardware, liquid products can be easier to spread.
4. Think About Cleanup
Some paint strippers clean up with water. Others require mineral spirits or a manufacturer-recommended wash. Some leave waxy residue that must be removed before sanding, staining, priming, or repainting. If you plan to stain wood, residue matters a lot. Any leftover stripper can interfere with stain absorption and finish adhesion.
Before buying, read the cleanup instructions. If the cleanup process sounds like a chemistry final, choose something more manageable for your skill level and workspace.
5. Read the Restrictions
Some products are outdoor-use only. Some are not recommended for floors. Some should not be used on plastic, fiberglass, veneer, or certain metals. Some formulas may be restricted by state or local VOC rules. If a product is not available in your area, there is probably a regulatory or formulation reason. Do not try to outsmart the label. The label has lawyers, chemists, and emergency scenarios behind it.
My Practical Testing Method Before Committing
Before I use any paint stripper on a full project, I do a small test patch. Pick a hidden area: the underside of a tabletop, the back of a drawer front, the inside edge of trim, or a small corner of metal. Apply the product exactly as directed. Cover it if the instructions recommend covering. Wait the minimum time, then test with a plastic scraper.
If the paint lifts easily, great. If it only smears, wait longer. If the surface underneath darkens, swells, softens, or gets damaged, stop and reconsider. Testing tells you three things: whether the stripper works, how long it really needs, and how the surface reacts.
For multiple paint layers, I expect more than one application. The best paint stripper is powerful, but it is not a magic eraser with a marketing budget. Old projects may need a first pass to remove top paint, a second pass for primer or older layers, and detail work with brushes, picks, or fine abrasive pads.
Tools That Make Paint Stripping Easier
The right stripper is only half the battle. The right tools make the job cleaner and faster.
Useful DIY Paint Stripping Tools
- Chemical-resistant gloves
- Splash-resistant safety goggles
- Disposable coveralls or old long-sleeve clothing
- Drop cloths or plastic sheeting
- Natural-bristle or disposable brushes
- Plastic scrapers for wood
- Metal scrapers for durable surfaces
- Detail brushes for carvings and grooves
- Steel wool or synthetic stripping pads, if safe for the surface
- Containers or bags for paint sludge disposal
Use plastic scrapers on wood whenever possible. Metal scrapers remove stubborn coatings but can gouge soft wood faster than you can say, “I meant to distress it.” For detailed furniture, a toothbrush-style detail brush or soft brass brush can help remove softened paint from grooves.
Step-by-Step: How to Use Paint Stripper the Smart Way
Step 1: Prepare the Work Area
Lay down plastic or a chemical-resistant drop cloth. Remove hardware if possible. Keep the project away from flames, pilot lights, heaters, and anything that could ignite vapors. Set up ventilation before opening the can. Put on protective gear before applying the stripper, not after you have already splashed it on your wrist like a DIY villain origin story.
Step 2: Apply a Thick, Even Coat
Most DIYers apply too little. Paint stripper needs enough thickness to stay wet and penetrate the coating. Brush it on in one direction and avoid overworking it. A thin coat may dry before it has time to loosen the paint.
Step 3: Let It Work
Follow the label’s dwell time. Do not rush. If the instructions allow covering the product with plastic wrap or stripping paper, doing so can keep it active longer. When the paint wrinkles, bubbles, or softens, test a small area with a scraper.
Step 4: Scrape Carefully
Scrape with the grain on wood. Use firm, steady pressure. Collect the sludge immediately into a lined container or disposable tray. Do not spread it around like frosting unless your cake is a hazardous waste violation.
Step 5: Repeat if Needed
Multiple layers usually require multiple passes. After the first scrape, apply more stripper to stubborn areas. Be patient. The second round often works better because the top layer is gone and the product can reach the older coating.
Step 6: Neutralize or Clean the Surface
Clean the surface exactly as the manufacturer recommends. This may involve water, mineral spirits, a specific after-wash, or another cleaner. Let the surface dry thoroughly before sanding, staining, priming, or painting.
Step 7: Sand Lightly
Once dry, sand lightly to remove residue and smooth raised grain. For wood, start gently. You can always sand more, but you cannot unsand a rounded antique edge.
What About Heat Guns and Infrared Paint Removal?
Chemical stripper is not the only option. Mechanical scraping, sanding, heat guns, and infrared paint removers can also remove coatings. Heat can be fast, especially on exterior trim and old layers, but it requires caution. High heat can scorch wood, crack glass, ignite dust, or create hazardous fumes, especially if lead paint is present.
Infrared paint removal tools use lower, controlled heat compared with many traditional heat guns and can soften old paint for scraping. They are useful for old-house restoration, windows, doors, and trim. However, they are tools, not miracles. You still scrape. You still contain debris. You still test for lead.
For many DIY furniture projects, a chemical gel stripper remains the most approachable method. For large architectural jobs, a combination of infrared heat, scraping, and safer chemical products may work better.
The Best Paint Stripper I’ve Ever Used: What It Had in Common
The best paint stripper I have ever used was a thick, brushable gel that stayed wet, clung to vertical surfaces, had manageable odor, and removed multiple finish layers without damaging the wood underneath. It did not work instantly, but it worked predictably. That is the quality I now value most.
A predictable stripper lets you plan. You know how much area to coat at once. You know when to scrape. You know how to clean it. You know whether it needs a second pass. The worst product is not always the weakest one; it is the one that behaves unpredictably and turns paint into permanent chewing gum.
For DIYers, I recommend choosing a product with these qualities:
- Thick gel or paste consistency for better control
- Clear surface compatibility on the label
- No methylene chloride
- Reasonable odor and ventilation requirements
- Enough dwell time to work without drying too fast
- Cleanup instructions you can actually follow
- Good performance on your exact coating type
Common Mistakes to Avoid
Using Too Little Product
A thin coat dries quickly and underperforms. Apply a generous layer according to the label.
Scraping Too Soon
If the paint is still stuck, give the stripper more time. Scraping early creates extra work and surface damage.
Letting the Stripper Dry Out
Dry stripper can glue softened paint back down. Work in sections and cover the product if directed.
Skipping Safety Gear
Gloves and goggles are not optional. Paint stripper does not care that you are “just doing one quick spot.”
Ignoring Lead Paint Risk
Any pre-1978 painted surface deserves caution. Test before scraping or sanding.
DIY Experience: What I Learned From Finding the Best Paint Stripper
My biggest lesson from paint stripping is that confidence should arrive after the test patch, not before it. The first time I stripped an old piece of furniture, I assumed the product would do all the work. I imagined brushing it on, waiting a few minutes, and wiping away paint like I was in a satisfying internet video. Reality arrived with a scraper, sticky gloves, and a chair that appeared to have twelve emotional layers of paint.
The turning point came when I stopped treating paint stripper like a magic potion and started treating it like a process. I learned to set up the workspace carefully, pour only what I needed into a disposable container, apply a thicker coat, and cover stubborn areas so the stripper stayed wet. That one change made a huge difference. Instead of drying into a crusty mess, the paint softened properly and lifted in ribbons.
I also learned that the best paint stripper is not always the fastest. Fast products can be useful, but on furniture and trim, I prefer control. A slower gel gives me time to work in sections. It clings to edges. It does not sprint down a table leg and puddle on the floor like it has somewhere better to be. For a DIYer, that control matters more than shaving ten minutes off the job.
Another lesson: scraping technique matters. I used to attack the surface with too much pressure, which left scratches and gouges. Now I let the stripper do more of the work. I use plastic scrapers first, move with the grain, and save aggressive tools for tough areas. For carvings and grooves, I use small brushes and detail tools instead of forcing a wide scraper into places it clearly was not invited.
Cleanup is where many projects succeed or fail. After stripping, I clean the surface exactly as the product directs and then let it dry longer than I think it needs. Wood can hold moisture or residue, and rushing into stain or paint can ruin the finish. Once dry, I sand lightly, wipe away dust, and inspect under good light. Good light reveals everything: leftover finish, raised grain, missed corners, and the tiny drip you somehow stared at for two hours without seeing.
If I were giving advice to a friend, I would say this: buy the paint stripper for the project, not for the promise on the front of the can. Read the back label. Test first. Wear the gear. Work small. Be patient. The best paint stripper I have ever used did not make the project effortless, but it made it predictable. In DIY, predictable is beautiful. It means fewer surprises, less damage, and a finished piece that looks restored instead of rescued from a glue factory.
Conclusion
Finding the best paint stripper for DIY work is about matching the product to the surface, coating, workspace, and safety requirements. A good paint stripper should soften paint effectively, stay wet long enough to work, clean up properly, and protect the material underneath. Whether you choose a gel, paste, liquid, or an alternative method like infrared heat, the smartest approach is to test first, follow the label, and respect the risks.
For furniture, cabinets, doors, and trim, a thick gel or paste is often the most beginner-friendly choice. For metal or masonry, a stronger specialty remover may be appropriate, especially outdoors. For old homes, lead safety must come before speed. The best DIY result is not just a stripped surface; it is a project completed safely, cleanly, and without turning your garage into a chemical-themed escape room.