
Table of Contents >> Show >> Hide
- Introduction: Yes, You Can Dye Eggs Without Vinegar
- Why Dye Eggs Without Vinegar?
- Supplies You Need
- How to Dye Eggs with Food Coloring Without Vinegar: 9 Steps
- Step 1: Hard-Boil the Eggs Properly
- Step 2: Protect Your Work Surface
- Step 3: Prepare the No-Vinegar Dye Bath
- Step 4: Adjust Color Strength Before Adding Eggs
- Step 5: Submerge the Eggs Carefully
- Step 6: Let the Eggs Soak Longer Than Usual
- Step 7: Remove and Dry Without Smudging
- Step 8: Add Patterns and Creative Effects
- Step 9: Store Dyed Eggs Safely
- Can You Use Lemon Juice Instead of Vinegar?
- Best Colors for No-Vinegar Egg Dye
- Troubleshooting: Why Are My Eggs Too Pale?
- Troubleshooting: Why Is the Color Uneven?
- Are Dyed Eggs Safe to Eat?
- Creative No-Vinegar Egg Dyeing Ideas
- Common Mistakes to Avoid
- Extra Experience: What I Learned Dyeing Eggs Without Vinegar
- Conclusion
Note: This guide is based on widely accepted egg-safety and food-coloring guidance from U.S. food safety agencies, university extensions, egg safety organizations, and tested home-cooking resources. For edible dyed eggs, use food-safe coloring, avoid cracked shells, refrigerate hard-boiled eggs promptly, and do not leave cooked eggs at room temperature for more than two hours.
Introduction: Yes, You Can Dye Eggs Without Vinegar
Learning how to dye eggs with food coloring without vinegar is wonderfully useful when you open the pantry, feel confident, grab the food coloring, and then discover the vinegar bottle is emptier than your patience during a family craft session. Good news: your Easter egg plans are not doomed. You can still create cheerful, colorful eggs using simple food coloring, hot water, and a little technique.
Vinegar is commonly used in Easter egg dye because its acidity helps color cling to the eggshell. Without it, the color may turn out softer, more pastel, or slightly less even. That is not a failure; that is called “charming homemade character,” and it is basically the cottagecore version of science. With the right ratio of food coloring to water, longer soaking time, and careful drying, you can make beautiful dyed eggs without vinegar.
This guide walks you through nine practical steps for dyeing eggs with food coloring and no vinegar. You will learn what supplies to use, how to make brighter colors, how long to soak the eggs, how to create patterns, and how to keep the eggs safe if you plan to eat them later. Whether you are decorating Easter eggs with kids, making spring table decor, or simply proving to your kitchen that you are resourceful, this method keeps things easy, colorful, and delightfully low-drama.
Why Dye Eggs Without Vinegar?
There are plenty of reasons to skip vinegar. Maybe you dislike the smell. Maybe someone in your house believes vinegar belongs only near pickles and potato chips. Maybe you ran out. Or maybe you simply want a gentler, no-vinegar egg dyeing method that still uses ingredients you already have.
Food coloring without vinegar works best when you understand one simple thing: eggshells are porous and naturally pale, so they can absorb color, but they need time. Vinegar speeds up the process. Without vinegar, you compensate with stronger dye, warm water, and patience. Think of it like asking the eggs politely instead of shouting at them with acid.
Supplies You Need
Before you begin, gather everything so you are not sprinting around the kitchen with blue fingers. Egg dyeing is fun; accidental countertop modern art is less fun.
- Hard-boiled white or brown eggs, cooled completely
- Liquid food coloring or gel food coloring
- Hot water
- Small cups, bowls, or mugs deep enough to cover an egg
- Spoons, tongs, or a wire egg dipper
- Paper towels or a cooling rack
- Old newspaper, parchment paper, or a washable table covering
- Optional: crayons, stickers, rubber bands, tape, oil, or paper towels for designs
- Optional: lemon juice or citric acid if you want a vinegar-free acidic alternative
How to Dye Eggs with Food Coloring Without Vinegar: 9 Steps
Step 1: Hard-Boil the Eggs Properly
Start with clean, uncracked eggs. Place them in a single layer in a saucepan and cover them with water. Bring the water to a boil, then turn off the heat, cover the pan, and let the eggs sit until cooked through. After cooking, transfer the eggs to cold water or an ice bath so they cool quickly and stop cooking.
For dyeing, fully cooled eggs are easier to handle and less likely to sweat moisture into the dye. If you plan to eat the eggs, keep food safety in mind from the beginning. Hard-boiled eggs should be refrigerated after cooling and should not sit out for long periods during decorating.
Step 2: Protect Your Work Surface
Food coloring is small, mighty, and apparently trained in stealth. One drop can travel farther than seems scientifically fair. Cover your table or counter with newspaper, parchment paper, an old towel, or a plastic tablecloth.
If kids are helping, give each child a defined workspace and a spoon. This reduces the chances of someone deciding that “egg dye volcano” is a necessary experiment. It may still happen, but at least you tried.
Step 3: Prepare the No-Vinegar Dye Bath
For each color, pour about 1/2 cup of hot water into a cup or small bowl. Add 15 to 25 drops of liquid food coloring and stir well. Because this method uses no vinegar, you need more food coloring than many classic Easter egg dye recipes require.
For deeper shades, use gel food coloring instead of liquid food coloring. Start with a small dab, about the size of a grain of rice, and stir until fully dissolved. Gel coloring is concentrated, so it can create stronger blues, reds, purples, and greens without requiring half the bottle. Your wallet and your future cupcakes will appreciate the restraint.
Step 4: Adjust Color Strength Before Adding Eggs
Before placing eggs into the dye, check the color of the water. It should look darker than the final color you want on the egg. Eggs usually dry lighter than they appear when wet, especially without vinegar. If the dye looks pale in the cup, the egg will likely come out whispering the color instead of announcing it.
Add more drops if needed. A good no-vinegar starting ratio is:
- Pastel eggs: 10 to 15 drops food coloring per 1/2 cup hot water
- Medium color: 20 to 25 drops per 1/2 cup hot water
- Bold color: 30 or more drops, or a small amount of gel coloring
Step 5: Submerge the Eggs Carefully
Use a spoon or tongs to lower each egg into the dye bath. Make sure the egg is fully covered. If the cup is too shallow, rotate the egg halfway through soaking so the color stays even.
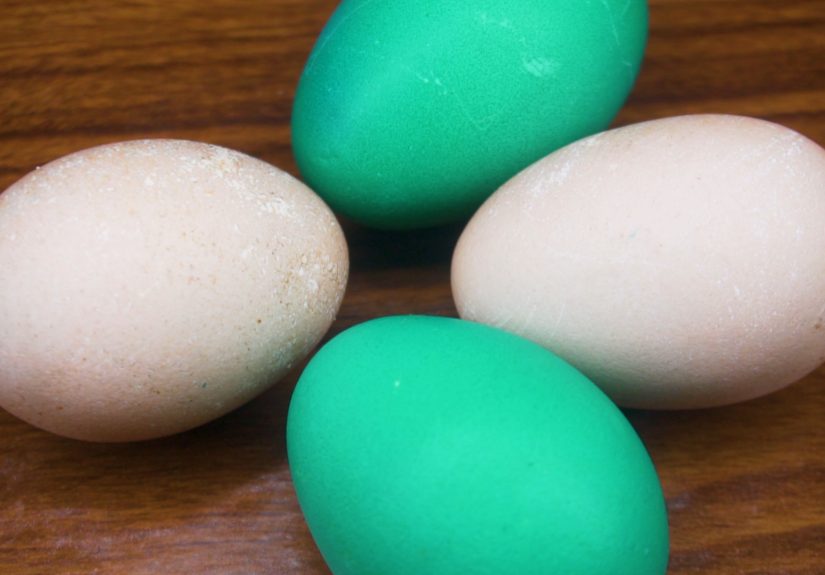
White eggs usually show brighter colors, while brown eggs create warmer, earthier tones. A blue dye on a brown egg may become slate gray or muted teal. Yellow on brown eggs may look golden. The results can be gorgeous, but they are less predictable. In other words, brown eggs are the jazz musicians of egg dyeing.
Step 6: Let the Eggs Soak Longer Than Usual
Without vinegar, eggs need more time in the dye bath. Start with 10 minutes for light color, 15 to 20 minutes for medium color, and up to 30 minutes for deeper shades. If you want very intense color, refrigerate the eggs while they soak, especially if they will be eaten later.
Check the eggs every few minutes. Lift one gently with a spoon, look at the shade, and return it to the dye if it needs more time. Do not rub the shell while it is wet because the color can smear or become patchy.
Step 7: Remove and Dry Without Smudging
When the eggs reach your preferred color, lift them from the dye and place them on a cooling rack, paper towel, or upside-down egg carton. A rack helps air circulate and prevents flat spots, while a paper towel is convenient but may leave small texture marks.
Let the eggs dry fully before touching them. Wet dye is delicate, especially when no vinegar is used. If you pick up an egg too soon, your fingerprint may become part of the design. This is not always terrible, but it is hard to explain when your thumbprint appears on the prettiest egg like a tiny crime scene.
Step 8: Add Patterns and Creative Effects
Once you know the basic method, you can make your eggs more interesting with simple decorating tricks. For a wax-resist effect, draw designs on the egg with a white crayon before dyeing. The colored water will not stick well to the waxed areas, leaving lines, dots, names, stars, or tiny questionable bunnies.
For striped eggs, wrap rubber bands around the shells before placing them in dye. For geometric designs, use small pieces of tape or stickers, then peel them off after the egg dries. For a speckled look, dip a toothbrush into concentrated food coloring and gently flick color onto dry eggs. Do this over a covered surface unless you want your kitchen to look like it lost a paintball match.
You can also make marbled eggs without vinegar by adding a teaspoon of neutral oil to a shallow bowl of strong food coloring and warm water. Roll the egg gently through the mixture. The oil prevents some dye from touching the shell, creating swirls and cloudy patterns.
Step 9: Store Dyed Eggs Safely
If the eggs are only for decoration and will sit out for many hours, do not eat them afterward. If you plan to eat your dyed eggs, refrigerate them as soon as they are dry. Hard-boiled eggs should not be left at room temperature for more than two hours, and they are best eaten within one week when stored in the refrigerator.
Avoid eating dyed eggs with cracked shells, eggs hidden outdoors in dirty areas, or eggs handled by many people without clean hands. Food coloring itself is not the problem when it is food-safe; time, temperature, cracks, and handling are the real troublemakers.
Can You Use Lemon Juice Instead of Vinegar?
Yes, lemon juice can help food coloring attach to eggshells because it is acidic, but it is not vinegar. If your goal is strictly “no vinegar smell,” lemon juice is a practical substitute. Add 1 teaspoon of lemon juice to 1/2 cup hot water and food coloring. The color may become brighter than water alone.
However, if your goal is “no acid at all,” skip lemon juice and use only hot water and extra coloring. The shades will be softer, but still attractive. Citric acid powder can also work, but it may be stronger than needed, so use only a tiny pinch if you try it.
Best Colors for No-Vinegar Egg Dye
Some colors perform better than others when vinegar is not used. Blue, green, and purple usually show up nicely with enough drops. Yellow may need extra coloring because it is naturally lighter. Red can turn pink unless you make the dye bath quite concentrated.
Easy Color Mixing Ideas
- Sky blue: 20 drops blue food coloring
- Mint green: 15 drops green plus 5 drops yellow
- Lavender: 10 drops blue plus 10 drops red
- Coral pink: 20 drops red plus 3 drops yellow
- Golden yellow: 25 to 30 drops yellow
- Teal: 15 drops blue plus 10 drops green
Remember, food coloring brands vary. Gel coloring is usually stronger than liquid drops. Neon food coloring can create playful colors that look especially fun on white eggs.
Troubleshooting: Why Are My Eggs Too Pale?
If your eggs look too pale, the dye bath may be too weak, the water may be too cool, or the eggs may not have soaked long enough. Add more food coloring, warm the dye slightly, and give the eggs more time.
Another common issue is a slick or oily eggshell. If the eggs feel slippery before dyeing, gently wipe them with a damp paper towel and dry them. Do not scrub hard, because tiny scratches can make the dye uneven.
Troubleshooting: Why Is the Color Uneven?
Uneven color can happen when eggs touch the side of the cup, when dye is not fully mixed, or when eggs dry against a paper towel. Stir the dye bath before adding eggs, use a cup deep enough for full coverage, and rotate eggs gently during soaking.
Also, do not panic over tiny speckles. Eggshells naturally have texture and pores. Speckles can make dyed eggs look handmade rather than factory-perfect, which is good because factory-perfect eggs have no personality and probably do not enjoy holidays.
Are Dyed Eggs Safe to Eat?
Dyed eggs can be safe to eat when you use food-safe dye, start with clean uncracked eggs, keep hands and surfaces clean, and refrigerate the eggs promptly. If dye seeps through the shell slightly, that is usually not a concern when the coloring is food-grade.
Food safety matters more than color. Do not eat eggs that were left out too long, hidden in unsafe places, cracked during decorating, or used only as room-temperature decorations. When in doubt, use one batch for decorating and another batch for eating. This strategy may sound extra, but it prevents the annual family debate known as “Is this egg decorative or lunch?”
Creative No-Vinegar Egg Dyeing Ideas
Pastel Spring Eggs
Use 10 to 15 drops of food coloring in hot water and soak white eggs for 8 to 12 minutes. The result is soft, gentle color perfect for Easter baskets, brunch tables, or anyone who likes their eggs to look like they belong in a watercolor painting.
Bold Jewel-Tone Eggs
Use gel food coloring or 30-plus drops of liquid coloring. Soak the eggs for 20 to 30 minutes, checking often. Colors such as emerald, sapphire, and deep purple work well when the dye bath is strong.
Two-Tone Dip-Dyed Eggs
Hold the egg halfway in one color, let it dry, then dip the other half into a second color. This creates a modern color-blocked look. Try yellow and pink, blue and green, or purple and teal.
Sticker-Resist Eggs
Place small stickers on dry eggs before dyeing. After the eggs dry, peel off the stickers to reveal clean shapes underneath. Stars, dots, letters, and hearts work well. Tiny dinosaur stickers also work, because nothing says spring like a pastel egg with a T. rex silhouette.
Common Mistakes to Avoid
The biggest mistake is using too little food coloring. No-vinegar dye needs a stronger color bath. Another mistake is removing the eggs too quickly. A five-minute soak may work with vinegar, but without vinegar it often creates barely-there color.
Do not use non-food-safe paints or dyes on eggs you plan to eat. Craft paints, markers, and glitter may be fine for blown-out decorative shells, but they are not ideal for edible hard-boiled eggs. Also avoid dyeing cracked eggs for eating, because cracks make it easier for bacteria and dye to enter.
Extra Experience: What I Learned Dyeing Eggs Without Vinegar
The first thing you notice when dyeing eggs without vinegar is that the kitchen smells better. There is no sharp vinegar cloud floating around the table, no child asking why the Easter Bunny smells like salad dressing, and no adult pretending not to notice. The process feels calmer, especially if you are doing the project indoors with kids or in a small kitchen.
The second thing you learn is that patience matters. Vinegar-based dye can color eggs quickly, but no-vinegar dye behaves more slowly. At first, it may look like nothing is happening. You lower the egg into blue water, wait three minutes, lift it up, and think, “Congratulations, egg, you are slightly damp.” But after 10 to 20 minutes, the color begins to build. The shades are often softer and more natural-looking, which can be beautiful if you stop expecting neon intensity from the first minute.
White eggs give the clearest results. They turn pink, blue, yellow, green, and purple more predictably. Brown eggs are moodier, but in a good way. They create warm, vintage colors: olive green instead of bright green, dusty rose instead of bubblegum pink, and deep teal instead of swimming-pool blue. If your style leans rustic, farmhouse, natural, or “I own at least one wooden serving board,” brown eggs are surprisingly lovely.
I also found that gel food coloring makes a big difference. Liquid food coloring works, but gel produces richer color with less liquid. The trick is to dissolve it completely in hot water before adding the egg. If the gel is not mixed well, you may get dark streaks. Sometimes that looks artistic. Sometimes it looks like the egg made bad life choices. Stir well.
Drying is another underrated step. Eggs fresh from the dye bath look darker and shinier than they will later. Once dry, they usually lighten. That means you should dye them slightly darker than your target shade. I like placing them on a cooling rack because paper towels can leave little marks. If marks happen, call them texture. Crafting is 40 percent technique and 60 percent confident rebranding.
For families, the no-vinegar method is especially nice because it is simple and less smelly. Kids can mix colors, watch eggs change slowly, and experiment with rubber bands or stickers. Just keep the food safety clock in mind. If the eggs will be eaten, decorate in a reasonable amount of time and get them back into the refrigerator. If the eggs are going to sit out all day as decorations, treat them as decorations only.
The best experience came from combining techniques: strong blue dye, a rubber band around the egg, a 20-minute soak, and careful drying. The result looked clean, bright, and intentional. The worst result came from touching a wet red egg too soon, which left a fingerprint so dramatic it looked like evidence from a tiny Easter investigation. Lesson learned: let the eggs dry, admire from a distance, and keep impatient hands busy with jelly beans.
Overall, dyeing eggs with food coloring without vinegar is absolutely worth trying. It is easy, inexpensive, kid-friendly, and flexible. The colors may be softer than traditional vinegar dye, but they have a handmade charm that fits spring perfectly. Plus, it proves that a missing pantry ingredient does not have to cancel the fun. Sometimes the best crafts begin with “Oops, we are out of vinegar.”
Conclusion
Dyeing eggs without vinegar is simple once you adjust the method. Use hot water, add extra food coloring, soak the eggs longer, and let them dry carefully. For brighter results, choose white eggs and concentrated gel food coloring. For softer, rustic tones, try brown eggs and longer soaking times.
The key is to set realistic expectations. Without vinegar, the dye may not grab the shell as quickly, but that does not mean the results are dull. You can still make pastel eggs, bold eggs, marbled eggs, striped eggs, and sticker-resist designs with basic supplies from your kitchen. Keep the eggs food-safe if you plan to eat them, refrigerate them promptly, and use decorative-only eggs when they will sit out for hours.
In short, how to dye eggs with food coloring without vinegar comes down to stronger dye, longer soaking, and a little creative patience. Your eggs may not look store-bought, and honestly, that is the point. They will look handmade, cheerful, and ready for springpossibly with one or two fingerprints, because every masterpiece needs a signature.






