
Table of Contents >> Show >> Hide
- Before You Dye Curtains, Know What You’re Working With
- Supplies You’ll Need
- How to Dye Curtains: Easy Step-by-Step Guide
- Best Dye Methods by Curtain Type
- Common Mistakes to Avoid
- How to Choose the Right Color for Curtains
- Aftercare: Keep Your Dyed Curtains Looking Good
- Real-World Experiences: What People Learn After Dyeing Curtains
- Conclusion
If your curtains are looking a little tired, a little faded, or a little too “rental beige,” dyeing them can be one of the cheapest ways to give a room a dramatic refresh. New curtains can cost a small fortune. Dye, on the other hand, usually costs less than a takeout dinner and gives you that deeply satisfying DIY feeling of I made this room look expensive with a bucket and stubborn optimism.
The trick is knowing what kind of curtains you have, choosing the right dye method, and not treating every panel like it was born to survive a boiling cauldron. Some curtains dye beautifully. Others fight back like tiny fabric attorneys. In this easy step-by-step guide, you’ll learn how to dye curtains the smart way, avoid blotchy disasters, and end up with a color that looks intentional instead of “mystery mauve.”
Before You Dye Curtains, Know What You’re Working With
Check the fabric content first
This is the part many people skip, then later wonder why their curtains refused to cooperate. Fabric content matters more than your color mood board. Cotton, linen, rayon, silk, and some nylon fabrics usually take dye well. Polyester and polyester blends are much pickier and often need a dye made specifically for synthetic fibers, usually with a hotter stovetop method.
If your curtain tag says 100% cotton, you’re in luck. If it says polyester, blackout, thermal, or dry clean only, slow down and read the fine print before diving into the dye bath like a DIY pirate. Some blackout curtains have coatings or liners that may not dye evenly at all. That means the front may change color while the back acts like it has diplomatic immunity.
Look at the current color
Dye works best when you’re going darker or richer than the original shade. You can turn ivory curtains sage, blush, terracotta, navy, or charcoal. What you usually cannot do is take dark brown curtains and turn them into breezy oat milk beige. Dye adds color; it does not erase what’s already there.
Patterned curtains can also be dyed, but the original print will still show through. Think of it as layering color, not hitting an undo button.
Read the care label like it owes you money
If the label says dry clean only, proceed with caution. Some fabrics can shrink, warp, or lose structure in water. If you’re attached to those curtains emotionally, financially, or because your mom picked them out, test a hidden corner first.
Supplies You’ll Need
- Curtains or drapery panels
- Fabric dye suitable for your curtain fiber
- Large plastic bin, stainless steel sink, or stainless steel pot
- Rubber gloves
- Hot water
- Mild detergent
- Salt for cotton, linen, or rayon or vinegar for silk, wool, or nylon, depending on the dye instructions
- A long spoon or stirring tool you do not plan to use for soup ever again
- Old towels or plastic table covering for spill protection
- Measuring cup
- Optional: color remover, color fixative, or a test swatch
How to Dye Curtains: Easy Step-by-Step Guide
Step 1: Remove hardware, hooks, and liners
Take off curtain rings, hooks, pins, and detachable liners. Metal pieces and plastic grommets do not belong in your dye bath. Neither does blind optimism. If your curtains have a separate liner, decide whether you’re dyeing only the decorative fabric or both layers. In most cases, liners are better left alone.
Step 2: Wash the curtains first
This step is not optional unless you enjoy patchy color. Curtains collect dust, cooking residue, pet hair, and mystery air particles that somehow float in from the universe. Prewashing removes dirt and fabric finishes that can block dye absorption.
Wash them in warm water with a mild detergent. Skip fabric softener, because it can leave residue. Do not dry them completely before dyeing. Damp fabric usually absorbs dye more evenly than dry fabric.
Step 3: Test a small section
If you can snip a bit from the hem allowance or test an inside edge, do it. A quick test can save you from a full-panel identity crisis. Dye may appear darker when wet and lighter once dry, so judge the sample after rinsing and drying.
This is also the time to check how the fabric reacts to hot water. If it puckers, shrinks, or looks offended, stop and reconsider.
Step 4: Prepare your dye bath
Follow the dye package directions closely, but here’s the general idea: use a container big enough for the fabric to move freely. Crowded curtains dye unevenly. For many all-purpose dyes, a common guideline is about three gallons of water per pound of dry fabric. For natural fibers, hot water around 140°F usually helps. For synthetic fibers, the water often needs to be much hotter, sometimes near simmering, depending on the product.
Add the dye and stir thoroughly. If your dye instructions call for a helper ingredient, this matters too. Salt is often used with cotton, linen, and rayon to boost color. Vinegar is often used with silk, wool, or nylon. Some methods also call for a small amount of dish soap to encourage even dyeing. In short, your curtains are getting a spa day, but with chemistry.
Step 5: Wet the curtains evenly
Before the curtains go into the dye bath, make sure they are evenly wet. This helps prevent blotches and streaks. Squeeze out excess water so they are damp, not dripping like a dramatic rain scene in a romance movie.
Step 6: Submerge and stir constantly
Place the curtains into the dye bath and stir, lift, turn, and move the fabric continuously, especially in the first 10 minutes. This is the secret to even color. If the fabric sits folded in one spot, that crease may become a permanent artistic statement you did not ask for.
The length of time depends on the dye, the fabric, and the depth of color you want. Many projects take anywhere from 10 to 30 minutes, while some synthetic fabrics need longer. Check the shade frequently. Remember that wet fabric looks darker than dry fabric, so stop slightly deeper than your target color.
Step 7: Rinse until the water runs clearer
When the curtains reach the color you want, remove them carefully and rinse in warm water, then gradually cooler water, until the runoff becomes much clearer. This part can feel endless, but it is worth it. Rushing the rinse is one of the easiest ways to end up with dye transfer later.
After rinsing, wash the curtains alone with mild detergent. Do not toss them in with towels, T-shirts, or anything else you enjoy keeping its original color.
Step 8: Dry and rehang
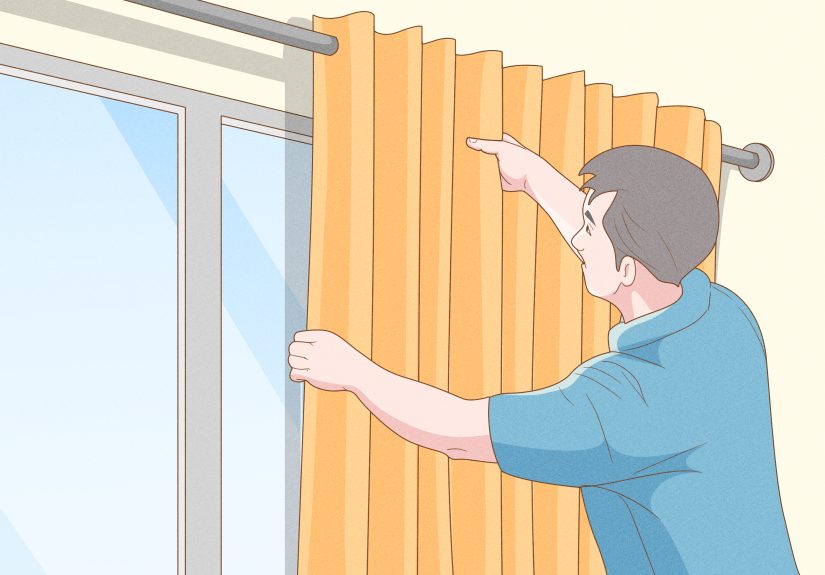
Air-drying is the safest option for most curtains. Hang them up while they are still slightly damp to help smooth wrinkles naturally. If the care label allows machine drying, use a gentle setting. Once dry, rehang the panels and admire your work like the curtain whisperer you now are.
Best Dye Methods by Curtain Type
Cotton and linen curtains
These are usually the easiest to dye at home. They absorb color well and respond nicely to bucket, sink, or washer methods when the dye instructions allow it. If you are a beginner, this is your dream scenario.
Rayon curtains
Rayon can dye beautifully and often takes rich, saturated color. Handle it gently when wet, because it can be weaker and more delicate than it looks.
Polyester curtains
These are trickier. You usually need a dye made for synthetic fibers and much higher heat. If your curtains are polyester sheers or blackout polyester panels, do a small test first. Some polyester items take color well; others barely change and then act smug about it.
Blackout or coated curtains
Proceed carefully. Many blackout curtains contain acrylic, foam, rubbery backings, or layered construction that may not absorb dye evenly. Even if the face fabric changes color, the backing may stay the same. If the project matters, test an inside corner before committing the whole panel.
Common Mistakes to Avoid
Skipping the prewash: Dirt and residue block dye absorption.
Ignoring fiber content: The wrong dye plus the wrong fabric equals disappointment with extra stirring.
Using a too-small container: Curtains need room to move or you risk blotches.
Expecting dye to lighten fabric: It usually cannot.
Not stirring enough: Still fabric becomes uneven fabric.
Forgetting that wet color looks darker: Do not panic halfway through and keep adding dye like a villain in a laboratory.
Washing dyed curtains with other laundry right away: Give them a solo wash or two first.
How to Choose the Right Color for Curtains
If you want a calm, airy room, try sage, dusty blue, soft clay, or muted taupe. If you want drama, navy, forest green, charcoal, and deep rust can make basic curtains look custom. For small rooms, medium tones often work better than very dark colors because they add richness without swallowing the light.
A practical tip: dye can be a great way to disguise age, sun fading, or small stains. Off-white curtains that have yellowed slightly can often be saved by moving into a deeper color family instead of trying to force them back to perfect white. In other words, when life gives you dingy drapes, make moody linen-core decor.
Aftercare: Keep Your Dyed Curtains Looking Good
Wash dyed curtains separately the first couple of times. Use a mild detergent and cool to warm water based on the care label. Avoid harsh bleach. If you ever notice loose dye transfer, rinse and rewash before putting them back into regular laundry circulation.
Sunlight can also fade fabric over time, especially on windows that get strong afternoon light. If your room is bright, consider rotating panels occasionally or using a lining that protects the dyed face fabric. Your curtains cannot wear sunscreen, unfortunately.
Real-World Experiences: What People Learn After Dyeing Curtains
One of the most common experiences with dyeing curtains is simple surprise. People start the project thinking it will be a quick color swap, then realize curtains are big, absorbent, and dramatically committed to chaos. A shirt can be dyed in a small bucket. Curtain panels often need a large bin, more hot water than expected, and enough stirring to count as light cardio. The first lesson most DIYers learn is that scale matters. A project that sounds tiny in theory can suddenly take over the laundry room, the kitchen, and part of your personality for an afternoon.
Another common experience is discovering that fabric tags tell the truth more often than wishful thinking does. Many people buy curtains without paying attention to fiber content. Later, when the urge to dye them appears, they realize one panel is a cotton blend, another is polyester, and the lining is apparently made from pure defiance. Those who get the best results usually say the same thing: once they checked the label, matched the dye to the fabric, and followed the heat requirements properly, the process became much more predictable.
There is also the emotional roller coaster of the “wet fabric panic.” Dyed curtains almost always look darker in the rinse stage, and plenty of first-time DIYers are convinced they have accidentally created theater drapes for a haunted mansion. Then the fabric dries, the tone softens, and suddenly the color looks intentional, elegant, and far less alarming. It is a useful reminder that patience is part of the process. Curtains, like many home projects, often look worst in the messy middle.
People also learn that imperfect results are not always bad results. Slight tonal variation can make curtains look more organic and expensive, especially in relaxed spaces like bedrooms, breakfast nooks, and creative studios. A perfectly flat color is not the only version of success. In fact, a little variation can add character, provided it looks soft and consistent rather than blotchy and accidental.
Perhaps the most satisfying experience is the transformation itself. Plain white or faded beige curtains can become soft olive, smoky blue, terracotta, or deep gray and suddenly change the whole room. The walls look fresher. The furniture seems more intentional. Even the lamp in the corner starts acting like it lives in a catalog. That is the magic of fabric dye in home decor: it is relatively inexpensive, surprisingly effective, and gives old textiles a second life. For many DIYers, the project becomes less about saving money and more about control. Instead of hunting for the exact curtain color in stores, they create it.
And yes, nearly everyone who dyes curtains for the first time says they would do at least one thing differently next time. Use a bigger container. Stir more. Test first. Wear older clothes. Protect the floor better. Buy an extra pair of gloves. But that is part of the charm. A good curtain-dye project does not just leave you with new window treatments. It leaves you with better instincts, smarter methods, and a story that begins with, “So I decided my curtains needed a makeover,” which is exactly how many excellent home updates begin.
Conclusion
Dyeing curtains is one of those home projects that looks a little intimidating until you understand the basic rules. Check the fabric. Use the right dye. Prewash thoroughly. Keep the fabric moving. Rinse well. That is the formula. Whether you are refreshing faded cotton panels, deepening linen curtains for a richer look, or experimenting with a bold new color, the process can be simple, affordable, and genuinely fun.
The best part is that you do not need to be a professional decorator to pull it off. You just need the right setup, realistic expectations, and enough confidence to believe your curtains deserve a second act. And honestly, they do.





