Table of Contents >> Show >> Hide
- Why broken mirror + old crockery makes mosaics look expensive
- Safety first (because mosaics should be cute, not medically memorable)
- Materials and tools checklist
- Step-by-step: how to create a pretty mosaic (broken mirror + old crockery)
- Step 1: Choose the “hero” project and decide where it will live
- Step 2: Prep the surface like you mean it
- Step 3: Break, sort, and “audition” your pieces
- Step 4: Plan your design (dry layout first)
- Step 5: Stick it down in sections
- Step 6: Let it cure (yes, you have to wait)
- Step 7: Grout for a “finished” look
- Step 8: Remove haze without ruining your shine
- Step 9: Seal it for durability (especially outdoors)
- Design choices that make your mosaic look “curated,” not “accidental”
- Common mistakes (and how to fix them)
- Project ideas that look amazing with mirror + crockery
- Budget and timing (so you can plan like a sane person)
- Real-world “experience” section: what DIYers learn while making mirror-and-crockery mosaics
- You will underestimate how many pieces you need
- The “perfect” design usually happens after the first one
- Grout color can surprise you (in a good way… or not)
- Spacing is everythingand it’s easier than it looks
- Your hands will get tiredplan for it
- Outdoor mosaics are a weather negotiation
- Cleanup is part of the craft, not a punishment
- Final thoughts
Somewhere in your house, a chipped plate is living its best life as a cabinet decoration… and a cracked mirror is pretending
it’s “vintage.” Good news: both are one craft session away from becoming a stunning mosaic that looks intentional, artsy,
and only slightly like you got mad at your dinnerware.
This guide walks you through making a pretty mosaic with broken mirror and old crockerystep-by-step, beginner-friendly,
and with enough real-world tips to keep your grout where it belongs (in the joints, not on your soul).
Why broken mirror + old crockery makes mosaics look expensive
Ceramic dishware gives you color, pattern, and that satisfying “found object” charm. Mirror adds sparkle, bounce, and
dimensionespecially outdoors where sunlight turns a simple design into a “wait… did you buy that?” moment.
- Crockery brings pattern and texture (florals, stripes, speckles, vintage motifs).
- Mirror brings light, contrast, and tiny highlights that make the whole piece feel “designed.”
- Together they look curatedeven if you started with “oops, dropped it.”
Safety first (because mosaics should be cute, not medically memorable)
Working with mirror and ceramics is totally doablejust treat it like you’re handling tiny, dramatic divas that love to
chip, fly, and sneak into your socks.
Must-do safety basics
- Wear eye protection (non-negotiable).
- Wear sturdy gloves when breaking and sorting pieces.
- Cover your work surface with cardboard + an old towel to catch shards.
- Use a dust mask when mixing dry thinset or grout (powders get airborne).
- Keep kids and pets away until all shards are cleaned up and the piece is cured.
How to break mirror and crockery with less chaos
-
Mirror: Tape the surface in a grid with painter’s tape before breaking. It helps keep fragments from
launching into low orbit and makes pieces easier to handle. -
Crockery: Put plates/cups in a heavy-duty bag (or wrap in a towel), then tap with a hammer. Open the
bag carefully and sort pieces into containers. -
Edge check: If an edge feels sharp, it is. Plan to dull it with a nipper, grinder stone, or
place it where grout will fully cushion it.
Materials and tools checklist
Pick your base (start simple)
- Outdoor-friendly: concrete stepping stone, paver, concrete planter, cement board
- Indoor-friendly: tray, tabletop (properly sealed), picture frame, mirror frame
- Avoid (unless you’re experienced): raw, unsealed wood outdoors (it moves with moisture and can crack grout)
Adhesive options
-
Thinset mortar (cement-based): Best for outdoor pieces and anything that might get wet. Strong, durable,
and fills small gaps under uneven ceramics. -
Mastic (premixed tile adhesive): Convenient for indoor projects, especially vertical ones. Not ideal for
outdoor or constant moisture. - Epoxy adhesive: Very strong and water-resistant, but fussier and pricier. Optional upgrade, not required.
Cutting and shaping tools
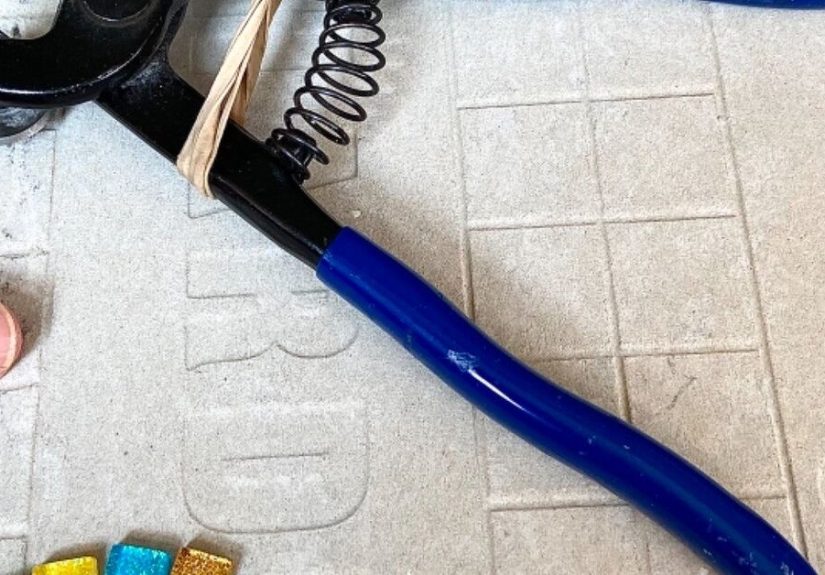
- Wheeled glass nippers for mirror and glassy bits
- Tile nippers for ceramic pieces
- Safety goggles (yes, listed twice on purpose)
- Small containers for sorting colors/patterns
Grout and finishing
- Grout: sanded for wider gaps; unsanded for tight joints and delicate surfaces
- Rubber grout float
- Grout sponge + microfiber cloth for haze cleanup
- Grout sealer (especially outdoors or on tabletops)
Step-by-step: how to create a pretty mosaic (broken mirror + old crockery)
Step 1: Choose the “hero” project and decide where it will live
Location determines materials. Outdoor mosaic? Think thinset + durable base + sealing. Indoor décor piece? You can use a
wider range of adhesives and finishes. Decide now so you don’t build a gorgeous garden stone using an adhesive that melts
emotionally the first time it rains.
Step 2: Prep the surface like you mean it
- Clean: Remove dust, oils, and anything flaky.
- Roughen: Lightly sand glossy surfaces so adhesive can grip.
- Seal wood (if used): Prime and seal all sides to reduce warping.
- Dry fit: Make sure your base is stable and won’t rock or flex.
Step 3: Break, sort, and “audition” your pieces
Sorting feels extra until it saves you 40 minutes of rummaging through a pile of sharp confetti. Create small bins:
whites/creams, blues/greens, florals, mirror, “interesting shards,” and “oops-too-sharp.”
For mirror, aim for a mix of small triangles and a few longer slivers. For crockery, keep some patterned pieces large
enough to read as “design,” not just “random.”
Step 4: Plan your design (dry layout first)
Dry layout is your free trial. Use it. A simple approach that always looks polished:
- Border: Outline the edge with consistent pieces (plain ceramic or small mirror bits).
- Focal point: One flower motif, a spiral, a starburst, or a cluster of patterned crockery.
- Background: Fill around it with calmer colors so the focal area pops.
Keep gaps consistentthink “even spacing” rather than “pieces touching like they’re scared of grout.”
Step 5: Stick it down in sections
Work in small areas so your adhesive doesn’t skin over before pieces are seated.
- Spread adhesive with a putty knife or craft stick.
- Press pieces in until they feel stable (but don’t bury them completely).
- Mind the height: Try to keep surfaces relatively level so grout doesn’t create hills and valleys.
- Mirror tip: Keep adhesive from squishing up onto mirror faces (it’s annoying to clean later).
Step 6: Let it cure (yes, you have to wait)
Most adhesives need time to set before grouting. If you grout too early, pieces can shift and you’ll invent new words.
Cover the project lightly to keep dust off and let it cure as directed.
Step 7: Grout for a “finished” look
Mix grout to a thick, spreadable consistency (think creamy peanut butter, not soup). Apply with a rubber float, pushing
grout into every joint. Work it from multiple angles so gaps fill fullyespecially around mirror pieces where tiny voids
love to hide.
After a short rest (per grout instructions), wipe with a damp grout sponge in gentle passes. Rinse the sponge often. The
goal is “clean tile faces, full joints.”
Step 8: Remove haze without ruining your shine
A light haze is normal. Buff with a dry microfiber cloth once the grout firms up. If haze persists, you can use a gentle
cleaner method appropriate for your materials. For many ceramic/porcelain surfaces, a diluted vinegar-and-water wipe can
helpbut don’t use acidic cleaners on natural stone or anything that doesn’t tolerate acid.
Step 9: Seal it for durability (especially outdoors)
Sealing helps protect grout from stains, moisture, and grime. Outdoor stepping stones, planters, and tabletops benefit
the most. Follow the sealer’s directions and allow full curing time before heavy use or weather exposure.
Design choices that make your mosaic look “curated,” not “accidental”
Choose a color strategy
- Classic: blues + whites + a few mirror highlights
- Garden bright: greens + yellows with mirror as “dew drops”
- Modern: black/white crockery + sharp geometric mirror pieces
Grout color is the mood lighting of mosaics
White grout feels fresh and vintage; gray grout feels modern; charcoal grout makes colors pop dramatically. If you’re
nervous, test grout on a small sample board with a few piecesbecause grout can look different when it dries.
Use mirror like jewelry, not wallpaper
Mirror is most effective when it accents: outlining a motif, sprinkling “sparkle points,” or creating a border. Too much
mirror can make the piece visually noisy (and you’ll be cleaning fingerprints forever).
Common mistakes (and how to fix them)
“My pieces are popping off”
- Cause: dusty base, wrong adhesive, or not enough cure time.
- Fix: scrape old adhesive, clean, reattach with appropriate adhesive, and let cure fully.
“My grout cracked”
- Cause: base flexing (often wood), joints too wide for the grout type, or curing too fast in heat.
- Fix: remove loose grout and re-grout; consider a sturdier base for future projects.
“The mirror edges look dark or weird”
- Cause: mirror backing showing through, adhesive visible, or moisture exposure over time.
- Fix: use an opaque adhesive behind mirror, keep mirror as accent, and seal properlyespecially outdoors.
“I can’t get the haze off”
- Fix: buff with dry cloth first; if needed, use a haze remover suited to your surface. Always spot-test.
Project ideas that look amazing with mirror + crockery
- Mosaic stepping stone: durable, giftable, and great for learning.
- Planter makeover: mirror pieces catch sunlight near greenery.
- Tabletop or tray insert: seal well and use coasters (yes, still).
- Frame a plain mirror: mirror-on-mirror is surprisingly elegant when controlled.
- Garden wall plaque: hang under a covered area for longer life.
Budget and timing (so you can plan like a sane person)
- Budget-friendly version: mostly reclaimed pieces + basic grout/adhesive (often under $30–$60).
- Tool upgrade version: adding nippers, float, better sealer (more upfront, reusable forever).
- Time: design + sticking (2–6 hours), cure time (overnight), grouting/cleanup (1–2 hours), sealing (quick, plus cure).
Real-world “experience” section: what DIYers learn while making mirror-and-crockery mosaics
Mosaic projects have a funny way of starting with confidence and ending with you whispering, “Who decided grout was a
personality?” If you’re new to broken mirror and old crockery mosaics, here are the most common real-life moments DIYers
run intoplus how to handle them without rage-quitting into a pile of ceramic confetti.
You will underestimate how many pieces you need
The first layout looks fantasticuntil you realize you’ve designed a masterpiece that requires approximately 900 tiny
triangles and you currently have… 37. The trick is to break more material than you think you’ll need, then sort it.
Having “filler” pieces (plain white ceramic, small mirror chips, solid-color plate fragments) saves your sanity when your
patterned crockery runs out halfway through the background.
The “perfect” design usually happens after the first one
Many makers find that the first layout is either too busy or too random. That’s normal. Dry layout is where you discover
what your materials want to do. A helpful strategy is to create a simple border firstinstant structure. Then build a
focal point. If things still look chaotic, reduce your palette: keep two main colors, one accent color, and mirror as a
highlight. Suddenly, the piece looks like you planned it for weeks instead of “five minutes after dinner.”
Grout color can surprise you (in a good way… or not)
Wet grout and dry grout can look like cousins, not twins. Light grout brightens and “vintage-ifies” broken china; dark
grout makes patterns pop and can hide tiny imperfections. DIYers often report wishing they’d tested grout on a small
sample firstjust a scrap board with a few pieces and a bit of grout. It’s a tiny step that prevents the classic moment
where you step back and say, “Why does my beach-themed stone look like it’s wearing eyeliner?”
Spacing is everythingand it’s easier than it looks
Beginners sometimes press pieces so close together that grout can’t settle in, which can lead to weak joints or messy
wipe-downs. A practical “experience-based” tip: aim for consistent gaps that are visibly there but not huge. If you can
see the spacing and your grout float can push grout into it, you’re good. When in doubt, leave slightly more spacegrout
is what makes a mosaic read as one finished surface instead of a pile of glued shards.
Your hands will get tiredplan for it
Nipping and placing tiny pieces is oddly intense for your hands and wrists. Many DIYers benefit from working in shorter
sessions: design and glue one day, grout the next. It also helps to sit comfortably, keep tools close, and use small
containers so you’re not constantly pinching through a sharp pile. The project is supposed to be fun, not a new sport
called “Competitive Finger Fatigue.”
Outdoor mosaics are a weather negotiation
Outdoor projects look incredible with mirror sparkle, but they demand patience. Adhesives and grout cure best under
reasonable temperatures and out of heavy rain. A common real-life lesson: don’t grout at dusk if dew is coming, and don’t
set an outdoor stepping stone in the garden before it’s fully cured and sealed. Give it time. Your future self (and your
grout lines) will thank you.
Cleanup is part of the craft, not a punishment
The best-looking mosaics usually come from people who clean as they go. Wipe adhesive smudges early. Keep a small trash
cup for tiny shards. Vacuum carefully after breaking materials. And when grouting, rinse your sponge often and buff haze
with a soft cloth once things firm up. That final buff is when many DIYers experience the “oh wow” momentmirror highlights
brighten, patterns reappear, and suddenly it looks like a boutique garden piece instead of a science experiment.
Final thoughts
A broken mirror and a stack of old crockery can become something genuinely beautifulsparkly, textured, and full of
character. Start with a small project, follow the cure times, keep your spacing consistent, and don’t be afraid of grout.
(Okay, be slightly afraid of grout. It keeps you humble.)