Table of Contents >> Show >> Hide
- Pick the Right Ribs (Because the Rack Matters)
- Prep Like a Pro (This Is Where “Delicious” Becomes “Wow”)
- The Three Best Ways to Cook Pork Ribs
- How to Tell When Ribs Are Done (Without Guessing or Panicking)
- Make Ribs Look Stunning: Color, Shine, and Clean Cuts
- Common Rib Mistakes (And How to Avoid Them)
- Serving Ideas That Make the Whole Plate Pop
- Conclusion
- Extra: of Real-Life Rib Wisdom (So You Can Skip the Pain)
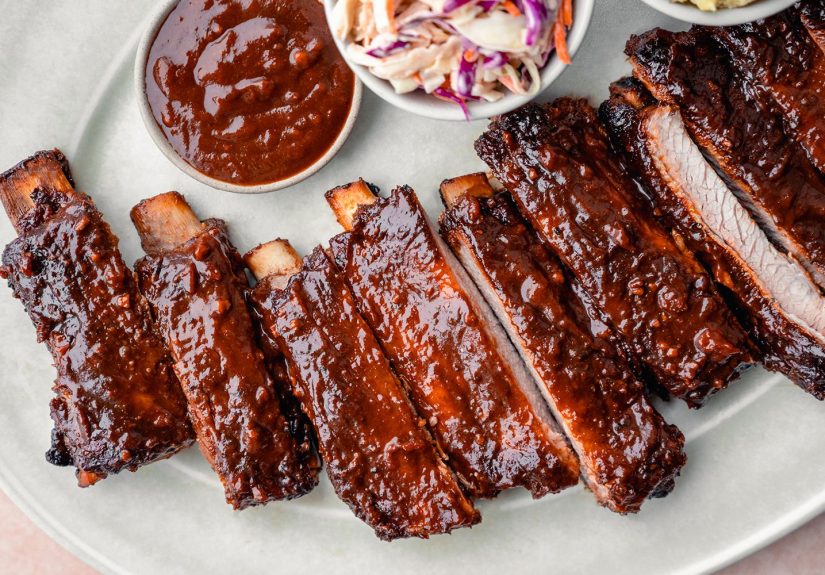
Pork ribs are one of life’s greatest food magic tricks: take a tough, bony slab of meat, apply patience (and maybe a little brown sugar), andboomsuddenly you’re the person everyone texts when they’re “just casually doing a cookout.” The goal isn’t only tender meat. It’s ribs that look like you know what you’re doing: glossy, bronzed, beautifully sliced, and begging for a stack of napkins.
This guide shows you how to cook pork ribs that look and taste delicious whether you’re using an oven, a grill, or a smoker. You’ll learn how to pick the right rack, prep it like a pro, build flavor without overcomplicating your life, and finish with that photogenic “BBQ lacquer” that makes people whisper, “Did you buy these?” (You didn’t. You’re a legend now.)
Pick the Right Ribs (Because the Rack Matters)
Baby Back vs. Spare vs. St. Louis-Style
Most rib drama starts at the store. Here’s the quick cheat sheet:
- Baby back ribs: Smaller, leaner, often more tender. Great for oven-baked ribs and weeknight-friendly cooks.
- Spare ribs: Bigger, meatier, fattier. More forgiving and often more flavorfulexcellent for low-and-slow smoking.
- St. Louis-style ribs: Spares trimmed into a neat rectangle. They cook evenly and look extra tidy on a platter (aka “party ribs”).
What to Look For at the Store
- Even thickness: Avoid racks that are thick on one end and paper-thin on the other unless you enjoy overcooked corners.
- Good meat coverage: You want meat on top of the bonesnot just a scenic view of skeleton.
- Fresh smell and color: Pinkish-red meat, white fat, no funky odor.
Prep Like a Pro (This Is Where “Delicious” Becomes “Wow”)
Step 1: Remove the Membrane (Your Teeth Will Thank You)
On the bone side of most racks is a thin, papery membrane (the silverskin). If you leave it on, seasoning won’t penetrate well and the ribs can turn chewy in a way that feels like you’re arguing with a rubber band.
- Slide a butter knife under the membrane near the middle bones.
- Lift to loosen a flap.
- Grab it with a paper towel (extra grip) and pull slowly. It should peel off in one satisfying sheet like removing a phone screen protectorexcept edible things are involved.
Step 2: Dry-Brine for Flavor and Better Bark
If you have time, salt the ribs lightly (or use a salt-forward rub) and rest them uncovered in the fridge for 4–24 hours. This seasons the meat more deeply and helps the surface dry slightly, which improves browning and “bark” (that savory crust people fight over).
Step 3: Build a Rub That Tastes Big (Not Just Loud)
A great dry rub balances sweet, savory, and gentle heat. A reliable mix includes:
- Brown sugar (for caramelization and color)
- Kosher salt
- Paprika (smoked paprika if you like)
- Black pepper
- Garlic powder and onion powder
- Optional: mustard powder, chili powder, cayenne (tiny pinch), or cumin
Pro-looking tip: For deeper color without burning, keep the sugar moderate if you’re cooking hotter than 275°F, and save the sweet shine for the glaze at the end.
The Three Best Ways to Cook Pork Ribs
There’s no single “best” methodjust the best method for your kitchen and patience level. Pick your lane:
Method 1: Oven-Baked Ribs (Foolproof, Tender, Restaurant-Level Finish)
If you want ribs that are reliably juicy and don’t require babysitting a fire, oven baked ribs are your best friend.
How to Do It
- Heat your oven to 275°F–300°F.
- Season the ribs generously with rub on both sides.
- Wrap tightly in heavy-duty foil (meat side down helps baste in its own juices).
- Bake until tender:
- Baby backs: ~2 to 2.5 hours
- Spare/St. Louis: ~2.5 to 3+ hours
- Unwrap carefully (hot steam is not a personality trait you want).
- Finish for looks: Brush with sauce and broil 2–6 minutes, watching closely, until glossy and caramelized.
Why it works: Foil traps moisture and heat, speeding up tenderness. The broiler (or a quick grill finish) brings the “BBQ shop” look: sticky glaze, darker edges, and a little char-kiss without turning your sauce into burnt candy.
Method 2: Grill Ribs (That Char, That Aroma, That Backyard Energy)
Grilling is perfect when you want smoke-adjacent flavor without a full smoker setup. The key is indirect heatribs hate direct flame like socks hate puddles.
How to Do It
- Set up two zones: hot side and cool side (coals on one half, burners off on one side).
- Cook low-ish and slow-ish: Keep the grill around 225°F–275°F if possible.
- Start unwrapped for 1.5–2.5 hours (build color and flavor).
- Optional wrap phase: Wrap in foil with a small splash of apple juice (or a little butter and a touch of brown sugar if you like sweeter ribs) for 30–90 minutes to push tenderness.
- Unwrap and glaze: Sauce in thin layers over indirect heat, then briefly move to direct heat for quick caramelization30 to 90 seconds per side. Do not walk away. Sauce burns faster than gossip spreads.
Make it look amazing: Use two thin coats of sauce instead of one thick one. Thick sauce slides off and looks messy; thin layers set into a glossy shell.
Method 3: Smoked Ribs (For When You Want People to Applaud)
If you have a smoker (or a pellet grill), you can get that deep barbecue flavor and gorgeous mahogany bark. Popular approaches include the 3-2-1 ribs method (especially for baby backs), or a simplified “smoke-then-wrap-then-glaze” routine.
A Flexible 3-2-1 Style Blueprint
- Smoke at ~225°F for about 3 hours (until the color is rich and the rub looks “set,” not wet).
- Wrap in foil for about 2 hours to tenderize (add a little liquid if you want extra moisture).
- Unwrap and finish about 30–60 minutes with sauce or a final dusting of rub, letting the surface dry slightly and the glaze set.
Hot-and-fast option: Many pitmasters cook ribs closer to 275°F for a shorter time to keep more bite and reduce the “steamed” texture that can happen if you wrap too long. The best schedule is the one that gets you tender ribs with a clean bitenot just a number on a clock.
How to Tell When Ribs Are Done (Without Guessing or Panicking)
Two truths can coexist:
- Pork is safe at 145°F for certain cuts with a short rest.
- Ribs are tender at higher temperatures because collagen needs time and heat to convert into gelatin.
The Best Doneness Checks
- Temperature as a guide: Many cooks like ribs in the ~180°F–205°F range depending on style and texture preference.
- Bend test: Pick up the rack with tongs from the middle. If it bends into a soft “U” and the surface cracks slightly, you’re close.
- Toothpick test: Slide a toothpick between bones. If it goes in with little resistance (like room-temp butter), you’re there.
- Bone peek: A bit of bone exposure at the ends often signals the meat has pulled back as it tenderized.
Texture target matters: “Fall-off-the-bone” is fun, but competition-style ribs usually have a gentle tugmeat bites cleanly without shredding the whole rack. Decide what you want, then cook to that feeling.
Make Ribs Look Stunning: Color, Shine, and Clean Cuts
How to Get That Glossy BBQ Finish
- Reduce your sauce (optional but powerful): Simmer 5–10 minutes to thicken. Thick sauce clings better and looks shinier.
- Brush thin layers during the last 10–20 minutes of cooking.
- Set the glaze with gentle heat (indirect grill, smoker, or broiler on watch mode).
- Final “beauty coat” right before serving: one light brush for shine.
Slice Like You’re on a Cooking Show
- Rest 10 minutes so juices settle.
- Flip bone-side up to see the bone lines clearly, then cut between bones.
- Use a sharp knife and wipe the blade occasionally for cleaner edges.
Common Rib Mistakes (And How to Avoid Them)
- Sauce too early: Sugar burns. Add sauce near the end.
- Too much direct heat: Ribs need indirect cooking for tenderness; direct flame is only for quick finishing.
- Under-seasoning: Ribs are thick; be generous with rub (especially on the meat side).
- Over-wrapping: Wrapping too long can turn ribs mushy and wash off bark. Wrap to tenderize, then unwrap to dry and set.
- No rest: Cutting immediately can leak juices and dull flavor. Give them a short break.
Serving Ideas That Make the Whole Plate Pop
Ribs love contrast. Pair them with something crunchy, tangy, or fresh:
- Vinegar-based coleslaw (cuts richness)
- Pickles and pickled onions (instant “BBQ tray” energy)
- Grilled corn, baked beans, or potato salad (classic comfort)
- Simple green salad with a sharp vinaigrette (your future self will thank you)
Conclusion
To cook pork ribs that look and taste delicious, focus on the fundamentals: choose a good rack, remove the membrane, season with intention, cook low and steady until tender, and finish with a glaze that sets into a glossy, caramelized coat. Whether you use the oven, grill, or smoker, the “wow” factor comes from smart timing at the endwhen color, sauce, and texture come together.
Extra: of Real-Life Rib Wisdom (So You Can Skip the Pain)
Let’s talk about the part no one posts: the rib moments that happen right before the photo. The “everything was perfect until…” moments. If you cook ribs often enough, you’ll collect these stories like souvenir magnetsexcept the magnets are edible and the souvenirs sometimes involve mild panic.
The Case of the Beautifully Burned Sauce: This is the classic. You sauce too early because you want that glossy look for the last hour. And for about seven minutes, you’re a genius. Then the sugar in the barbecue sauce starts to carbonize, and suddenly your ribs smell like a campfire had a breakup with a candy store. The fix is simple and feels almost unfair: cook the ribs until they’re tender first, then sauce late, in thin layers, and set it with gentle heat. If you need char, you do it fastseconds, not minutes. Your sauce should look like a glaze, not evidence from a crime scene.
The “Fall-Off-The-Bone” Trap: People say they want ribs that fall off the bone, but what they often mean is “tender and easy to eat.” If you cook them until they completely collapse, slicing becomes messy and serving turns into pulled pork with bones as garnish. If that’s your style, awesome. But if you want ribs that look clean and impressive, aim for tender with a slight tug. When you lift the rack, it should bend nicely and crack a little, not snap in half like a dramatic movie scene.
The Overnight Party Save: One of the most reliable hosting tricks is cooking ribs ahead. Bake or smoke them until nearly tender, cool them, and refrigerate. On party day, reheat gently (covered in foil), then finish on the grill or under the broiler with sauce to set that shiny coat. This approach makes you look calm and organizedwhich is wonderful, because you will secretly be thinking about whether you bought enough ice. The ribs will distract everyone from noticing you’re doing math in your head.
The “My Oven Runs Hot” Reality: Recipes give temperatures like they’re universal laws of physics. In real kitchens, ovens and grills have personalities. Some run hot, some have cold spots, and some are just… moody. Use time as a rough plan and tenderness as the truth. If your ribs look dark too early, lower the heat. If they’re pale and stubborn, give them more time. Ribs reward patience more than precision.
The Confidence Builder: The first time you nail ribs that are tender, glossy, and beautifully sliced, something changes. You stop seeing ribs as “a special-occasion gamble” and start seeing them as “a thing I can do.” That’s the real secret ingredient: repeatable technique. Once you own the prep, the low-and-slow cook, and the late glazing, you can swap rubs, sauces, woods, and side dishes forever. The ribs will still look and taste like you meant it.