
Table of Contents >> Show >> Hide
- Know Your Parts First (So You Don’t Clean the Wrong Thing the Wrong Way)
- Before You Start: The Two Rules That Save Slow Cookers
- Daily Cleaning (The 5-Minute Routine That Prevents Stains)
- How to Clean Stuck-On Food and Stains (Without Scratching the Insert)
- Method 1: The “Soak Smart” Approach (Low drama, high success)
- Method 2: The Steam-Assist Trick (Vinegar + Heat = less scrubbing)
- Method 3: Baking Soda Power (For stubborn stains and the “ring of doom”)
- Method 4: Mineral deposits and cloudy film (When your crock looks “chalky”)
- Method 5: Burnt sugar, sticky barbecue sauce, and “I made caramelized everything”
- How to Clean the Lid (And Get Rid of Greasy Film and Odors)
- How to Clean the Base (Without Damaging the Controls)
- Deep Clean Schedule (Because “Sometimes” Is a Schedule)
- Food Safety Habits That Pair With Cleaning (So You Don’t Cook Germs Along With Dinner)
- Prevention Hacks: How to Make Future Cleanup Ridiculously Easy
- Common Cleaning Mistakes That Can Ruin Your Slow Cooker
- When Stains Won’t Budge (And What “Normal Wear” Actually Looks Like)
- of Real-World Cleaning Experiences (So You Feel Less Alone)
- Conclusion
A slow cooker is basically the kitchen’s “set it and forget it” herountil you remember it… with a crusty ring
around the crock that looks like it survived a stew apocalypse. The good news: cleaning a slow cooker doesn’t
require elbow grease, a chisel, or bargaining with the universe. With the right order of operations (and a couple
of pantry staples), you can get rid of stuck-on stains, cloudy rings, grease film, and lingering odorswithout
damaging the insert or accidentally giving the base a bath (spoiler: the base hates baths).
Know Your Parts First (So You Don’t Clean the Wrong Thing the Wrong Way)
Most slow cookers have three main pieces:
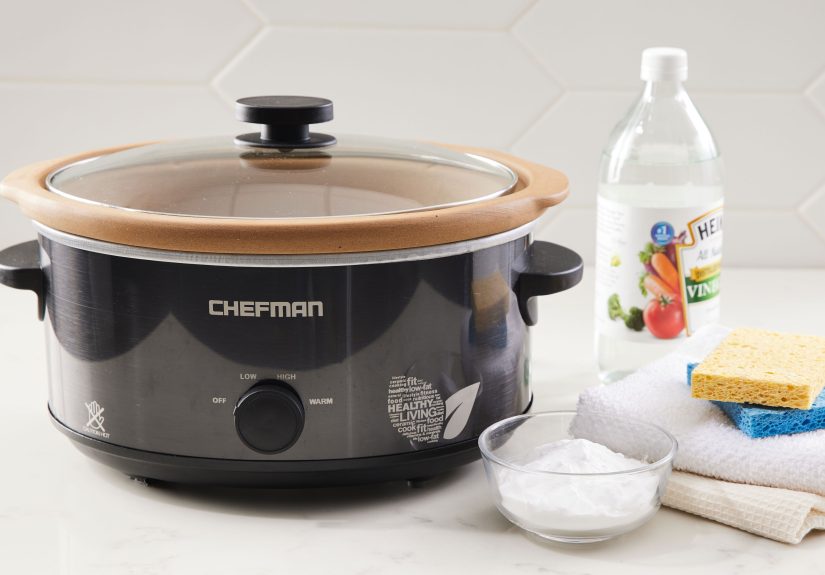
- The insert (crock/inner pot): Often ceramic stoneware, sometimes metal (and occasionally nonstick-coated).
- The lid: Usually tempered glass with a rim and a handle/knob.
- The heating base: The electrical part with the heating element and controls (aka: absolutely not dishwasher-friendly).
Cleaning goes smoothly when you treat each piece according to what it’s made of. Stoneware hates sudden
temperature changes. Nonstick coatings hate abrasives. And the heating base hates moisturelike a cat hates
unexpected jazz.
Before You Start: The Two Rules That Save Slow Cookers
- Unplug and cool completely. Cleaning a hot crock can lead to thermal shock (cracks) and burned fingers.
- Never submerge the base. Wipe itdon’t soak it. Water and electrical components are not a “cute couple.”
Daily Cleaning (The 5-Minute Routine That Prevents Stains)
If you clean your slow cooker soon after servingwhile residue is still softyou’ll prevent most stuck-on
stains from forming in the first place.
Step-by-step: standard cleanup
- Let it cool, then remove the insert and lid.
- Rinse the insert with warm water to loosen sauce and grease.
- Wash with dish soap and a soft sponge. Skip steel wool and gritty cleaners.
- Wash the lid with hot, soapy water (or the dishwasher if your manual allows it).
- Dry everything thoroughly. Air-dry is fine, but towel-drying helps prevent water spots and musty smells.
Dishwasher note: Many inserts and lids are dishwasher-safe, but not all. If you’re not sure, check the manual
(especially for older or non-removable models). When in doubt, hand-wash gently.
How to Clean Stuck-On Food and Stains (Without Scratching the Insert)
Stuck-on stains happen when sauces reduce at the edges, sugar caramelizes, or you simply left the leftovers
“for later” and later became tomorrow. Here are the most effective methods, starting with the gentlest.
Method 1: The “Soak Smart” Approach (Low drama, high success)
- Fill the insert with hot water (not boiling) and a squirt of dish soap.
- Let it soak for 20–60 minutes.
- Use a soft sponge or a rubber/silicone spatula to lift residue.
If food is still clinging like it pays rent, move to Method 2 or 3. The goal is to soften first, scrub second.
Method 2: The Steam-Assist Trick (Vinegar + Heat = less scrubbing)
This is the fan-favorite approach for the infamous “ring” and baked-on edges because it uses warm steam to do
the heavy lifting.
- Place the insert back in the base (only for this heating step).
- Add water until it sits just above the stuck-on line.
- Add distilled white vinegar (a splash up to about 1/2 cup; more for very large crocks).
- Cover with the lid and run on LOW for 30–60 minutes (enough to warm and steam, not violently boil).
- Unplug, carefully remove the lid (open it away from your face), and let it cool a bit.
- Pour out the liquid, then wash as usual with dish soap and a soft sponge.
Why it works: warm acidic steam helps loosen dried-on residue and mineral film. It’s basically a spa day for your crockminus the cucumber water.
Method 3: Baking Soda Power (For stubborn stains and the “ring of doom”)
Baking soda is a gentle abrasive and deodorizer. Used correctly, it removes stains without scratching most inserts.
Option A: Baking soda paste (targeted stain removal)
- Make a paste: 2–3 tablespoons baking soda + a little water.
- Spread it over stained or crusty areas.
- Let it sit for 15–30 minutes.
- Scrub gently with a soft sponge, then rinse and wash with dish soap.
Option B: The fizz method (baking soda + vinegar combo)
- Wet the stained area with vinegar (spray bottle works nicely).
- Sprinkle baking soda over the vinegar and let it fizz.
- After 5–10 minutes, wipe and scrub gently.
Safety tip: If you use the vinegar + baking soda combo inside the insert, add baking soda slowly. It foams, and nobody wants a “science fair volcano” on the countertop.
Method 4: Mineral deposits and cloudy film (When your crock looks “chalky”)
If you see a white, cloudy ring that doesn’t feel like food residue, it may be mineral buildup from hard water.
A simple vinegar rinse often helps:
- Add a vinegar + water mixture (about equal parts).
- Let it sit 5–15 minutes.
- Rinse thoroughly and wash with dish soap.
Method 5: Burnt sugar, sticky barbecue sauce, and “I made caramelized everything”
Sugary sauces can bake on like glue. Don’t attack them with metal tools. Instead:
- Soak with hot soapy water longer (up to 1–2 hours).
- Use a plastic pan scraper or silicone spatula to lift softened residue.
- Follow with a baking soda paste if discoloration remains.
How to Clean the Lid (And Get Rid of Greasy Film and Odors)
Lids collect grease vapor, spice aromas, and that weird “slow cooker smell” that lingers even after the insert is spotless.
Glass lid cleaning steps
- Wash with hot, soapy water and a non-scratch sponge.
- Pay attention to the rim and under the handle where grease hides.
- If the lid smells, wipe it with vinegar or soak briefly in warm water with a little vinegar, then rinse well.
- Dry completely before storing (trapped moisture = musty vibes).
If your lid has a gasket: Some models have a removable silicone gasket. If yours does, remove it and wash it separately,
then dry fully before reattaching. (Not all slow cookers have thischeck your manual.)
How to Clean the Base (Without Damaging the Controls)
The base is where spills go to become permanent… unless you wipe them early.
Base cleaning steps
- Unplug and let it cool.
- Wipe the exterior with a damp microfiber cloth. Add a tiny drop of dish soap if it’s greasy.
- Use a soft toothbrush or cotton swab around seams, handles, and edges.
- Wipe again with a clean damp cloth to remove soap residue.
- Dry with a towel.
Important: Don’t spray cleaner directly onto the base. Spray onto your cloth instead to keep liquid out of the controls.
Deep Clean Schedule (Because “Sometimes” Is a Schedule)
Clean the insert and lid after every use. For a deeper clean:
- Weekly (if you use it often): Do a baking soda paste on the interior walls and rim to prevent buildup.
- Monthly: Steam-assist (vinegar + warm) to remove film and odors.
- As needed: Mineral deposit treatment if you notice cloudy rings.
Food Safety Habits That Pair With Cleaning (So You Don’t Cook Germs Along With Dinner)
Cleaning is part of food safety, especially if you cook meat-heavy dishes. Start cooking with a clean slow cooker,
clean utensils, and a clean prep area. Keep perishables refrigerated until it’s time to add them. And wash hands
during prepespecially after handling raw meat.
Prevention Hacks: How to Make Future Cleanup Ridiculously Easy
1) Use linerssmartly
Slow cooker liners can dramatically reduce stuck-on stains. If you use them, choose the right size, keep the liner
fully inside the insert (no hanging over edges), and avoid using them in other appliances (no stovetop, no oven).
Many liners are designed for temperatures well above typical slow cooker heat, but they’re not meant for direct flame or dry heat.
2) Don’t overfill
Overfilling increases boil-over risk, which creates baked-on residue on the rim andworst casespills into the base.
Keep food below the top edge, and follow your recipe’s fill guidance.
3) Grease control: quick wipe after serving
Right after serving (once it’s safe), wipe the rim area where grease splatters cling. That one-minute wipe prevents the “ring”
that later requires a whole vinegar opera.
4) Avoid the “locked-lid while cooking” mistake
Some slow cookers have lid clamps designed for transport. Don’t clamp the lid during cooking unless your manufacturer specifically says it’s safe.
A slow cooker isn’t a pressure cooker; it needs normal venting.
Common Cleaning Mistakes That Can Ruin Your Slow Cooker
- Scrubbing with abrasives: Scouring pads can scratch stoneware and damage coatings.
- Thermal shock: Rinsing a hot crock with cold water can crack it.
- Soaking the base: Even “just for a second” can let water into places it shouldn’t go.
- Harsh chemicals: Strong cleaners can leave residues or dull surfacesstick with dish soap, baking soda, and vinegar.
- Storing it wet: Moisture trapped under the lid can cause odors and mildew.
When Stains Won’t Budge (And What “Normal Wear” Actually Looks Like)
Some discoloration is purely cosmeticespecially with tomato sauces, spices, or long-cooked foods. If your crock is clean
(no residue, no odor, no greasy film) but still slightly stained, you’re not failing at cleaning. You’re just living life with paprika.
That said, consider replacement if you notice:
- Cracks in the insert or lid
- Chipped surfaces that could worsen over time
- Persistent odors that remain after vinegar + baking soda cleaning and full drying
of Real-World Cleaning Experiences (So You Feel Less Alone)
Let’s talk about the slow cooker messes nobody posts onlinebecause they’re busy pretending their crock “just needs a quick rinse.”
Here are common real-life scenarios (and what actually works), so you can recognize your situation and skip straight to the fix.
The Chili Ring That Laughs at Sponges
You made chili. It was glorious. You came back later and found a dark, crusty “tide line” where the sauce reduced on the sides.
The mistake most people make here is going straight to scrubbing. That ring is basically dehydrated tomato + spice + grease.
The win is to rehydrate first: warm water above the ring, a splash of vinegar, LOW heat for 30–60 minutes, then a baking soda paste
on whatever remains. When you scrub after steam-softening, the ring lifts in sheets instead of crumbs. It’s oddly satisfyinglike peeling
plastic off a new appliance, but edible-adjacent.
The Pulled Pork “Glue Layer”
Pulled pork leaves behind sticky sugars from sauce and rendered fat that cools into a stubborn film. If you try cold water first, the fat
just smears like lip balm on a windshield. The better experience: rinse with warm water, do a hot soapy soak, then wipe with a soft sponge.
If the sauce baked on, use a silicone spatula or plastic scrapergentlyso you’re lifting softened residue, not sanding your crock.
Finish with dish soap to remove any remaining grease. The lesson: temperature matters, and warm water is your friend.
The Oatmeal Overflow (A Breakfast Crime Scene)
Overnight oatmeal can expand, creep up the sides, and dry into a starchy crust by morning. Starch is sneaky: it can look like it’s gone,
then feel rough when dry. In this case, baking soda paste is less important than timegive it a longer soak with hot soapy water, then rinse,
then run your fingers along the inside to check for rough patches. If it feels squeaky-clean but still looks cloudy, a quick vinegar wipe helps
with film. The lesson: don’t trust your eyes alone. Your fingertips are the quality control department.
The Queso Situation (Grease Film + Mystery Smell)
Cheese dips create two problems: a stubborn fatty film and a lingering aroma that can haunt your next batch of applesauce (ask anyone who’s lived
through “cheddar-cinnamon” by accident). The most effective experience is a two-step clean: dish soap and warm water first (to break down fat),
then vinegar as a finishing wipe on both the insert and lid to cut odor. Dry everything completely before storingodors love trapped moisture.
The lesson: deodorizing works best after degreasing, not before.
The Potluck Commute (Because Somebody Always Hits a Speed Bump)
Transporting a full slow cooker can leave sauce splatters on the outer rim and sometimes down the base. The insert might be cleanable,
but the base needs careful wiping: damp cloth, a tiny drop of dish soap, and a toothbrush for seams. No soaking. No “I’ll just rinse it under the faucet.”
The lesson: treat the base like a laptopwipe, don’t wash.
If there’s one universal takeaway from all these scenarios, it’s this: stuck-on stains usually surrender to a combination of heat (or soak time)
and gentle cleaners. Your slow cooker shouldn’t require a wrestling match. It should require a plan.
Conclusion
Cleaning a slow cooker is less about scrubbing harder and more about working smarter: soften residue first, use gentle abrasives like baking soda
for stains, reach for vinegar to tackle film and odors, and keep the base dry with wipe-only cleaning. Do that, and your slow cooker stays ready for
the next batch of soup, chili, or “I forgot to meal prep” hero dinnerwithout carrying last week’s casserole into your next recipe like an uninvited guest.





