Table of Contents >> Show >> Hide
- What Is a Symbol in Illustrator?
- Why Symbols Matter for Faster Design
- How to Add a Symbol in Illustrator: 10 Steps
- Step 1: Open Your Illustrator File and Prepare the Artwork
- Step 2: Open the Symbols Panel
- Step 3: Select the Object You Want to Turn into a Symbol
- Step 4: Add the Artwork to the Symbols Panel
- Step 5: Name the Symbol and Choose the Right Options
- Step 6: Place the Symbol on the Artboard
- Step 7: Resize, Rotate, and Position the Symbol Instance
- Step 8: Edit or Redefine the Symbol When Needed
- Step 9: Use Symbol Libraries for Better Organization
- Step 10: Use the Symbol Sprayer for Repeating Artwork
- Common Mistakes to Avoid
- Best Use Cases for Symbols in Illustrator
- Final Thoughts
- Experience: What It Feels Like to Actually Use Symbols in Illustrator
- SEO Tags
Adobe Illustrator is full of tools that make you feel like a design wizard, but symbols are one of the few that actually deserve the dramatic soundtrack. If you use the same icon, badge, leaf, star, logo, or little decorative doodad more than once, symbols can save you time, reduce repetitive work, and keep your artwork more organized. In plain English: instead of copying and pasting the same object over and over like it is still 2009, you turn it into a reusable asset and let Illustrator do the heavy lifting.
This guide walks through exactly how to add a symbol in Illustrator in 10 simple steps. You will learn how to create a symbol from artwork, place it on the artboard, manage symbol options, and use it more efficiently in real projects. Whether you are designing icons, branding assets, packaging details, UI elements, or decorative illustrations, this workflow is one of those small Illustrator skills that quietly makes everything easier.
What Is a Symbol in Illustrator?
A symbol in Illustrator is reusable vector artwork stored in the Symbols panel. Once you turn an object into a symbol, you can place multiple instances of it throughout your document. That means you do not need to rebuild the same shape every time, and you can keep repeated visual elements consistent.
Think of a symbol like a cookie cutter for design. You make the shape once, save it, and then stamp out as many copies as you need. The beauty is that Illustrator treats those copies as connected instances, which is incredibly helpful when building repeating graphics, icon systems, product mockups, or decorative scenes filled with similar elements.
Why Symbols Matter for Faster Design
If you have ever duplicated an object 47 times and then realized the original needed fixing, you already understand why symbols matter. Symbols are useful because they help streamline repetitive work, keep artwork consistent, and make larger Illustrator documents easier to manage. They are especially handy when you are building patterns, creating icon sets, designing maps, or adding repeated decorative elements like leaves, stars, packaging marks, and interface graphics.
They also fit naturally into a smarter vector workflow. Instead of cluttering your file with random copies, you create one clean master element and reuse it with purpose. Your future self will be grateful, and your file will look less like a design junk drawer.
How to Add a Symbol in Illustrator: 10 Steps
Step 1: Open Your Illustrator File and Prepare the Artwork
Start by opening Adobe Illustrator and either create a new document or open an existing project. Before you add a symbol, make sure the object you want to save is ready. This can be a logo mark, icon, vector illustration, badge, or any other artwork you expect to reuse.
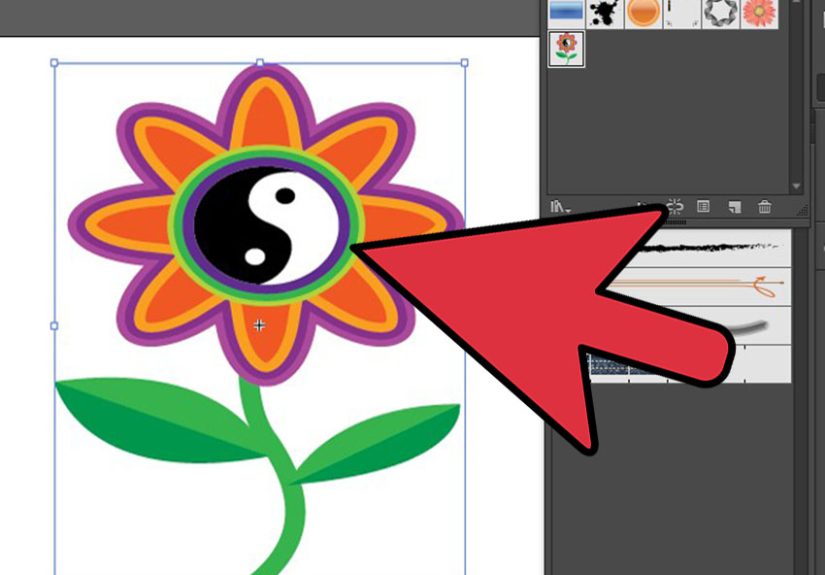
The cleaner your object is before becoming a symbol, the better. Group related pieces together if your design has multiple parts. For example, if you created a small flower made from several petals and a center circle, group the artwork first so Illustrator treats it like one design unit. Symbols work best when the object is already organized.
Step 2: Open the Symbols Panel
Go to Window > Symbols. This opens the Symbols panel, which is the home base for creating, storing, editing, and reusing symbols in Illustrator. If you have never paid attention to this panel before, do not worry. It has been sitting there patiently, waiting for its moment.
You may notice a few default symbols already inside the panel. These are preset items, and you can use them if they fit your project. But in most design workflows, you will create your own custom symbol from original artwork.
Step 3: Select the Object You Want to Turn into a Symbol
Use the Selection Tool and click the artwork you want to convert. This is the key step where Illustrator needs to know exactly what should become the reusable asset. If your artwork has several components, confirm that everything is selected.
Good examples of artwork to convert into symbols include logos, arrows, map markers, stars, decorative plants, app icons, interface buttons, and product labels. Bad examples include random unfinished doodles you are not emotionally ready to commit to. Save yourself the cleanup later.
Step 4: Add the Artwork to the Symbols Panel
Now drag the selected artwork directly into the Symbols panel. You can also click the New Symbol button at the bottom of the panel. Either method adds the selected object as a symbol.
This is the moment the artwork goes from “just another object” to “official reusable design asset.” Illustrator will usually replace the selected object with a symbol instance once it is created, which is normal. Do not panic. Nothing is broken. You simply leveled up the object.
Step 5: Name the Symbol and Choose the Right Options
After adding the artwork, Illustrator opens the Symbol Options dialog box. Give your symbol a clear, practical name. “Leaf_Final_Actual_Real_v2” is technically a name, but it is not helping anyone. Choose something simple like Map Pin, Gold Star, Logo Badge, or Flower Icon.
You may also see options such as Dynamic Symbol or Static Symbol, along with a registration point. If you want more flexibility when editing individual instances, dynamic symbols are often the better choice. The registration point helps define how the symbol aligns when placed. Once you are done, click OK.
Step 6: Place the Symbol on the Artboard
To use the symbol, click it in the Symbols panel and drag it onto your artboard. That placed object is called an instance. You can drag out one instance or many, depending on what your design needs.
This is where symbols start becoming useful in the real world. Need five stars on a label? Drag five instances. Need a repeated icon for a user interface mockup? Same move. Need a whole field of tiny flowers because your client said the illustration needs to feel “more alive”? Symbols are about to become your best friend.
Step 7: Resize, Rotate, and Position the Symbol Instance
Once the symbol is on the artboard, you can move, scale, and rotate the instance just like other Illustrator objects. Use the bounding box handles or the Transform panel to position it precisely. This makes symbols ideal for layouts that repeat the same element at different sizes or angles.
For example, a single bird icon can appear large in one corner and small in another. A decorative snowflake symbol can be rotated in multiple directions to avoid that awkward copy-paste look. The symbol remains reusable, but your design still feels varied and natural.
Step 8: Edit or Redefine the Symbol When Needed
If you need to change the original symbol, you can edit or redefine it. This is one of the biggest advantages of working with symbols instead of loose copies. When the master changes, your symbol workflow becomes more controlled and efficient.
Say you created a custom logo symbol and later decide the stroke is too thick. Instead of fixing every copy by hand, you update the symbol and keep the system cleaner. If you want a placed instance to become a normal object again, you can break the link to the symbol and edit it independently.
Step 9: Use Symbol Libraries for Better Organization
Illustrator lets you open preset symbol libraries and even save your own custom symbol libraries. This is incredibly useful when you work on recurring projects or maintain brand assets across multiple files. You can open a library, browse ready-made options, and drag symbols into your current document.
Let us say you design event graphics every month. You could build a custom symbol library with stars, ribbons, badges, arrows, and branded accents. Next month, instead of hunting through old files like an exhausted digital archaeologist, you simply load the library and get to work.
Step 10: Use the Symbol Sprayer for Repeating Artwork
If you need a lot of the same symbol, the Symbol Sprayer tool is where Illustrator gets a little flashy. Instead of manually placing instance after instance, you can spray a group of them onto the artboard. This is perfect for grass, confetti, stars, leaves, snowflakes, or any repeated decorative object.
After spraying, you can use related symbol tools to resize, rotate, scatter, tint, or style the instances. It is a smart way to create natural-looking repetition without losing your mind to endless dragging. Basically, it is copy-paste with a gym membership and a caffeine habit.
Common Mistakes to Avoid
The first mistake is turning messy artwork into a symbol too early. Clean up your shapes first. The second is naming symbols badly, which feels harmless until you open a file full of vague labels and regret your life choices. The third is forgetting that symbol instances are part of a reusable system, not just random decorations.
Another common problem is overusing symbols without organizing them into libraries or logical naming groups. If you plan to reuse a symbol in future projects, treat it like an asset, not an afterthought. A little structure now saves a lot of confusion later.
Best Use Cases for Symbols in Illustrator
Symbols are especially useful for branding systems, icon sets, packaging graphics, environmental illustrations, UI mockups, map markers, repeating patterns, and product labels. If an object appears more than once, symbols deserve consideration.
They are also useful when building mockups for 3D objects, because reusable graphic elements can be easier to manage when applied repeatedly. In short, symbols are not just a beginner trick. They are part of a more efficient Illustrator workflow for both simple and advanced design work.
Final Thoughts
Learning how to add a symbol in Illustrator is one of those skills that feels small at first and then becomes weirdly essential. Once you understand how to create a symbol, place instances, edit the original, and organize your libraries, Illustrator starts feeling faster and more intentional. You stop rebuilding the same object over and over and start designing with a system.
So yes, adding a symbol in Illustrator is only a few clicks. But those clicks can save real time, reduce repetitive work, and make your files easier to manage. That is a pretty nice return for something hiding quietly in the Window menu.
Experience: What It Feels Like to Actually Use Symbols in Illustrator
The first time most people use symbols in Illustrator, they expect fireworks. What they usually get instead is a quiet little realization that says, “Wait… I could have been doing this the whole time?” That is the real experience. Symbols do not look flashy at first. They feel almost too simple. You select artwork, add it to a panel, drag out a few instances, and move on. But after a few real projects, the value becomes impossible to ignore.
One of the most common experiences is discovering symbols right after wasting an embarrassing amount of time duplicating and editing the same object manually. Maybe it is a row of stars on packaging, a dozen icons in a web mockup, or repeated leaves in a decorative illustration. At first, copy and paste seems harmless. Then you decide the shape should be slightly rounder, the stroke should be thinner, or the color should be warmer. Suddenly every duplicate becomes a tiny problem with your name on it. That is the moment symbols stop being “nice to know” and start becoming “where have you been all my life?”
Another real-world experience is how much calmer complex files feel when symbols are part of the workflow. Instead of treating each repeated object like a separate design emergency, you start thinking in systems. One master star. One master logo. One master leaf. Then you place instances wherever needed. The artboard feels cleaner, the design feels more consistent, and revisions become less dramatic. Clients still send revision notes at 4:57 p.m., of course, but at least Illustrator is no longer fighting you.
There is also a confidence boost that comes with using symbols well. Beginners often feel like Illustrator experts must know secret shortcuts hidden behind velvet curtains. In reality, many professional workflows are built on simple features used thoughtfully. Symbols are a perfect example. They are not glamorous, but they make you work smarter. When you build a custom library for a brand or save reusable design elements for future jobs, you stop treating every new project like it begins from absolute zero.
And then there is the fun part: experimentation. Once you start using the Symbol Sprayer and related tools, symbols become less like storage and more like creative control. You can scatter repeated objects, vary their size, shift their position, and create more natural scenes without manually touching every element. That opens up a more playful side of Illustrator. You are not just saving time anymore. You are creating faster, adjusting with less friction, and giving yourself more room to try ideas.
So the honest experience of learning how to add a symbol in Illustrator is this: it starts small, feels practical, and ends up changing how you build artwork. Not in a dramatic movie-trailer way. More in a “my workflow is suddenly less annoying and far more efficient” way. Which, in design life, is honestly even better.