Table of Contents >> Show >> Hide
- Why Roller Coasters Are Basically Made for Drawing
- A Tiny History Lesson (So Your Coaster Has Lore)
- The Physics That Makes a Roller Coaster Work (Without Magic)
- Safety and Real-World Design: Why Coasters Aren’t Just “Whee!”
- Okay Pandas: How to Draw a Roller Coaster That Looks Real
- Step 1: Pick Your View (Side View vs. Perspective)
- Step 2: Draw the Track Path (One Confident Line First)
- Step 3: Add Supports That Actually Support Something
- Step 4: Make Your Loop Look Like a Real Loop
- Step 5: Add a Train (Tiny Cars, Big Personality)
- Step 6: Sell the Scene (Scale Cues = Instant Depth)
- Make It Fun: Mini-Prompts for a “Hey Pandas” Roller Coaster Thread
- Common Roller Coaster Drawing Mistakes (And Quick Fixes)
- Conclusion: Your Roller Coaster, Your Rules (Mostly Gravity’s Rules)
- of Roller Coaster Drawing “Experience” (The Part That Makes You Want to Grab a Pencil)
Somewhere on the internet, a simple prompt can cause a beautiful chain reaction: people who “can’t draw” suddenly draw. People who do draw suddenly overachieve. And everyone else becomes a judge on a very specific talent show: Can you sketch a roller coaster that looks thrilling, believable, and only mildly illegal?
“Hey Pandas, Draw A Rollercoaster” is that kind of prompt. It’s playful. It’s low-stakes. It’s the perfect mix of engineering and doodlinglike math class, but with more screaming (the fun kind). In this guide, we’ll turn the challenge into an easy, satisfying project: you’ll learn the basic parts of a roller coaster, the physics that makes it work, and the art tricks that make it look realwithout needing a degree or a drafting table.
Why Roller Coasters Are Basically Made for Drawing
Roller coasters are a cheat code for creativity because they come with built-in drama: a climb, a drop, twists, loops, near-misses, and that moment where your stomach temporarily files a complaint with management. Visually, coasters are all rhythmbig curves, repeating supports, and tracks that guide the viewer’s eye like a comic strip.
Even better: a roller coaster drawing can be as simple as two lines and a loop… or as detailed as a full theme park scene with cotton-candy clouds, tiny riders, and a suspicious number of snack stands. Either way, it’s instantly recognizable. That’s why “roller coaster drawing” is a great art challenge: beginners get a win, and experienced artists get a playground.
A Tiny History Lesson (So Your Coaster Has Lore)
From Coney Island to Modern Giants
The American roller coaster story is often traced to Coney Island in the 1880s, when early “switchback” style rides helped turn amusement parks into a must-visit experience. Early coasters were slower and simplermore “pleasant scenic ride” than “scream therapy.” Today, coaster design has evolved into a mix of architecture, mechanics, and psychology: speed, height, launches, inversions, airtime, and themed storytelling.
What “Counts” as a Roller Coaster Element?
If you want your drawing to feel authentic, it helps to know the common building blocks:
- Lift hill: the classic chain-lift climb that sets up the first big drop.
- First drop: the dramatic plunge where the speed is “born.”
- Airtime hills: smaller crests that create a floaty, weightless feeling.
- Banked turns: turns that tilt, so riders feel pressed into their seats instead of shoved sideways.
- Inversions: loops, corkscrews, rollsanything that flips riders upside down.
- Launch: a rapid acceleration section (instead of a lift hill) that feels like a surprise sprint.
- Brakes: sections that slow the train at the end or between “acts” of the ride.
The best part? You don’t need to draw every single detail. You just need enough recognizable structure that the viewer’s brain goes: “Yep. That’s a coaster. I can already hear the click-click-click.”
The Physics That Makes a Roller Coaster Work (Without Magic)
Here’s the secret: most roller coasters are energy storytelling. They start by saving energy, then spend it like a kid with arcade tokens and no plan.
Potential Energy → Kinetic Energy (The Big Trade)
When a train climbs a lift hill, it gains heightstored energy. When it drops, that stored energy converts into speed. This is why the first major drop often sets the tone: it “funds” the rest of the ride. In drawing terms, this means a coaster usually has its largest hill early, and smaller hills later (unless there’s another lift or a launch to add energy back in).
Drawing tip: If your coaster has a giant loop at the end, it probably needs a big hill or launch close enough to supply the speed for it. Otherwise your train would crawl into the loop like it’s late for a meeting.
G-Forces: The Thrill Has a Budget
Riders feel forces when the train changes direction quicklyespecially in dips, turns, and loops. That’s why modern loop shapes aren’t perfect circles. A circular loop can create uncomfortable forces at the bottom where speed is highest. Many real coasters use a clothoid (teardrop-like) loop: larger radius at the bottom, tighter at the top, helping manage forces smoothly.
Drawing tip: If you draw a loop, give it a teardrop silhouette: wider at the bottom, narrower at the top. Your art will look more “engineered” instantlyand you’ll look like you secretly own a hard hat.
Friction Is the Uninvited Guest
Air resistance and wheel friction quietly steal energy the whole time. That’s one reason coasters can’t just keep going forever on one lift hill. Designers plan for this with a strong initial energy boost, efficient track profiling, and sometimes mid-course launches or additional lifts.
Drawing tip: Adding a brake run (a straight section with fins or blocks) makes your coaster look realistic and also communicates pacinglike chapters in a book, but with more yelling.
Safety and Real-World Design: Why Coasters Aren’t Just “Whee!”
A coaster is a controlled experience. It’s supposed to feel wild while being carefully engineered. That balance shows up in everything from track geometry to ride checks to safety standards.
Standards and Oversight (Yes, There’s Paperwork)
In the U.S., amusement ride safety is supported by widely used standards developed through ASTM’s amusement ride committee work, and industry groups like IAAPA publish safety reporting and guidance. The unglamorous truth is that the thrill is built on checklists, inspections, and engineering marginsaka “the adult stuff that keeps the fun fun.”
Restraints, Sensors, and the “Nope, Not Today” Systems
Modern rides rely on multiple layers of safety: restraint designs, verification systems, and operational procedures that prevent dispatch if something isn’t right. It’s why the ride operator may seem calm while you’re emotionally rehearsing your will. They’re surrounded by systems designed to say “no” before danger becomes “maybe.”
Okay Pandas: How to Draw a Roller Coaster That Looks Real
Let’s turn the prompt into a simple process. You don’t need fancy tools. A pencil (or tablet) and a willingness to draw a few confident curves will do.
Step 1: Pick Your View (Side View vs. Perspective)
Side view is easiest: the track is mostly a clean silhouette. Great for beginners. One-point perspective looks dramatic: the track runs toward a vanishing point, and supports shrink with distance. Great if you want your drawing to scream “theme park poster.”
If you’re unsure, choose side view first. You can always add perspective laterlike a sequel, but with better supports.
Step 2: Draw the Track Path (One Confident Line First)
Start with a single “spine” line showing the coaster’s path: lift hill, first drop, a few hills, a big turn, maybe a loop. Keep it readable. You’re choreographing the ride, not drawing a bowl of spaghetti in a wind tunnel.
Then turn that spine into two rails by drawing a parallel line. Add short cross-ties to suggest structure. Congratulations: it’s already obviously a roller coaster.
Step 3: Add Supports That Actually Support Something
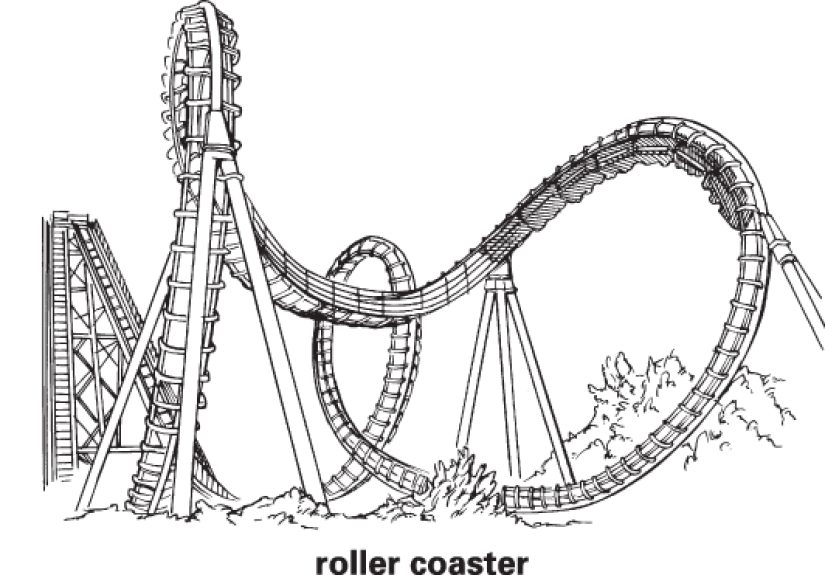
This is where most coaster drawings go from “fun doodle” to “believable ride.” Supports usually connect down to the ground with angled beams. They repeat in patterns. They look like they were designed by someone who enjoys math (or at least respects gravity).
- Use tall supports under high track sections and big drops.
- Use clusters (two or three beams) where the track changes direction sharply.
- Make supports closer together in intense sections like loops and tight turns.
Quick realism hack: Don’t let your track float. If a section is high, it needs visible structure. Viewers might not know engineering, but they do know when something looks like it’s about to fall over.
Step 4: Make Your Loop Look Like a Real Loop
Avoid a perfect circle. Instead, draw a teardrop-like loop: wider at the bottom, slimmer at the top. It instantly signals “this was designed” instead of “I drew a bagel and committed to it.”
Step 5: Add a Train (Tiny Cars, Big Personality)
A coaster without a train is like a pizza without cheese: technically still food, but why? Draw a few connected cars. Add simple wheels as small circles tucked under the car body. If you want extra charm, add tiny raised hands and a couple of “WOOO!” faces.
Step 6: Sell the Scene (Scale Cues = Instant Depth)
Add anything that tells the viewer how big this thing is:
- Trees
- People
- Fence lines
- A station platform
- Signs and flags
- A snack stand that feels morally obligated to sell funnel cake
Even two or three tiny trees can make a coaster feel enormous. Scale cues are basically art’s version of “proof.”
Make It Fun: Mini-Prompts for a “Hey Pandas” Roller Coaster Thread
If you’re posting this challenge in a group (or just entertaining yourself), here are ways to make it more creative:
Theme Variations
- Food Coaster: The track is a licorice twist, and the supports are pretzel sticks.
- Nature Coaster: The coaster weaves through cliffs and trees like it’s apologizing for existing.
- Sci-Fi Coaster: Launch tunnel, glowing station, and a loop that looks like a portal.
- “I’m Late” Coaster: Every hill is shaped like a panic spike and the station is your alarm clock.
Constraint Challenges
- Draw it using only straight lines (you’ll invent the “polygon coaster”).
- Draw it with one continuous line.
- Draw it as a map view (top-down), like you’re designing a park layout.
- Design a coaster with one “signature element” and build the rest around it.
Common Roller Coaster Drawing Mistakes (And Quick Fixes)
Mistake 1: The Impossible Loop
If your loop is huge and at the end, the train may not have enough speed. Fix it by adding a big hill earlier, moving the loop closer to the main drop, shrinking the loop, or adding a launch.
Mistake 2: Floating Track Syndrome
Track needs supports. If your track is high, add beams down to the ground. If you want a clean look, use fewer but thicker supports.
Mistake 3: “Spaghetti Track” Confusion
If the viewer can’t tell where the ride goes, simplify the layout. Emphasize one main drop, one big turn, one signature element. Clear beats beat chaotic noodles.
Conclusion: Your Roller Coaster, Your Rules (Mostly Gravity’s Rules)
“Hey Pandas, Draw A Rollercoaster” is the rare creative prompt that welcomes every skill level. You can doodle a simple side-view coaster in five minutes, or you can build a full-on theme park scene with perspective, supports, trains, signage, and a loop shaped like it went to engineering school.
The sweet spot is this: keep the drawing readable, add a few realistic cues (teardrop loop, believable supports, a brake run), and then let your imagination do the rest. Your coaster can be cute, epic, spooky, silly, or all of the above. The only real requirement is that it makes someone think, “I’d ride that.”
of Roller Coaster Drawing “Experience” (The Part That Makes You Want to Grab a Pencil)
The funniest thing about drawing a roller coaster is how quickly it turns into storytelling. You start with a lift hill, and then your brain immediately asks, “Okay, what happens next?” That’s why this prompt works so well in communities: everyone draws the same basic idea, but the results feel wildly differentlike watching ten people describe the same dream and realizing none of you are sleeping in the same universe.
If you try this challenge with friends or online, you’ll notice a pattern: the first version is usually “the safe coaster.” It’s a big hill, a drop, a loop, the end. Then someone adds a tunnel. Someone else adds a waterfall. Suddenly there’s a coaster weaving through a haunted library, and the supports are made of giant pencils, and the station is shaped like a panda head wearing a tiny safety helmet. At that point, you’re not just drawing a rideyou’re designing a vibe.
Another common experience: people discover perspective by accident. You add one support in the background, it looks too big, so you shrink it. Then you shrink the next one. Then you realize, “Wait… this is depth.” It’s one of the most satisfying “I didn’t know I knew how to do that” moments in casual art. Roller coasters practically teach perspective for free because the repeating supports create a natural rhythm that your eyes want to follow.
The prompt also has a sneaky confidence boost built in. Even if your lines are messy, the subject is forgivingcoasters are made of metal and motion and chaos, so a slightly wobbly curve can still read as excitement. People tend to laugh at their own drawings in a good way (“This loop is a crime”), then immediately try again, and the second attempt is noticeably better. Improvement happens fast because you’re repeating shapes: rails, ties, supports, curves. Your hand gets smarter mid-doodle.
And if you’re sharing results, the comment section becomes a mini theme park. Some people will react like engineers (“That loop needs a bigger entry!”), others like poets (“This one feels like freedom!”), and others like your most honest friend (“I would throw up immediately, 10/10.”). It’s a rare kind of feedback that stays lighthearted while still being useful, because everyone is rooting for the same thing: a coaster that looks like fun.
If you want the full experience, do a “three coaster sprint.” Draw one coaster in five minutes, one in fifteen, and one where you take your time and add details. When you line them up, you’ll see your style appearmaybe you love huge drops, maybe you love tangled turns, maybe your coaster always ends up with an unnecessary but delightful tunnel. That’s the real payoff of the prompt: you don’t just draw a roller coaster. You discover the kind of roller coaster your imagination keeps building.