
Table of Contents >> Show >> Hide
- Why This Tablecloth Trick Works (Even If You’re Not “Crafty”)
- Materials and Tools
- Step 1: Pick the Right Size (So It Actually Fits Your Table)
- Step 2: Prep the Fabric (Don’t Skip This If You Want a Better Finish)
- Step 3: Measure and Tape Your Runner Stripe
- Step 4: Paint the Stripe
- Step 5: Peel Tape (Timing Matters)
- Step 6: Heat-Set (If You Want It to Last)
- Style Variations (Because One Stripe Is Just the Beginning)
- How to Set the Table So the Runner Effect Pops
- Care and Cleaning
- Troubleshooting: Fixes for the Most Common Oops Moments
- Budget Breakdown (Realistic, Not Fantasy-DIY Math)
- Closing Thoughts
- Experience Notes: What People Usually Learn After Making One
If you’ve ever tried to “make the table look nice” and somehow ended up with a centerpiece that screams
middle-school science fair, you’re not alone. The good news: you don’t need a design degree, a linen closet
the size of a studio apartment, or a budget that requires a permission slip.
David Starkan event designer known for turning ordinary materials into high-impact momentsshared a deceptively
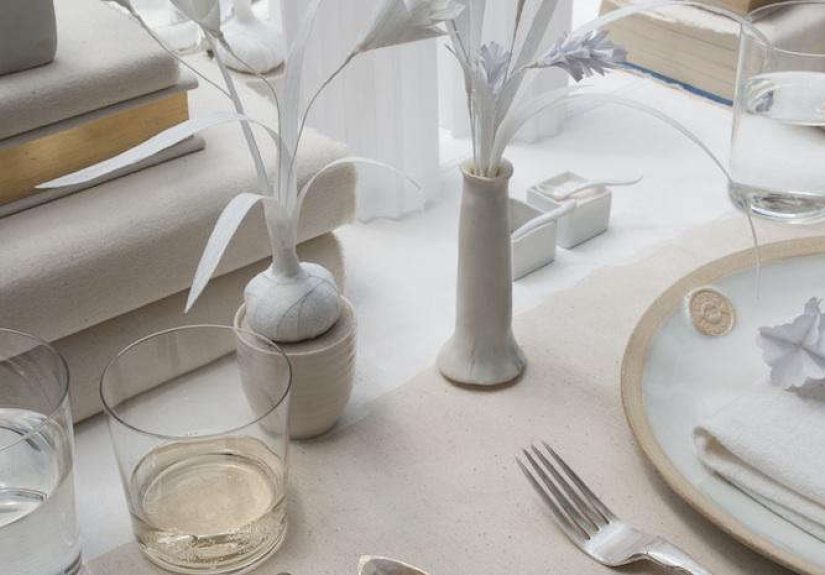
simple idea: take a canvas drop cloth, paint a wide stripe down the middle, and boom… you’ve got a tablecloth
with a built-in runner. It’s minimal, modern, a little imperfect (in the best way), and it looks like you planned
your whole life around this dinner party.
In this guide, you’ll learn how to recreate the classic “painted runner tablecloth” look, plus variations for
different seasons, table sizes, and skill levels. We’ll also cover practical stufflike how to keep paint from
bleeding under tape and how to make the finish more washablebecause pretty is great, but functional is
what keeps you from crying into the napkins later.
Why This Tablecloth Trick Works (Even If You’re Not “Crafty”)
The painted stripe is basically visual magic. A runner usually creates a strong line that guides your eye down the
table, making everything feel intentional. By painting the runner directly onto the cloth, you get that same
structurewithout extra layers sliding around or bunching up under plates.
It’s a design shortcut with three big wins
- High contrast, low effort: A single bold stripe reads as modern and graphic.
- Built-in “center lane”: Your flowers, candles, and serving dishes automatically look organized.
- Imperfection looks intentional: Slightly soft edges feel hand-done, not factory-stiff.
Materials and Tools
The original concept uses a painter’s canvas drop cloth and a wide painted stripe. You can keep it super simple
(basic paint + tape) or upgrade it for better washability and a softer hand-feel.
Core supplies (the essentials)
- Canvas drop cloth (or lightweight canvas yardage): Choose one big enough for your table.
- Painter’s tape: Helps create a clean-edged stripe.
- Measuring tape + metal ruler: For centering the stripe and keeping it straight.
- Paint: Fabric paint works best, but acrylic can work with the right prep.
- Foam roller or wide brush: For smooth coverage over large areas.
- Drop cloth / plastic sheet: Protects your floor or work surface (and your future happiness).
Optional upgrades (worth it if you want durability)
- Fabric medium (or acrylic medium): Mixed with acrylic paint to keep the finish flexible.
- Iron: Helps heat-set paint for better longevity.
- Gesso or primer wash: Can soften contrast and give a more “washed canvas” background look.
- Sandpaper (fine grit): Light smoothing if the drop cloth is very rough.
Step 1: Pick the Right Size (So It Actually Fits Your Table)
Before you paint anything, decide how much overhang (also called “drop”) you want. Casual tables often look great
with a shorter drop; more formal settings can use a longer drop. A practical measuring rule is:
Tablecloth length = table length + (drop × 2)
Tablecloth width = table width + (drop × 2)
Example: If your table is 72 inches long and you want a 9-inch drop on each side, you’ll want about
90 inches in length (72 + 18). Do the same math for the width.
Quick note about drop cloth sizing
Drop cloths are often sold in “general” sizes that may not perfectly match your table. That’s fine. This style
actually looks great with a slightly more relaxed drape. If it’s too large, you can hem it, trim it, or embrace a
casual puddle at the corners (a.k.a. “I meant to do that.”).
Step 2: Prep the Fabric (Don’t Skip This If You Want a Better Finish)
Drop cloths can come with sizing, dust, or stiffness from manufacturing. Prepping helps paint absorb more evenly
and reduces weird blotches.
Basic prep (recommended)
- Wash and dry the fabric if possible (skip fabric softener, which can affect paint adhesion).
- Iron or press it so you’re taping onto a smooth surface.
- Lay it flat and smooth out wrinkles with your hands.
Optional “designer wash” background
If you want the cloth to look more like a soft, pale canvas rather than bright raw cotton, you can do a thin wash:
mix a little gesso or primer with water and brush it loosely over the cloth. Let it dry fully before taping.
This creates a gently “whitewashed” base that feels artsy instead of stark.
Step 3: Measure and Tape Your Runner Stripe
The stripe is the whole point, so take a few minutes to center it. A great runner width is typically
14–20 inches for standard dining tables, but you can go wider if your table is large or you want a
bolder, more graphic look.
How to center it cleanly
- Measure the full width of your cloth.
- Find the center point and lightly mark it (pencil or a tiny piece of tape).
- Decide stripe width, then measure outward from center to mark both edges.
- Apply painter’s tape along both edges, pressing firmly to reduce paint bleed.
Don’t panic if your edges aren’t razor-sharp. This project looks charming with a tiny bit of blurlike a handmade
linen you’d “discover” at a boutique and immediately pretend you’ve owned forever.
Step 4: Paint the Stripe
There are two main routes here: use fabric paint (easy mode) or use
acrylic paint mixed with fabric medium (custom color mode).
Option A: Fabric paint (simplest)
- Pour paint into a tray or plate.
- Use a foam roller for smooth coverage and fewer brush marks.
- Apply thin coats rather than one thick coat (thick paint can dry stiff and crack).
- Let it dry fully between coats if needed.
Option B: Acrylic + fabric medium (more flexible and washable)
Mix acrylic paint with fabric medium (often a 1:1 mix for a flexible finish, though always follow your medium’s
label). The medium helps paint soak in more like textile paint instead of sitting stiffly on top.
- Mix paint + medium thoroughly until smooth.
- Roll or brush onto the stripe area in thin layers.
- Keep edges neat by rolling away from tape lines, not into them.
- Let dry at least 24 hours before heat-setting.
Step 5: Peel Tape (Timing Matters)
For cleaner lines, peel tape when the paint is dry to the touch but not rock-hard.
Pull the tape back slowly at a 45-degree angle. If paint starts lifting, score the edge lightly with a craft knife
(very gentlythis is a tablecloth, not a drywall project).
Step 6: Heat-Set (If You Want It to Last)
Heat-setting helps paint bind and improves durability. Once the stripe is fully dry:
- Turn the cloth so you iron from the back, or place a thin pressing cloth over the painted area.
- Use a dry iron (no steam) on a medium setting.
- Move the iron continuously for a few minutes across the painted area.
After that, give it time to fully cure before washing. If you’re using this mainly for entertaining and spot-cleaning,
you can be less strictbut curing time is your friend if you want longevity.
Style Variations (Because One Stripe Is Just the Beginning)
David Stark’s original idea is wonderfully minimal, but the same method can go in a dozen directionsmodern,
coastal, holiday, boho, you name it.
1) Double stripe
Tape and paint two thinner stripes with a small gap between them. It feels tailoredlike the tablecloth is wearing
a crisp suit.
2) Color-block runner
Paint the center stripe in a bold color (ink blue, forest green, terracotta) and keep everything else natural canvas.
Pair with simple white plates for maximum contrast.
3) Soft-edged “wash” runner
Skip tape. Use a wide brush and let the edges feather out a little. This looks especially good for outdoor tables
and relaxed brunches.
4) Stencil accents
Keep the main stripe plain, then add small stencil motifs at each place setting (tiny dots, leaves, geometric marks).
It’s a subtle “I tried” without being loud about it.
5) Seasonal swaps
- Spring: pale green stripe + citrus centerpiece
- Summer: white stripe + blue napkins (clean coastal)
- Fall: rust stripe + brass candlesticks
- Winter: deep charcoal stripe + evergreen clippings
How to Set the Table So the Runner Effect Pops
The stripe creates a “lane.” Use that lane on purpose.
Center lane rules (gentle rules, not the bossy kind)
- Keep tall items spaced out: Candles or flowers should be staggered, not clustered.
- Repeat one color: If the stripe is white, echo white in napkins or candles.
- Use texture, not clutter: A wooden board, a ceramic bowl, linen napkinssimple and tactile wins.
Care and Cleaning
Let’s be honest: tablecloths get hit with everything from olive oil to “mystery red sauce.” Your care routine
depends on what paint you used and how precious you feel about this project.
Best practices
- Spot-clean quickly with mild soap and cool water, especially for oily spills.
- Wash gently if needed (cold water, gentle cycle). Avoid harsh detergents.
- Air dry when possible to reduce wear on the painted stripe.
- Iron from the back if the painted area needs pressing later.
If you used acrylic + medium and heat-set properly, the stripe should hold up better than plain acrylic alone.
Still, treat it like a “nice” textile rather than a gym towel.
Troubleshooting: Fixes for the Most Common Oops Moments
Paint bled under the tape
- Press tape down firmly next time, especially on textured canvas.
- Try sealing the tape edge with a light coat of the base color (or clear medium) before painting.
- Embrace it: tiny soft edges are part of the hand-painted charm.
The stripe feels stiff
- Use thinner coats.
- Add fabric medium for flexibility.
- Heat-setting can help “settle” the finish.
Brush marks look too obvious
- Switch to a foam roller.
- Work in long strokes in one direction.
- Do a second thin coat to even out texture.
Budget Breakdown (Realistic, Not Fantasy-DIY Math)
This is one of those rare projects where the “designer look” really can cost less than takeout for two.
A drop cloth is typically cheaper than a large linen tablecloth, and you might already own tape, a ruler, or paint.
The biggest upgrade expense is fabric mediumbut even that can be modest and makes the result more durable.
Closing Thoughts
The genius of this DIY is that it’s not trying too hard. It’s a simple, graphic gesture that turns an everyday
material into something that looks curated and calm. And in the world of hostingwhere one minute you’re lighting
candles and the next minute you’re frantically searching for the missing serving spoonthat kind of calm is
basically a superpower.
Make one in classic white-on-canvas, or go bold with color. Either way, you’ll end up with a reusable piece that
makes the table feel styled before you even put down a plate. Which is great, because then you can spend your
energy on what matterslike dessert.
Experience Notes: What People Usually Learn After Making One
This project looks almost suspiciously easy on paper: tape, paint, peel, done. In real life, makers tend to walk
away with a few surprisingly useful lessonsmostly about texture, timing, and the strange emotional journey of
watching paint dry (yes, it’s a journey, and yes, you will have opinions).
First, the fabric itself is the secret main character. A painter’s drop cloth can be beautifully sturdy, but it’s
also textured and thirstymeaning it will absorb paint unevenly if you rush. People often notice that the first
coat looks patchy and panic for approximately 38 seconds. Then the second thin coat magically evens it out, and
suddenly everyone’s an artist again. The key takeaway: thin layers win. Thick paint might look
“done” faster, but it can dry stiff and feel plastickyespecially right where your arms rest at dinner.
Next comes the tape reality check. On a super-smooth surface, painter’s tape behaves like a perfect little helper.
On canvas weave, it behaves like a helpful little gremlin who sometimes lets paint sneak under the edge. Most
people find that pressing the tape down firmly (really firmly) makes a big difference. Some even run a credit card
or the side of a ruler along the tape edge to seal it. But here’s the funny part: even when there’s a tiny blur,
the finished look still worksbecause hand-painted linens are supposed to feel human. A slightly soft edge reads as
“artisan,” not “accident.”
Another common moment: the stripe looks too bright at first, especially if you choose a stark white paint
on natural canvas. Many makers end up loving it once the table is set, because plates, glassware, and candles
visually break up the contrast. But if it still feels too bold, people often soften the whole cloth with a light
wash (a diluted primer/gesso-style brush coat) before painting the stripe next time. That extra step gives the
fabric a calm, “collected” looklike it’s been to a few fabulous dinners already.
Heat-setting is where the practical folks quietly win. Makers who skip it sometimes notice the paint scuffs sooner,
especially if the cloth gets washed frequently. The ones who heat-set (and let the paint cure properly) tend to get
a longer-lasting finish that stays more flexible. And then there’s the real-life hosting test: someone always spills
something on the stripe. The good news is, if you spot-clean quickly, you can usually save the day. The even better
news is that a slightly “lived-in” tablecloth is not a tragedyit’s proof you actually use it, which is the whole
point of making something.
Finally, there’s the confidence boost. People who try this project often start with “I’m not creative,” and end
with “Wait… I kind of want to paint matching napkins.” That’s the David Stark effect: one bold, simple move that
makes you see everyday materials as design tools. And if you do end up painting napkins, just remember: tape is
cheaper than therapy, and thin coats are cheaper than regret.





