Table of Contents >> Show >> Hide
- The Fast Answer: Pick Audio by Use Case
- Option 1: HDMI Audio
- Option 2: The 3.5 mm Jack on Older Pi Boards
- Option 3: USB Audio
- Option 4: Bluetooth Audio
- Option 5: I2S DACs and Audio HATs
- Option 6: Audio Input for Recording, Voice, and Smart Projects
- How to Choose the Right Audio Option
- Common Mistakes People Make
- Real-World Experiences: What Using Audio on Pi Actually Feels Like
- Final Verdict
If you have ever stared at a Raspberry Pi and thought, “This tiny board can emulate a game console, run a server, and probably judge my cable management, but how exactly do I get decent sound out of it?” you are not alone. Raspberry Pi audio is one of those topics that seems simple until you realize there are several paths, each with its own strengths, quirks, and occasional opportunities for light swearing.
The good news is that Raspberry Pi gives you more than one way to handle audio. The bad news is that the best choice depends on what you are building. A Pi plugged into a TV has different needs than a Pi music streamer, a smart speaker, a voice assistant, or a little retro arcade cabinet that deserves more than sad, thin sound from a bargain-bin speaker. Once you understand the categories, the whole thing gets much easier.
This guide walks through the main Raspberry Pi audio options in plain English: HDMI, the older 3.5 mm jack, USB audio, Bluetooth audio, I2S DACs, amplifier HATs, digital audio boards, and audio input options for microphones and voice projects. By the end, you should know exactly which route makes sense for your setup and which route will just eat your weekend.
The Fast Answer: Pick Audio by Use Case
Before we get fancy, here is the practical cheat sheet. If your Raspberry Pi is connected to a TV or monitor with speakers, HDMI audio is usually the easiest answer. If you have an older Pi and just want quick sound for headphones or powered speakers, the 3.5 mm jack is fine. If you want something that works on nearly every Pi model, especially Pi 5, USB audio is the safe bet. If you hate cables, Bluetooth can be convenient. If you care about hi-fi quality, cleaner output, or a polished embedded project, an I2S DAC or audio HAT is where things get interesting.
And if you want to record sound, that is a separate decision. A lot of people assume the old 3.5 mm jack handles microphone input. It does not. For audio input, you are generally looking at a USB microphone, a USB audio adapter with mic support, an I2S microphone, or a codec-style add-on board.
Option 1: HDMI Audio
HDMI audio is the no-drama option. If your Raspberry Pi is connected to a monitor, TV, or AV receiver over HDMI, audio can travel over the same cable as video. That means fewer wires, less setup, and a much lower chance of creating a spaghetti nest behind your desk that looks like a nervous octopus designed it.
This path is ideal for media centers, digital signage, desktops, and living room builds. If your display already has speakers, you may not need any extra hardware at all. For plenty of users, that is the entire story: plug in Pi, connect HDMI, play sound, move on with life.
The tradeoff is flexibility. HDMI is great when the screen is also the sound destination, but it is less elegant when you want the picture going one place and the audio going somewhere else. You can solve that with an HDMI audio extractor, but that adds cost and clutter. So HDMI wins the “simple and clean” award, not always the “most adaptable” award.
Option 2: The 3.5 mm Jack on Older Pi Boards
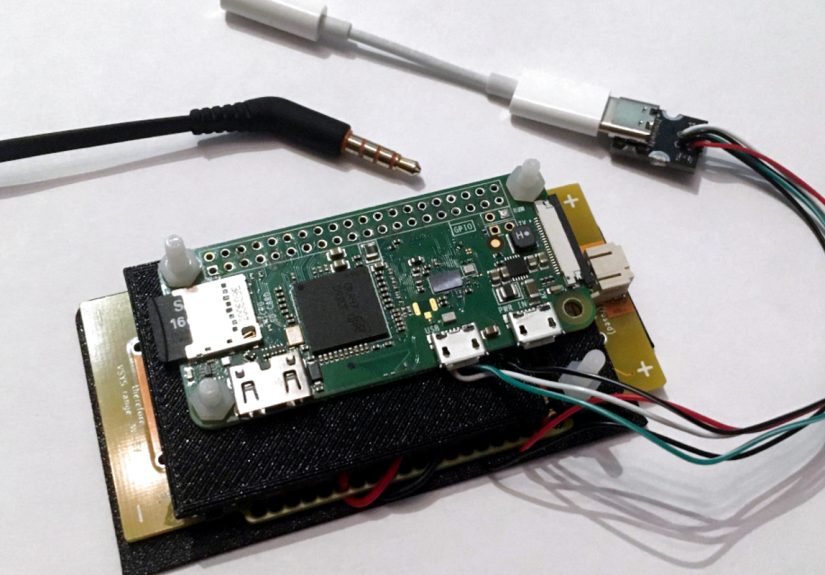
On Raspberry Pi 1, 2, 3, and 4 models, the familiar 3.5 mm TRRS jack gives you a fast way to get analog audio out. It is convenient, it is built in, and it is excellent for quick experiments, powered desktop speakers, tiny retro projects, and casual listening. Plug in headphones, hear sound, feel accomplished. It is a beautiful moment.
That said, the built-in analog jack has never been the audiophile path. It is better described as “handy” than “legendary.” It works well enough for alerts, voice prompts, emulator sound, classroom projects, and everyday tinkering, but if your goal is crisp music playback on a serious hi-fi system, you will probably outgrow it quickly.
There is also one important reality check: Raspberry Pi 5 does not include built-in analog audio output. That catches people all the time because older Pis trained us to expect a headphone jack. Pi 5 kept moving forward in performance, but the analog jack did not make the trip. So if you are using Pi 5 and want analog speakers or headphones, plan for USB audio or an add-on board from the start.
Option 3: USB Audio
If there is one audio option that deserves the title of “most practical across the whole Raspberry Pi family,” it is USB audio. USB speakers, USB headsets, USB microphones, and USB sound cards are widely available, easy to understand, and supported across Pi models. This makes USB especially useful on Pi 5, where it often becomes the simplest route to analog audio without extra soldering or HAT stacking.
USB audio works well in several situations. It is a great choice when you want both input and output, such as for calls, voice assistants, simple recording stations, or kiosks that need a mic and a speaker. It is also great when you want better sound quality than the older analog jack but do not want to commit to an I2S board. A modest USB DAC or USB sound adapter can punch above its price and save you a lot of setup time.
The downsides are mostly practical. USB devices use a port, some need more power than you expect, and not all cheap adapters are equal. The good news is that even a basic, decent USB audio adapter can be a huge upgrade for straightforward speaker or headphone output. If your goal is “I want this to work today, not after I read six forum posts and negotiate with a device tree overlay,” USB is very hard to beat.
Option 4: Bluetooth Audio
Bluetooth audio sounds modern, convenient, and wonderfully cable-free. And sometimes it is. Pairing a Raspberry Pi with a wireless speaker or Bluetooth headphones can be a clean solution for portable builds, kitchen streamers, wall displays, smart assistants, and projects where dragging an audio cable across the room would make the whole build look like a science fair accident.
Bluetooth shines for casual listening and neat physical design. It lets you hide the Pi, keep the project compact, and avoid analog cable noise. It can also make multi-room or custom speaker projects feel delightfully polished.
But Bluetooth is not magic. It can introduce latency, which matters for gaming, video sync, and any project where timing matters. Pairing can also be more fiddly than people hope, especially in headless setups or projects that need to reconnect automatically every time they boot. Bluetooth is excellent when convenience matters most, but it is rarely the best answer for zero-latency audio or mission-critical reliability.
Option 5: I2S DACs and Audio HATs
This is where Raspberry Pi audio stops being merely functional and starts getting fun. I2S-based DACs and audio HATs are a popular choice when you want cleaner audio, better hardware integration, or a more purpose-built project. Instead of relying on a generic USB device, these boards connect through the GPIO header and use the Pi’s digital audio interface.
For makers, that has several advantages. The setup can look cleaner, the hardware often feels more intentional, and the results can be dramatically better than the old built-in jack. In other words, this is the point where your Raspberry Pi stops sounding like “small computer trying its best” and starts sounding like “oh, this is actually a respectable music box.”
DAC HATs for Line-Out and Headphones
If you want better analog output for active speakers, headphones, or a stereo system, a DAC HAT is one of the best upgrades available. Boards in this category are designed to convert the Pi’s digital audio into cleaner analog sound. Some provide RCA outputs, some add headphone amplification, and some do both. They are ideal for desktop audio players, network streamers, jukeboxes, and custom hi-fi projects.
Official and third-party boards both exist here. Some are aimed at simple line-out use, while others focus on extra features like hardware volume control, displays, or tighter integration with audio software. If your project’s mission is “play music and sound good doing it,” a DAC HAT is the grown-up answer.
Amp HATs for Passive Speakers
A normal DAC gives you audio output, but it does not directly power passive speakers. That is where amplifier HATs come in. These boards combine digital audio handling with speaker-driving power, which makes them perfect for speaker boxes, smart radios, kitchen audio builds, and one-piece Pi stereos.
If you want to wire the Pi directly to passive bookshelf speakers or embed it into a custom speaker cabinet, an amp HAT is often the cleanest solution. Instead of juggling an external amplifier and extra cables, the Pi and the amplification live together in one stack. It is wonderfully tidy and deeply satisfying, which is probably why makers keep building little Pi music boxes like it is a competitive sport.
Digital Audio HATs for Optical or Coax Output
Sometimes you do not want analog output from the Pi at all. Sometimes you want the Pi to act as a digital transport feeding a nicer DAC, receiver, or hi-fi system. That is where digital audio HATs come in. These boards typically provide optical or coaxial S/PDIF output, which is perfect when your existing stereo gear is already better at digital-to-analog conversion than the Pi ever needs to be.
This category makes sense for serious media playback, living room audio racks, and anyone building a streamer to connect with existing home audio gear. If you already own a quality DAC or AV receiver, there is no point asking the Pi to imitate one badly. Let the Pi handle the bits and let your audio equipment handle the sound.
Option 6: Audio Input for Recording, Voice, and Smart Projects
Output is only half the story. Lots of Pi projects also need input: smart assistants, doorbells, intercoms, simple recorders, kiosks, talk-back systems, robots, and sound-reactive art projects. This is where newcomers often make the wrong assumption. The older 3.5 mm jack is not your microphone input solution.
For simple voice capture, USB microphones are the easiest choice. They are common, affordable, and easy to replace. A USB headset is also great if you need both mic and speaker output with minimal setup. If your project is more embedded, an I2S MEMS microphone gives you a compact digital option. And if you want a more complete voice interface with speakers and microphones together, a codec or voice board is usually the smartest path.
Codec-style HATs are especially useful because they cover both directions. They can handle playback and recording, support microphones, and suit compact interactive builds. That makes them a natural fit for smart doorbells, handheld communicators, voice assistants, or any Pi project that needs ears and a mouth instead of just a soundtrack.
How to Choose the Right Audio Option
For a Pi connected to a TV or monitor
Use HDMI unless you have a specific reason not to. It is the simplest solution and often the one that requires the fewest moving parts.
For Pi 5 with headphones or analog speakers
Use USB audio or an audio HAT. Do not waste time hunting for a headphone jack that is not there. The Pi is not hiding it. It is gone.
For music playback on powered speakers or a stereo
Use a DAC HAT or a decent USB DAC. The answer depends on whether you want maximum simplicity or a cleaner, more integrated hardware build.
For passive speakers
Use an amplifier HAT. A plain line-out board is not enough for passive speakers by itself.
For a hi-fi rack with your own DAC or receiver
Use a digital audio HAT with optical or coax output. This keeps the signal digital until it reaches better audio gear.
For microphones, voice projects, or recording
Use USB audio input, an I2S microphone, or a codec/voice board. Pick the one that matches how compact and integrated you want the final build to be.
Common Mistakes People Make
The first mistake is assuming every Raspberry Pi behaves the same. Audio choices depend heavily on the model. The second mistake is trying to connect passive speakers directly to line-level output and wondering why the result is whisper-quiet sadness. The third is assuming microphone input exists on the old jack. It does not. And the fourth is forgetting to switch the audio output in the operating system when the hardware is fine and the Pi is simply sending sound somewhere else.
There is also the classic hobbyist move of blaming the board before checking the basics: wrong output selected, volume muted, powered speakers not actually powered, or Bluetooth paired but not connected as expected. Raspberry Pi is clever, but it still cannot turn off your amplifier’s power switch for you.
Real-World Experiences: What Using Audio on Pi Actually Feels Like
In real use, each Raspberry Pi audio method has a personality. HDMI audio feels like borrowing the family car: reliable, boring, and surprisingly useful. You plug in one cable, the display handles the sound, and you get on with your project. It is not exciting, but it is dependable. For media centers and dashboards, that is often exactly what you want. Nobody frames a poster that says, “My audio setup was thrillingly inconvenient.”
The old 3.5 mm jack on earlier Pi models feels like the emergency flashlight in your kitchen drawer. It may not be glamorous, but it saves the day all the time. It is fantastic when you just need sound right now. I have seen it used for arcade builds, museum buttons, classroom demos, weather stations with spoken alerts, and projects where “good enough” is not a compromise but the whole point. You do not always need golden ears. Sometimes you just need the Pi to say hello without buying extra hardware.
USB audio, by contrast, feels like the sensible friend who always brings a phone charger, snacks, and a backup plan. It is rarely the most romantic solution, but it keeps projects moving. A cheap USB sound adapter can rescue a Pi 5 build instantly. A USB headset can make a kiosk or voice app feel finished in ten minutes. A USB microphone turns a Pi into a recorder with minimal fuss. If you build a lot of practical systems, you eventually learn to respect USB audio the way adults learn to respect comfortable shoes.
I2S DACs and HATs feel different. They feel intentional. They feel like the moment a weekend project stops being a prototype and starts becoming a device. When you stack a DAC board onto a Pi, route the outputs neatly, and hear clean sound coming through proper speakers, the project suddenly has dignity. It stops saying, “I am a computer with some wires,” and starts saying, “I am an appliance now. Please admire my cable discipline.” That is why makers love these boards so much. They make the Pi feel purpose-built.
Amplifier HATs take that even further. There is something deeply satisfying about a Raspberry Pi directly driving a pair of passive speakers inside a custom enclosure. It feels clever, compact, and a little bit smug in the best possible way. The Pi becomes the brains, the streamer, and the playback engine all at once. For radios, smart speakers, and one-box music systems, this setup has real charm.
Bluetooth audio is the most emotionally unpredictable option. When it works, you feel like a wizard. The Pi boots, reconnects, and music appears from a wireless speaker across the room as if by magic. When it does not work, you begin bargaining with small icons and muttering things like, “You were paired yesterday. We had a good thing.” Bluetooth is wonderful for clean-looking builds, but it asks for patience. It is the cool cousin of Pi audio: stylish, useful, and occasionally impossible to reach by phone.
So the real experience comes down to this: Raspberry Pi audio is not one feature, but a toolbox. The best results come from choosing the method that matches your project instead of forcing one method to do everything. Once you accept that, the Pi becomes a surprisingly capable audio platform, whether you are building a simple sound effect trigger or a serious little music machine.
Final Verdict
There is no single best Raspberry Pi audio option. There is only the best option for your project. HDMI is easiest for screens. The older 3.5 mm jack is convenient for quick analog output on Pi 1 through 4. USB audio is the universal problem-solver, especially for Pi 5. Bluetooth is neat and cable-free when latency is not critical. I2S DACs and HATs are the best route for cleaner, more polished builds. Amp boards are perfect for passive speakers. Digital HATs are ideal for hi-fi gear. And for microphones or recording, choose USB, I2S mics, or a codec board instead of hoping the old headphone jack will magically become a studio interface.
In other words, Raspberry Pi audio is not limited. It is just modular. Once you know the menu, ordering gets a lot easier.