
Table of Contents >> Show >> Hide
- Why Magic Erasers Work (and Why That’s the Problem)
- 8 Things to Never Clean With a Magic Eraser
- 1) Nonstick cookware (and nonstick bakeware)
- 2) Stainless steel appliances and brushed metal finishes
- 3) Natural stone countertops (marble, granite, and other sealed stone)
- 4) High-gloss paint, satin/semi-gloss walls, and painted trim
- 5) Finished wood furniture, wood floors, and varnished surfaces
- 6) Leather and suede (including bags, couches, car seats, and shoes)
- 7) Electronics screens, TV panels, phone displays, and eyeglass lenses
- 8) Your car’s paint, clear coat, and glossy exterior trim
- Bonus “Proceed With Extreme Caution” Surfaces
- The “Before You Swipe” Checklist (So You Don’t Regret It Later)
- A Quick Word on Waste (Because the Eraser Doesn’t Magically Disappear)
- So… What Should You Use a Magic Eraser For?
- Conclusion
- Real-Life Experiences: The Stuff You Only Learn After One “Oops”
A Magic Eraser is basically the cleaning version of that friend who “just wants to help” and then accidentally deletes your entire spreadsheet.
Yes, it can make grime disappear like a magician. But it can also quietly, politely, and permanently mess up the wrong surfaceno dramatic explosion,
just a sad little patch of dullness you’ll notice forever.
Cleaning pros love Magic Erasers for certain jobs (hello, sneaker soles and scuff marks), but they also have a firm “do-not-pass-go” list.
Below are eight things you should never clean with a Magic Eraserplus what to do instead, how to avoid damage, and what to try if you already went
a little too “abracadabra” on something expensive.
Why Magic Erasers Work (and Why That’s the Problem)
Magic Erasers are made from melamine foam, and when you wet one and rub it on a surface, it acts like a super-fine abrasivemore like microscopic
sandpaper than a soft sponge. That “micro-scrub” action is why it can remove stubborn marks with just water. It’s also why it can strip finishes,
haze glossy coatings, and leave fine scratches that only show up when the light hits just right (a.k.a. exactly when guests walk in).
The key takeaway: a Magic Eraser doesn’t just remove the stain. It can remove the surfaceor at least the top layer of the finish protecting it.
That’s why the safest approach is always: start gentle, keep it damp, and test an inconspicuous spot first. And if a surface has a coating, a sheen,
or a “do not use abrasives” warning anywhere on the care instructions… believe it.
8 Things to Never Clean With a Magic Eraser
1) Nonstick cookware (and nonstick bakeware)
Nonstick coatings are designed to be slick, not scoured. A Magic Eraser can abrade that coating, shortening the life of the pan and potentially
causing it to flake or wear unevenly. Even if the damage looks minor, it’s not worth gambling with the surface that touches your food.
Do this instead: Use warm water, a gentle dish soap, and a non-scratch sponge. For stuck-on bits, soak first. If you need extra help,
use a paste of baking soda and water with a soft spongeno aggressive scrubbing.
2) Stainless steel appliances and brushed metal finishes
Stainless steel seems tough, but many stainless surfaces (especially brushed or “fingerprint-resistant” finishes) can show micro-scratches and
dull patches from abrasives. A Magic Eraser can turn “shiny and new” into “why does it look cloudy when the sun hits it?”
Do this instead: Clean with a microfiber cloth and warm, soapy water, then dry immediately. Follow the grain. For fingerprints,
use a stainless-steel-specific cleaner or a damp microfiber with a tiny drop of dish soapthen buff dry.
3) Natural stone countertops (marble, granite, and other sealed stone)
Stone countertops often rely on a protective sealant. Magic Erasers can be abrasive enough to wear away that seal, leaving the stone more vulnerable
to staining and dullness. With softer stones like marble, you’re also risking a change in sheen that you can’t “un-see.”
Do this instead: Use a stone-safe cleaner or mild dish soap diluted in warm water, wiped with a soft microfiber cloth. Skip harsh
acids and abrasives, and reseal stone when recommended by the manufacturer.
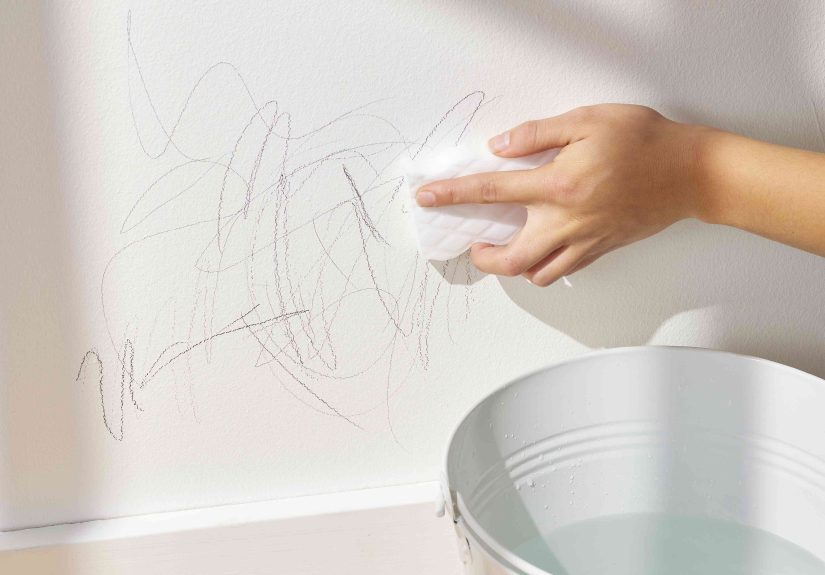
4) High-gloss paint, satin/semi-gloss walls, and painted trim
Magic Erasers can remove scuffs on wallssometimes a little too well. On anything glossy or higher-sheen, they can leave a dull spot by
altering the finish. On flat paint, they can lift color or make the area look “cleaner” than the surrounding wall, which is a weird kind of problem
to have.
Do this instead: Start with warm water and a small amount of mild dish soap on a microfiber cloth. For scuffs, try a soft “pencil”
eraser or a damp microfiber with gentle pressure. Always test firstpaint is surprisingly sensitive.
5) Finished wood furniture, wood floors, and varnished surfaces
Finished wood looks smooth because it’s protected by a topcoatpolyurethane, varnish, lacquer, wax, or another finish. A Magic Eraser can scratch
that coating or thin it out, leaving a pale, hazy, or uneven patch. On floors, that can also create a spot that grabs dirt faster, meaning you’ll
“fix” it… forever.
Do this instead: Use a cleaner meant for finished wood and a soft microfiber cloth. For sticky residue, try a slightly damp cloth,
then dry immediately. If you’re unsure what finish you have, go gentler than you think you need to.
6) Leather and suede (including bags, couches, car seats, and shoes)
Leather can scratch, discolor, and lose its protective finish when scrubbed. Suede is even more delicate; it’s basically a texture that’s begging
you not to sand it. A Magic Eraser can leave a scuffed, faded area that doesn’t blend back in.
Do this instead: For leather, use a leather cleaner and a soft cloth, then condition afterward. For suede, use a suede brush and a
suede eraser designed for that materialdifferent tool, same concept, way less risk.
7) Electronics screens, TV panels, phone displays, and eyeglass lenses
Screens and lenses often have special coatings (anti-glare, oleophobic, scratch-resistant layers) that are not fans of abrasives. A Magic Eraser can
scratch the surface or strip coatings, leaving smears, haze, or a “permanent fingerprint” look that no amount of normal cleaning will fix.
Do this instead: Use a clean microfiber cloth. If needed, lightly dampen with distilled water or a screen-safe cleaner. For glasses,
use lens spray and a microfiber cloth made for eyewear.
8) Your car’s paint, clear coat, and glossy exterior trim
Cars look smooth because of their clear coat. Magic Erasers can dull or haze that layer, especially on darker paint where swirls show up easily.
The result can look like a “clean spot” at firstuntil you step back and realize you’ve created a matte patch on a glossy panel. Not ideal.
Do this instead: Use automotive soap, microfiber wash mitts, and proper detailing products. For scuffs on interior plastics,
choose a cleaner made for automotive interiors and a soft cloth.
Bonus “Proceed With Extreme Caution” Surfaces
Some materials live in the gray zone: acrylic (like some tub surrounds), soft plastics, laminate, vinyl plank flooring, coated fixtures, and certain
glass surfaces with protective coatings. Pros often avoid Magic Erasers here because discoloration, haze, or fine scratching can happen quickly.
If you’re tempted, test a hidden spot and use almost no pressurethen decide if it’s worth the risk.
The “Before You Swipe” Checklist (So You Don’t Regret It Later)
- Make it damp, not dripping: A wet eraser glides better; a dry one can be extra abrasive.
- Use feather-light pressure: Let the material do the workyour arm doesn’t need to bench press the stain.
- Test a hidden spot first: Inside a cabinet, behind an appliance, or a corner no one stares at.
- Stop if you see color transfer: If paint or finish shows up on the eraser, that’s your sign.
- Rinse/wipe after: Follow with a clean damp cloth, then dryespecially on metals and wood.
A Quick Word on Waste (Because the Eraser Doesn’t Magically Disappear)
Melamine sponges wear down as you use themthey literally shed tiny particles while scrubbing. If you want to reduce waste, cut one sponge into
smaller pieces and use only what you need for the job. And when you’re done, toss it in the trash rather than rinsing bits down the drain for fun.
So… What Should You Use a Magic Eraser For?
Magic Erasers shine on durable, non-delicate, non-coated surfaces where a little micro-abrasion is acceptable: sneaker rubber soles, stubborn scuffs
on certain low-sheen painted walls (carefully), some plastic outdoor furniture, and grime on textured surfaces that can handle gentle abrasion.
The secret is matching the tool to the surfacenot using it as a universal “delete button.”
Conclusion
The Magic Eraser is powerful, but it’s not harmless. If something has a finish, a coating, a shine, or a “do not use abrasives” vibe, step away from
the melamine foam and choose a gentler method. When you save the Magic Eraser for the right jobs, it really does feel like magicwithout the tragic
sequel: “Why Is This Spot Different Forever?”
Real-Life Experiences: The Stuff You Only Learn After One “Oops”
Ask enough cleaning pros about Magic Erasers and you’ll hear the same theme: everyone loves them… right up until the day they don’t. One housekeeper
described it like a relationship status update: “It’s complicated.” The first time a Magic Eraser saves you from a weird scuff that shouldn’t exist
(but absolutely does), you feel unstoppable. The second timewhen it quietly dulls a surface you can’t replaceyou start reading labels like you’re
studying for finals.
A common story goes like this: a client has a gorgeous stainless steel fridge that always looks smudgy. Someone decides to “quickly fix it” with a
Magic Eraser because it worked on a sink once. Under kitchen lighting, it looks fine. The next morning, sunlight hits the door at an angle and suddenly
there’s a faint cloudy rectangle where the finish looks slightly different. It’s not a deep scratch you can buff out easilyjust a soft haze that
catches the eye every single time you walk by. The pro lesson here is simple: stainless steel isn’t just metal; it’s a finish. Treat it like you
would a fancy countertop, not like a cast-iron skillet.
Another “classic” involves painted walls. Parents discover Magic Erasers and feel like they’ve unlocked a cheat code for crayon marks. Sometimes they
haveuntil they scrub one spot a little too enthusiastically and end up with a clean-but-dull patch that looks like a spotlight on the wall. The wall
isn’t dirty anymore, sure. But now it’s also uneven, and the only true fix is touch-up paint… which never quite matches the old paint… which becomes a
whole weekend project… which is how a tiny crayon mark turns into a home improvement saga.
Then there’s the “I tried it on stone” crowd. People see a stubborn ring or a dark smudge on a marble counter and want it gone now. A Magic
Eraser seems gentleuntil the sealant is compromised and the area starts grabbing stains more easily. Pros often say the regret isn’t immediate; it’s
delayed. The counter looks okay today, but a month later you notice that spot is suddenly more reactive to spills. That’s what makes surface damage so
sneaky: it doesn’t always announce itself with a loud scratch. Sometimes it shows up later as “why is this area always harder to clean now?”
My favorite cautionary tale is the electronics one, because it’s so relatable. Someone uses a Magic Eraser on a phone screen or TV panel thinking,
“I’m barely touching it.” And they probably are. But coatings don’t care how careful you feltthey care what touched them. The result can be a subtle
haze, a streak that never fully disappears, or a change in how fingerprints look on the screen. It’s the kind of problem that doesn’t break the device,
but it breaks your peace.
The “pro move” you hear over and over is boring but brilliant: test first, use almost no pressure, and stop early. If you’re thinking, “Just one more
scrub,” that’s usually the moment you should switch tools. Magic Erasers are best used like a spot treatment, not a full-surface strategy. Keep them for
the tough scuffs, the random grime in textured corners, and the tasks where a tiny bit of abrasion is acceptable. And when you find a surface that’s
precious, glossy, coated, or expensivechoose a microfiber cloth and the right cleaner instead. It’s less exciting, but it’s also how you avoid turning
a five-minute clean into an eternal reminder.





