
Table of Contents >> Show >> Hide
- Before You Start: Know Which GM System You Have
- Way 1: Use the Driver Information Center Relearn Menu
- Way 2: Program a Push-Button-Start GM Remote When You Still Have a Working Fob
- Way 3: Do the 30-Minute Relearn When No Recognized Remote Is Available
- Way 4: Use the Older Ignition-and-Chime Routine on Select Classic GM Models
- Way 5: Use a Dealer, Locksmith, or Retail Key-Programming Service
- Common Mistakes That Make GM Remote Programming Fail
- How to Tell Whether You Need Programming or Just Re-Syncing
- My Biggest Practical Lessons From GM Remote Programming
- Final Thoughts
- SEO Tags
If you have ever stared at a freshly bought GM key fob and thought, “How hard can this be?” the answer is: delightfully inconsistent. Programming a GM keyless remote can be easy, annoying, weirdly dramatic, or “guess I’m calling a locksmith now,” depending on your vehicle’s year, trim, and security system.
That is the big truth most articles skip. There is no single universal GM remote programming trick. A 2008 GMC Acadia does not behave like a 2019 Chevrolet Equinox, and neither of them thinks like an older Yukon with a classic ignition-and-chime routine. Some GM vehicles let you do everything yourself. Others will only cooperate if you already have a working fob. And a few will look at your DIY optimism and politely demand professional equipment.
This guide breaks down five real ways GM keyless remotes are programmed across different generations of Chevrolet, GMC, Buick, Cadillac, and older GM family vehicles. You will also learn how to figure out which route fits your car, what mistakes waste the most time, and how to avoid turning a ten-minute task into a driveway saga.
Important note: always verify your exact owner’s manual, FCC ID, and part number before you buy or program a remote. The wrong fob will not magically become the right one because you believed in it hard enough.
Before You Start: Know Which GM System You Have
Before you attempt anything, identify your setup. That one step saves more frustration than any clever shortcut.
Traditional key plus separate remote
Older GM vehicles often use a standard ignition key and a separate remote for lock, unlock, panic, or trunk release. Many of these use a relearn sequence through the Driver Information Center, the ignition switch, or a door-panel routine.
Keyless Access or push-button start
Newer GM vehicles often use a smart fob with proximity unlock and a push-button start. These usually rely on a transmitter pocket, backup location, or a start/stop-based learning sequence. Some require one working recognized fob. Some require two. Some allow a 30-minute relearn if all working remotes are gone.
Immobilizer-heavy modern systems
Some newer GM systems are less “DIY project” and more “security protocol with paperwork.” If your vehicle uses advanced anti-theft coding or does not offer a manual relearn path in the owner’s manual, you may need a dealer, locksmith, or specialized programming service.
Way 1: Use the Driver Information Center Relearn Menu
This is one of the cleanest at-home methods, and it shows up on certain older GM SUVs and crossovers. If your vehicle has a Driver Information Center that can display messages like Relearn Remote Key or Remote Key Learning Active, you may be in luck.
On these systems, the process usually goes something like this: put the vehicle in Park, scroll through the Driver Information Center until the relearn option appears, activate that menu, then press and hold the lock and unlock buttons on the remote at the same time until the vehicle confirms the match with a chime.
The beautiful part is that the car basically tells you what is happening. The slightly less beautiful part is that the menu names can vary a little, and timing matters. On some GM models, each new remote must be learned during that same session. Skip one, and the forgotten remote may stop working later.
This method is especially handy for vehicles that still feel modern but are old enough to let owners do useful things without a scan tool. If your dashboard menu is offering you a remote relearn function, accept the invitation.
Best for
Mid-2000s GM models with a DIC relearn screen, especially certain Acadia, Outlook, Yukon-era, and related platforms.
Watch out for
If the vehicle says all transmitters must be relearned, believe it. Programming one new remote may erase the old list. Do them all in one sitting.
Way 2: Program a Push-Button-Start GM Remote When You Still Have a Working Fob
This is the “things are still under control” method. Many push-button-start GM vehicles let you add a new remote if you already have at least one recognized transmitter. Some models require one working fob, while others require two recognized transmitters before the vehicle will allow another one to be added.
The usual formula is wonderfully GM-flavored: place the recognized fob or fobs in a specified spot, use the mechanical key in the driver-door lock cylinder a set number of times, wait for a Driver Information Center message such as Ready for Remote, place the new fob in the transmitter pocket or cupholder area, then press the start/stop button so the vehicle learns it.
This sounds intimidating on paper, but in practice it is manageable once you know where the transmitter pocket is. That last part matters more than people expect. Owners often assume the “pocket” is a literal little tray labeled KEY HERE. Sometimes it is hidden in the cupholder, center console, armrest storage area, or another backup location that feels like it was chosen during a corporate scavenger hunt.
If your GM vehicle still recognizes a working fob, this is usually the easiest time to make a spare. Do not wait until the original is lost, soaked, cracked, or dropped into a mysterious seat-rail dimension where all small objects go to retire.
Best for
Push-button-start GM vehicles where the owner’s manual specifically allows adding a remote with one or more recognized transmitters present.
Watch out for
You need the correct remote. The buttons can look identical while the internals are absolutely not identical. Match the part number and FCC ID, not just the vibes.
Way 3: Do the 30-Minute Relearn When No Recognized Remote Is Available
This is the method nobody wants to need, but everyone is glad exists. On some GM keyless-access vehicles, you can still program a remote even if no recognized transmitter is available. The catch is time. Lots of time. Usually about 30 minutes.
The structure is simple but slow. You use the mechanical key and the vehicle’s lock cylinder or ignition sequence to put the car into a pending learn mode, then wait through multiple ten-minute cycles. After the third wait, the system finally lets you teach the new remote in the transmitter pocket.
Why so long? Security. GM does not want a stranger to stroll up, push a few buttons, and casually adopt your vehicle. The extended wait is part of the theft-deterrent process. It is annoying, yes, but it is annoying for a reason.
This method is ideal when you bought a used GM vehicle with only one flaky remote and it finally quits, or when all working fobs have disappeared and you are trying to avoid towing the vehicle to a dealership. Still, patience is not optional. Interrupting the sequence, opening things at the wrong moment, or letting the vehicle battery get too weak can send you back to the beginning.
Best for
Certain push-button-start GM vehicles that explicitly describe a no-recognized-transmitter relearn procedure in the owner’s manual.
Watch out for
Not every market or model supports it. Some manuals even note limitations by country. Also, if the vehicle battery is weak, the whole process can become an endurance sport with no medal at the end.
Way 4: Use the Older Ignition-and-Chime Routine on Select Classic GM Models
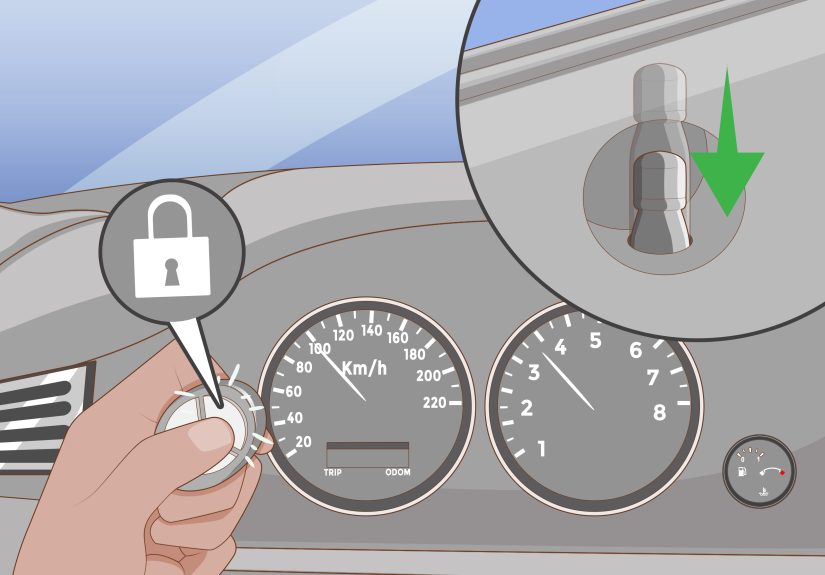
Some older GM trucks, SUVs, and sedans use what can only be described as a ceremonial sequence. You sit in the vehicle, keep the driver door unlocked, hold the unlock switch on the door panel, cycle the ignition in a specific pattern, wait for chimes, release the switch, then press and hold the lock and unlock buttons on the remote until the chimes confirm success.
If that sounds oddly specific, it is because older GM programming routines are basically tiny rituals. Miss one step and the vehicle responds with total silence, which is GM’s version of a judgmental stare.
The good news is that these routines can work well on the vehicles that were designed for them. The bad news is that people often try this method on the wrong generation because an online video said “works on GM cars.” That is how you lose an afternoon and gain a headache.
This path is most commonly associated with older full-size GM vehicles and certain remote-only setups rather than modern proximity smart keys. If your vehicle still has a classic keyed ignition and the remote is a simple lock-unlock-panic style unit, this kind of programming routine may apply.
Best for
Older GM vehicles with separate remotes and known ignition/door-switch programming procedures.
Watch out for
Do not assume all old GM vehicles use the same sequence. “Old GM” is a very large family tree with a lot of cousins who do things differently.
Way 5: Use a Dealer, Locksmith, or Retail Key-Programming Service
Sometimes the smartest DIY move is knowing when to stop DIY-ing.
If your GM remote will not program at home, your vehicle may need professional programming. That does not always mean the dealer, although the dealer is often the most straightforward option. A qualified automotive locksmith can often handle smart-key pairing, erase lost keys from memory, and program a compatible replacement on-site. Some national retail services and key centers also offer programming for select GM remotes.
This route makes sense when:
- you bought the wrong remote and need compatibility checked;
- your vehicle requires specialized diagnostic equipment;
- all keys are lost and the car will not enter a manual learn mode;
- the immobilizer, receiver, or remote itself may be faulty;
- you value your Saturday and your blood pressure.
Professional programming also tends to be safer when vehicle security is involved. A good locksmith or dealer can verify ownership, confirm the exact remote type, program it properly, and test every button before sending you back into the world feeling competent again.
Best for
Newer GM systems, lost-all-key situations, suspiciously stubborn vehicles, and anyone who wants certainty over experimentation.
Watch out for
Bring the vehicle, your identification, and any remaining remotes. Also ask whether all existing fobs must be present for programming. On many systems, the answer is yes.
Common Mistakes That Make GM Remote Programming Fail
Buying a look-alike remote
Two remotes can have the same button layout and still be electronically incompatible. Always match the exact part number, frequency, and FCC ID when possible.
Ignoring the battery
A weak fob battery can make a perfectly good programming session look broken. A weak vehicle battery can do the same thing, only with more drama.
Forgetting the transmitter pocket
On many push-button-start GM vehicles, the car wants the fob in a specific backup location during programming or when the battery is weak. Randomly waving the fob around the cabin is not a recognized GM procedure, no matter how persuasive the motion feels.
Programming only one remote
Some systems erase the old list and expect all remotes to be relearned in one session. If you have two fobs, bring both. If you have three, bring all three. This is not the moment for partial attendance.
Using a generic tutorial instead of your manual
GM built a lot of vehicles. Your exact model year matters. A procedure that works perfectly on a Buick LaCrosse may do absolutely nothing on a Chevrolet Traverse built a few years later.
How to Tell Whether You Need Programming or Just Re-Syncing
Sometimes a remote is not truly “unprogrammed.” It is just out of sync after a battery change or signal issue. On some older GM systems, re-synchronizing is much simpler than full programming. A remote may come back to life after a basic lock-and-unlock button hold near the vehicle.
That is why troubleshooting should start with the easy stuff: confirm the battery, verify the remote is correct, inspect for water damage or cracked buttons, and test whether the vehicle still sees the fob in the backup pocket. If the doors, panic alarm, or remote start still refuse to respond, then move on to a full programming procedure or professional help.
My Biggest Practical Lessons From GM Remote Programming
The first lesson is that GM remote programming is rarely hard because the individual steps are complicated. It is hard because the steps are picky. There is a difference. You are not rebuilding a transmission. You are just trying to convince a vehicle and a tiny piece of plastic to agree on a digital handshake. The problem is that both parties are extremely particular.
The second lesson is that owners often blame the procedure when the real problem is the remote itself. I have seen people repeat the same sequence five or six times, convinced they missed a timing window, when the actual issue was a mismatched aftermarket fob. The buttons looked right. The shell looked right. The listing online practically sang a love song about compatibility. But the internals were wrong, so the car responded with a firm and emotionless “no.”
The third lesson is that a fresh battery saves more time than any shortcut. A weak coin-cell battery inside the remote creates chaos. Sometimes the car sees the fob in the transmitter pocket but not from your hand. Sometimes the panic button works but lock and unlock act half asleep. Sometimes the remote starts behaving like it has a personal grudge. Replacing the battery before programming is one of those boring steps that prevents spectacularly boring failure.
Another lesson is that the transmitter pocket is always in the place you least expect after you have already looked in three wrong places. Owners check the cupholders, then the armrest, then the console, then the manual, then suddenly discover a tiny molded slot that was there the whole time. The moment you find it, you feel half victorious and half insulted.
I have also learned that timing and environment matter more than people think. A weak vehicle battery, an open door, a rushed button press, or a pause that is too long can kick you out of programming mode. That is why I always recommend doing the process slowly, with the manual open, with every remote present, and with zero confidence in your memory. Memory is how you end up restarting a 30-minute relearn because you were “pretty sure” the next step was to press lock twice.
Finally, the best lesson is this: make a spare while you still have a working remote. That is the golden rule. Programming a new GM keyless remote when one working fob still exists is usually manageable. Doing it after the last good fob disappears is when the task gets slower, more expensive, and much more creative in the worst possible way. The cheapest remote is often the one you program before you desperately need it.
Final Thoughts
Programming GM keyless remotes is not one job. It is a family of jobs. Some are quick and friendly. Some are slow and security-heavy. Some belong to the era of chimes and ignition cycles. Others live in the world of transmitter pockets and push-button starts. And a few would rather be handled by a pro with the right tools.
The trick is matching the method to the vehicle. Once you do that, the process becomes much less mysterious. Start by identifying your system, verifying the exact remote, changing the battery, and checking the owner’s manual. Then pick the right route instead of trying every route like you are speed-dating your dashboard.
Do that, and you stand a much better chance of ending the day with a working GM remote instead of a new hobby called yelling at door locks.





