
Table of Contents >> Show >> Hide
- Before You Start: The 3 Things That Make Soccer Players Hard (and Fixable)
- Way 1: The Simple Cartoon Soccer Player (Fast, Fun, and Shockingly Effective)
- Way 2: The Realistic “Construction” Method (Proportions + Structure, No Panic)
- Way 3: The Action-Pose Method (Gesture + Foreshortening for Real Game Energy)
- Way 4: The Stylized Illustration Method (Line Weight + Shading for a Poster Look)
- How to Practice Without Getting Bored (or Declaring War on Your Sketchbook)
- Experiences and Lessons Artists Commonly Share (Extra Practice Fuel)
- Conclusion
Drawing soccer players is one of those “looks easy until you try it” art challenges. You’ve got speed, balance, complicated uniforms,
and limbs that seem to teleport mid-kick. The good news: you don’t need to be born with a magical pencil. You need a plan.
This guide gives you four distinct approachesranging from quick cartoon sketches to dynamic, game-day action posesso you can pick the style
that matches your mood, your skill level, and how much patience you have left in your eraser.
Along the way, you’ll learn how to simplify the body into basic shapes, keep proportions believable, create movement that feels athletic,
and add details like jerseys, socks, shin guards, cleats, and the classic “I’m about to score” posture. Let’s build soccer-player drawings
that look like they belong on the pitchnot like they got lost on the way to a stick-figure convention.
Before You Start: The 3 Things That Make Soccer Players Hard (and Fixable)
1) Proportions shift when the body moves
A standing pose is basically a friendly math problem. A running pose is that math problem… on roller skates. When players bend, twist,
or lean, the torso compresses, the hips tilt, and the legs overlap in ways that can confuse your brain. The fix is to draw a simple
“structure” first (gesture + basic forms), then build the uniform and muscles on top.
2) Sports poses require clear weight and balance
Even in midair, a soccer player has a believable center of gravity. If your character looks like they’re falling over without meaning to,
it’s usually because the standing foot isn’t supporting the body, or the hips/shoulders aren’t angled in a natural way.
Think “athlete” not “wet noodle.”
3) Details can destroy the pose if you add them too early
Jersey numbers, logos, folds, and laces are fun… but they should come after the pose works. If you start with details, you risk
locking in a stiff body and then decorating the stiffness. (It’s like putting racing stripes on a shopping cart.)
Way 1: The Simple Cartoon Soccer Player (Fast, Fun, and Shockingly Effective)
This approach is perfect for beginners, kids, quick doodles, posters, and anyone who wants a clear soccer-player look without stressing
over anatomy. The secret is to exaggerate the “soccer clues”: dynamic stance, big socks/cleats, and a ball nearby.
Step-by-step build (using shapes)
- Start with the head: draw a circle (or slightly oval) and add a simple jaw line if you want a more “hero” look.
- Add a line of action: a single curved line showing the body’s main movementleaning forward for running, arcing back for a kick.
- Block the torso: use a rounded rectangle or bean shape. Slightly tilt it to match the line of action.
- Place the hips: a small oval below the torso. This helps you aim the legs correctly.
- Draw limbs as tubes: arms and legs are cylinders. Keep the thigh thicker than the calf.
- Make the “soccer socks”: long sock shapes (like tall boots) up to the knee. Add a band line at the top.
- Finish with cleats: keep shoes chunky and angled in the direction of movement.
- Add the uniform: jersey sleeves, shorts, and a number. (Numbers instantly say “player,” even in cartoon style.)
Cartoon pose ideas that always read as “soccer”
- The dribble: knees bent, torso forward, ball slightly ahead of the front foot.
- The pass: one leg planted, the other swinging across the body.
- The celebration: arms up, chest out, slight lean back (bonus points for confetti in your imagination).
Common cartoon mistakes (and quick fixes)
- Stiff stick limbs: bend elbows and knees a little. Athletes rarely stand perfectly straight.
- Flat feet: angle the foot like it’s contacting the ground. Add a simple sole line.
- Ball looks glued on: leave a small gap between the foot and ball unless you’re drawing contact.
Way 2: The Realistic “Construction” Method (Proportions + Structure, No Panic)
If you want your soccer player to look believablelike a real person in motionuse construction drawing. This means you build the figure
from a simple framework: gesture, basic volumes, then refined forms. It’s the drawing equivalent of assembling furniture with instructions
instead of vibes.
Step 1: Gesture first (30–60 seconds)
Lightly sketch the movement: a line of action, shoulder line, hip line, and the main direction of arms and legs. Keep it loose.
Your goal is energy and direction, not perfect anatomy.
Step 2: Use “big forms” for torso and pelvis
Think of the torso as two main blocks: the ribcage and the pelvis. They tilt against each other in sports poses (that twist is where
a lot of athletic energy lives). Add a neck cylinder and a head oval on top.
Step 3: Check proportions with a simple rule of thumb
A common classroom guideline is that an average adult figure is roughly seven to eight “heads” tall. You don’t need to measure perfectly,
but using head units keeps your player from becoming a long-limbed alienor a tiny-legged action figure in shin guards.
For many soccer poses, the crouch and bend will shorten the visible height, so focus on relative limb lengths: thigh roughly similar length
to the lower leg, and upper arm roughly similar length to the forearm.
Step 4: Build limbs as cylinders, then “wrap” muscles
Draw arms and legs as simple cylinders first. Then refine with muscle groups that matter most in soccer:
quadriceps (front thigh), hamstrings (back thigh), calves, and deltoids.
You don’t have to label them like a biology testjust indicate the major bulges and tapering.
Step 5: Add uniform details last
Soccer uniforms help you communicate the form with fewer lines. Use the jersey as a smooth shape over the ribcage and add folds
mainly where the body bends: under the armpits, around the waist, at the hip crease, and behind the knee. Socks and shin guards
create clean, sporty shapes that make the legs read clearly.
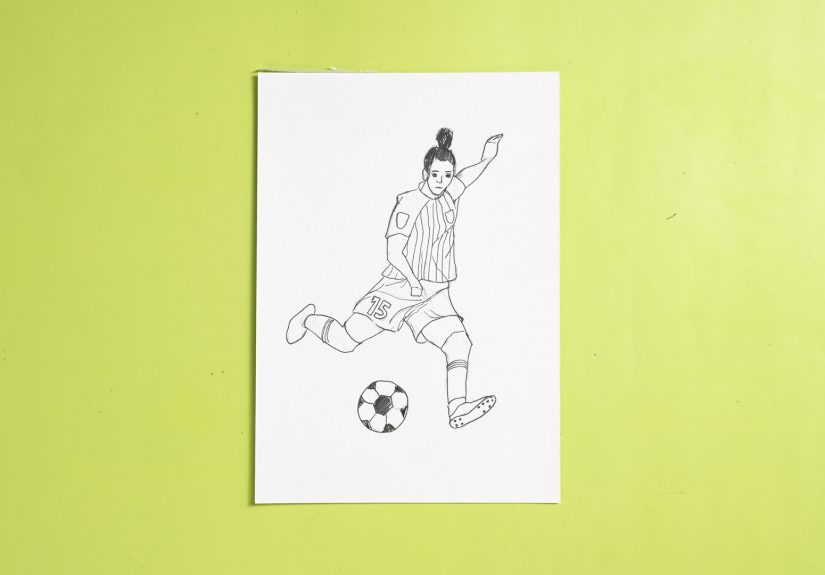
Example: Drawing a player lining up a shot
- Gesture: torso leaning slightly forward, one leg planted, kicking leg pulled back.
- Hips/shoulders: hips rotated slightly toward the ball; shoulders counter-rotate to balance.
- Focus point: make the planted foot and the ball area clean and readablethis is where the viewer looks first.
Way 3: The Action-Pose Method (Gesture + Foreshortening for Real Game Energy)
Soccer is motion: sprinting, pivoting, kicking, jumping, sliding, and changing direction in a heartbeat. To capture that,
you need two things: a strong gesture and a basic understanding of foreshortening (when a limb points toward the viewer and looks shorter).
This method is the difference between “a person standing near a ball” and “a striker about to break the internet.”
Step 1: Choose a clear “story moment”
Pick one action and commit. Don’t try to draw a player who is simultaneously kicking, turning, waving, and contemplating their life choices.
Good action drawings are specific: a volley, a header, a bicycle kick (ambitious!), or a goalie dive.
Step 2: Draw the line of action and “lean” the pose
Action poses usually have a dominant curve or angle. A sprint leans forward. A powerful kick often leans slightly back or sideways.
A header arcs the spine and lifts the chest. Put that main movement on the page first, then attach the body to it.
Step 3: Use overlaps to sell depth
Overlap is your best friend for motion. If the kicking thigh overlaps the torso, or the forearm overlaps the chest,
the drawing instantly feels more real. Try to avoid “paper-doll limbs” where every body part has its own personal space bubble.
Step 4: Simplify foreshortened limbs into forms
When an arm or leg comes toward the viewer, it visually compresses. Don’t panicsimplify it into a cylinder pointing in space.
The closer end appears larger; the farther end appears smaller. Add contour lines (like rings around the cylinder) to show direction.
This is especially helpful for a foot coming toward the camera (yes, it will look bigbecause perspective is rude like that).
Example: A dramatic kick toward the viewer
- Gesture: big sweeping curve from head through spine to the planted foot.
- Foreshortening: the kicking foot is closest to the viewer, so it’s larger and more detailed.
- Silhouette test: squint at your drawing. Can you still tell what the pose is? If not, separate the limbs more.
Quick action drills (10 minutes a day)
- 20 x 30-second gestures: capture movement onlyno faces, no jersey numbers, no drama.
- 5 x 2-minute gestures: add simple forms (ribcage/pelvis blocks + limb cylinders).
- 1 x 5-minute “hero pose”: pick your best gesture and develop it into a clean sketch.
Way 4: The Stylized Illustration Method (Line Weight + Shading for a Poster Look)
Want your soccer player to look like a graphic novel, a sports poster, or a logo-style illustration? Stylization is your lane.
You’ll rely on bold shapes, confident lines, and controlled shading instead of tiny details everywhere.
This method is also great if you enjoy inking or digital drawing.
Step 1: Design the silhouette first
A stylized drawing needs a strong outline. Aim for an instantly readable shape: bent legs, angled torso, arms placed to show motion.
If the silhouette looks good, the inside details can be simpler and still work.
Step 2: Use line weight like a spotlight
Vary your line thickness. Thicker lines can go on the shadow side or around the outside contour. Thinner lines can describe interior
details like jersey folds, sock bands, and facial features. This creates depth without over-rendering.
Step 3: Shade with intentional patterns
For a clean illustrated look, use hatching or cross-hatching instead of smudgy shading. Keep the direction of your hatch marks consistent
with the form (wrap the lines around the leg cylinder, for example). Save the darkest values for under the chin, under the arms,
between the legs, and under the shortsplaces where shadows naturally cluster.
Step 4: Stylize details that scream “soccer”
- Jersey number: big and bold, slightly curved over the fabric.
- Socks + shin guards: clean shapes that break up the leg.
- Cleats: simplified studs and a strong sole line.
- Ball: keep the pattern simple; emphasize the sphere with a shadow and a highlight gap.
Example style recipe: “Game Poster” look
- Gesture + construction sketch (light).
- Clean ink outline with varied line weight.
- Two-value shading: mid-tone hatch + dark hatch (limit yourselfrestriction improves consistency).
- One focal detail area (face or kicking foot), and let the rest stay simpler.
How to Practice Without Getting Bored (or Declaring War on Your Sketchbook)
Create a “soccer pose library”
Save or collect references of classic moves: dribbles, passes, shots, headers, goalie dives, throw-ins, celebrations.
Then practice drawing the same pose in different styles: cartoon one day, realistic construction the next, stylized ink after that.
You’ll learn faster because you’re comparing approaches on the same action.
Use the “start loose, end precise” rule
Many strong drawing routines follow the same rhythm: begin with looser marks, then tighten up as you understand the pose.
If you start tight, you tend to freeze. If you start loose, you stay flexiblelike the player you’re drawing.
Fix these three problems and your drawings level up fast
- Stiffness: exaggerate the line of action slightly, then dial it back if needed.
- Wobbly proportions: use head units or quick measuring comparisons (thigh vs calf, torso vs legs).
- Flat drawings: add overlaps and a simple shadow under the feet to anchor the player to the ground.
Experiences and Lessons Artists Commonly Share (Extra Practice Fuel)
If you talk to people who draw sports regularlystudents, hobbyists, illustrators, even the “I only doodle during meetings” crowdyou’ll
hear a funny pattern: everyone starts by trying to draw the uniform first. That usually lasts about five minutes. Then reality shows up
wearing cleats and says, “Cool jersey. Now where’s the body?” The shared lesson is simple: structure before style. The artists who improve
fastest treat the uniform like icing, not cake. Once you build a solid pose, the jersey almost draws itself.
Another common experience is the “mystery leg problem.” You draw one leg perfectly, you feel unstoppable, and then the second leg shows up
like a confusing plot twist. This happens because soccer poses often involve twists at the hips. A lot of artists report that the fix is
drawing the pelvis shape earlyjust a simple tilted oval or blockso both legs attach in a believable way. When the hips make sense, the
legs stop looking like they were added by a different person in a different timeline.
People also tend to remember their first attempt at an action kick. The foot comes toward the viewer, and suddenly the shoe looks gigantic.
Some beginners “correct” it by shrinking the foot… and then the perspective collapses. The more experienced artists say the breakthrough is
accepting foreshortening as a feature, not a mistake. If the foot is closest to the camera, it should be larger. The trick is to support
that perspective with overlaps (shin in front of the thigh, thigh overlapping the torso) and with a few contour lines that show direction.
Once you stop fighting the perspective, the pose starts to look cinematic instead of chaotic.
A lot of artists also share a surprisingly wholesome practice habit: drawing quick gestures during games. Not full portraits, not perfect
anatomyjust 20–40 second sketches of players running, turning, or celebrating. The reason it works is that soccer has clear, readable
movement patterns. You see repeated shapes: forward lean in sprints, knee lift, arms out for balance, quick hip rotations, and that classic
planted-foot stance before a shot. Over time, your brain builds a visual library. You start predicting the pose before the pose happens,
which makes you faster on paper.
Finally, there’s a shared “artist confidence” moment: the day someone realizes they can draw the same soccer player in multiple styles.
Cartoon version? Check. Realistic sketch? Check. Graphic ink poster? Also check. That’s when drawing stops feeling like a test and starts
feeling like a tool. The experience is empowering because it proves you’re not stuck with one “right” way. You can choose the method that
fits the projectkids’ workbook, sports blog illustration, team poster, storyboard, or just a fun sketchbook page. And if you’re having an
off day, the best method is the one that gets you drawing at all. Even a messy gesture is a winbecause it’s one more rep toward better
soccer-player drawings.
Conclusion
Soccer players are challenging to draw because they combine human anatomy, fast motion, and sporty detailsall at once. But when you break
the process into four clear methods, it gets a lot more manageable (and honestly, more fun). Start with a cartoon approach for speed,
use construction for realism, lean on gesture and foreshortening for action, and choose stylized line + shading when you want a bold,
illustrated finish. Pick one method today, draw four quick poses, and your sketchbook will start looking like a highlight reel.





