
Table of Contents >> Show >> Hide
- Before You Measure: A 60-Second Reality Check
- Way #1: Measure the Seat Tube (The Traditional “Frame Size” Number)
- Way #2: Use Inseam + Standover Height (The “Will This Bike Punch Me?” Test)
- Way #3: Compare Stack, Reach, and Effective Top Tube (The Modern Fit-First Method)
- Common Measuring Mistakes (So You Don’t Accidentally Buy a “Great Deal” in the Wrong Size)
- Quick Size Sanity Check: What a “Good Enough” Fit Feels Like
- Conclusion: Use All Three Methods for the Best Answer
- Real-World Experiences: What Riders Learn After Measuring (and Re-Measuring)
Buying (or adjusting) a bike is a lot like buying jeans online: the label might say “Medium,” but your knees know the truth. Bicycle “frame size” is real… and also a little slippery, because brands don’t always measure the same points the same way. The good news: you can measure a bike frame size in a few reliable ways that work whether you’re shopping online, buying used, or just trying to figure out why your current ride feels like a pogo stick with handlebars.
In this guide, you’ll learn three practical ways to measure a bicycle frame size: (1) the traditional seat-tube number, (2) inseam and standover clearance (aka “crotch confidence”), and (3) geometry metrics like stack and reach that cut through marketing fog. You’ll also get specific examples, quick sanity checks, and a “real-world experiences” section at the end that sounds like it came from the group chat after a weekend ride.
Before You Measure: A 60-Second Reality Check
“Frame size” often refers to the seat tube length (the tube the seatpost slides into), measured from near the bottom bracket area up toward the top tube. But many bike brands and bike types treat sizing differentlysome use centimeters, some use inches, and many mountain bikes live in the land of S/M/L. Even within the same category, a “56 cm” in one model can feel totally different in another, especially with modern sloping top tubes and longer cockpits.
That’s why the best approach is to measure frame size with more than one method. Think of it like checking the weather: you don’t rely on one appunless you enjoy being surprised by rain.
Way #1: Measure the Seat Tube (The Traditional “Frame Size” Number)
This is the classic method and the one most people mean when they say “What size is that bike?” You measure the seat tube and get a number like 54 cm (common for road bikes) or 17 inches (often used historically for mountain bikes). It’s helpfuljust not the whole story.
What you’ll need
- A tape measure (a rigid measuring tape is easier than a floppy one).
- A notebook or phone to record results.
- Optional: a straight edge or level (helpful for consistency).
Step-by-step: how to measure seat tube length
- Stand the bike upright on level ground. If it’s a wobbly friend, lean it gently against a wall.
- Find the bottom bracket area (where the crank/pedals attach). Many sizing measurements start from the center of the bottom bracket.
- Locate the seat tube (the tube running upward from the bottom bracket to the saddle/seatpost).
- Measure from the center of the bottom bracket straight up along the seat tube to one of these endpoints:
- Center-to-Top (C-T): up to the top of the seat tube (near the seatpost clamp).
- Center-to-Center (C-C): up to the center of the top tube/seat tube junction (more common on older frames).
- Write down which method you used (C-T or C-C). This matters because the same bike can “change sizes” depending on the endpoint.
Example: why the endpoint matters
Let’s say your tape measure reads 56 cm from the bottom bracket to the very top of the seat tube (C-T). If the top tube meets the seat tube a bit lower, the C-C measurement might be 54 cm. That’s not you measuring wrongthat’s the bike being a bike.
When seat tube measurement works best (and when it doesn’t)
- Works best: older road bikes with more level top tubes, many traditional sizing systems, quick comparisons within a similar category.
- Less reliable: modern mountain bikes with long reach/short seat tubes, bikes sized primarily by S/M/L, frames with aggressive sloping top tubes, and brands using “fit-first” geometry approaches.
Bottom line: seat tube measurement is a solid starting point, but it doesn’t always predict how the bike feels when you’re actually riding.
Way #2: Use Inseam + Standover Height (The “Will This Bike Punch Me?” Test)
If you’re shopping online or trying a bike in person, standover height is a practical, confidence-boosting metric. It tells you how much clearance you’ll have when standing over the bike with your feet on the ground. It’s especially useful for commuters, beginners, and anyone who enjoys dismounting without drama.
Step 1: measure your inseam accurately (yes, with a book)
Your inseam for bike sizing is the distance from the floor to your crotchmeasured in a way that mimics how a saddle supports you. The easiest method uses a thick book (or a similarly shaped object).
- Stand with your back against a wall, feet about shoulder-width apart.
- Place a thick book between your legs, spine up, and lift it snugly until it presses firmly (like a saddle would).
- Mark the top of the book against the wall (or have a helper mark it).
- Measure from the floor to the mark. That’s your inseam.
- Repeat once or twice. If the numbers vary a lot, your book is telling on you (or you’re not pressing it consistently).
Step 2: understand standover height and how to compare it
Standover height is typically measured as a vertical distance from the ground to the top tube around its midpointbasically where you’d stand over the bike when stopped. With modern frames, top tubes slope, so the midpoint matters more than “near the seat tube.”
How much clearance do you need?
A common rule of thumb:
- Road bikes: about 1 inch of clearance between inseam and standover.
- Mountain, touring, hybrid/comfort bikes: about 2 inches of clearance.
Why more clearance off-road? Because trails love surprise dismounts.
Example: quick standover check
If your inseam is 30 inches, you might look for:
- A road bike with roughly 29-inch standover height (about 1 inch clearance).
- A mountain or hybrid bike with roughly 28-inch standover height (about 2 inches clearance).
Important standover caveats
- Standover isn’t everything: you can have perfect clearance but still feel stretched out or cramped when seated.
- Women’s/unisex geometries vary: some frames lower standover by design, which can be greatjust confirm cockpit fit too.
- Tire size affects standover: larger tires and sagged suspension can change real-world height slightly.
Think of standover as the “no-regrets” filter: it helps you avoid bikes that are obviously too tall, especially when buying sight unseen.
Way #3: Compare Stack, Reach, and Effective Top Tube (The Modern Fit-First Method)
If seat tube length is the old-school “shoe size,” then stack and reach are the foot measurements that tell you whether the shoe fits your actual foot. These geometry numbers help you compare sizing across brandsespecially on modern mountain bikes and many gravel bikes, where “frame size” labels don’t tell the full story.
What stack and reach actually mean (without making your eyes glaze over)
- Reach: a horizontal measurement from the bottom bracket area to the head tube area, describing how long the bike feels when you’re standing and riding aggressively (especially relevant on mountain bikes).
- Stack: the vertical height of the front end relative to the bottom bracket, influencing how upright or low your position feels.
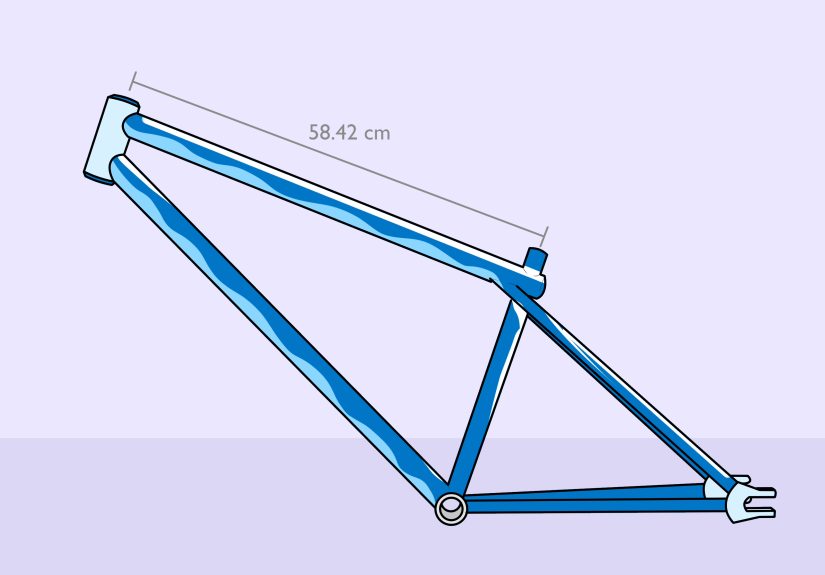
- Effective top tube (ETT): a horizontal “virtual” top tube length that helps represent seated fit even on sloping top tubes.
In plain English: reach is “how far forward the bars are,” stack is “how high the bars want to be,” and ETT is “how long it feels when you’re seated.”
How to use stack and reach to size a bike (even if you don’t own a geometry lab)
- Start with a brand’s size chart based on height/inseam to get into the right neighborhood.
- If you’re between sizes, compare the bike’s reach and stack numbers to a bike you know fits you well (or to a professional fit recommendation).
- Decide your priority:
- More stable, roomier feel: slightly longer reach (often sizing up).
- More nimble, easier handling: slightly shorter reach (often sizing down).
- Use effective top tube as a cross-check for seated comfort, especially on drop-bar bikes.
Why this method is especially useful for mountain bikes
Many modern mountain bikes are designed around how they feel when you’re standing on the pedals, not just seated and spinning. That’s why reach is often treated as a key sizing metric. Some brands even emphasize “rider size and style” rather than inseam-first sizing, letting riders choose a more playful or more stable feel by selecting a shorter or longer reach within their height range.
A practical “compare your current bike” trick
If you already have a bike that fits reasonably well, you can capture a few cockpit measurements as a reference:
- Saddle height (bottom bracket to top of saddle along the seat tube line).
- Saddle-to-bar distance (tip of saddle to center of handlebar clamp, measured horizontally).
- Saddle setback (how far the saddle nose sits behind the bottom bracket line).
These aren’t perfect substitutes for stack/reach, but they help you avoid buying a bike that puts the bars in the next zip code.
Common Measuring Mistakes (So You Don’t Accidentally Buy a “Great Deal” in the Wrong Size)
- Mixing up centimeters and inches: 54 cm is not 54 inches unless you’re riding a bicycle built for a dinosaur.
- Not noting C-T vs C-C: seat tube measurements can differ depending on endpointalways record which one you used.
- Using inseam from pants size: denim lies. Use the book method for bike fit.
- Ignoring geometry on modern bikes: a “Medium” can feel radically different across models depending on reach and stack.
- Forgetting intended use: a racy road fit may feel too stretched for commuting; a super-upright fit may feel sluggish for fast group rides.
Quick Size Sanity Check: What a “Good Enough” Fit Feels Like
These aren’t lab testsjust practical cues:
- Standover: you can stand over the bike without panic, with the clearance ranges above as a guide.
- Seated reach: you can comfortably hold the bars without locking your elbows or feeling like you’re doing a plank.
- Handling: the bike feels controllable at low speed (parking lot turns are revealing) and stable at your normal riding pace.
- No “hot spots” quickly: if the bike makes your hands, neck, or lower back angry in the first few minutes, sizing may be off.
Conclusion: Use All Three Methods for the Best Answer
If you only remember one thing, make it this: measuring a bicycle frame size works best in layers. Start with the traditional seat tube number for a baseline. Confirm standover and inseam to avoid obvious mismatches. Then use stack/reach (and effective top tube) to dial in how the bike will actually feel when you ride it.
Do that, and you’ll spend less time second-guessing size charts and more time ridingideally in comfort, and without accidentally purchasing a bike that doubles as a medieval stretching device.
Real-World Experiences: What Riders Learn After Measuring (and Re-Measuring)
Here’s something that comes up again and again: people measure once, feel confident, buy the bike… and then realize sizing is more like cooking than math. You can follow a recipe perfectly and still end up thinking, “Why does this feel off?” That’s not failureit’s just how bodies and bicycles interact.
One common experience is the “between sizes” dilemma. Riders who land right on the border of two sizes often discover that the best choice depends on their riding style. If you want a bike that feels quick to turn and easy to maneuverespecially on tight trails or in city trafficyou might prefer the smaller option. If you crave stability on fast descents, longer rides, or chunky terrain, the larger option can feel calmer and more planted. Many riders end up picking based on handling personality, not just their height.
Another classic: switching bike types makes your old sizing assumptions feel outdated overnight. Someone who rode a “56 cm” road bike for years can hop on a modern gravel bike labeled “Large” and feel like the cockpit is longer even though the sticker sounds familiar. That’s where stack and reach become the peacekeepers. Riders often say the moment they start comparing geometry instead of labels is the moment sizing stops feeling like superstition.
Used-bike shopping has its own set of adventures. Sellers may list a frame size as whatever they were told at purchase (“It’s a 54, I swear”), but the measurement could be center-to-center, center-to-top, or… vibes-based. Riders who bring a tape measure and calmly confirm seat tube length, then double-check standover with their inseam, tend to avoid the most expensive kind of bargain: the one you have to resell immediately.
There’s also the “standover surprise.” Riders sometimes obsess over standover clearance, then realize their real discomfort comes from being too stretched out or too cramped when seated. This is especially common on bikes with sloping top tubes: standover can look generous even when the reach is long. Many riders report that once they check reach (or effective top tube on drop-bar bikes), the confusion clears up fast.
Finally, people often discover that fit isn’t a single measurementit’s a system. Small changes can save a borderline size: a shorter stem, different bar rise, moving the saddle slightly, or adjusting saddle height can transform a “maybe” into a “yes.” The best experience is when measurements get you close, and then minor adjustments make the bike feel like it’s cooperating instead of negotiating.





