
Table of Contents >> Show >> Hide
- What Is Thatch, Exactly?
- How to Tell If Your Lawn Needs Dethatching
- What Causes Excess Thatch?
- Best Time to Dethatch a Lawn
- Dethatching Tools: Which One Should You Use?
- How to Dethatch a Lawn Step by Step
- What to Do After Dethatching
- Dethatching vs. Aerating: Which One Does Your Lawn Need?
- Common Dethatching Mistakes to Avoid
- How to Prevent Thatch from Coming Back
- Final Thoughts
- Experience-Based Advice: What Dethatching Really Feels Like in Real Life
- SEO Tags
If your lawn feels a little like a sponge cake that went to gardening school, you may be dealing with thatch. A small layer of thatch is normal, even helpful. But when it gets too thick, it blocks water, air, and nutrients from reaching the soil and roots. That is when your lawn starts acting dramatic: patchy growth, shallow roots, more stress during heat, and a general “I am not thriving” vibe.
The good news is that dethatching is not mysterious. It is simply the process of removing excess organic buildup from between the grass blades and the soil surface. The trick is knowing when to do it, how to do it, and whether your lawn actually needs it in the first place. In this guide, you will learn how to dethatch a lawn the smart way, avoid common mistakes, and help your turf recover without turning the yard into a hayfield with commitment issues.
What Is Thatch, Exactly?
Thatch is the dense layer of living and dead stems, roots, rhizomes, stolons, and other tough plant material that builds up between the green grass and the soil surface. It is not mainly grass clippings, despite that rumor being passed around lawns for decades like bad backyard gossip. When grass is mowed properly, clippings break down quickly and generally do not cause thatch problems.
A little thatch is beneficial. It can cushion foot traffic, help moderate soil temperature, and reduce moisture loss. The problem starts when the layer becomes too thick. As a rule of thumb, if the thatch is more than about half an inch thick, it is time to pay attention. At that point, roots may start growing into the thatch layer instead of the soil, and the lawn becomes more vulnerable to drought, disease, insects, and temperature stress.
How to Tell If Your Lawn Needs Dethatching
Before you rent a machine that looks like it belongs in a turf-themed action movie, confirm that dethatching is actually necessary. Not every struggling lawn needs to be power-raked. Sometimes the issue is compacted soil, poor drainage, or plain old neglect.
Look for these signs
- The lawn feels spongy or springy underfoot.
- Water runs off instead of soaking in.
- The grass dries out quickly even after watering.
- The lawn has thin spots, patchy growth, or increased disease pressure.
- You can see a brown, fibrous layer between the green grass and the soil.
Do the wedge test
Use a spade or knife to cut a small wedge-shaped section out of the lawn. Look at the cross-section and measure the thatch layer. If it is under half an inch, your lawn probably does not need aggressive dethatching. If it is over half an inch, especially close to one inch, dethatching or aeration may be worth the effort.
What Causes Excess Thatch?
Thatch forms when tough plant material builds up faster than soil organisms can break it down. That often happens because of a mix of grass type, soil conditions, and lawn-care habits.
Common causes of thatch buildup
- Too much nitrogen fertilizer, especially if it pushes fast, lush top growth.
- Overwatering or frequent shallow watering.
- Soil compaction, which limits oxygen and microbial activity.
- Heavy clay soil or poor drainage.
- Improper mowing height or mowing too infrequently.
- Creeping grasses such as Kentucky bluegrass, bermudagrass, and zoysiagrass, which tend to produce more stems and runners.
One of the most useful lawn truths is this: dethatching removes the symptom, but fixing mowing, watering, and soil conditions prevents the problem from coming right back like an unwanted sequel.
Best Time to Dethatch a Lawn
Timing matters. Dethatching is stressful for grass because it tears into the turf and can expose roots and crowns. You want to do it when the lawn is actively growing and can recover quickly.
For cool-season grasses
If you grow Kentucky bluegrass, perennial ryegrass, or fine fescue in northern or transition-zone lawns, the best time to dethatch is late summer to early fall. Early fall is ideal because the grass is growing well, weed pressure is often lower, and the lawn has time to recover before winter. In some regions, early spring can also work, but fall usually gives better recovery conditions.
For warm-season grasses
If you have bermudagrass, zoysiagrass, centipedegrass, or St. Augustinegrass, dethatch in late spring to early summer after green-up, when the lawn is actively growing. Do not dethatch warm-season turf while it is dormant, barely waking up, or struggling through extreme heat and drought. That is a recipe for a lawn that files a complaint.
When to wait
Do not dethatch during drought, extreme heat, or when the lawn is already weak from disease, insect damage, or poor root growth. If the turf is stressed, give it a chance to recover first. In many cases, core aeration is the gentler and more useful first move.
Dethatching Tools: Which One Should You Use?
Thatching rake
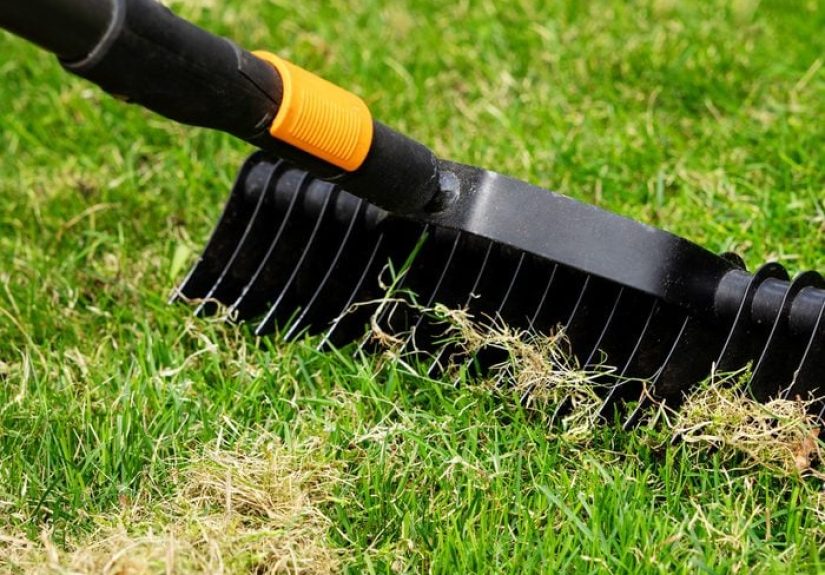
A dethatching rake works best for small lawns or spot treatment. It has curved, sharp tines that pull up the thatch by hand. It is affordable, effective for light buildup, and excellent exercise if you enjoy waking up the next day and discovering muscles you forgot existed.
Power rake or dethatcher
For medium to large lawns, a power rake or machine dethatcher is much faster. These machines use rotating tines or blades to lift and loosen the thatch layer. They can be rented from hardware stores and equipment centers.
Vertical mower or verticutter
A vertical mower uses straight blades to slice through thatch and lightly into the soil. This is one of the most effective tools for heavy buildup. It also creates grooves that can help with overseeding on cool-season lawns. The downside is that it can be aggressive, so blade depth and spacing need to be set correctly.
Core aerator
Strictly speaking, aeration is not the same as dethatching, but it often belongs in the same conversation. If your lawn has soil compaction, heavy clay, or chronic thatch, core aeration may be the better long-term solution. It improves oxygen flow, drainage, and microbial activity, all of which help break down thatch naturally over time.
How to Dethatch a Lawn Step by Step
1. Mow slightly lower than usual
A day or so before dethatching, mow the lawn a bit shorter than normal, but do not scalp it. Shorter grass makes it easier for the machine or rake to reach the thatch layer. Bag the clippings if needed so you are not adding surface debris to the chaos.
2. Lightly water the lawn
The soil should be slightly moist, not soaked. A lightly moistened surface helps the tines or blades work through the lawn more effectively. Wet, muddy soil makes a mess, while bone-dry soil can make the process harder on both the machine and the turf.
3. Mark obstacles and irrigation parts
Before using a rented machine, mark sprinkler heads, shallow irrigation lines, invisible dog fences, edging, and any other hidden surprises. This is not a thrilling step, but it is dramatically better than discovering your sprinkler system by sound.
4. Set the machine correctly
If using a vertical mower or power rake, adjust the depth so it reaches the thatch layer and, if needed, just lightly touches the soil. Too shallow and you accomplish very little. Too deep and you may shred healthy turf. When in doubt, test a small area first and inspect the results.
5. Make one pass, then evaluate
Run the machine across the lawn in straight lines. For lawns with heavier buildup, a second pass at a right angle may help, but do not assume more passes are always better. Some grasses, especially centipedegrass and St. Augustinegrass, can be injured by overly aggressive treatment. Let the lawn’s condition guide you.
6. Rake up the debris
Once the thatch is loosened, rake or bag the debris and remove it from the lawn. There will be more of it than you expect. Probably much more. Enough to make you briefly wonder whether your lawn was actually a compost heap wearing a green disguise. Composting the debris is often a smart option if the material is free of weeds and disease issues.
7. Water thoroughly after dethatching
After the process, water the lawn well to reduce stress and keep exposed roots from drying out. Recovery depends on moisture, active growth, and not panicking when the yard looks rough for a short while. A dethatched lawn often looks worse before it looks better.
What to Do After Dethatching
Post-dethatching care is where a lot of lawns are made or broken. You have opened the turf, disturbed the surface, and exposed weak areas. Now help the lawn recover instead of leaving it to sort out its feelings alone.
Overseed thin cool-season lawns
If you dethatch a cool-season lawn in early fall, overseeding is often a smart next step. The grooves created by vertical mowing help improve seed-to-soil contact. Spread the right grass seed for your region, rake lightly if needed, and keep the area moist during germination.
Fertilize carefully
A light feeding can help recovery, but do not overdo it. Too much nitrogen is one of the reasons thatch builds up in the first place. Use a sensible application rate for your grass type and season, and follow local extension guidance or label directions.
Aerate if compaction is part of the problem
If the soil is compacted or drainage is poor, core aeration after dethatching can improve oxygen movement, infiltration, and root growth. In many lawns, aeration is what keeps the thatch from returning with suspicious speed.
Resume proper mowing and watering
Once the lawn begins recovering, mow at the recommended height for your turf type and avoid removing more than one-third of the blade at a time. Water deeply and less frequently rather than giving the lawn constant shallow sips. Grass is not a houseplant with a dramatic thirst schedule.
Dethatching vs. Aerating: Which One Does Your Lawn Need?
Homeowners often confuse these two jobs, and that is understandable because both involve noisy rental equipment and a strong sense of weekend ambition.
Choose dethatching when
- The thatch layer is clearly thicker than half an inch.
- The lawn feels spongy underfoot.
- Water has trouble reaching the soil because of surface buildup.
- You need to physically remove a dense mat of stems and runners.
Choose aeration when
- The soil is compacted.
- Water puddles or runs off because the ground is tight.
- The lawn has clay soil or heavy foot traffic.
- You want a gentler, long-term way to reduce thatch and improve roots.
In some cases, the right answer is both. A lawn with thick thatch and compacted soil may need dethatching to remove the buildup and aeration to improve the conditions that caused it.
Common Dethatching Mistakes to Avoid
- Dethatching too often: Most lawns do not need it every year. Only dethatch when the thatch layer is excessive.
- Doing it at the wrong time: Dormant or stressed grass recovers poorly.
- Going too deep: Aggressive settings can rip out healthy grass crowns and roots.
- Ignoring grass type: Some species tolerate multiple passes better than others.
- Skipping cleanup: Leaving debris on the lawn slows recovery and looks awful.
- Not fixing the cause: Overwatering, compaction, and excess fertilizer will rebuild thatch faster than you think.
How to Prevent Thatch from Coming Back
The best dethatching strategy is not needing to dethatch often.
Use these prevention habits
- Mow at the proper height for your grass type.
- Never remove more than one-third of the blade in one mowing.
- Water deeply and infrequently instead of little and often.
- Fertilize moderately, not like you are trying to launch the lawn into orbit.
- Core-aerate compacted lawns in spring or fall, depending on grass type and climate.
- Address drainage, pH, and soil-quality issues when they are part of the problem.
Healthy soil biology helps break down organic matter before it becomes a problem. That means your real long-term ally is not just the dethatcher. It is better lawn management across the whole season.
Final Thoughts
Dethatching can do wonders for a tired, spongy lawn, but it is not something to do just because you feel like renting a loud machine and making dramatic stripes in the yard. Start by measuring the thatch layer. If it is truly excessive, choose the right season, match the method to your grass type and lawn size, and plan for recovery with watering, overseeding, and smarter maintenance afterward.
Done correctly, dethatching opens the door for better air movement, stronger rooting, improved water penetration, and a healthier lawn overall. Done carelessly, it can leave your yard looking like it lost a fight with a rake. Timing, moderation, and follow-up care are what separate a lawn refresh from a lawn crisis.
Experience-Based Advice: What Dethatching Really Feels Like in Real Life
Here is the part many how-to guides skip: dethatching is satisfying, messy, and occasionally humbling. On paper, it sounds simple. You remove excess buildup, rake the debris, water, and move on. In real yards, the experience often starts with confidence and ends with a surprising mountain of brown material piled at the curb while you stare at it like, “This came out of my lawn?” Yes. Yes, it did.
One common experience is that homeowners underestimate how aggressive dethatching looks. Right after the job, the lawn can appear thin, torn, and frankly offended. That reaction is normal. People often assume they ruined the turf, especially after using a rented machine for the first time. In many cases, the lawn is just going through a brief ugly phase before recovery begins. If the timing was right and the grass was actively growing, you usually start to see improvement within the next stretch of favorable weather.
Another real-world lesson is that small adjustments make a big difference. People who mow a little lower first and lightly water the lawn before dethatching generally report smoother results. People who skip those prep steps often say the machine either bounces across the surface or digs too aggressively. The same is true for machine settings. The smartest users test a small area first instead of charging ahead like they are taming a wild frontier. That tiny test patch can save a lot of regret.
There is also a practical difference between lawns with simple thatch buildup and lawns with deeper soil problems. If your yard has heavy clay, poor drainage, or constant foot traffic, dethatching alone may feel like a short-term fix. Many homeowners find that the lawn improves more noticeably when dethatching is paired with core aeration and better watering habits. In other words, the lawn was not just choked by thatch. It was also dealing with compacted soil and weak root conditions behind the scenes.
Warm-season lawns and cool-season lawns can create very different experiences too. Bermudagrass and zoysia often bounce back strongly when dethatched at the proper time, but they can also produce a shocking amount of debris. Cool-season lawns, especially bluegrass-heavy ones, may benefit greatly from early-fall dethatching followed by overseeding. That combination often gives homeowners the most dramatic “before and after” turnaround because the lawn comes back thicker, greener, and more even.
Perhaps the biggest experience-based takeaway is emotional, not technical: do not judge the lawn too early. Right after dethatching, it may look rough enough to make you question every life choice that brought you to this weekend. Give it water, give it time, and stick to proper follow-up care. Lawns are resilient when the timing is right. The best results usually go to people who treat dethatching as part of a larger lawn recovery plan, not a one-day miracle cure. Think of it less as a magic trick and more as turf rehab with better shoes.





