
Table of Contents >> Show >> Hide
- Start by Identifying the Type of Plastic Damage
- Clean First, Repair Second
- The Easiest Fixes for Light Plastic Scratches
- How to Handle Deeper Scratches Without Filler
- Simple Ways to Fill Plastic Scratches That Are Actually Deep
- Can You Use Acetone to Smooth Scratches?
- How to Make the Repair Look Better After Filling
- Common Mistakes to Avoid
- Which Repair Method Is Best?
- Conclusion
- Practical Experiences and Real-World Lessons From Plastic Scratch Repair
Plastic scratches are like mosquitoes at a cookout: tiny, annoying, and somehow impossible to ignore once you notice them. They show up on everything from appliance panels and storage bins to car trim, helmet visors, acrylic organizers, and outdoor furniture. The good news is that many scratches can be improved without replacing the item. The even better news is that the right fix is usually simple once you know what kind of scratch you are dealing with.
Here is the first truth bomb: not every plastic scratch should be “filled.” Very light scratches are often better polished out. Medium scratches may need wet sanding and polishing. True gouges, chips, or low spots usually need an actual filler, repair compound, or touch-up coating. In other words, if the scratch is shallow, polish it. If it is deep enough to catch a fingernail, it may need to be filled or rebuilt. That one little test can save you time, money, and an unnecessary relationship with a tube of epoxy.
Start by Identifying the Type of Plastic Damage
Before you grab sandpaper and channel your inner restoration wizard, figure out what you are repairing. Plastic scratches fall into three broad categories:
1. Surface scuffs and hairline scratches
These usually affect the top layer only. They are common on glossy hard plastics, clear plastics, and appliance surfaces. These often respond well to plastic polish, mild abrasives, or very fine wet sanding.
2. Moderate scratches that dull the surface
These are deeper than a scuff but not quite a crater. They may still be repairable with progressive sanding, polishing, or multiple passes of a scratch-removal product. If the area looks cloudy rather than gouged, it often means the surface needs leveling more than filling.
3. Deep scratches, gouges, chips, and missing material
This is where fillers earn their paycheck. If the damage leaves a visible trench, pit, or low spot, you will likely need a plastic-safe repair compound, epoxy putty, flexible filler, or touch-up epoxy coating.
Clean First, Repair Second
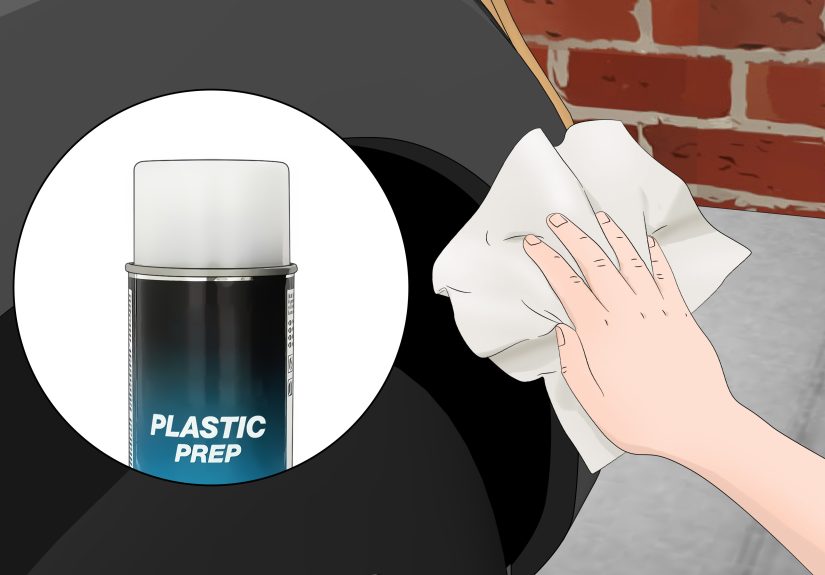
If there is one step DIYers love to rush, it is cleaning. Unfortunately, plastic repair hates that. Dirt, wax, oil, silicone, and cleaner residue can keep fillers from sticking and can also grind fresh scratches into the surface while you work. So before you repair anything, wash the area with mild soap and water, dry it completely, and remove any greasy residue. Use a soft microfiber cloth rather than a rough rag that looks like it has been through three garage sales and a barbecue.
For clear or glossy plastic, be gentle. Wiping hard while dust is still on the surface can actually make the scratch pattern worse. Blow away loose dust first or lift it off with a clean microfiber cloth. Think of it as preparing the stage before the starring role of repair begins.
The Easiest Fixes for Light Plastic Scratches
If the scratch is faint and only visible in certain light, start with the least aggressive option. This matters because plastic is softer than many people realize, and going too aggressive too early can turn one scratch into a frosted patch.
Use a Plastic Polish or Fine Scratch Remover
A dedicated plastic polish is usually the safest first move for hard or clear plastic. Apply a small amount to a soft cloth and work across the scratch with light to moderate pressure. Then buff the entire area so the sheen looks even. This works especially well on clear plastic covers, acrylic organizers, headlight lenses, and glossy trim.
The goal here is not to stuff material into the scratch. It is to gently level the surrounding surface and restore clarity. That is why polishes often work better than random household hacks when appearance matters.
Try Toothpaste or Baking Soda for Minor Marks
Yes, the toothpaste trick is real, though it is best for very minor scratches and not for major damage. A non-gel toothpaste or a baking soda paste can act as a mild abrasive. Rub it in gently with a soft cloth using small circular motions, then rinse and inspect the surface. It is a budget-friendly option, but it is not magic. If the scratch laughs in the face of toothpaste, move on.
How to Handle Deeper Scratches Without Filler
Once you move past light scuffs, the repair becomes more about leveling the surface. This is where wet sanding enters the chat like a competent friend who brings actual tools.
Wet Sand the Scratch
For moderate scratches, soak wet/dry sandpaper in water and work gradually. Start around 800 grit if the scratch is noticeable, then move to 1000, 1500, and up to 2000 grit as needed. Keep the surface wet, use light pressure, and stop frequently to inspect your progress. The water helps carry away debris and reduces the risk of cutting new scratch marks into the plastic.
After sanding, polish the area to restore shine. This final step matters because sanding removes the scratch by dulling the surrounding surface first, and polishing brings the finish back to life.
When This Works Best
- Clear plastic storage boxes
- Acrylic display pieces
- Headlight lenses
- Glossy hard-plastic panels
- Decorative plastic covers
If the scratch is still visibly low after sanding, it is no longer just a scratch-removal job. It is now a filling job.
Simple Ways to Fill Plastic Scratches That Are Actually Deep
Now we get to the main event. If the scratch has depth, here are the simplest ways to fill plastic scratches depending on the type of item and the kind of plastic involved.
Option 1: Use Epoxy Putty for Rigid Plastic Gouges
Epoxy putty is one of the best choices for deeper scratches or small gouges in rigid plastic. It is moldable, easy to press into low spots, and can usually be sanded and painted after it cures. This makes it ideal for utility items, housings, plastic panels, bins, trim pieces, and non-flexing surfaces.
How to do it:
- Clean and dry the area thoroughly.
- Lightly roughen the scratch with fine sandpaper so the putty can grip.
- Mix or knead the epoxy putty according to the product instructions.
- Press a small amount into the scratch or gouge.
- Use a plastic spreader or gloved finger to level it slightly proud of the surface.
- Let it cure fully.
- Sand smooth with fine grit paper and polish or paint if needed.
This is especially effective when the goal is to rebuild missing material rather than simply hide a blemish. It is not the best match for soft vinyl or bendy bumper-like plastic, though. A rigid patch on a flexible part can crack later, which is a little like fixing yoga pants with a ceramic tile.
Option 2: Use Flexible Filler for Flexible Plastic
If the scratched item flexes when you press it, use a flexible filler rather than a rigid epoxy putty. Flexible fillers are commonly used on bumper covers and other bendable plastic parts because they move with the substrate instead of breaking away from it.
Apply the filler in thin coats rather than one thick blob. Let each application cure as directed, then sand with light pressure and avoid generating too much heat. Plastic does not love heat. Plastic plus friction plus impatience equals a repair that suddenly looks worse.
Option 3: Use Vinyl Repair Compound for Soft Plastic and Vinyl
For dashboards, seats, armrests, marine vinyl, luggage, and other soft textured surfaces, a vinyl repair compound or kit can work better than a general-purpose filler. These kits are designed to fill gashes, gouges, and surface damage while blending color and texture more effectively than a standard hard filler.
This is the route to take when the scratched area needs to stay slightly flexible and when the surface grain matters. If you repair a textured dashboard with a hard white putty and call it a day, the result may technically be “fixed” but emotionally it will still be a problem.
Option 4: Use Appliance or Surface Touch-Up Epoxy for Cosmetic Chips and Scratches
On appliances, tubs, and similar coated plastic-like surfaces, a touch-up epoxy paint can be a smart cosmetic solution. This is especially helpful when the scratch is shallow but visually obvious because it has cut through a glossy coating or colored top layer.
Touch-up products do not always rebuild depth very well, but they can seal the area, reduce visibility, and restore color. For small chips and scratches on white or colored household surfaces, this can be the quickest path to “good enough to stop bothering me every morning.”
Can You Use Acetone to Smooth Scratches?
Sometimes, but with caution. On certain hard plastics, a tiny amount of acetone can soften the surface just enough to reduce the appearance of a light scratch. The danger is obvious: too much acetone can melt, cloud, distort, or permanently damage the plastic. That means this is a spot-test-only method, not an excuse to freestyle chemistry in the kitchen.
If you try it at all, use the tiniest amount on a cotton swab, test in a hidden area first, and avoid soft, thin, coated, or clear plastics unless you are fully willing to accept the consequences. This is a last-resort trick, not the first chapter of the repair book.
How to Make the Repair Look Better After Filling
Filling the scratch is only half the job. Blending the repair is what makes it look intentional rather than suspicious.
Sand in Stages
After the filler cures, sand lightly and progressively. Do not jump straight from a coarse grit to polishing. Smooth transitions matter. The goal is to feather the edges so the repair merges into the surrounding surface.
Match the Sheen
A repaired area may end up too glossy or too dull compared with the rest of the item. Polish can increase shine. Very fine sanding or a matte-safe finishing method can reduce it. Always compare the repaired section from multiple angles before declaring victory.
Restore Color if Needed
If the original color was damaged, use a suitable touch-up coating, plastic-safe paint, or repair tint. On clear plastic, focus on clarity rather than color. On white appliances or bath surfaces, matching the finish may matter more than achieving structural perfection.
Common Mistakes to Avoid
- Using the wrong repair product: Rigid filler on flexible plastic is asking for future cracking.
- Skipping the cleaning step: Dirt and oil sabotage adhesion.
- Using coarse sandpaper too soon: Plastic scratches faster than your confidence can recover.
- Pressing too hard: Heat buildup can warp plastic or roll the filler edge.
- Not testing first: Clear plastic, coated plastic, and vinyl all behave differently.
- Expecting every repair to disappear completely: Some scratches can be dramatically improved, but not all can be made invisible.
Which Repair Method Is Best?
If you want the quick version, use this cheat sheet:
- Light scratch: plastic polish, fine scratch remover, or mild abrasive
- Moderate scratch: wet sanding plus polishing
- Deep scratch in rigid plastic: epoxy putty or plastic-safe filler
- Deep scratch in flexible plastic: flexible filler
- Scratch in vinyl or soft dashboard material: vinyl repair compound
- Small cosmetic chip on coated household surface: touch-up epoxy paint
That is the real secret behind simple ways to fill plastic scratches: choose the repair method that matches the material. Most failed repairs happen because people pick a product based on what is nearby, not what the plastic actually needs.
Conclusion
Plastic scratches are annoying, but they are usually not the end of the road for your favorite item. The smartest approach is to start small, inspect carefully, and escalate only when the damage calls for it. Light scratches often polish out. Deeper ones may need wet sanding. True gouges usually need a filler, whether that means epoxy putty for rigid plastic, flexible filler for bendy parts, vinyl compound for soft surfaces, or touch-up epoxy for cosmetic chips.
The biggest win is not perfection. It is making the damage less visible, stopping it from getting worse, and extending the life of the item without replacing it. That is practical, budget-friendly, and strangely satisfying. There is something deeply rewarding about taking a scratched-up piece of plastic that looked headed for the trash and making it presentable again. Not glamorous, maybe. But wildly effective.
Practical Experiences and Real-World Lessons From Plastic Scratch Repair
In real-world DIY situations, the most useful lesson is that scratches rarely behave the way they look in photos. A mark that seems deep from one angle may turn out to be a transfer stain or a dull scuff that polishes away in five minutes. On the other hand, a scratch that looks harmless can reveal a deeper trench once the area is cleaned and the light hits it correctly. That is why patient inspection matters more than dramatic optimism.
A common experience with household plastic is overcorrecting too early. Someone sees a scratch on a storage bin, appliance trim piece, or acrylic organizer, grabs the most aggressive abrasive in the garage, and suddenly the original scratch is joined by a broad hazy patch. The scratch may be shallower, but now the finish is cloudy. This is one reason detailers and repair pros so often stress using the least aggressive method first. With plastic, gentleness is not laziness. It is strategy.
Another frequent lesson comes from car interiors and dashboards. Hard plastic trim often improves nicely with polishing, but soft-touch surfaces and vinyl need a different mindset. A rigid repair may fill the groove, yet the texture mismatch will still catch your eye every time sunlight crosses the panel. In those cases, flexibility and color matching matter almost as much as filling the damage itself. A repair that bends and blends usually looks better over time than one that is technically stronger but visually obvious.
Clear plastics teach an even harsher lesson: every repair affects light. A filled scratch on a clear cover, visor, or headlight lens may be structurally fine, but if the sanding pattern is uneven, the eye notices distortion immediately. That is why progressive sanding and polishing are so important. People often think the repair failed when the real issue is that they stopped one stage too early. With clear plastic, the final polish is not a bonus step. It is the step that makes the previous steps make sense.
There is also a practical emotional lesson here. Many DIY repairs are not about making an item factory-new. They are about making it look clean, useful, and no longer distracting. That is a worthwhile goal. A scratched laundry-room bin does not need concours-level restoration. A dashboard gouge does not need museum funding. It just needs to stop shouting every time you look at it. When people adjust their expectations that way, they usually end up happier with the repair and less likely to keep “fixing” it into a worse condition.
In the end, experience shows that successful plastic scratch repair is less about secret tricks and more about good judgment: clean first, test first, choose the right product, work slowly, and stop when the result looks better rather than chasing perfection until the plastic files a complaint.





