
Table of Contents >> Show >> Hide
- Why Cleaning an Amplifier PCB Matters
- Before You Start: A Safety Reality Check (No Panic, Just Smart)
- What You’ll Need (Simple, Not a Chemistry Lab)
- What NOT to Use (Your Amp Will Appreciate It)
- 11 Steps to Clean an Amplifier Circuit Board (Without Making It Worse)
- Step 1: Power Down, Unplug, and Set Up Your Workspace
- Step 2: Take Photos and Label Connections
- Step 3: Open the Chassis Carefully and Inspect First
- Step 4: Dry Clean First (Dust Removal Before Liquids)
- Step 5: Protect What Shouldn’t Get Wet
- Step 6: Decide Between Spot Cleaning and “Board-Wide” Cleaning
- Step 7: Use High-Purity Isopropyl Alcohol the Right Way
- Step 8: Brush, Then Blot (Don’t Just “Scrub Forever”)
- Step 9: Handle Corrosion and Weird Residues with Extra Caution
- Step 10: Clean Controls and Connectors (Often the Real Culprit)
- Step 11: Dry Completely, Reinspect, and Reassemble Like a Pro
- Common Mistakes That Turn “Cleaning” into “Crying”
- When to Stop and Call a Technician
- Quick Checklist: A “Good Clean” in 60 Seconds
- Real-World Experiences: of “What Actually Happens”
- Conclusion
Amplifiers live hard lives. They inhale dust bunnies, sip on smoky bar air, and occasionally get “mysteriously” splashed by a drink that was definitely
nowhere near the rack. Over time, that grime can turn into crackles, intermittent dropouts, overheating, and the kind of noise that makes you blame the
guitar cable first (it’s always the cable… until it isn’t).
The good news: cleaning an amplifier circuit board (the PCB) is usually straightforward. The bad news: the fastest way to ruin an amp is to clean it like
you’re scrubbing a cast-iron pan. This guide walks you through a safe, simple, and realistic processno heroics, no “just hose it off,” and no
turning your treasured amp into a very expensive paperweight.
Why Cleaning an Amplifier PCB Matters
A clean amplifier circuit board isn’t about aesthetics (although a shiny board is satisfying). It’s about reliability:
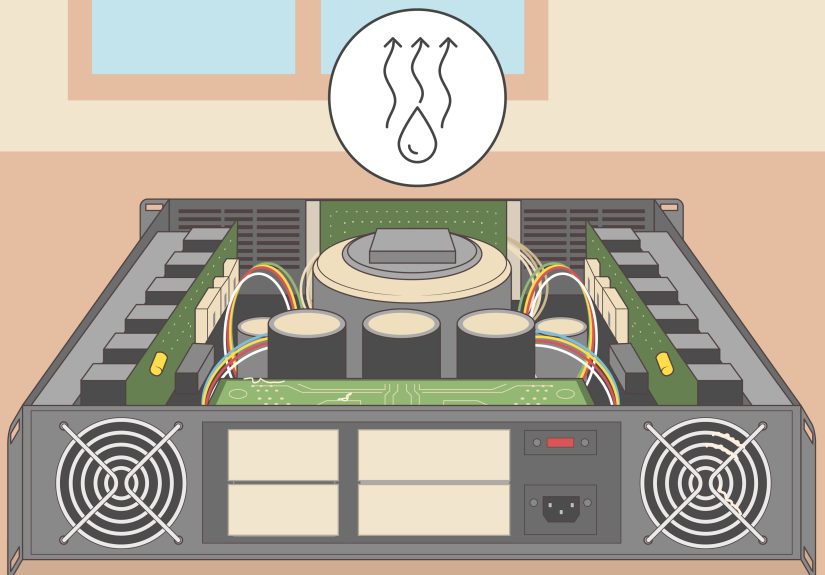
- Dust can trap heat, acting like a blanket over components that already run warm.
- Grime and oils can create leakage paths on the board surface, especially in humid environments.
- Flux residue from old repairs can attract dirt and sometimes become mildly conductive under moisture.
- Corrosion can increase resistance or weaken joints and connector contacts.
- Dirty controls and connectors can cause crackling, pops, and channel dropouts that mimic “major failure.”
Before You Start: A Safety Reality Check (No Panic, Just Smart)
Amplifiers can contain high voltages and large capacitors that may store energy even after power is removed. If you’re not comfortable working around
that, the safest move is to take the amp to a qualified technicianespecially for tube amps and high-power solid-state units.
- Unplug the amp from the wall and disconnect speakers and signal cables.
- Let it sit for a while before opening it. (This is not magic; it’s just a safer baseline.)
- Avoid touching power supply areas unless you truly know what you’re doing.
- Work in a ventilated area when using isopropyl alcohol or contact cleaner.
- ESD matters: static discharge can damage sensitive components. Ground yourself when possible.
What You’ll Need (Simple, Not a Chemistry Lab)
- High-purity isopropyl alcohol (ideally 90%–99%)
- ESD-safe soft brush (or a very soft, clean toothbrush used only for electronics)
- Cotton swabs (lint-minimizing if possible) and/or lint-free wipes
- Compressed air (optional) or a small hand blower
- Non-metallic tools for gentle scraping (plastic spudger or wooden stick)
- Contact cleaner for controls/connectors (electronics-safe, residue-free)
- Nitrile gloves and eye protection (recommended)
- Small containers for screws, plus masking tape and a marker for labeling
- Phone/camera for photos (your future self will thank you)
What NOT to Use (Your Amp Will Appreciate It)
- Household cleaners (ammonia, bleach, “all-purpose” sprays): wrong chemistry, wrong residues.
- Vinegar: acidic and not ideal for electronics surfaces.
- Tap water: minerals can leave deposits and promote corrosion.
- Abrasive pads and metal brushes: they can damage solder mask, traces, and component markings.
-
Acetone (generally): it can attack plastics, markings, and some board coatings. It’s sometimes used in specialized rework settings,
but it’s not the “easy button” for amplifier PCB cleaning.
11 Steps to Clean an Amplifier Circuit Board (Without Making It Worse)
Step 1: Power Down, Unplug, and Set Up Your Workspace
Clear a sturdy table, add bright lighting, and lay down a towel or mat so screws don’t roll into another dimension. Unplug everything. If you have a
grounding strap, use it. If not, at least avoid shuffling around on carpet like you’re training for the Static Olympics.
Step 2: Take Photos and Label Connections
Before removing anything, take a full set of photos: top-down, close-ups of connectors, cable routing, and where each screw came from. Add small tape
labels to connectors if there’s any chance you’ll forget what goes where. “I’ll remember” is the first lie we tell ourselves in electronics.
Step 3: Open the Chassis Carefully and Inspect First
Remove the cover. Look for obvious issues: burnt areas, bulging capacitors, loose wires, or sticky brown residue. Cleaning is not a substitute for repair.
If you see charred board material or melted parts, stop and consult a professional.
Step 4: Dry Clean First (Dust Removal Before Liquids)
Start with the least aggressive method. Use a soft brush to loosen dust, then gently blow it away with compressed air or a hand blower. Keep the air at an
angle so you’re not driving dust deeper into connectors or controls. This alone can improve cooling and reduce noise in dusty amps.
Step 5: Protect What Shouldn’t Get Wet
Many amplifier boards have areas you should keep relatively dry: paper labels, transformers, some trimmer potentiometers, and certain switch assemblies.
If you’re doing targeted cleaning, you may not need masking. But if you plan to clean a wider area, use tape to shield delicate or absorbent parts and
avoid over-spraying contact cleaner.
Step 6: Decide Between Spot Cleaning and “Board-Wide” Cleaning
Most amplifier circuit board cleaning should be spot cleaning: only the dirty areas. Board-wide cleaning can be appropriate when there’s
smoke residue, drink splash aftermath, or heavy grimebut it also increases drying time and risk.
- Spot cleaning: best for dust, fingerprints, small flux patches, and minor grime.
- Board-wide cleaning: consider only if contamination is widespread and you can dry thoroughly.
Step 7: Use High-Purity Isopropyl Alcohol the Right Way
Dampen (don’t soak) a swab or lint-free wipe with high-purity isopropyl alcohol. Wipe gently. For stubborn areas, let the alcohol sit for 10–30 seconds
to soften residue, then wipe again. The goal is to lift contaminants off the boardnot smear them into a larger, shinier problem.
If you’re tempted to use 70% rubbing alcohol: it contains more water, dries slower, and may be less effective on residues. Higher-purity alcohol tends to
evaporate faster and leave less behind.
Step 8: Brush, Then Blot (Don’t Just “Scrub Forever”)
For flux residue or sticky grime, use a soft brush lightly dampened with alcohol. Brush in small sections, then blot with a clean wipe. Rotate to fresh
swabs/wipes often so you don’t redeposit dissolved gunk. If you keep brushing with a dirty swab, you’re basically painting the board with yesterday’s
residue.
Pro move: work from “clean” areas toward “dirty” ones, so you’re not dragging contaminants across the whole PCB like a mop in a cartoon spill scene.
Step 9: Handle Corrosion and Weird Residues with Extra Caution
If you see green/white crust on component leads or connectors, that’s corrosion. Light corrosion may clean up with alcohol and gentle brushing. Heavier
corrosion can mean damaged metal, compromised solder joints, or deeper issues under components.
- Light surface corrosion: gentle brush + alcohol, then inspect closely.
- Heavy corrosion: avoid aggressive scraping; consider professional evaluation.
- Unknown sticky spills: treat as potentially conductive; clean thoroughly and dry longer than you think is necessary.
Step 10: Clean Controls and Connectors (Often the Real Culprit)
Many “my amp is dying” symptoms are actually dirty contacts: scratchy knobs, crackly switches, oxidized input jacks, or ribbon connectors that need a
reseat. Use an electronics-safe contact cleaner sparingly. If the cleaner includes a straw, use it to target the contact area and avoid spraying the whole
board.
- Pots (knobs): apply cleaner into the access opening (if present), rotate the knob fully several times, and let dry.
- Switches: a small amount, then actuate repeatedly to work it in.
- Connectors: unplug/replug carefully to wipe oxidation; use cleaner only if needed and appropriate.
Avoid overdoing itmore spray does not equal more clean. Sometimes it equals “why is there residue everywhere and why do my fingers smell like a robot?”
Step 11: Dry Completely, Reinspect, and Reassemble Like a Pro
Let everything dry thoroughly before power-up. Alcohol evaporates quickly, but pockets under connectors and between tight components can hold moisture or
solvent longer than expectedespecially if any water-based cleaning happened.
- Use a fan to increase airflow.
- If you used a lot of liquid, wait longer (think hours, not minutes).
- Inspect for lint strands, loose screws, and any pooled solvent.
- Reassemble using your photos as a map.
When you power up again, do it thoughtfully: listen for unusual noises, watch for odd smells, and be ready to shut down if something seems off.
Common Mistakes That Turn “Cleaning” into “Crying”
- Skipping photos and then playing “Where does this connector go?” for two hours.
- Flooding the board instead of spot cleaning.
- Using the wrong solvent on plastics, labels, or coatings.
- Scrubbing aggressively and damaging solder mask or component markings.
- Powering up too soon before everything is truly dry.
When to Stop and Call a Technician
Cleaning is maintenance. Repair is a different sport. Consider professional help if:
- You see burnt areas, melted parts, or repeated blown fuses.
- There’s heavy corrosion around power supply components.
- The amp is a high-voltage design (especially tube amps) and you’re not trained for it.
- Cleaning improves nothing and symptoms persist (hum, distortion, overheating, no output).
Quick Checklist: A “Good Clean” in 60 Seconds
- Unplug, label, photograph.
- Dry dust removal first.
- Spot clean with 90%–99% isopropyl alcohol.
- Brush gently, blot often.
- Target controls/connectors with proper contact cleaner.
- Dry thoroughly, then reassemble and test.
Real-World Experiences: of “What Actually Happens”
The first amplifier board I ever “cleaned” (in a totally hypothetical, definitely-not-a-real-life way) taught me a simple truth: electronics don’t fail
dramatically nearly as often as they fail annoyingly. The amp didn’t explode. It didn’t burst into flames. It just made a crackle every time the volume
knob passed one particular spotlike it was politely reminding everyone in the room that I had procrastinated on maintenance.
The lesson wasn’t “spray everything.” The lesson was “clean the thing that needs cleaning.” A tiny shot of contact cleaner into the potentiometer, followed
by rotating the knob a bunch of times, fixed what felt like a major problem. If I had doused the entire circuit board first, I would’ve created a bigger
mess, a longer dry time, and a new mystery: “Why does it sound worse now?”
Another common scenario is the Dust Blanket Amp. You open the chassis and find a layer of dust so thick it looks like a tiny attic in there.
In those cases, dry cleaning is the hero. A soft brush and carefully directed air can remove a shocking amount of debris without introducing liquids at all.
And once the heat can escape again, the amp often runs cooler and more consistently. It’s not glamorous, but it’s effectivelike eating vegetables.
Then there’s the Sticky Film Mystery, usually from smoke, cooking grease in a studio apartment, or the world’s finest combination of humidity and
time. That film loves to hold onto dust. Here’s where isopropyl alcohol shines: not by pouring it on, but by working in small sectionssoften, wipe, repeat.
The “repeat” part matters. On my first go, I used one swab too long and basically re-smeared residue into a wider area. Switching to fresh swabs and
blotting with a lint-free wipe made the board noticeably cleaner and prevented that streaky, half-clean look.
I’ve also learned to respect connectors. A slightly oxidized connector can cause channel dropouts that feel like a failing component. Gently reseating
plugs (carefully unplugging and plugging back in) can wipe the contact surfaces enough to restore a reliable connection. If you do use contact cleaner,
less is more. You want to clean contacts, not marinate them.
The biggest “experience-based” takeaway is patience with drying. Even if alcohol evaporates fast, tight spaces and bundled wiring can trap solvent longer
than you expect. Waiting an extra few hours costs nothing. Powering up too soon can cost everything. If cleaning has a secret superpower, it’s not a fancy
chemicalit’s the willingness to slow down, work clean, and let the amp dry fully before the big moment.
Conclusion
Cleaning an amplifier circuit board doesn’t have to be intimidating. Start dry, clean only what’s dirty, choose the right materials (high-purity
isopropyl alcohol and electronics-safe contact cleaner), and give the amp plenty of time to dry. Most importantly, know when cleaning is enoughand when
it’s time to call in a technician. Your future self (and your speakers) will be grateful.






